Wstęp
This manual provides detailed instructions for the safe and efficient operation of your Xiaomi Portable Electric Air Compressor 2 Pro. Please read this manual thoroughly before using the product and retain it for future reference. This device is designed for inflating tires on cars, motorcycles, bicycles, and balls, offering a convenient and portable solution for maintaining optimal pressure.
Informacje dotyczące bezpieczeństwa
Ostrzeżenie: Nieprzestrzeganie tych instrukcji bezpieczeństwa może skutkować porażeniem prądem, pożarem lub poważnymi obrażeniami.
- Trzymaj urządzenie poza zasięgiem dzieci.
- Do not operate the compressor in wet conditions or near flammable liquids or gases.
- Ensure the air hose is securely connected to the valve before starting inflation.
- Do not over-inflate items. Always refer to the recommended pressure for the item being inflated. The auto shut-off feature helps prevent over-inflation.
- Unikaj długotrwałej, ciągłej pracy, aby zapobiec przegrzaniu. Jeśli urządzenie się nagrzeje, poczekaj, aż ostygnie.
- Do ładowania należy używać wyłącznie dołączonego kabla ładującego i kompatybilnego zasilacza 5 V/3 A.
- Do not disassemble or modify the device. Contact customer support for repairs.
Zawartość opakowania
Sprawdź, czy w opakowaniu znajdują się wszystkie elementy:
- Xiaomi Portable Electric Air Compressor 2 Pro
- Fast-connecting air valve
- High-pressure air hose extension
- Needle valve (for balls)
- Presta valve adapter (for some bicycle tires)
- Kabel ładujący typu C
- Torebka do przechowywania

Figure 1: Included accessories with the air compressor.
Produkt ponadview
The Xiaomi Portable Electric Air Compressor 2 Pro is a compact and powerful inflation device. It features a digital LED display, multiple preset modes, and a long-lasting rechargeable battery for convenient use.
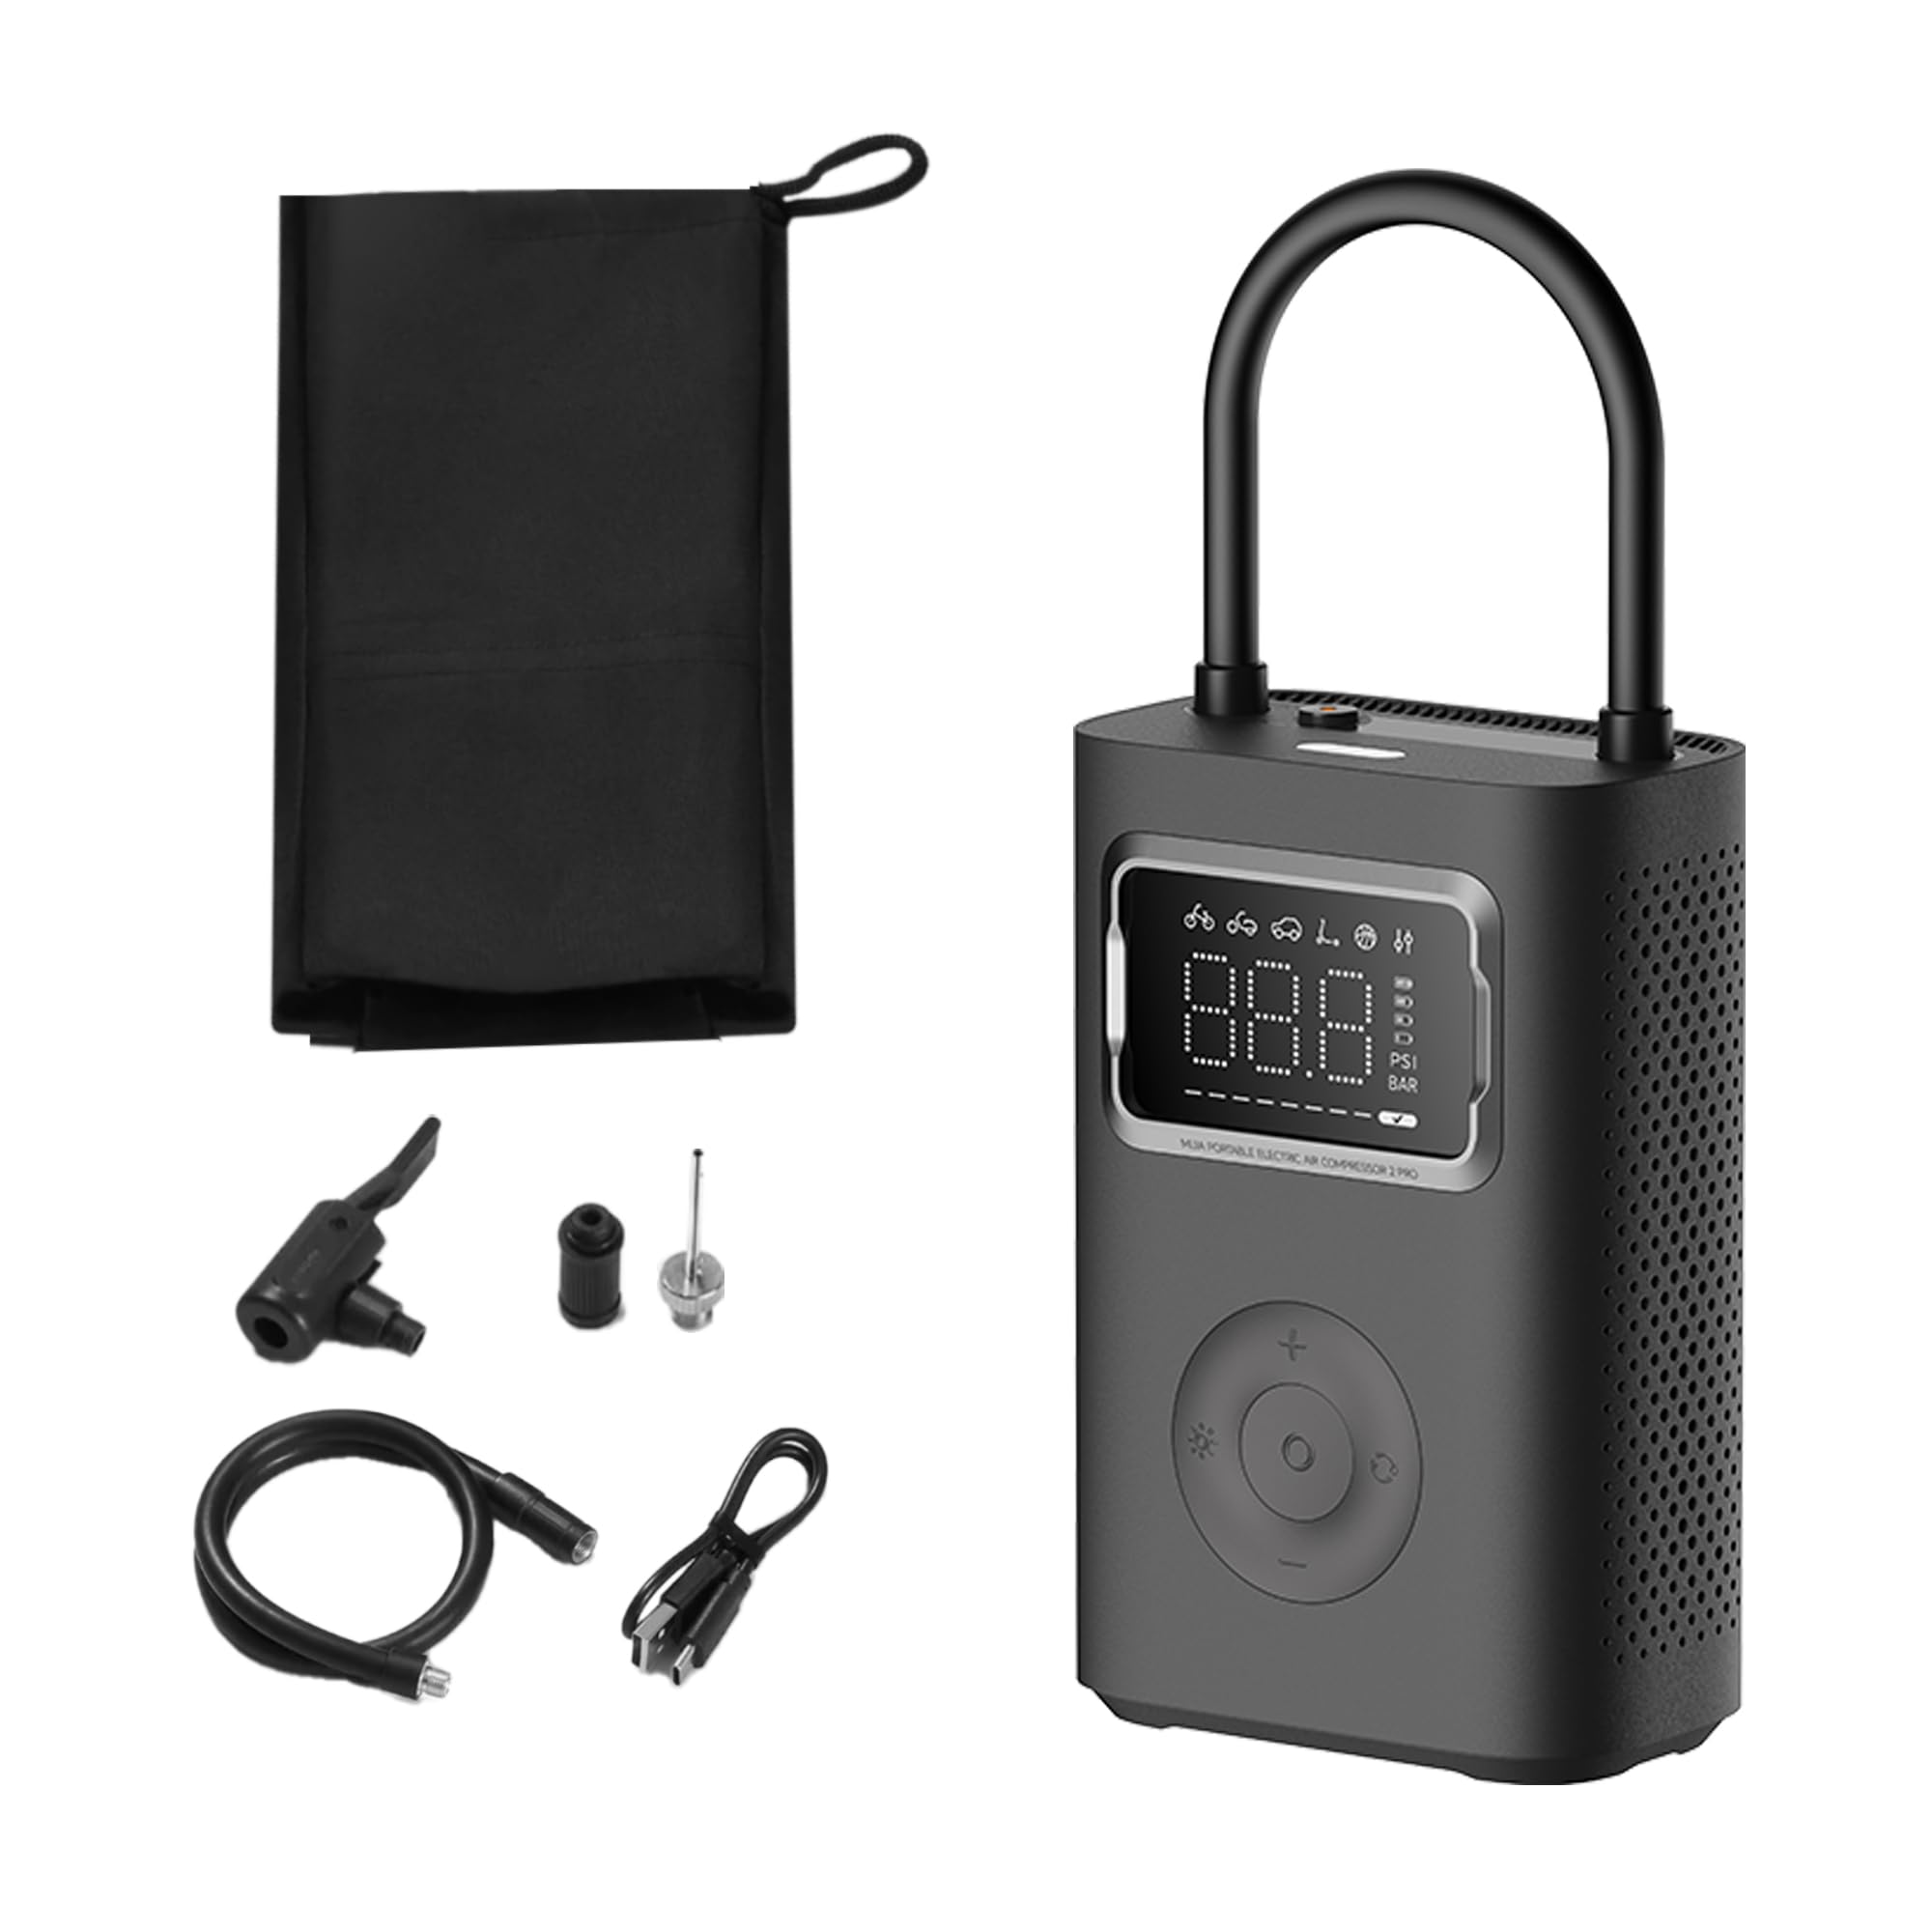
Figure 2: Xiaomi Portable Electric Air Compressor 2 Pro.
Główne cechy:
- Maksymalne ciśnienie: Up to 150 PSI for various inflation needs.
- Cyfrowy wyświetlacz LED: Zapewnia odczyt ciśnienia w czasie rzeczywistym i pozwala na precyzyjne ustawienie ciśnienia.
- Automatyczne wyłączenie: Automatycznie zatrzymuje pompowanie po osiągnięciu ustawionego ciśnienia, zapobiegając nadmiernemu napompowaniu.
- Bezprzewodowe i ładowalne: Powered by a 27 Watt-hour battery, offering portability and convenience.
- Wiele trybów ustawień wstępnych: Includes modes for car, motorcycle, bicycle, electric scooter, and ball, along with a custom mode.
- Dual-Purpose LED Light: Features a white light for illumination and a red light for signaling.
- Kompaktowy i lekki: Zaprojektowane z myślą o łatwym przechowywaniu i transporcie.

Figure 3: Product details showing 150 PSI capability, battery indicator, and hose lock.
Organizować coś
1. Ładowanie początkowe
Before first use, fully charge the air compressor. Connect the provided Type-C charging cable to the charging port on the device and the other end to a 5V/3A USB power adapter (not included). The battery indicator on the display will show charging progress. A full charge typically takes approximately 3.5 hours.
2. Podłączanie węża powietrznego
The air hose is stored by being locked into the device. To use, pull the air hose out of its storage slot. This action will automatically power on the device. Connect the appropriate valve adapter (Schrader, Presta, or needle valve) to the end of the air hose, depending on the item you intend to inflate.

Figure 4: Pulling the air hose from its slot to power on the device.
Instrukcja obsługi
1. Włączanie/wyłączanie zasilania
- Włączanie: Pull the air hose out of its storage slot. The device will automatically power on and display the current pressure.
- Wyłączone: Push the air hose back into its storage slot. The device will automatically power off.
2. Zrozumienie wyświetlacza
The large LED display shows the current pressure, selected mode, and battery level. You can switch between PSI and Bar units using the unit selection button.

Figure 5: Digital display showing mode icons and pressure.
3. Selecting Inflation Modes
Press the mode button to cycle through the 6 preset inflation modes:
- Tryb niestandardowy: Default 35 PSI (adjustable 3-150 PSI / 0.2-10.3 Bar)
- Tryb rowerowy: Domyślne 45 PSI (regulowane w zakresie 30–65 PSI)
- Motorbike Mode: Default 2.4 Bar (adjustable 1.8-3.0 Bar)
- Tryb samochodowy: Default 2.5 Bar (adjustable 1.8-3.5 Bar)
- Tryb hulajnogi elektrycznej: Domyślne 50 PSI (regulowane w zakresie 45–60 PSI)
- Tryb piłki: Domyślne 8 PSI (regulowane w zakresie 4–16 PSI)

Rysunek 6: Koniecview of multiple preset inflation modes.
4. Adjusting Pressure Settings
After selecting a mode, use the '+' and '-' buttons to adjust the target pressure. The display will show the target pressure blinking. Once set, the value will stabilize.
5. Proces inflacji
- Connect the air hose with the appropriate adapter securely to the valve stem of the item to be inflated.
- The display will show the current pressure of the item.
- Select the desired inflation mode and set the target pressure.
- Press the start button (usually the center button) to begin inflation.
- Kompresor zatrzyma się automatycznie po osiągnięciu docelowego ciśnienia.
- Odłączyć wąż powietrza od trzpienia zaworu.

Figure 7: Auto pressure detection and inflation for a bicycle tire.
6. Korzystanie ze światła LED
Press the light button to activate the LED light. It has two modes: a white light for illumination in dark environments and a red flashing light for emergency signaling.
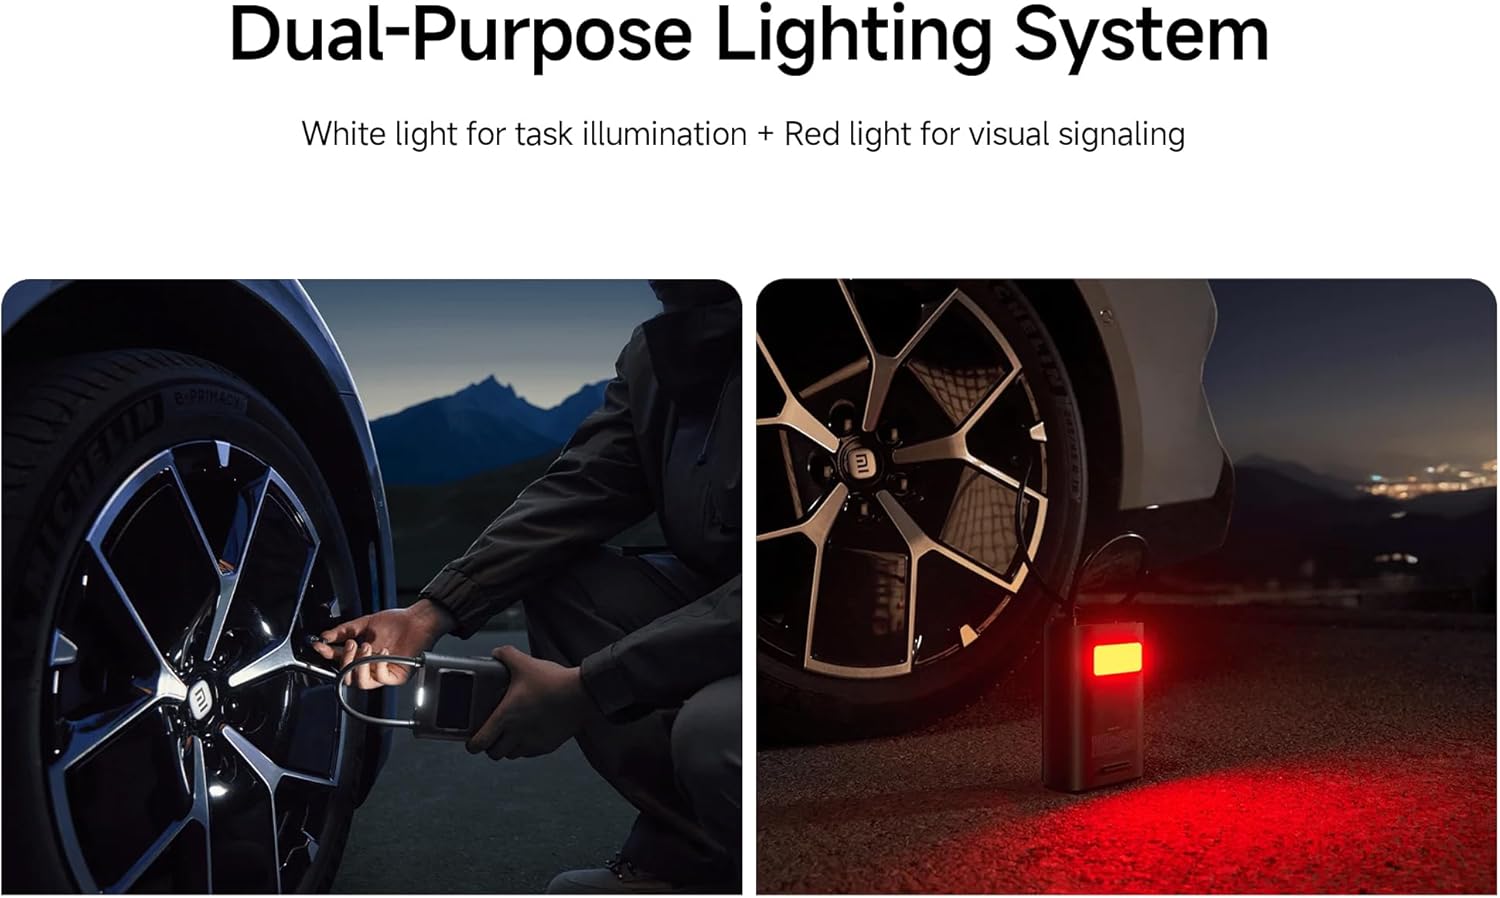
Figure 8: Dual-purpose lighting system in use (white for task, red for signaling).
Ładowanie
The device is equipped with a 27 Watt-hour rechargeable battery. When the battery level is low, the battery indicator on the display will show a low charge. Connect the Type-C charging cable to recharge. The device can reinflate approximately 16 car tires (from 2.0 Bar to 2.5 Bar) on a full charge, or inflate up to 138 size 7 basketballs (from 0 PSI to 8 PSI).

Figure 9: Battery capacity and inflation performance examples.
Konserwacja
- Czyszczenie: Przetrzyj zewnętrzną część sprężarki miękką,amp płótno. Nie używaj ostrych środków chemicznych ani ściernych środków czyszczących.
- Składowanie: Store the device in a cool, dry place, away from direct sunlight and extreme temperatures. Ensure the air hose is properly stowed to prevent damage.
- Pielęgnacja baterii: Aby zapewnić optymalną żywotność baterii, ładuj urządzenie co najmniej raz na trzy miesiące, jeśli nie używasz go regularnie.
Rozwiązywanie problemów
| Problem | Możliwa przyczyna | Rozwiązanie |
|---|---|---|
| Urządzenie nie włącza się. | Battery is depleted; Air hose not fully pulled out. | Charge the device; Ensure the air hose is fully extended from its slot. |
| Inflacja jest powolna i nieskuteczna. | Low battery; Air hose not securely connected; Incorrect pressure setting. | Recharge the device; Check all connections for leaks; Verify the target pressure. |
| Urządzenie nieoczekiwanie się zatrzymuje. | Target pressure reached (auto shut-off); Overheating; Low battery. | This is normal if target pressure is met; Allow device to cool down; Recharge the device. |
| Niedokładny odczyt ciśnienia. | Loose connection; Sensor error. | Ensure the air hose is tightly connected to the valve; If problem persists, contact support. |
Specyfikacje
| Funkcja | Szczegół |
|---|---|
| Numer modelu | XM-MJCQB06QW-03 |
| Wymiary | Wymiary 10.5 x 8 x 25.5 cm |
| Waga | 1.1 kilogramów |
| Tworzywo | Plastikowy |
| Źródło zasilania | Zasilany bateryjnie |
| Tomtage | 10.8 wolty |
| Cotage | 27 watogodzin |
| Amperage Pojemność | 3 Amps |
| Maksymalne ciśnienie | 150 PSI |
| Długość węża | 200 mm |
| Cechy specjalne | Automatic Shut-Off, Digital Display, LED Light, Lightweight |
| Zalecane zastosowania | Tire Inflation (Car, Bike, Motorcycle, Electric Scooter), Ball Inflation, Toy Inflation |
Oficjalne filmy produktowe
Video 1: General product overview i demonstracja kluczowych funkcji.
Video 2: Demonstration of the compressor's portability and ease of use.
Video 3: Detailed look at the inflation process and digital display functionality.
Gwarancja i wsparcie
For warranty information or technical support, please refer to the warranty card included with your product or contact the manufacturer directly through their official website. Ensure you have your product model number (XM-MJCQB06QW-03) and purchase details available when seeking support.