1. Wprowadzenie
Thank you for choosing the VITCOCO Portable Bidet. This rechargeable handheld sprayer is designed for personal hygiene on the go, offering convenience and cleanliness for various situations including travel, postpartum care, and daily hygiene. Its compact and waterproof design ensures ease of use and maintenance. Please read this manual thoroughly before using the product to ensure proper operation and longevity.

Figure 1: VITCOCO Portable Bidet applications for personal hygiene.
2. Składniki produktu
The VITCOCO Portable Bidet package includes the following items:
- Main Bidet Unit (Sprayer)
- Transparent Water Bottle (200 ml capacity)
- Black Transparent Spare Bottle (200 ml capacity)
- Kabel ładujący USB
- Torba do przechowywania
- Small Towel (may vary by package)

Figure 2: Contents of the VITCOCO Portable Bidet package.
3. Konfiguracja
3.1 Pierwsze ładowanie
Before first use, fully charge the bidet unit. The unit has a 450 mAh battery.
- Locate the USB charging port on the bidet unit.
- Connect the provided USB charging cable to the bidet unit.
- Plug the other end of the USB cable into a compatible USB power source (e.g., mobile phone charger, USB power bank, car USB charger).
- Allow the unit to charge until the indicator light shows a full charge (refer to indicator light behavior in Operating Instructions).

Figure 3: USB charging options for the bidet.
3.2 Montaż bidetu
- Choose either the transparent or black transparent water bottle.
- Ensure the bottle is clean before filling.
- Fill the bottle with clean water. The transparent bottle allows for clear visibility of the water level.
- Screw the main bidet unit onto the filled water bottle securely by rotating it clockwise until tight.

Figure 4: Assembly and filling instructions.
4. Instrukcja obsługi
4.1 Korzystanie z bidetu
- Once assembled and filled, open the spray nozzle by rotating it outwards. The nozzle can rotate 180 degrees for optimal positioning.
- Position the bidet as desired for cleaning.
- Press the power button (switch) once to activate the first spray mode (Relieve Mode).
- Press the power button a second time to switch to the second spray mode (Strong Mode).
- Press the power button a third time to turn off the bidet.
- After use, close the spray nozzle by rotating it back into its stored position.

Figure 5: Nozzle rotation and spray modes.

Rysunek 6: Szczegółowy view of the two spraying modes.
5. Konserwacja i pielęgnacja
5.1 Cleaning the Bidet
The VITCOCO Portable Bidet is IPX7 waterproof, allowing for easy and thorough cleaning.
- After each use, empty any remaining water from the bottle.
- The entire unit can be washed under warm running water (10 to 50 degrees Celsius).
- Ensure no water enters the charging port when cleaning, although the unit is designed to be waterproof.
- Use a soft cloth to wipe down the exterior. Do not use abrasive cleaners or harsh chemicals.
- Przed ponownym montażem lub przechowywaniem należy odczekać, aż wszystkie elementy całkowicie wyschną na powietrzu.

Figure 7: The bidet is fully washable due to its IPX7 waterproof rating.
5.2 Przechowywanie
Store the bidet in its provided storage bag in a cool, dry place when not in use. Ensure the unit is completely dry before storage to prevent mold or mildew.
6. Rozwiązywanie Problemów
| Problem | Możliwa przyczyna | Rozwiązanie |
|---|---|---|
| Bidet does not turn on. | Bateria jest słaba lub rozładowana. | Charge the bidet unit using the provided USB cable. |
| Słabe ciśnienie wody. | Insufficient water in the bottle; nozzle partially blocked; incorrect mode selected. | Ensure the bottle is adequately filled. Check the nozzle for any obstructions and clean if necessary. Press the power button twice to select Strong Mode. |
| Water leaks from connection. | Bottle not securely attached to the main unit. | Ensure the bottle is screwed on tightly and correctly aligned. |
| Urządzenie wydaje nietypowe dźwięki. | Air in the pump; internal malfunction. | Ensure the bottle is filled with water. If the noise persists, contact customer support. |
7. Specyfikacje
| Funkcja | Szczegół |
|---|---|
| Numer modelu | JSQ-LH-New |
| Marka | WITKOKO |
| Wymiary produktu | Wymiary 22 x 17 x 7 cm |
| Waga przedmiotu | 700 gramów |
| Tworzywo | Plastikowy |
| Pojemność butelki na wodę | 200 ml (each bottle) |
| Typ baterii | 1 bateria litowo-jonowa (wymagana) |
| Pojemność baterii | 450 mAh |
| Źródło zasilania | Zasilany bateryjnie (ładowany przez USB) |
| Stopień wodoodporności | IPX7 |
| Temperatura pracy | 10 do 50 stopni Celsjusza |
| Kraj pochodzenia | Chiny |
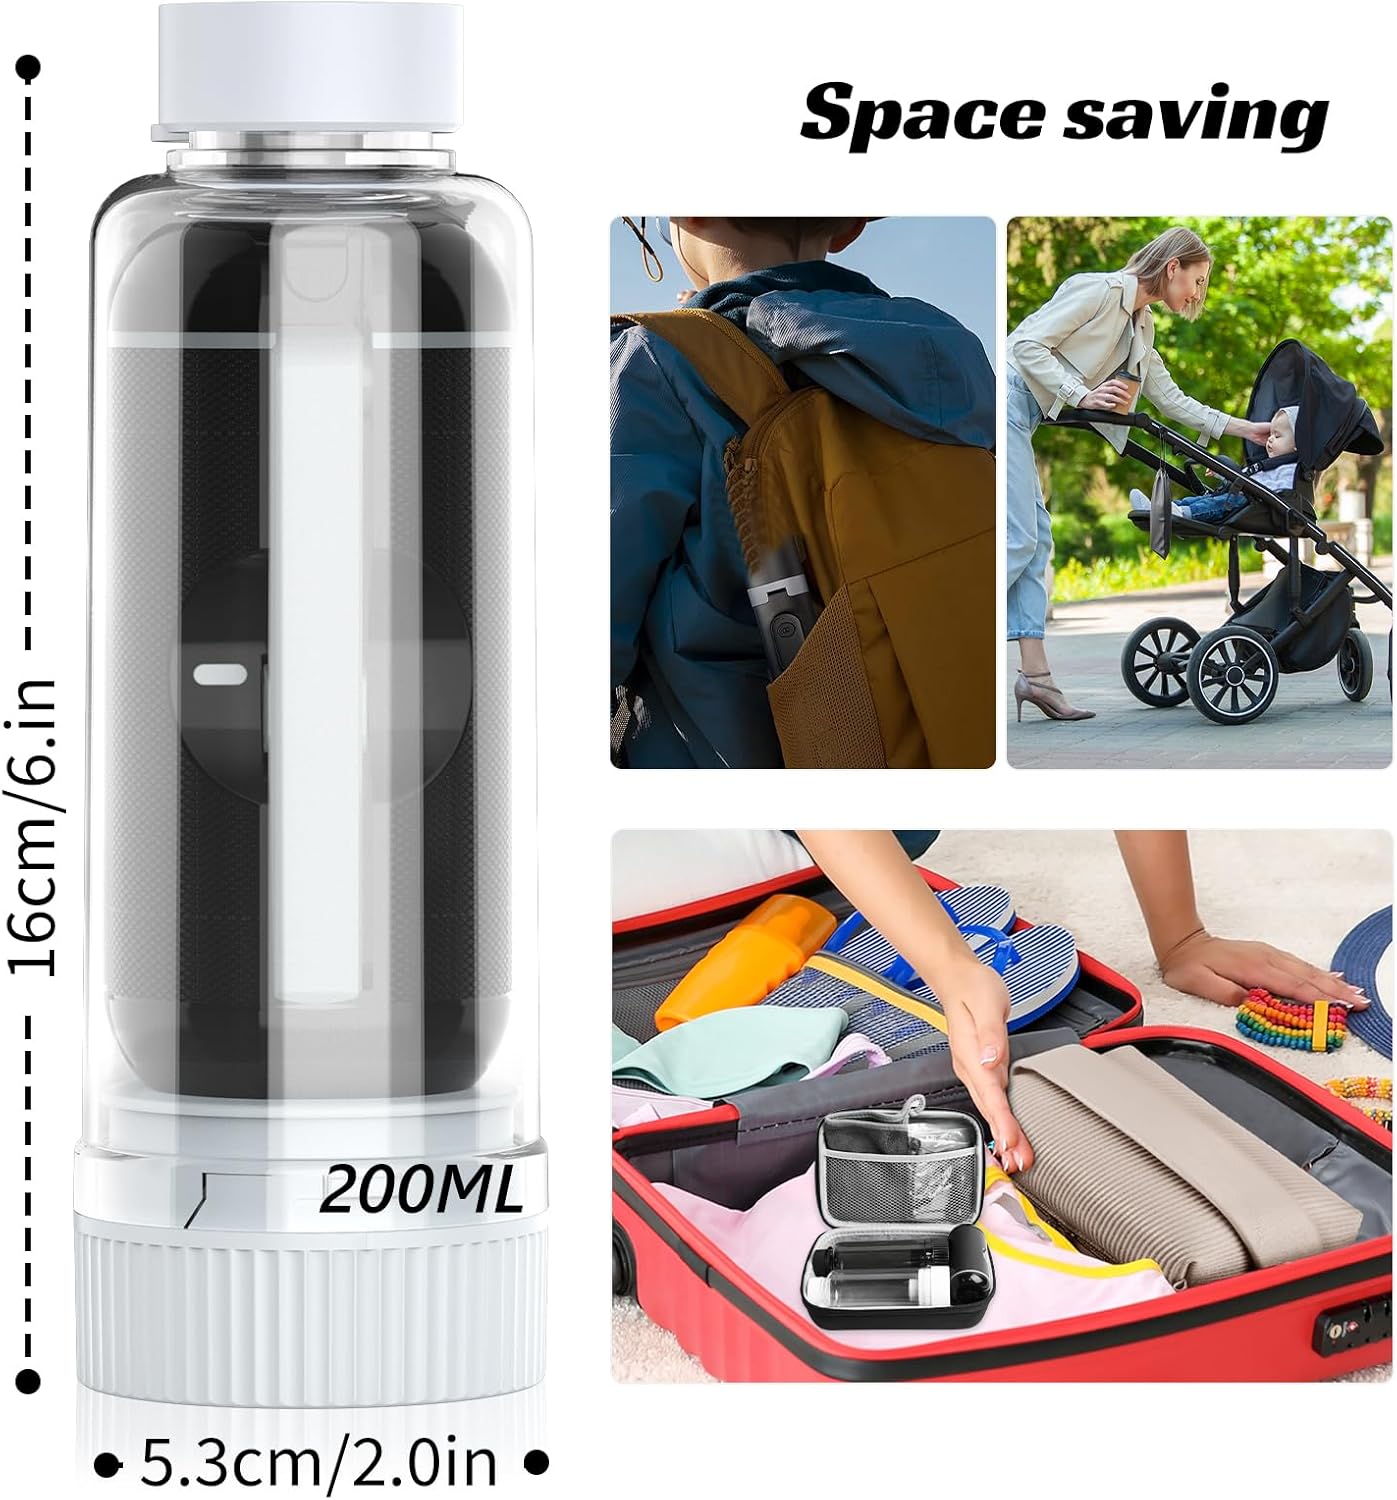
Figure 8: Compact dimensions and portability for travel.
8. Gwarancja i wsparcie
For warranty information and customer support, please refer to the official VITCOCO webOdwiedź stronę internetową lub skontaktuj się bezpośrednio ze sprzedawcą. Zachowaj paragon jako dowód zakupu.
Aby uzyskać dalszą pomoc, odwiedź stronę: VITCOCO Official Store on Amazon


