1. Wprowadzenie
Dziękujemy za zakupasing the Karlsson Vogue Alarm Clock. This versatile device combines a digital alarm clock, a wireless induction charger, and a Bluetooth speaker, designed to enhance your daily routine. Please read this manual carefully before using the product to ensure proper operation and to maximize its lifespan. Keep this manual for future reference.
Środki ostrożności
- Nie wystawiaj urządzenia na działanie wody ani nadmiernej wilgotności.
- Unikaj ekstremalnych temperatur.
- Nie demontuj ani nie próbuj samodzielnie naprawiać urządzenia.
- Use only the provided or recommended USB adapter for power.
- Podczas pracy urządzenia należy zapewnić odpowiednią wentylację.
2. Koniec produktuview
The Karlsson Vogue Alarm Clock features a sleek design with a fabric-covered front and intuitive controls. Below is an overview of its main components and controls.

Rycina 2.1: Przód view of the Karlsson Vogue Alarm Clock, displaying the digital time and temperature.

Rysunek 2.2: Tył view of the alarm clock, highlighting the control buttons and USB-C power input.
Control Buttons (from left to right on rear panel):
- Przycisk alarmu 1: Press to activate/deactivate Alarm 1. Long press to set Alarm 1 time.
- Przycisk alarmu 2: Press to activate/deactivate Alarm 2. Long press to set Alarm 2 time.
- Brightness/Snooze Button: Press to adjust display brightness. When alarm sounds, press to snooze.
- Przycisk ustawiania czasu: Long press to enter time setting mode.
- Przycisk w dół: Decrease values during setting, navigate menus.
- Przycisk w górę: Increase values during setting, navigate menus.
- Bluetooth/Play/Pause Button: Long press to enter Bluetooth pairing mode. Press to play/pause music.
- Wejście zasilania USB-C: Podłącz tutaj zasilacz.
Górny panel:
- Bezprzewodowa podkładka ładująca: Umieść tutaj urządzenia kompatybilne z ładowaniem bezprzewodowym.
3. Konfiguracja
3.1 Połączenie zasilania
- Connect the provided USB adapter to the USB-C Power Input port on the rear of the alarm clock.
- Podłącz adapter USB do standardowego gniazdka ściennego.
- Wyświetlacz zaświeci się, co oznacza, że urządzenie jest włączone.
3.2 Ustawienie czasu początkowego
- Naciśnij i przytrzymaj Przycisk ustawiania czasu (clock icon) on the rear panel. The hour digits will start flashing.
- Użyj Up I Przyciski w dół ustawić godzinę.
- Naciśnij Przycisk ustawiania czasu Naciśnij ponownie, aby potwierdzić godzinę i przejść do ustawiania minut. Cyfry minut zaczną migać.
- Użyj Up I Przyciski w dół aby ustawić minuty.
- Naciśnij Przycisk ustawiania czasu one more time to confirm the minute and exit time setting mode.
4. Instrukcja obsługi
4.1 Ustawianie alarmów
The device supports two independent alarms (Alarm 1 and Alarm 2).
- To set Alarm 1: Naciśnij i przytrzymaj Przycisk alarmu 1 (bell icon with '1'). The hour digits for Alarm 1 will flash.
- Użyj Up I Przyciski w dół aby dostosować godzinę alarmu.
- Naciśnij Przycisk alarmu 1 ponownie, aby potwierdzić godzinę i przejść do ustawiania minut.
- Użyj Up I Przyciski w dół aby ustawić minuty alarmu.
- Naciśnij Przycisk alarmu 1 one more time to confirm and exit alarm setting. The alarm icon will appear on the display.
- To set Alarm 2: Follow the same steps using the Przycisk alarmu 2 (bell icon with '2').
4.2 Aktywowanie/dezaktywowanie alarmów
- Naciśnij odpowiedni Przycisk alarmu 1 or Przycisk alarmu 2 briefly to toggle the alarm on or off. The alarm icon on the display will indicate its status.
4.3 Funkcja drzemki
- Gdy zabrzmi alarm, naciśnij przycisk Brightness/Snooze Button (light bulb icon) to activate snooze. The alarm will temporarily stop and sound again after approximately 9 minutes.
- To turn off the alarm completely, press any other button on the rear panel.
4.4 Obsługa głośnika Bluetooth
- Łączenie w pary: Naciśnij i przytrzymaj Bluetooth/Play/Pause Button (music note icon) until the display shows "BT" and starts flashing, indicating pairing mode.
- On your mobile device, enable Bluetooth and search for "Karlsson Vogue". Select it to connect.
- Once connected, the "BT" indicator will stop flashing. You can now play audio through the alarm clock's speaker.
- Odtwarzanie nagranego dźwięku: Naciśnij Bluetooth/Play/Pause Button na krótko, aby odtworzyć lub wstrzymać muzykę.
- Volume control is managed via your connected mobile device.
4.5 Wireless Induction Charging
The top surface of the alarm clock features a wireless charging pad compatible with Qi-enabled devices.
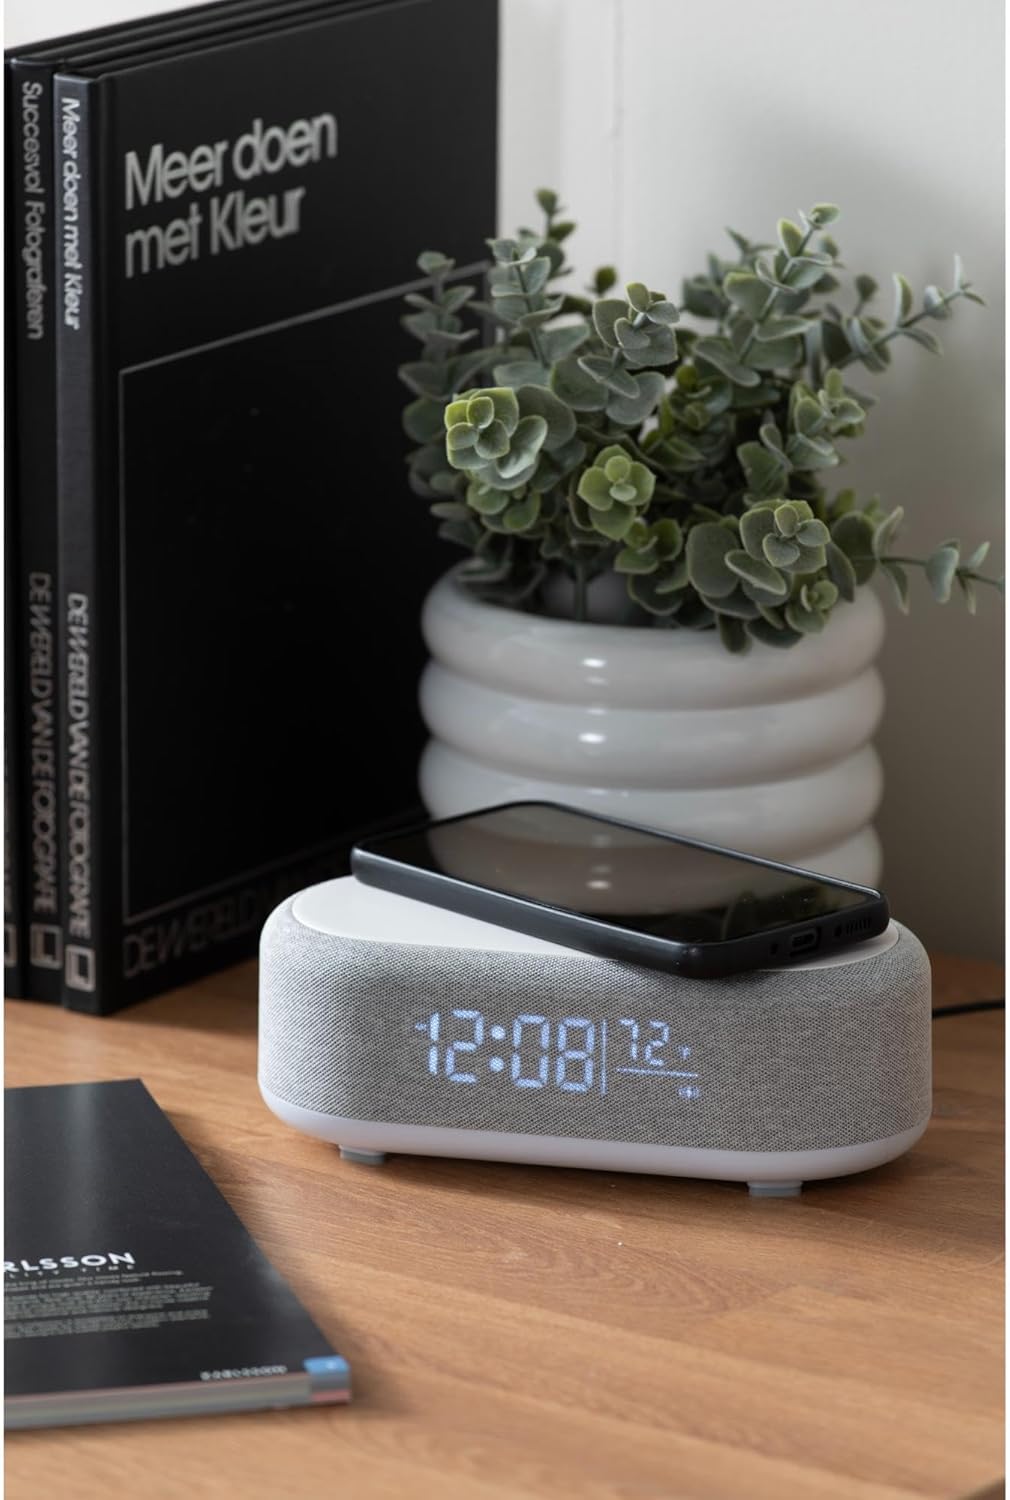
Figure 4.1: A smartphone placed on the wireless charging pad of the alarm clock.
- Place your Qi-compatible smartphone or other device directly onto the center of the top charging pad.
- Ensure the device is properly aligned. A charging indicator (usually on your phone screen) will confirm charging has begun.
- Po pełnym naładowaniu wyjmij urządzenie.
4.6 Regulacja jasności wyświetlacza
- Naciśnij Brightness/Snooze Button (light bulb icon) repeatedly to cycle through different brightness levels for the display.
5. Konserwacja
5.1 Czyszczenie
- Before cleaning, disconnect the power adapter.
- Wipe the surface of the alarm clock with a soft, dry, or slightly damp płótno.
- Nie należy używać środków czyszczących o działaniu ściernym, rozpuszczalników ani silnych środków chemicznych, gdyż mogą one uszkodzić powierzchnię.
5.2 Przechowywanie
- If storing the device for an extended period, disconnect it from power.
- Przechowywać w chłodnym, suchym miejscu, z dala od bezpośredniego światła słonecznego i ekstremalnych temperatur.
6. Rozwiązywanie Problemów
| Problem | Możliwa przyczyna | Rozwiązanie |
|---|---|---|
| Urządzenie się nie włącza. | Brak połączenia z zasilaniem lub uszkodzony adapter. | Ensure the USB-C cable is securely connected and the adapter is plugged into a working outlet. Try a different outlet. |
| Brak połączenia Bluetooth. | Device not in pairing mode; already connected to another device; mobile device Bluetooth off. | Long press the Bluetooth button to enter pairing mode. Ensure no other device is connected. Turn off and on Bluetooth on your mobile device. |
| Ładowanie bezprzewodowe nie działa. | Phone not Qi-compatible; phone not aligned; phone case too thick. | Ensure your device supports Qi wireless charging. Re-position the device on the center of the pad. Remove thick phone cases. |
| Alarm nie działa. | Alarm deactivated; volume too low (for Bluetooth alarm). | Check if the alarm icon is displayed. Ensure the alarm time is set correctly. If using Bluetooth audio for alarm, ensure phone volume is adequate. |
7. Specyfikacje
| Funkcja | Szczegół |
|---|---|
| Marka | Karlsson |
| Numer modelu | KA6033GY |
| Kolor | Szary |
| Tworzywo | Plastik (ABS) |
| Wymiary (dł. x szer. x wys.) | 19.8 x 9.8 x 7 cm (7.8 x 3.86 x 2.76 cala) |
| Waga | 0.46 kg (1.01 funta) |
| Moc wejściowa | USB (Adapter included) |
| Ładowanie bezprzewodowe | Induction (Qi-compatible) |
| Łączność | Bluetooth |
8. Gwarancja i wsparcie
For warranty information and customer support, please refer to the documentation provided with your purchase or contact your retailer. You may also visit the official Karlsson webAby uzyskać dalszą pomoc, odwiedź naszą witrynę.
Webstrona: Karlsson Official Store


