1. Wprowadzenie
The Wiltec Oscillating Spindle and Belt Sander is a versatile woodworking tool designed for precise sanding of various materials, primarily wood. This machine combines the functionality of both a spindle sander and a belt sander, offering flexibility for different sanding tasks. Its oscillating motion ensures smooth, even finishes and reduces the risk of gouging or uneven surfaces. The tiltable work table allows for angled sanding, expanding its application range for both straight and curved edges.
This manual provides essential information for the safe operation, setup, maintenance, and troubleshooting of your Wiltec sander. Please read it thoroughly before operating the machine to ensure proper use and to maximize its lifespan.

Rysunek 1.1: Główny view of the Wiltec Oscillating Spindle and Belt Sander.
2. Instrukcje bezpieczeństwa
Aby zminimalizować ryzyko pożaru, porażenia prądem i obrażeń ciała, należy zawsze przestrzegać podstawowych zasad bezpieczeństwa podczas korzystania z narzędzi elektrycznych.
2.1 Ogólne zasady bezpieczeństwa
- Read and understand all instructions before operating the sander.
- Należy nosić odpowiedni sprzęt ochrony osobistej (PPE), obejmujący okulary ochronne, ochronniki słuchu i maskę przeciwpyłową.
- Utrzymuj miejsce pracy w czystości i dobrym oświetleniu. Zagracone lub ciemne obszary sprzyjają wypadkom.
- Nie należy używać elektronarzędzi w atmosferach zagrożonych wybuchem, np. w obecności łatwopalnych cieczy, gazów lub pyłów.
- Trzymaj dzieci i osoby postronne z dala od siebie podczas obsługi elektronarzędzia. Rozproszenie uwagi może spowodować utratę kontroli.
- Always disconnect the power plug from the outlet before making any adjustments, changing accessories, or storing the tool.
2.2 Bezpieczeństwo elektryczne
- Wtyczki elektronarzędzi muszą pasować do gniazdka. Nigdy nie modyfikuj wtyczki w żaden sposób.
- Unikaj kontaktu ciała z uziemionymi powierzchniami, takimi jak rury, grzejniki, kuchenki i lodówki. Istnieje zwiększone ryzyko porażenia prądem, jeśli twoje ciało jest uziemione.
- Nie wystawiaj elektronarzędzi na deszcz lub mokre warunki. Woda dostająca się do elektronarzędzia zwiększa ryzyko porażenia prądem.
- Nie nadużywaj przewodu. Nigdy nie używaj przewodu do przenoszenia, ciągnięcia lub odłączania elektronarzędzia. Trzymaj przewód z dala od ciepła, oleju, ostrych krawędzi lub ruchomych części.
2.3 Bezpieczeństwo osobiste
- Zachowaj czujność, zwracaj uwagę na to, co robisz, i kieruj się zdrowym rozsądkiem podczas obsługi elektronarzędzi.
- Nie używaj narzędzia, gdy jest się zmęczonym lub pod wpływem narkotyków, alkoholu lub leków.
- Ubierz się odpowiednio. Nie noś luźnej odzieży ani biżuterii. Trzymaj włosy i odzież z dala od ruchomych części.
- Use dust extraction and collection facilities if provided. These can reduce dust-related hazards.
3. Koniec komponentówview
Familiarize yourself with the main components of your Wiltec sander before assembly and operation.
- Stół roboczy: The main surface where the workpiece rests. It can be tilted for angled sanding.
- Spindle Sander Post: The vertical shaft for attaching sanding sleeves.
- Belt Sander Assembly: The horizontal belt for linear sanding.
- Przycisk zasilania: Wyłącznik zasilania urządzenia.
- Port pyłowy: Punkt podłączenia systemu odpylania.
- Sanding Sleeves: Cylindrical abrasive sleeves for spindle sanding (various diameters).
- Pas szlifierski: Abrasive belt for belt sanding.
- Klucze: Tools for assembly and adjustments.

Figure 3.1: Included sanding sleeves and wrenches.

Rysunek 3.2: Tył view of the sander, highlighting the power cord and spindle area.
4. Konfiguracja
4.1 Rozpakowanie i kontrola
- Ostrożnie wyjąć wszystkie elementy z opakowania.
- Inspect the machine for any shipping damage. If damage is found, do not operate the machine and contact customer support immediately.
- Verify that all listed components are present. Refer to the "Components Overview" sekcja.
4.2 Montaż
The Wiltec sander comes largely pre-assembled. Minor assembly may be required for specific components or accessories.
- Place the sander on a stable, level workbench.
- Ensure the power switch is in the "OFF" position and the machine is unplugged.
- If using the spindle sanding function, ensure the appropriate sanding sleeve and corresponding table insert are installed.
- If using the belt sanding function, ensure the belt assembly is correctly positioned and the belt is tensioned.
4.3 Podłączanie do zasilania
Connect the power cord to a grounded 230V AC outlet. Ensure the circuit can handle the 500W power consumption of the sander.
5. Instrukcja obsługi
5.1 Ogólne zasady działania
- Upewnij się, że obrabiany przedmiot nie zawiera gwoździ, śrub ani innych ciał obcych.
- Always hold the workpiece firmly against the work table.
- Apply light, even pressure when sanding. Excessive pressure can lead to poor results and motor strain.
- Move the workpiece smoothly across the sanding surface.
5.2 Spindle Sanding
The spindle sanding function is ideal for sanding curved edges and internal contours.
- Select the appropriate sanding sleeve diameter for your workpiece.
- Install the chosen sanding sleeve onto the spindle post.
- Ensure the correct table insert is in place to minimize the gap around the spindle.
- Włącz maszynę.
- Carefully bring the workpiece into contact with the oscillating and rotating sanding sleeve.
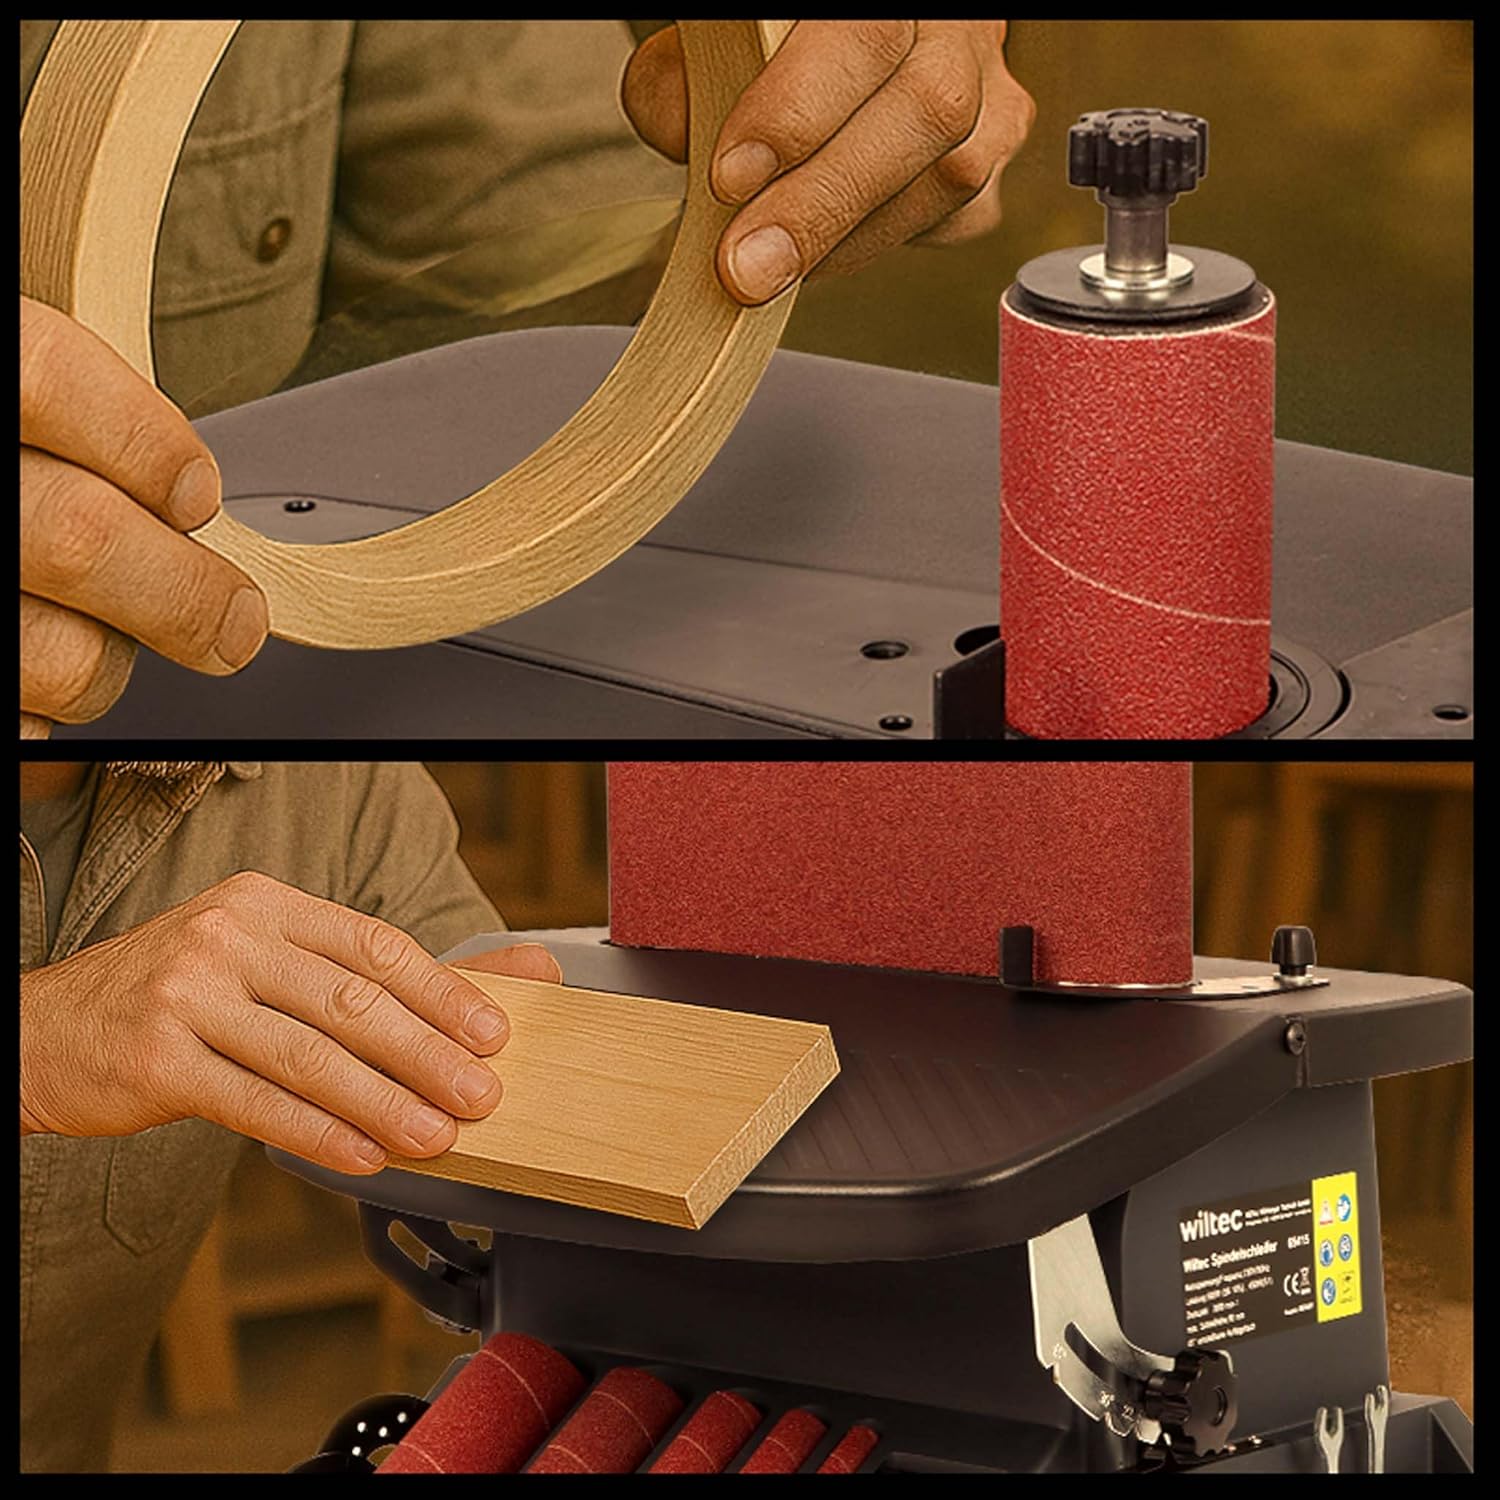
Figure 5.1: Demonstrating sanding of curved and straight edges.
5.3 Belt Sanding
The belt sanding function is suitable for sanding straight edges and larger flat surfaces.
- Ensure the belt sanding assembly is engaged.
- Check the tension and alignment of the sanding belt.
- Włącz maszynę.
- Feed the workpiece smoothly against the moving sanding belt.

Figure 5.2: The sander demonstrating its tiltable table and dual sanding modes.
5.4 Tilting the Work Table
The work table can be tilted up to 45 degrees for bevel sanding.
- Poluzuj pokrętło blokujące stół.
- Ustaw stół pod żądanym kątem za pomocą skali kątowej.
- Tighten the table locking knob securely before operating.
6. Konserwacja
Regularna konserwacja zapewnia optymalną wydajność i wydłuża żywotność szlifierki.
6.1 Czyszczenie
- Zawsze odłączaj urządzenie przed czyszczeniem.
- Use a brush or compressed air to remove sawdust from the machine, especially around the motor vents and sanding areas.
- Przetrzyj powierzchnie zewnętrzne środkiem adamp płótno. Nie używaj rozpuszczalników.
- Regularly empty the dust collection bag/system.
6.2 Sanding Sleeve/Belt Replacement
- Replace sanding sleeves and belts when they become worn or lose their abrasive quality.
- Refer to the machine's specific instructions for detailed steps on changing sleeves and belts. Ensure proper tensioning for belts.
6.3 Smarowanie
The machine's internal components are generally sealed and do not require user lubrication. Do not attempt to lubricate internal parts unless specifically instructed by the manufacturer.
7. Rozwiązywanie Problemów
This section addresses common issues you might encounter with your Wiltec sander.
| Problem | Możliwa przyczyna | Rozwiązanie |
|---|---|---|
| Maszyna nie uruchamia się. | No power supply; Power switch off; Thermal overload. | Check power connection; Ensure switch is ON; Allow motor to cool down. |
| Poor sanding results / Uneven finish. | Worn sanding sleeve/belt; Excessive pressure; Incorrect sleeve/belt for material. | Replace abrasive; Reduce pressure; Use appropriate grit. |
| Nadmierne wibracje. | Loose components; Unbalanced sanding sleeve/belt; Machine not on stable surface. | Check and tighten all fasteners; Replace damaged abrasive; Secure machine to workbench. |
| Silnik się przegrzewa. | Overloading the motor; Blocked ventilation; Continuous operation. | Reduce load; Clean ventilation openings; Allow machine to rest periodically. |
If the problem persists after attempting these solutions, please contact Wiltec customer support.
8. Specyfikacje
| Funkcja | Szczegół |
|---|---|
| Numer modelu | 65415 |
| Moc wejściowa | 500 W |
| Tomtage | 230 V (prąd przemienny) |
| Maksymalna prędkość | 2000 obr./min. |
| Oscillation Stroke | 16 mm |
| Work Table Tilt | 0° do 45° |
| Sanding Sleeve Diameters | Approx. 13 mm to 51 mm (0.5" to 2") |
| Tworzywo | Cast Iron, PP |
| Waga przedmiotu | 17.4 kg (ok. 38.36 funta) |
| Wymiary opakowania | 51 x 47.5 x 40 cm (ok. 20.1 x 18.7 x 15.7 cala) |

Rysunek 8.1: Wymiary produktu.
9. Gwarancja i wsparcie
9.1 Informacje o gwarancji
Wiltec products are manufactured with high-quality materials and are subject to strict quality controls. This product comes with a standard manufacturer's warranty against defects in materials and workmanship. The warranty period typically covers 14 days for returns/replacements as per standard policy, but specific terms may vary by region and purchase date. Please retain your proof of purchase for warranty claims.
The warranty does not cover damage caused by improper use, neglect, unauthorized repairs, or normal wear and tear of consumable parts (e.g., sanding sleeves/belts).
9.2 Obsługa klienta
For technical assistance, spare parts, or warranty claims, please contact Wiltec customer support. You can find contact information on the official Wiltec website or through your point of purchase. When contacting support, please have your model number (65415) and proof of purchase ready.
Więcej informacji znajdziesz na stronie Wiltec Store on Amazon.


