1. Wprowadzenie
Thank you for choosing the PRUVEEO Waterproof Rear Camera. This manual provides essential information for the proper installation, operation, and maintenance of your new rear camera. Please read this manual thoroughly before use to ensure optimal performance and longevity of the product.
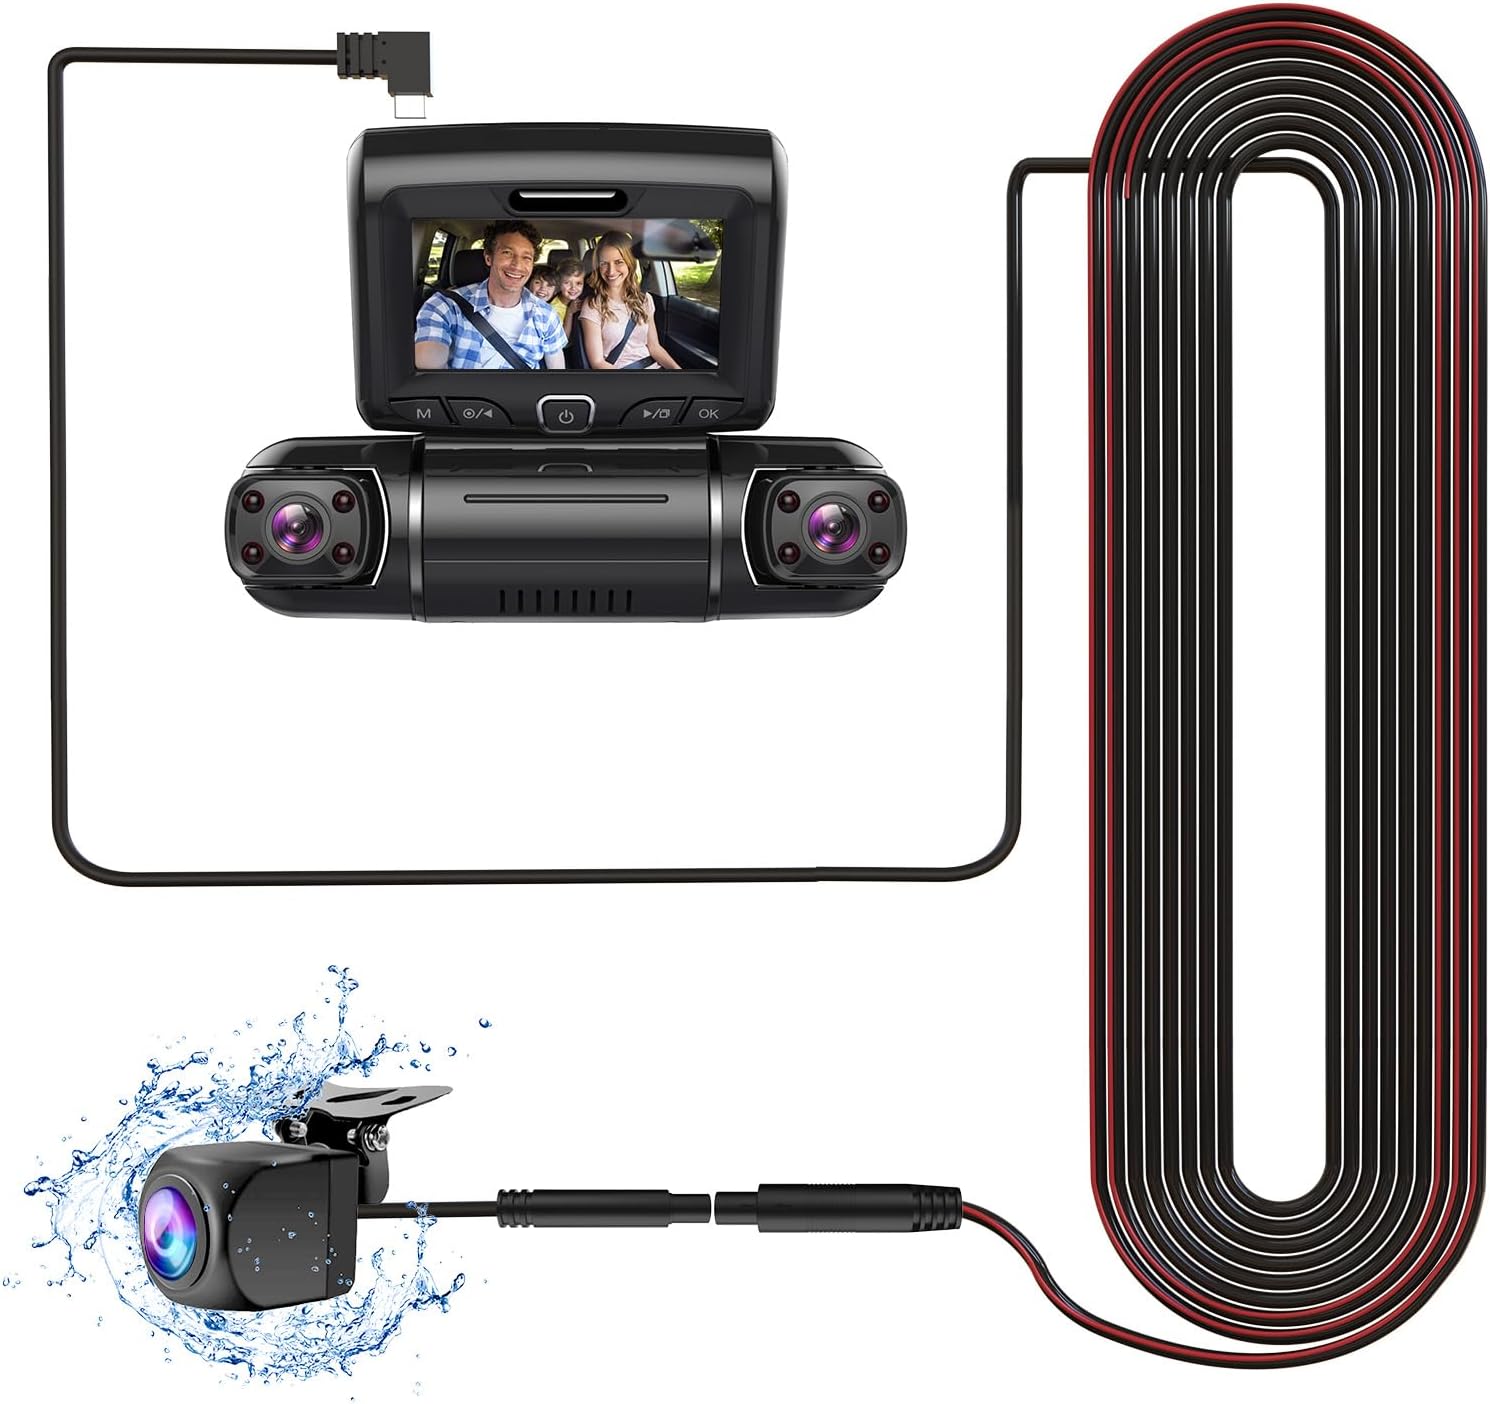
2. Zawartość opakowania
Verify that all items listed below are present in your package. If any items are missing or damaged, please contact PRUVEEO customer support.
- 1x PRUVEEO Rear Camera (1080P)
- 1x przedłużacz
- Installation Tools (screws)

Rysunek 2.1: Package contents including the rear camera, extension cable, and installation tools.
3. Zgodność
This PRUVEEO Rear Camera is specifically designed for use with the following PRUVEEO Dash Camera models:
- PRUVEEO D90-4CH
- PRUVEEO A6
- PRUVEEO D88
It features a Type-C port for connection to the compatible dash camera. Ensure your dash camera model is listed above for proper functionality.
4. Główne cechy
- Rozdzielczość 1080P: Provides clear and detailed video recording.
- Wodoodporna konstrukcja: Engineered to withstand various weather conditions.
- Obiektyw szerokokątny: Oferuje szerokie pole view for comprehensive rear coverage.
- Port typu C: Ensures secure and reliable connection to compatible dash cameras.
- Łatwa instalacja: Designed for straightforward setup with included tools and extension cable.

Rysunek 4.1: The rear camera demonstrating its waterproof feature.

Rysunek 4.2: Visual representation of the camera's key features: waterproof, high resolution, car rear view, and wide angle.
5. Konfiguracja i instalacja
Proper installation is crucial for optimal performance. It is recommended to have this camera installed by a professional if you are unfamiliar with vehicle wiring.
5.1 Wybór miejsca instalacji
The rear camera is typically mounted on the rear license plate area or near the rear window. Choose a location that provides a clear, unobstructed view of the road behind your vehicle. Ensure the camera is centered for the best perspective.
5.2 Montaż kamery
- Clean the chosen mounting surface thoroughly to ensure proper adhesion or secure screw placement.
- Attach the camera bracket to the vehicle using the provided screws. Ensure it is securely fastened and angled correctly.
- Dostosuj kąt kamery, aby uzyskać pożądany widok z tyłu view.
5.3 Podłączenie okablowania
- Connect the rear camera's cable to the provided extension cable.
- Carefully route the extension cable from the rear of the vehicle to the location of your PRUVEEO dash camera. Ensure the cable is tucked away safely to avoid interference with vehicle operations and to protect it from damage.
- Connect the Type-C end of the extension cable to the designated rear camera input port on your compatible PRUVEEO dash camera (D90-4CH, A6, or D88).
- Once connected, power on your dash camera to verify the rear camera feed is displayed correctly.
Rysunek 5.1: Connection diagram of the rear camera to a compatible dash camera.

Rysunek 5.2: The PRUVEEO Rear Camera and its extension cable.
6. Działanie
Once properly installed and connected to a compatible PRUVEEO dash camera, the rear camera operates in conjunction with the dash camera system.
- Automatyczne nagrywanie: The rear camera will automatically begin recording when the dash camera is powered on, typically when the vehicle's ignition is turned on.
- Tryby wyświetlania: Refer to your specific PRUVEEO dash camera's manual for instructions on how to switch between front camera view, kamera tylna view, or picture-in-picture display modes.
- Parking Monitor (if supported by dash cam): If your dash camera supports a parking monitor feature, the rear camera will also record events when the vehicle is parked, depending on the dash camera's settings.
For detailed operational instructions, please consult the user manual of your PRUVEEO D90-4CH, A6, or D88 dash camera.
7. Konserwacja
Regular maintenance ensures the longevity and optimal performance of your rear camera.
- Czyszczenie soczewek: Okresowo czyść obiektyw aparatu miękką,amp szmatką, aby usunąć brud, kurz lub plamy wodne, które mogą blokować view. Avoid abrasive materials or harsh chemicals.
- Kontrola kabla: Regularly check the connection cable for any signs of wear, damage, or loose connections. Ensure it remains securely tucked away.
- Kontrola montażu: Verify that the camera remains securely mounted and its angle has not shifted due to vibrations or impacts.
- Aktualizacje oprogramowania: Ensure your main dash camera firmware is up-to-date, as this may affect the performance of connected accessories like the rear camera.
8. Rozwiązywanie Problemów
If you encounter issues with your PRUVEEO Rear Camera, refer to the following common problems and solutions.
| Problem | Możliwa przyczyna | Rozwiązanie |
|---|---|---|
| No image from rear camera |
|
|
| Obraz jest niewyraźny lub niejasny |
|
|
| Przerywane połączenie |
|
|
If the problem persists after attempting these solutions, please contact PRUVEEO customer support for further assistance.
9. Specyfikacje
| Funkcja | Szczegół |
|---|---|
| Zgodność modelu | PRUVEEO D90-4CH, A6, D88 Dash Cameras |
| Rezolucja | 1080P |
| Stopień wodoodporności | Yes (Specific IP rating not provided, but described as "Waterproof") |
| Typ złącza | Typ C (USB) |
| Technologia czujnika optycznego | CMOS |
| Typ soczewki | Szeroki kąt |
| Rozmiar czujnika optycznego | 1/4 cala |
| Wymiary produktu | 11.02"L x 5.7"W x 1.95"H (Packaging dimensions, actual camera dimensions not specified, using packaging for reference) |
| Waga przedmiotu | 10.6 ounces (Packaging weight, actual camera weight not specified, using packaging for reference) |
10. Gwarancja i wsparcie
For information regarding warranty coverage, technical support, or to purchase replacement parts, please contact PRUVEEO customer service.
Please refer to the official PRUVEEO webAby uzyskać najaktualniejsze dane kontaktowe i szczegóły gwarancji, odwiedź witrynę lub dokumentację zakupu.


