Wstęp
The OMBAR T1 4K 3 Channel Dash Cam is an advanced vehicle recording system designed to enhance driving safety and provide comprehensive surveillance. Equipped with STARVIS 2 IMX678 sensors, it offers superior video quality, including Micro-Light Full-Color Night Vision and 3-Channel HDR imaging. This manual provides detailed instructions for setting up, operating, and maintaining your dash cam.
Co jest w pudełku
- OMBAR T1 Dash Cam (Front Camera)
- Kamera tylna
- Góra GPS
- Kabel kamery tylnej
- Adapter ładowarki samochodowej
- Crowbar (for cable tucking)
- 3M Adhesive Stickers (4x)
- Naklejki elektrostatyczne (4x)
- Instrukcja obsługi
- Karta SD 128 GB (wbudowana lub dołączona)

Konfiguracja i instalacja
1. Prepare the Windshield
Before mounting, ensure your windshield is clean and dry. Use the provided alcohol prep pads to thoroughly clean the mounting area for optimal adhesion of the electrostatic stickers and adhesive mounts.
2. Zainstaluj przednią kamerę samochodową
Attach the GPS mount to the front dash cam. Apply an electrostatic sticker to your windshield, then firmly press the dash cam with its adhesive mount onto the electrostatic sticker. Position it to ensure a clear view of the road without obstructing your driving vision. The camera's angle can be adjusted for optimal recording.

3. Zainstaluj tylną kamerę
Mount the rear camera on your rear windshield using an electrostatic sticker and adhesive. Connect the rear camera to the main dash cam using the provided long cable. Route the cable discreetly along the headliner and A-pillar, using the included crowbar and wire clips to tuck it away.

4. Podłączenie zasilania
Connect the car charger adapter to your vehicle's cigarette lighter socket and plug the USB-C cable into the main dash cam. Ensure you use the original car charger and power cable for stable operation. Avoid third-party phone chargers or cords, as they may cause voltage problemy.

The dash cam will automatically power on and begin recording when your vehicle starts. It will stop recording when power is disconnected.
Instrukcja obsługi
1. Initial Setup and Settings
Upon first power-on, the dash cam will prompt you for initial setup, including language and time zone. Use the buttons on the device to navigate the menu. The large screen on the back makes menu navigation easy.
Video: This video demonstrates how to access and adjust settings on the OMBAR T1 Dash Cam's display, including resolution, loop recording, G-sensor, WiFi, and GPS settings.
2. RoadRec App Connection
Download the "RoadRec" app from the App Store (iOS) or Google Play (Android). Enable Wi-Fi on your dash cam and connect your smartphone to the dash cam's Wi-Fi network. The app allows for live view, odtwarzanie wideo, file management, emergency lock, and GPS tracking. It also supports OTA firmware updates.

Video: A user demonstrates connecting the dash cam to the RoadRec app on a tablet, showing the live view and various app functions.
3. Recording Modes and Features
- Nagrywanie w pętli: The dash cam automatically overwrites the oldest unlocked videos when the SD card is full, ensuring continuous recording.
- Czujnik G: Wykrywa nagłe uderzenia lub kolizje i automatycznie blokuje bieżący obraz wideo.tage aby zapobiec jego nadpisaniu.
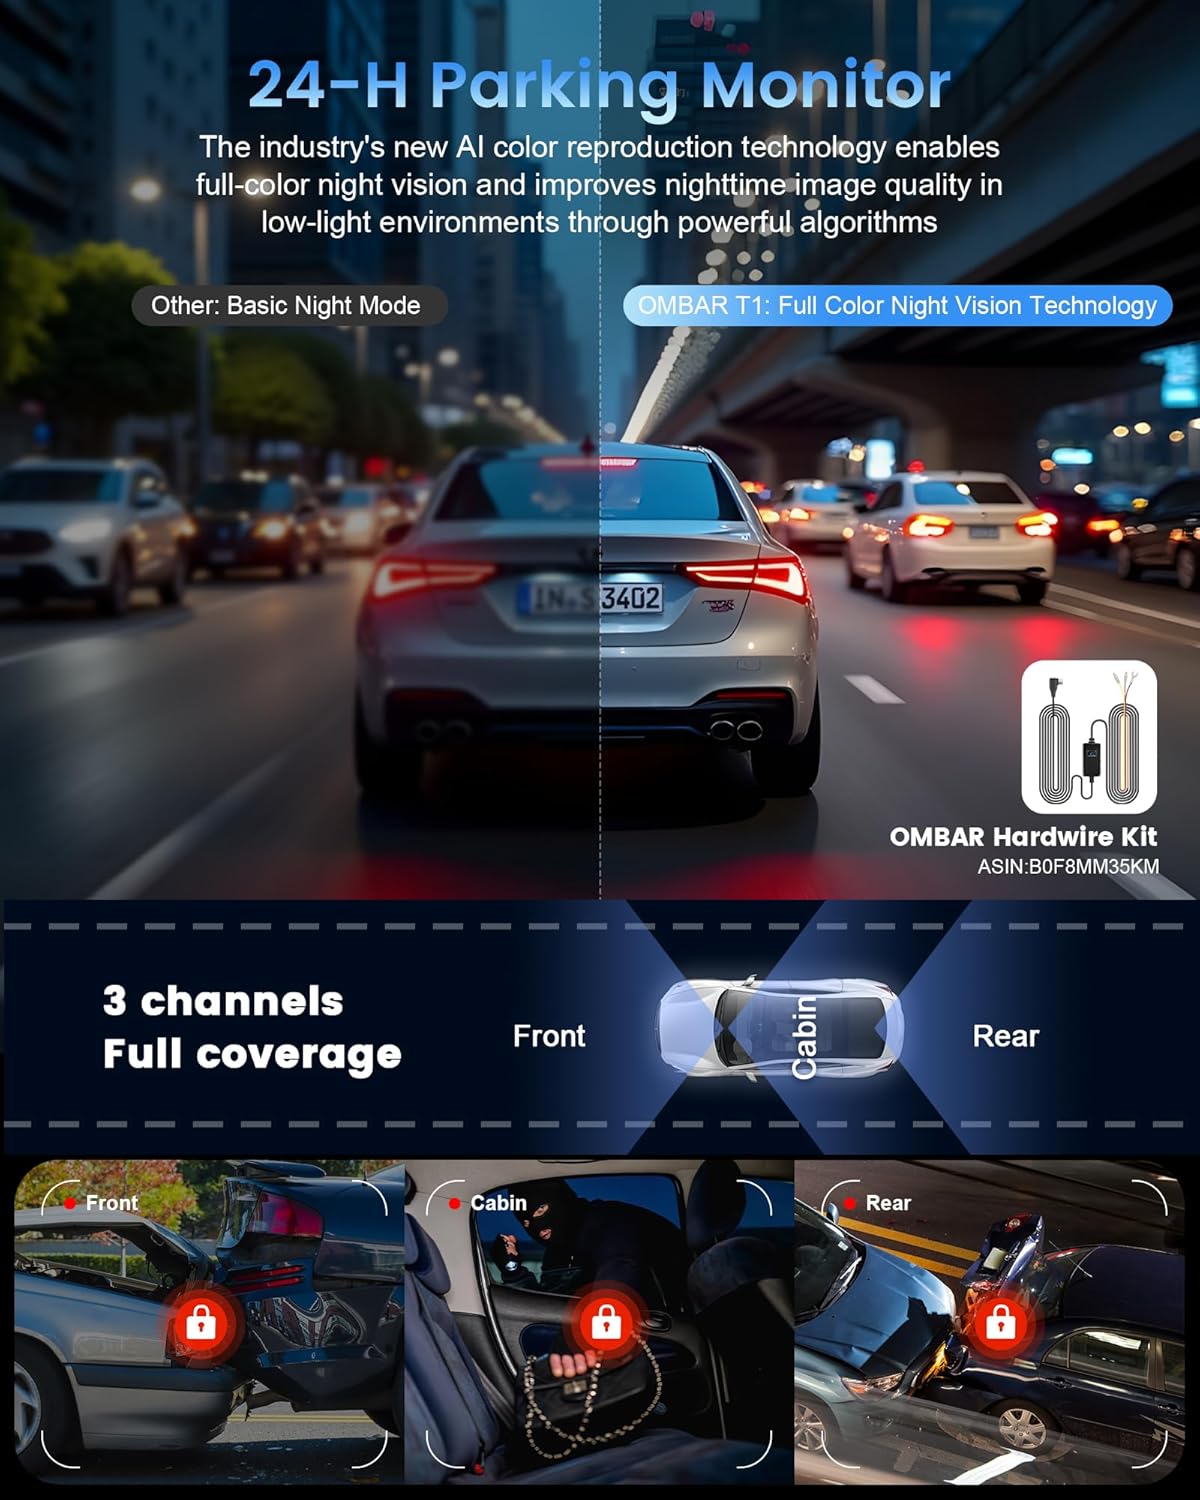
- Tryb parkowania: With the optional OMBAR hardware kit, the dash cam can continuously monitor your vehicle 24/7 for security and theft prevention, even when parked.
- Pełnokolorowa wizja nocna: Utilizes STARVIS 2 IMX678 sensors and advanced AI processing for vivid, true-to-color footage w warunkach słabego oświetlenia.
- Wbudowany GPS: Provides real-time route and location tracking, with optional speed stamps embedded in your footage.
Video: This video demonstrates the OMBAR T1 Dash Cam's full-color night vision capabilities in various low-light driving scenarios.
Konserwacja
- Regularly format the SD card (e.g., every 6 months) to prevent accumulation of false alarm footage and ensure optimal performance.
- Keep the camera lenses clean for clear recording quality.
- Always use the original power accessories to avoid potential voltage problemy.
Specyfikacje
| Funkcja | Szczegół |
|---|---|
| Nazwa modelu | T1 |
| Rozdzielczość przechwytywania wideo | 4K+1080P+1080P@30fps, 5K@25fps |
| Czujnik obrazu | STARVIS 2 IMX678 (Front), Dual IMX307 (Rear & Cabin) |
| Wizja nocna | Micro-Light Full-Color Night Vision |
| Łączność | 5GHz Wi-Fi, APP (RoadRec) |
| GPS | Built-in High-Precision Quad-Mode GPS (GPS, BeiDou, Galileo, GLONASS) |
| Składowanie | Supports up to 512GB MicroSD Card (128GB included) |
| Cechy specjalne | 4K HDR, 3-axis adjustable G-Sensor, OTA Firmware Update, Supercapacitor, Buffered Motion Detection, 24hrs parking mode |
| Wymiary produktu | 0.39 x 0.39 x 0.39 cala |
| Waga przedmiotu | 1.92 funta |
Gwarancja i wsparcie
The OMBAR T1 Dash Cam comes with a standard warranty. For extended warranty options or technical support, please refer to the information provided with your product or contact OMBAR customer service.
Aby uzyskać dalszą pomoc, odwiedź stronę OMBAR Store on Amazon.


