1. Wprowadzenie
This manual provides detailed instructions for the safe and effective use of your DEPSTECH DS650 210° Two-Way Articulating Borescope and DEPSTECH DS520 Dual Lens Sewer Inspection Camera. Please read this manual thoroughly before operating the devices to ensure proper functionality and to prevent damage.

Image 1.1: The DEPSTECH DS650 Articulating Borescope and DS520 Sewer Camera kit, showing both main units and their respective probes.
2. Informacje dotyczące bezpieczeństwa
Aby zapobiec obrażeniom ciała lub uszkodzeniu urządzenia, należy przestrzegać następujących środków ostrożności:
- Nie należy używać urządzenia w otoczeniu, w którym występują gazy łatwopalne lub wybuchowe.
- Trzymaj urządzenie z dala od wody i innych płynów, za wyjątkiem sondy wodoodpornej.
- Nie należy podejmować prób demontażu ani modyfikacji urządzenia. Naprawy powinny być wykonywane wyłącznie przez upoważniony personel.
- Przechowuj urządzenie w suchym, chłodnym miejscu, gdy nie jest używane.
- Ensure the probe is clean before and after each use to maintain optimal performance.
- Avoid bending the probe cable excessively, especially for the DS650 articulating probe, to prevent internal damage.
3. Zawartość opakowania
Sprawdź, czy w przesyłce znajdują się wszystkie elementy:
- DEPSTECH DS650 Przegubowy endoskop
- DEPSTECH DS520 Sewer Camera Unit
- DS650 Articulating Probe (6.2mm diameter)
- DS520 Dual Lens Probe (50ft cable)
- Kabel ładujący USB
- Instrukcja obsługi (ten dokument)
- Carrying Case (for DS650)
- Accessories (e.g., hooks, magnets, side mirror - specific to model, check individual packaging)
4. Koniec produktuview
4.1. DEPSTECH DS650 Articulating Borescope
The DS650 features a 4.5-inch IPS display and a 6.2mm diameter probe with 210° two-way articulation for precise inspection in confined spaces.
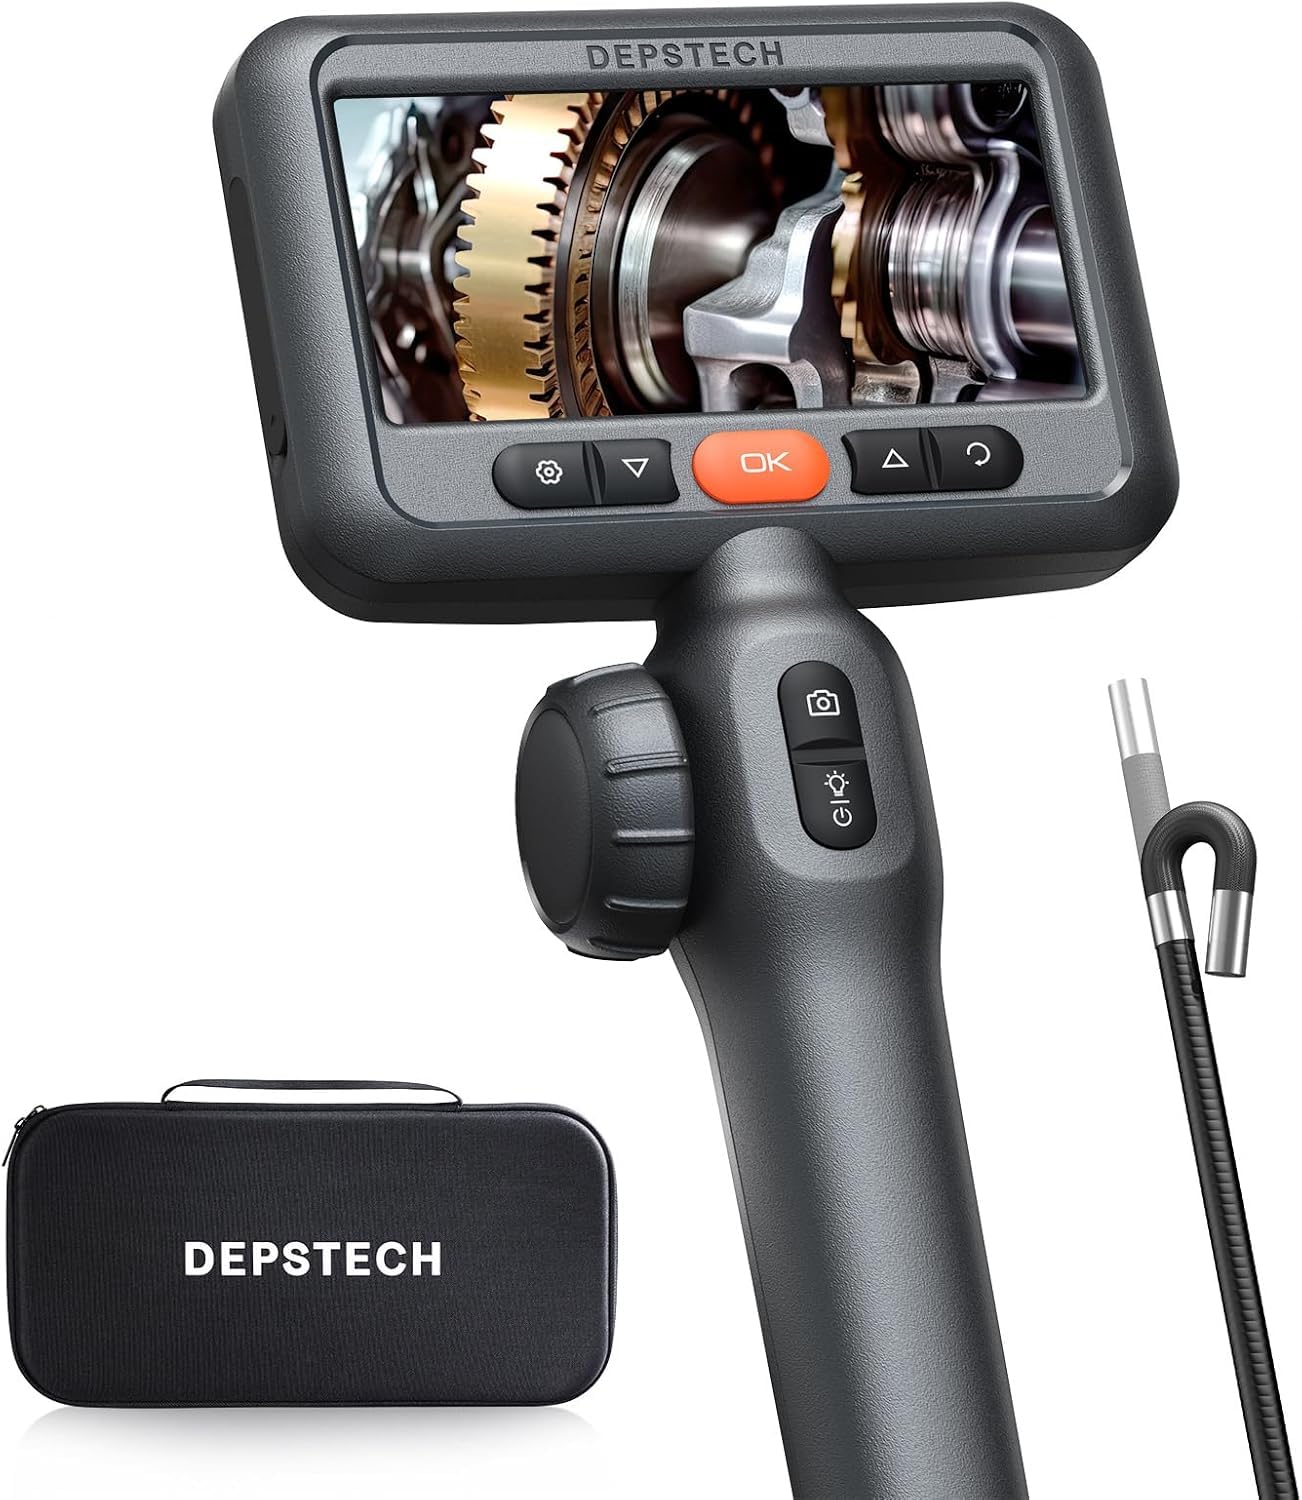
Image 4.1: The DEPSTECH DS650 Articulating Borescope, showing the main display unit, ergonomic handle, and the articulating probe.
- Wyświetlacz: Ekran IPS 4.5 cala
- Średnica sondy: 6.2mm
- Artykulacja: 210° Dwukierunkowy
- Oświetlenie: Regulowane światła LED
- Sterownica: Power button, articulation joystick, photo/video button, menu/OK buttons.
4.2. DEPSTECH DS520 Dual Lens Sewer Camera
The DS520 is equipped with a 5-inch IPS screen and a 50ft semi-rigid cable with dual lenses, ideal for inspecting longer pipes and sewer lines.
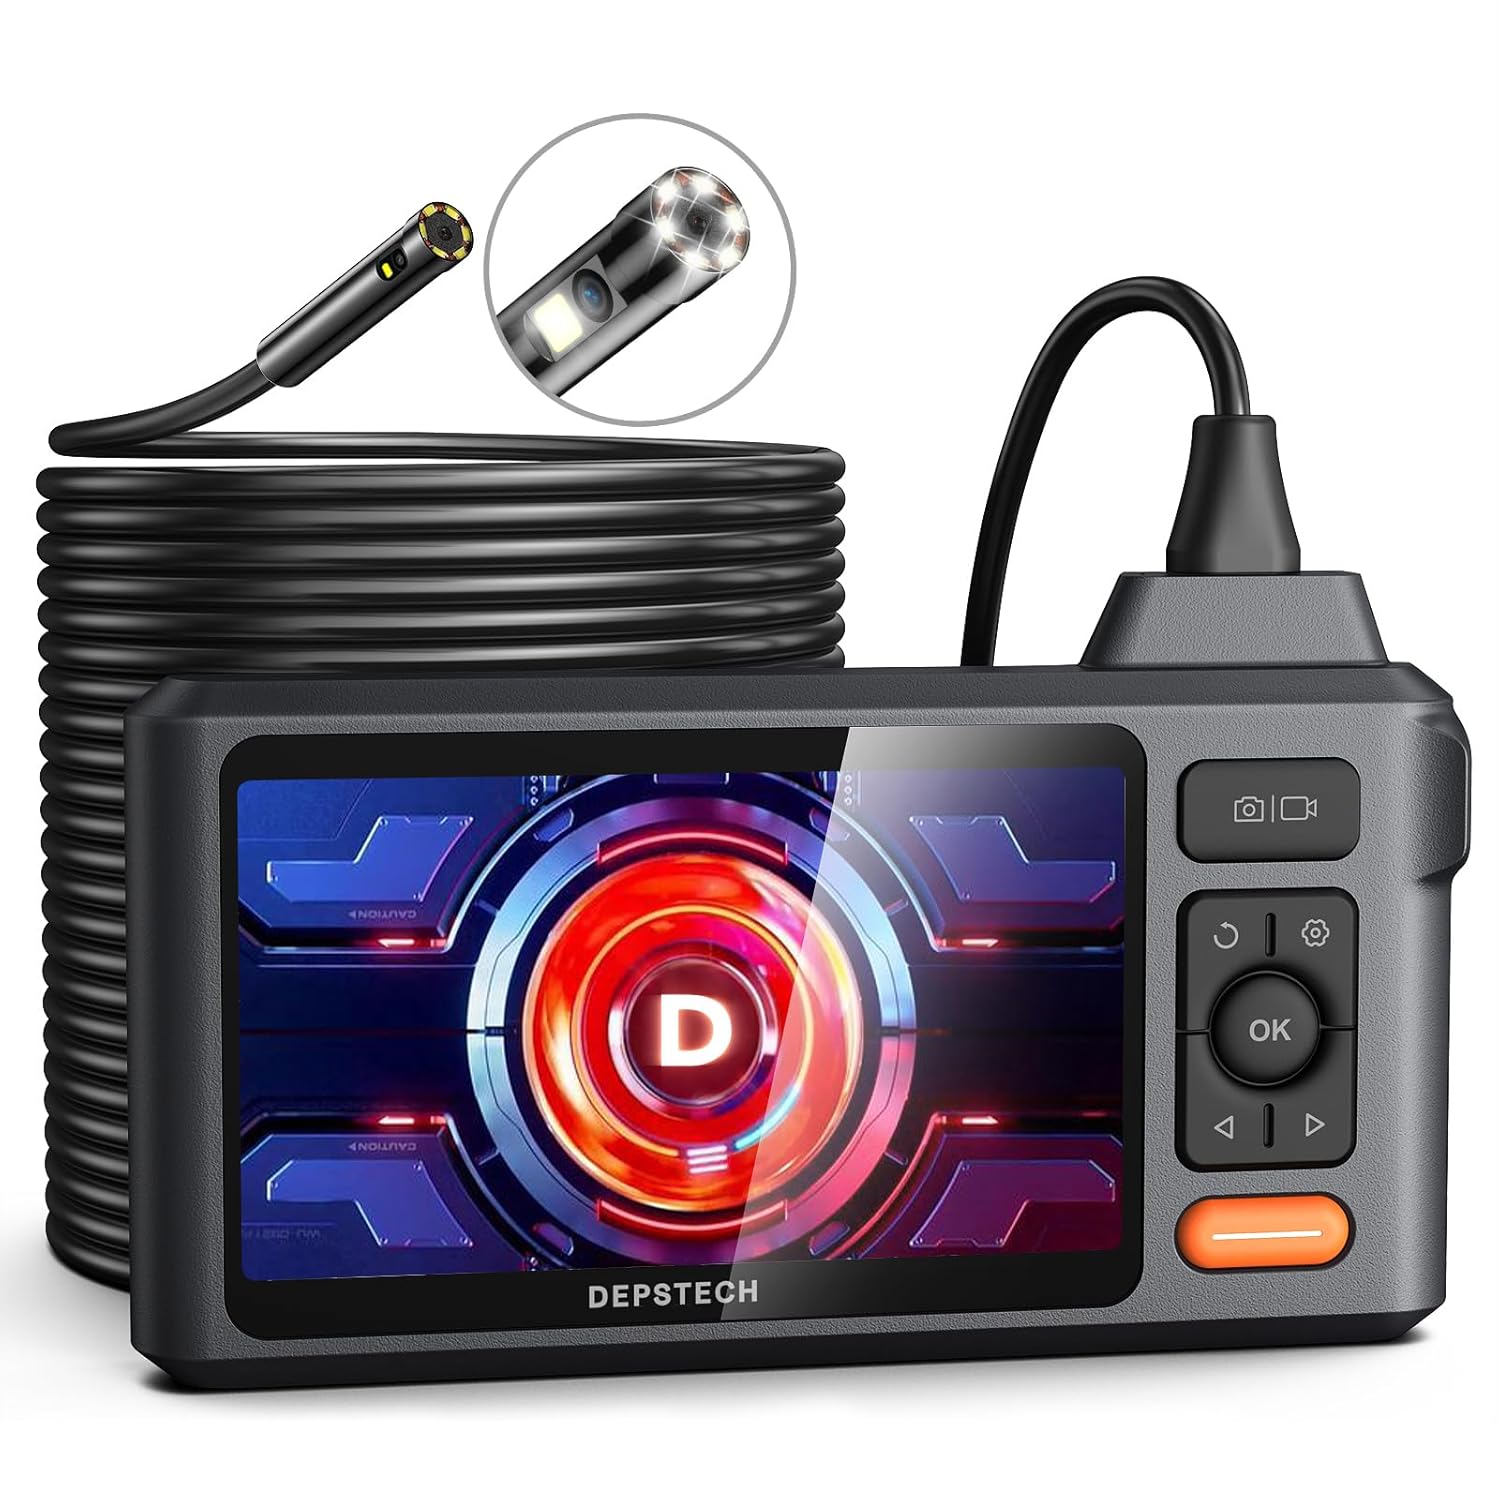
Image 4.2: The DEPSTECH DS520 Dual Lens Sewer Camera, featuring the main display unit and the long, coiled 50ft probe cable.
- Wyświetlacz: 5-inch IPS Screen (179° ultra-wide angle)
- Długość kabla: 50 stopy (półsztywny)
- Soczewki: Dual Lens (front and side view)
- Oświetlenie: 6+1 Adjustable LED lights
- Wodoodporny: IP67 rated probe
5. Konfiguracja
5.1. Ładowanie urządzenia
Before first use, fully charge the device. Connect the provided USB charging cable to the charging port on the main unit and to a standard USB power adapter (not included). The charging indicator will show the charging status.
5.2. Wkładanie karty TF
Locate the TF card slot on the side of the main unit. Insert a compatible TF card (up to 32GB, typically included) with the gold contacts facing down until it clicks into place. This card is necessary for saving photos and videos.
5.3. Attaching the Probe
Carefully align the connector of the probe cable with the port on the main unit. Push firmly until it is securely connected. Ensure a tight connection to prevent signal loss.
6. Instrukcja obsługi
6.1. Włączanie/wyłączanie zasilania
Press and hold the Power button (usually marked with a power symbol) for a few seconds to turn the device on or off.
6.2. Regulacja świateł LED
The probe is equipped with adjustable LED lights. Use the dedicated light adjustment button or scroll wheel (depending on model) to increase or decrease brightness for optimal visibility in dark environments.

Image 6.1: Close-up of the IP67 waterproof probe tip, illustrating the adjustable LED lights for illumination in dark inspection areas.
6.3. Articulating the DS650 Probe
For the DS650, use the articulation joystick or control wheel on the handle to bend the probe tip up to 210° in two directions. This allows navigation around obstacles and viewing at various angles without repositioning the entire cable.

Image 6.2: A hand demonstrating the articulation control of the DS650 borescope, showing the probe tip bending to inspect an engine component.
6.4. Using the DS520 Dual Lens
The DS520 features dual lenses (front and side). A dedicated button on the unit allows switching between the front view, bok view, or a split-screen display of both, providing comprehensive coverage for pipe inspections.
6.5. Robienie zdjęć i nagrywanie filmów
Press the Photo button (camera icon) to take a still image. Press the Video button (video camera icon) to start recording; press it again to stop. All captured media is saved to the inserted TF card.

Image 6.3: The borescope display interface, highlighting icons for 32GB TF card support, 180° image rotation, time watermark, and tutorial video access, indicating its photo and video capabilities.
6.6. Viewing i zarządzanie Files
Dostęp do trybu odtwarzania z menu głównego view saved photos and videos. Use the navigation buttons to browse through files. Files can be deleted directly from the device or by connecting the device to a computer via USB.
6.7. Ustawienia systemowe
Navigate to the 'Settings' menu to adjust various parameters, including:
- Język: Wybierz preferowany język.
- Data/Godzina: Ustaw prawidłową datę i godzinę, aby uzyskać dokładny czasampna nagraniach.
- Rezolucja: Adjust photo and video resolution settings.
- Sformatuj kartę TF: Usuń wszystkie dane z karty TF.
- Przywrócenie ustawień fabrycznych: Przywróć ustawienia domyślne.
7. Konserwacja
7.1. Cleaning the Probe and Screen
After each use, especially in dirty environments, gently wipe the probe tip and cable with a soft, damp ściereczką. W przypadku uporczywych zabrudzeń można użyć łagodnego detergentu, a następnie przetrzeć czystą szmatką.amp cloth. Ensure the probe is dry before storage. Clean the display screen with a soft, lint-free cloth.
7.2. Przechowywanie
Store the device and its components in a clean, dry, and cool environment. Avoid extreme temperatures and direct sunlight. Coil the probe cable loosely to prevent kinks or damage.
7.3. Pielęgnacja baterii
Aby przedłużyć żywotność baterii, należy unikać częstego całkowitego rozładowywania. W przypadku dłuższego przechowywania, należy ładować baterię do około 50–70% poziomu naładowania co kilka miesięcy.
8. Rozwiązywanie Problemów
| Problem | Możliwa przyczyna | Rozwiązanie |
|---|---|---|
| Urządzenie nie włącza się. | Niski poziom naładowania baterii; awaria urządzenia. | Naładuj urządzenie do pełna. Jeśli problem będzie się powtarzał, skontaktuj się z pomocą techniczną. |
| Brak obrazu na ekranie. | Probe not connected properly; damaged probe. | Ensure probe is securely connected. Try reconnecting. If still no image, the probe may be damaged. |
| Nie można zapisać zdjęć/filmów. | No TF card; TF card full; TF card error. | Insert a TF card. Delete old files or replace TF card. Format TF card in settings. |
| Image is blurry/dark. | Niewystarczające oświetlenie; brudny obiektyw. | Adjust LED brightness. Clean the probe lens. |
| DS650 probe articulation not working. | Przeszkoda mechaniczna; uszkodzenie wewnętrzne. | Ensure no physical obstruction. Avoid forcing articulation. If damaged, contact support. |
9. Specyfikacje
9.1. DEPSTECH DS650 Articulating Borescope
- Wyświetlacz: 4.5-calowy wyświetlacz IPS
- Średnica sondy: 6.2mm
- Articulation Angle: 210° Dwukierunkowy
- Rezolucja: 2.0MP (Bluart 3.0 technology)
- Oświetlenie: Regulowane światła LED
- Składowanie: Obsługuje karty TF o pojemności do 32 GB
- Stopień wodoodporności: IP67 (tylko sonda)
9.2. DEPSTECH DS520 Dual Lens Sewer Camera
- Wyświetlacz: 5-inch IPS Screen (179° ultra-wide angle)
- Długość kabla: 50 stopy (półsztywny)
- Soczewki: Podwójny obiektyw (przód i bok)
- Oświetlenie: 6+1 regulowanych świateł LED
- Stopień wodoodporności: IP67 (tylko sonda)
- Składowanie: Obsługuje karty TF o pojemności do 32 GB
10. Gwarancja i wsparcie
DEPSTECH products come with a standard manufacturer's warranty. For specific warranty details, please refer to the warranty card included in your package or visit the official DEPSTECH website. For technical support, troubleshooting assistance, or warranty claims, please contact DEPSTECH customer service through their official channels or visit the DEPSTECH Store on Amazon.


