1. Wprowadzenie
This manual provides instructions for the operation and maintenance of your RadioShack Universal Smart Battery Charger, Model 2309355. This charger is designed to charge various rechargeable battery types, including Li-ion, NiMH, AA, AAA, C, D, and 9V batteries, with automatic detection and current adjustment for efficient charging.
2. Informacje dotyczące bezpieczeństwa
Please read and understand all safety instructions before using the charger. Failure to follow these instructions may result in electric shock, fire, or personal injury.
- Use this charger only for rechargeable batteries specified in this manual. Attempting to charge non-rechargeable batteries may cause them to leak, rupture, or explode.
- Nie wystawiaj ładowarki na działanie deszczu lub wilgoci.
- Nie rozmontowuj ani nie modyfikuj ładowarki. Wszelkie czynności serwisowe powierzaj wykwalifikowanemu personelowi.
- Podczas ładowania należy zapewnić odpowiednią wentylację. Nie przykrywać ładowarki.
- Trzymaj ładowarkę z dala od dzieci i zwierząt.
- Odłącz ładowarkę od źródła zasilania, gdy nie jest używana.
3. Zawartość opakowania
Sprawdź, czy w opakowaniu znajdują się wszystkie elementy:
- RadioShack Universal Smart Battery Charger
- Kabel zasilający USB

Image: The package includes the smart battery charger and a USB power cable.
4. Koniec produktuview
The RadioShack Universal Smart Battery Charger features multiple charging bays and a digital display for monitoring battery status.
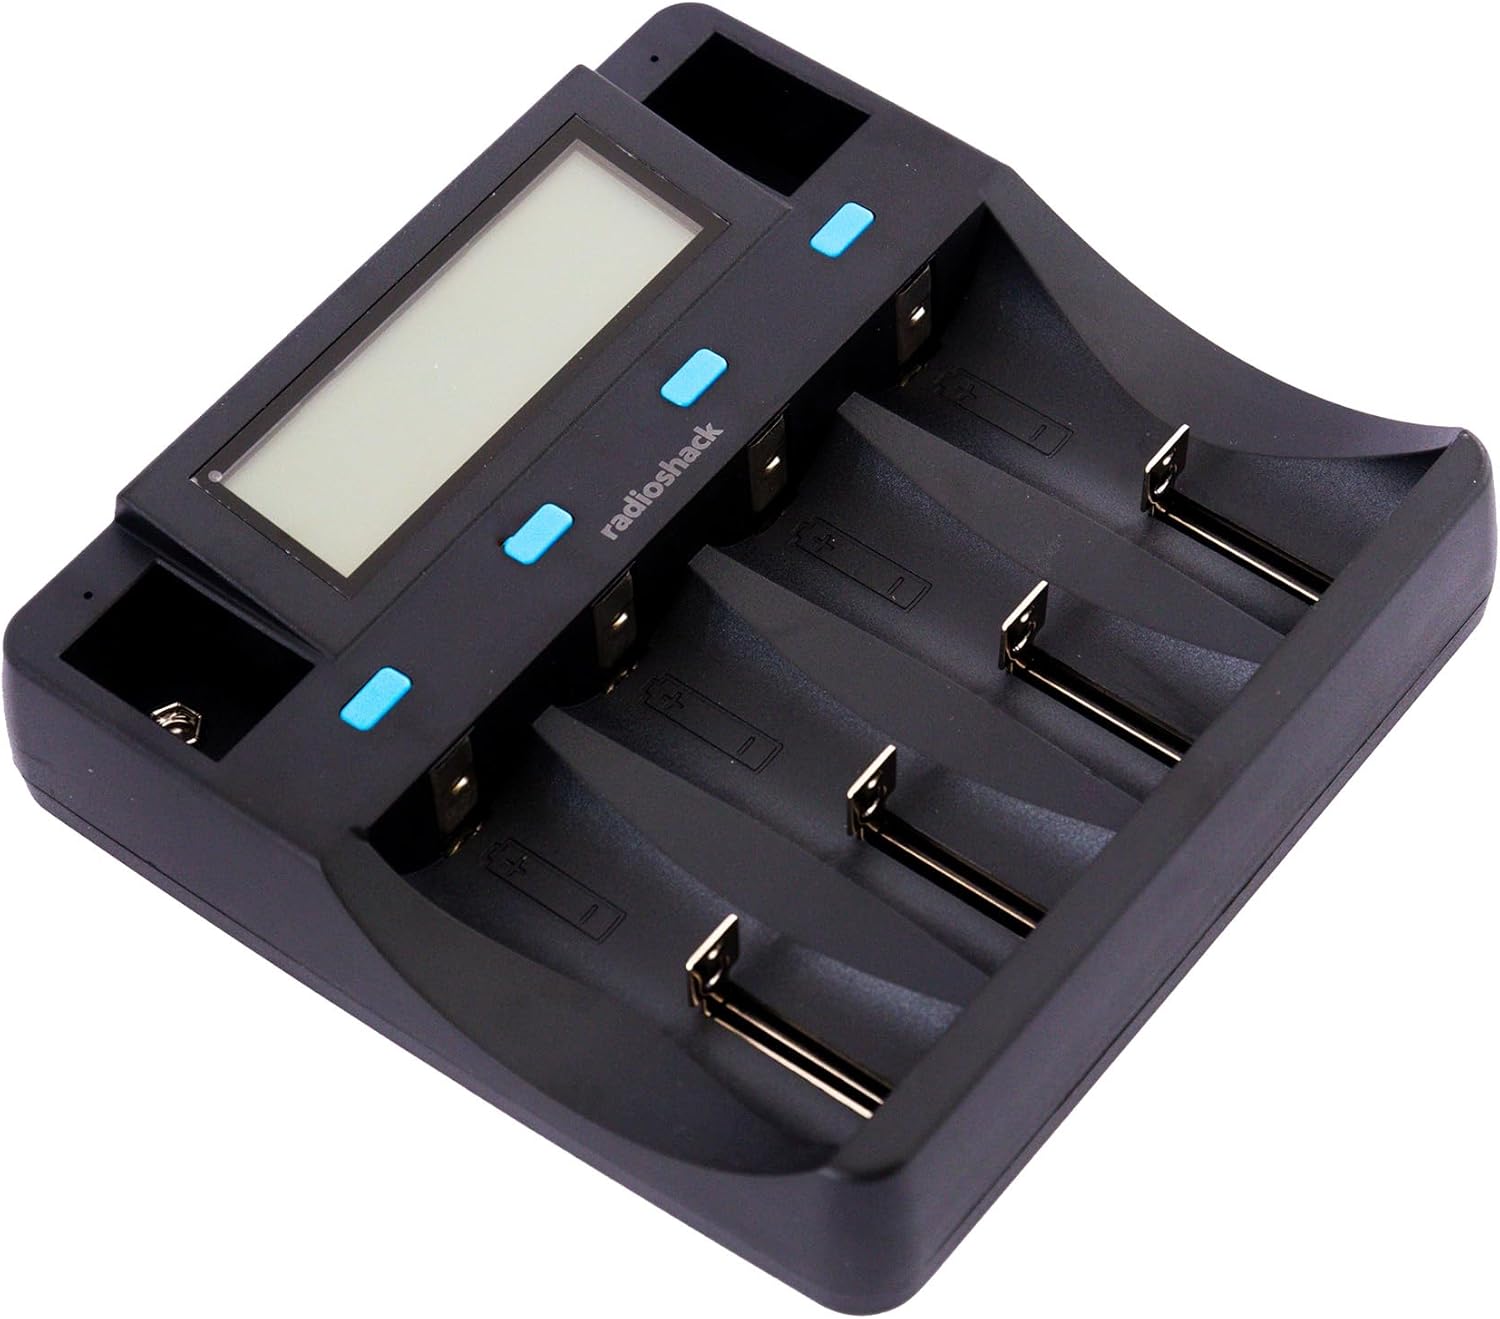
Obraz: widok z góry view of the charger, showing the digital display and four main charging bays, plus two 9V slots.
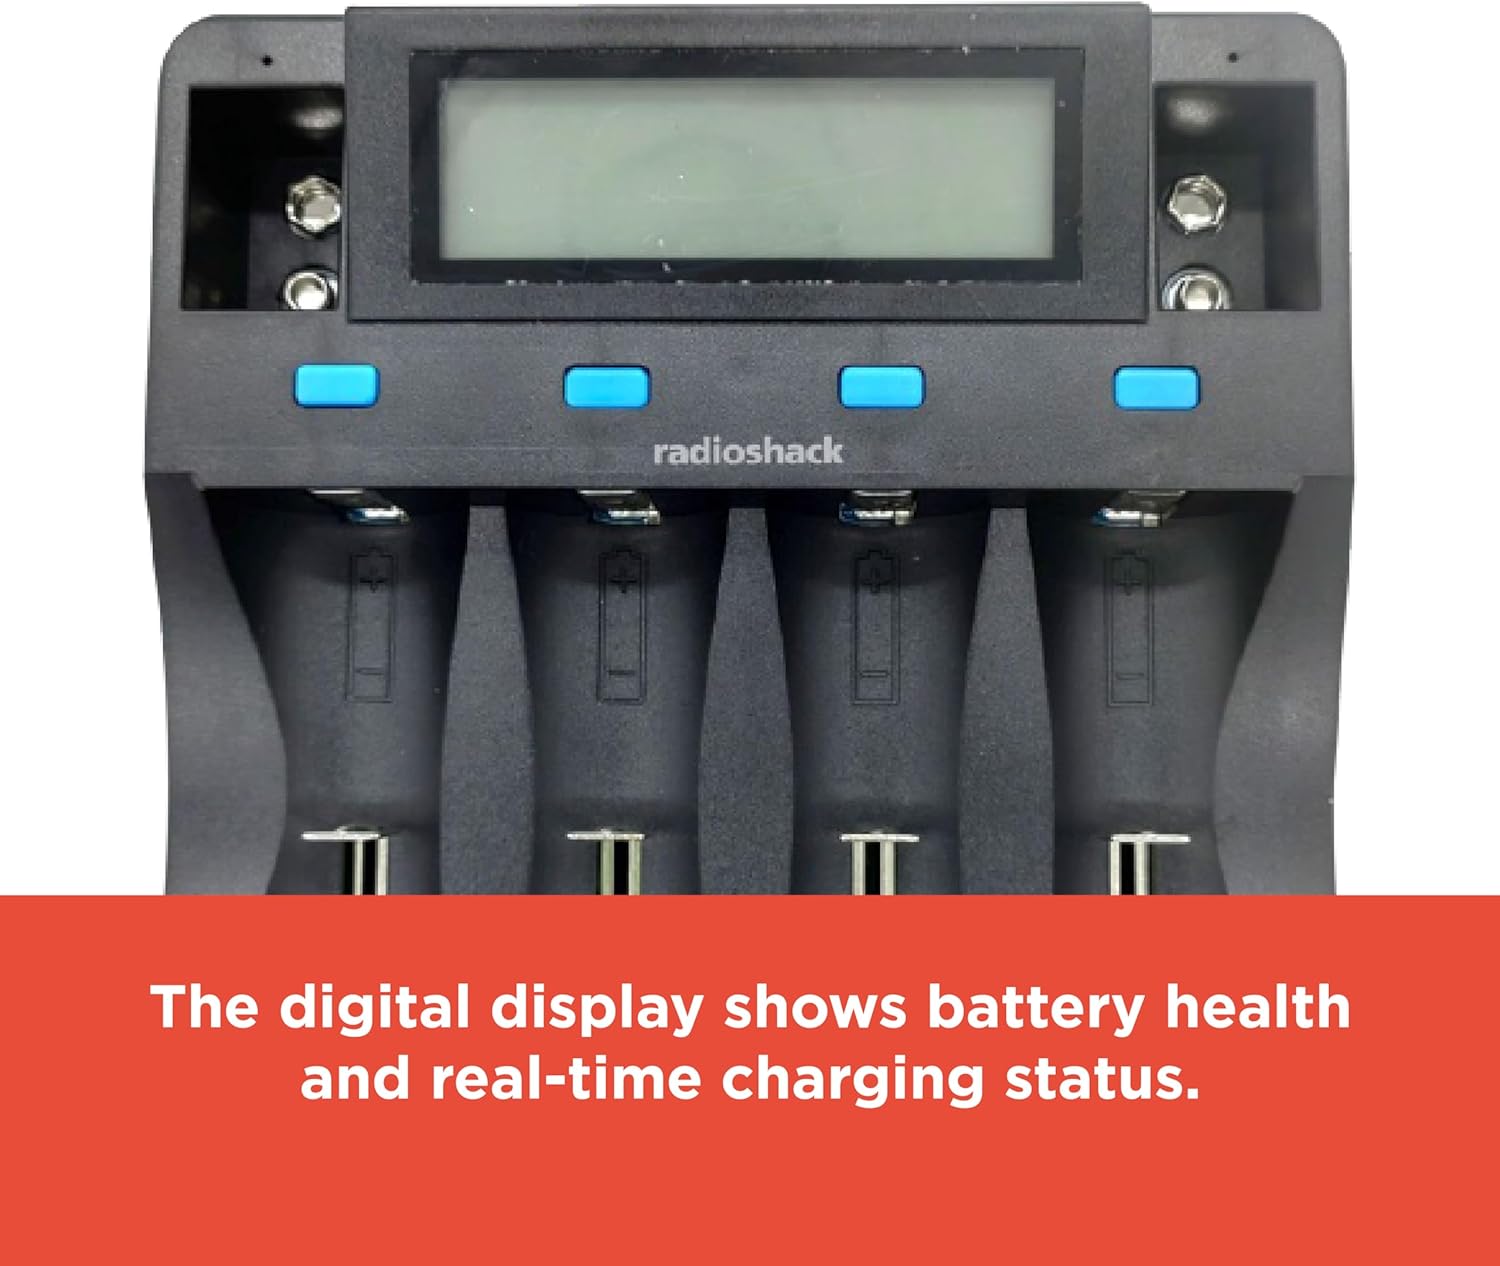
Image: The digital display provides real-time information on battery health and charging status.

Image: The charging slots are designed for safe, universal charging with automatic battery detection.

Obraz: Bok view of the charger, highlighting the USB input ports for power.
5. Konfiguracja
Aby skonfigurować ładowarkę akumulatora, wykonaj następujące czynności:
- Podłącz zasilanie: Use the provided USB cable to connect the charger to a compatible USB power source (e.g., a USB wall adapter, computer USB port, or power bank). The charger requires a DC 5V 2A input.
- Włączanie: Once connected, the charger's digital display will illuminate, indicating it is ready for use.

Image: The included USB cable allows for connection to various USB power outlets, making the charger portable.
6. Instrukcja obsługi
6.1 Wkładanie baterii
Carefully insert rechargeable batteries into the appropriate charging bays. The charger supports various sizes and chemistries. Ensure correct polarity (+ and -) when inserting batteries. For 9V batteries, use the dedicated 9V slots.
6.2 Automatyczne wykrywanie baterii
The charger automatically detects the battery type (Li-ion, NiMH, etc.) and adjusts the charging current accordingly. This ensures optimal and safe charging for each battery.
6.3 Zrozumienie wyświetlacza cyfrowego
The digital display provides real-time information for each of the four main charging bays. Information typically includes:
- Chemia baterii: Indicates Li-ion, NiMH, etc.
- Tomtage: Aktualna objętośćtage baterii.
- Aktualny: Charging current being applied.
- Pojemność: Estimated charged capacity.
- Czas upłynięty: Czas trwania procesu ładowania.
For 9V batteries, a small indicator light typically shows the charging status, but detailed information may not be displayed on the main screen.
6.4 Proces ładowania
Once batteries are inserted and detected, the charging process begins automatically. The display will update with charging progress. When a battery is fully charged, the display will indicate completion, and the charger will stop supplying current to prevent overcharging.
7. Kompatybilne typy baterii
The charger supports a wide range of rechargeable battery types and sizes:
| Chemia baterii | Zgodne rozmiary |
|---|---|
| Li-ion / Li-Fe | 26700, 26650, 18650, 18500, 17670, 17500, 14500, 10440, 16340 (CR123A), 6F22 (9V) |
| Ni-MH/Ni-Cd | D, C, SC, AA, AAA, 6F22 (9V) |

Image: The bottom label of the charger lists detailed input, output, and compatible battery specifications.
8. Rozwiązywanie Problemów
Jeśli masz problemy z ładowarką, zapoznaj się z poniższymi typowymi problemami i ich rozwiązaniami:
- Ładowarka się nie włącza:
- Ensure the USB cable is securely connected to both the charger and a functional USB power source.
- Verify that the USB power source provides at least DC 5V 2A.
- Wypróbuj inny kabel USB lub zasilacz.
- Baterie nie ładują się:
- Check that batteries are inserted with correct polarity.
- Ensure the batteries are rechargeable and compatible with the charger (refer to Section 7).
- Clean battery contacts on both the charger and batteries if they appear dirty.
- Some batteries, particularly certain CR123A types, may not fit securely in the slots despite being listed as compatible. Ensure a proper physical connection.
- "ERR" Display Message:
- This typically indicates a problem with the battery, such as being non-rechargeable, damaged, or incorrectly inserted.
- Remove and reinsert the battery. If the error persists, the battery may be faulty.
- Powolne ładowanie:
- Charging speed can vary based on the battery's capacity, current charge level, and the number of batteries being charged simultaneously.
- Ensure your USB power source provides sufficient current (DC 5V 2A) for optimal charging speed.
9. Specyfikacje
| Funkcja | Szczegół |
|---|---|
| Numer modelu | 2309355 |
| Wejście | Prąd stały 5 V 2 A |
| Wyjście (litowo-jonowe) | DC 4.2V 1000mA (2pcs), 500mA (4pcs) |
| Output (Li-Fe) | DC 3.7V 1000mA (2pcs), 500mA (4pcs) |
| Output (Ni-MH/Ni-Cd) | DC 1.48V 500mA (4pcs) |
| Wyjście (9 V) | DC 9V 85mA (2pcs) |
| Kompatybilne typy baterii | Li-ion/Li-Fe: 26700, 26650, 18650, 18500, 17670, 17500, 14500, 10440, 16340 (CR123A), 6F22 (9V) Ni-MH/Ni-Cd: D, C, SC, AA, AAA, 6F22 (9V) |
| Wymiary produktu | 11.02 x 7.64 x 1.97 cala (28 x 19.4 x 5 cm) |
| Waga przedmiotu | 12.2 uncji (0.34 kg) |
| Kolor | Czarny |
| Certyfikaty | FCC, RoHS |
10. Pielęgnacja i konserwacja
Aby zapewnić długą żywotność ładowarki:
- Czyść ładowarkę miękką, suchą ściereczką. Nie używaj środków czyszczących o właściwościach ściernych ani rozpuszczalników.
- Keep the charging contacts free from dust and debris.
- Jeśli nie używasz ładowarki, przechowuj ją w chłodnym i suchym miejscu.
- Unikaj upuszczania ładowarki i narażania jej na silne uderzenia.
11. Gwarancja i wsparcie
For warranty information or technical support, please refer to the documentation included with your purchase or contact RadioShack customer service. Keep your proof of purchase for warranty claims.


