1. Wprowadzenie
This manual provides detailed instructions for the safe and effective operation, maintenance, and troubleshooting of your Acebeam Terminator M2-X Dual Head Spot/Flood EDC Flashlight. Please read this manual thoroughly before using the product to ensure optimal performance and longevity.
2. Instrukcje bezpieczeństwa
- Ochrona oczu: Do not shine the flashlight directly into eyes. The powerful beam can cause temporary vision impairment or permanent damage.
- Ostrzeżenie o wysokiej temperaturze: The flashlight may become hot during prolonged use at high output levels. Handle with care to avoid burns.
- Bezpieczeństwo baterii:
- Use only the recommended 18650 Lithium-Ion battery.
- Nie rozmontowuj, nie przebijaj ani nie zwieraj akumulatora.
- Trzymaj baterie z dala od wody i ognia.
- Jeśli bateria jest uszkodzona lub wycieka z niej, należy natychmiast zaprzestać jej używania.
- Dzieci: Przechowywać w miejscu niedostępnym dla dzieci.
- Demontaż: Do not attempt to disassemble the flashlight head or body, as this may damage the device and void the warranty.
3. Zawartość opakowania
Upon opening your Acebeam Terminator M2-X package, please verify that all items are present and in good condition.

Rysunek 3.1: The Acebeam Terminator M2-X flashlight, an included 3100mAh 18650 battery, and two USB-C charging cables.
- Acebeam Terminator M2-X Flashlight
- Acebeam ARC18650H-310A 3100mAh 18650 Li-ion Battery (with integrated USB-C charging port)
- Kabel ładujący USB-C
- Instrukcja obsługi (ten dokument)
- Lanyard (if included)
- Spare O-rings (if included)
4. Koniec produktuview
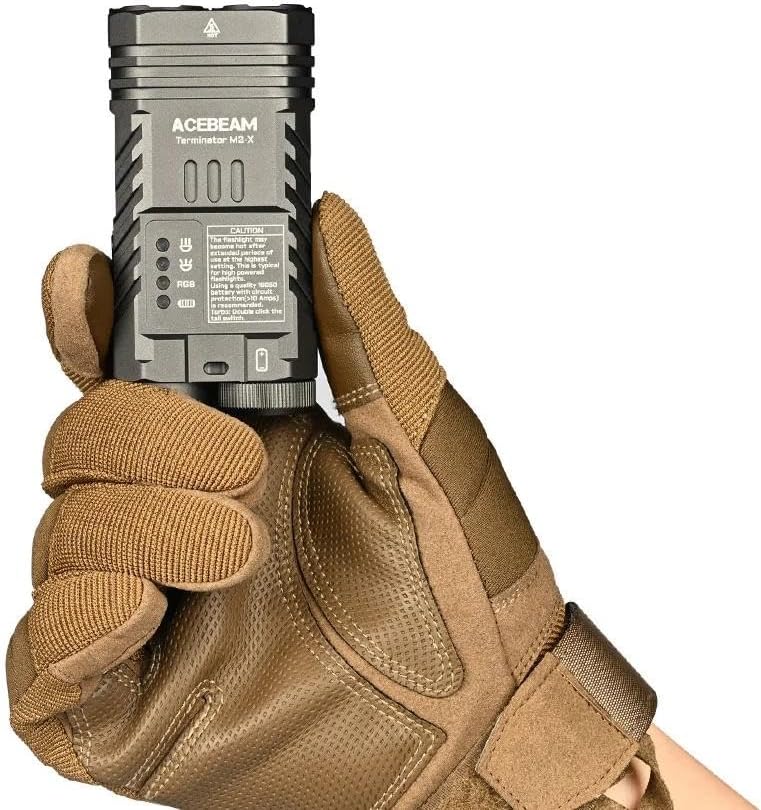
The Acebeam Terminator M2-X is a compact, dual-head EDC (Everyday Carry) flashlight featuring both a floodlight and a spotlight, along with auxiliary RGB lights. It is designed for versatility in various lighting scenarios.

Rysunek 4.1: The compact design and dimensions of the M2-X, suitable for everyday carry.
4.1 Główne cechy
- Podwójne źródła światła: Independent floodlight and spotlight for varied illumination needs.
- High CRI Floodlight: Nichia 519A 5000K High CRI90 LEDs for accurate color rendering.
- Potężny reflektor: Long-range beam for distant illumination.
- Auxiliary RGB Lights: Multiple color options and signal modes.
- Kompaktowa konstrukcja: Durable aluminum construction with a detachable body clip for easy carry.
4.2 Składniki

Rysunek 4.2: Szczegółowy view of the floodlight (left) and spotlight (right) heads.
- Floodlight Head: Contains 3x Nichia 519A 5000K High CRI90 LEDs.
- Głowa reflektora: Single LED for focused, long-distance beam.
- Auxiliary Light Emitters: Located within the floodlight head for RGB functions.
- Przełącznik ogonowy: For power on/off and brightness adjustment.
- Przycisk boczny: For switching between floodlight, spotlight, and auxiliary light modes.
- Korek baterii: Removable for battery access.
- Klips do ciała: Detachable stainless steel clip for secure attachment.
5. Konfiguracja
5.1 Instalacja baterii
- Odkręć tylną nakrętkę latarki, obracając ją w kierunku przeciwnym do ruchu wskazówek zegara.
- Insert the included Acebeam 18650 battery with the positive (+) terminal facing towards the flashlight head.
- Screw the tail cap back on clockwise, ensuring it is tightened completely. The flashlight will not operate if the tail cap is not fully secured.
5.2 Pierwsze ładowanie
The included 18650 battery features an integrated USB-C charging port. It is recommended to fully charge the battery before first use.
- Locate the USB-C port on the side of the 18650 battery.
- Connect the provided USB-C cable to the battery's port and to a USB power source (e.g., wall adapter, computer USB port).
- Kontrolka na akumulatorze pokazuje stan ładowania (zazwyczaj świeci na czerwono – ładowanie, a na zielono – pełne naładowanie).
- Once fully charged, disconnect the cable and reinsert the battery into the flashlight.
6. Instrukcja obsługi
The Acebeam Terminator M2-X features a tail switch for power and brightness, and a side button for mode selection (Floodlight, Spotlight, Auxiliary Light).
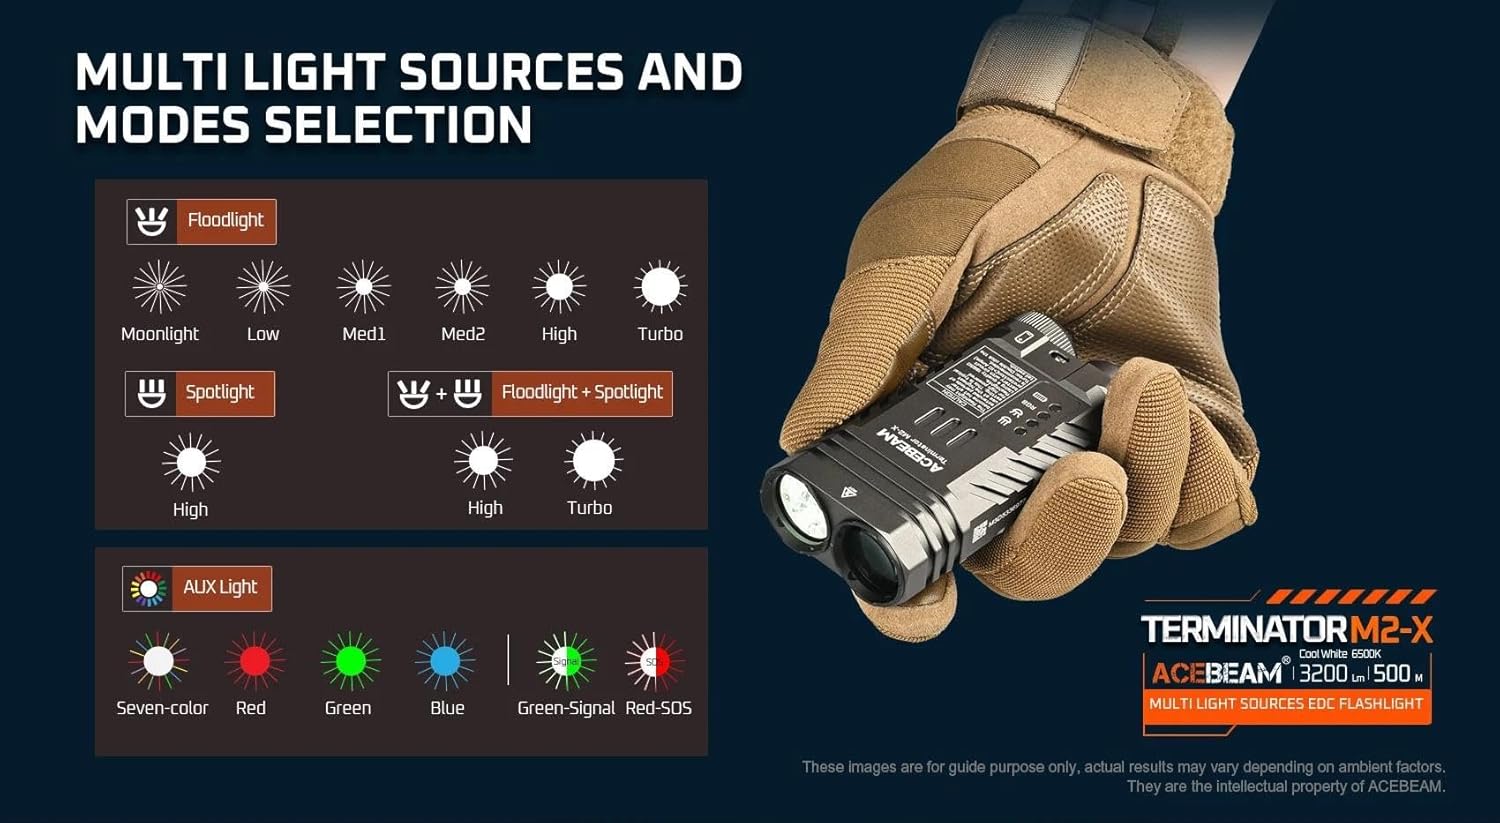
Rysunek 6.1: Nadview of multi-light sources and mode selection.
6.1 Basic Operation (Tail Switch)
- Włączanie/wyłączanie zasilania: Single click the tail switch to turn the flashlight ON or OFF.
- Brightness Adjustment (Floodlight/Spotlight): When the light is ON, press and hold the tail switch to cycle through brightness levels (Moonlight, Low, Med1, Med2, High, Turbo for Floodlight; High for Spotlight). Release the switch at your desired level. The light will memorize the last used brightness level for Floodlight and Spotlight independently.
- Natychmiastowa turbosprężarka: From OFF, press and hold the tail switch for approximately 1 second to activate Turbo mode directly. Release to turn OFF.
- Moonlight Mode (Floodlight only): From OFF, press and hold the tail switch for approximately 0.5 seconds to activate Moonlight mode.
6.2 Mode Selection (Side Button)
The side button controls which light source is active (Floodlight, Spotlight, or Auxiliary Light).
- Switching Main Modes: Single click the side button to cycle between Floodlight, Spotlight, and Auxiliary Light modes. The flashlight will remember the last selected mode.
- Floodlight + Spotlight (Combined Mode): From either Floodlight or Spotlight mode, double-click the side button to activate both simultaneously. Double-click again to return to the previous single mode.
- Strobe (Floodlight): From Floodlight mode, triple-click the tail switch to activate Strobe. Single click the tail switch to turn OFF.
6.3 Auxiliary Light Modes
When in Auxiliary Light mode (selected via the side button), the tail switch controls the RGB light functions.

Rysunek 6.2: Available auxiliary light modes.
- Cycling RGB Colors: With the auxiliary light ON, single click the tail switch to cycle through: Seven-color automatic cycle, Red, Green, Blue, Green-Signal Light, Red-SOS.
- Turning OFF Auxiliary Light: Press and hold the tail switch while in Auxiliary Light mode to turn it OFF.
6.4 Wskaźnik poziomu baterii
The M2-X features an indicator light to show battery status. This indicator typically turns red when the battery charge drops below 20%.
7. Konserwacja
- Czyszczenie: Wyczyść korpus latarki miękką,amp ściereczka. Nie należy używać środków czyszczących o właściwościach ściernych ani rozpuszczalników.
- Gwinty i pierścienie uszczelniające: Periodically lubricate the threads and O-rings with silicone grease to maintain water resistance. Replace O-rings if they appear damaged or worn.
- Pielęgnacja baterii:
- Gdy nie używasz baterii, przechowuj ją w chłodnym i suchym miejscu.
- W przypadku dłuższego przechowywania akumulatora należy naładować go do około 50% jego pojemności.
- Unikaj całkowitego rozładowania akumulatora, ponieważ może to skrócić jego żywotność.
8. Rozwiązywanie Problemów
| Problem | Możliwa przyczyna | Rozwiązanie |
|---|---|---|
| Flashlight does not turn ON. |
|
|
| Moc światła jest słaba lub migocze. |
|
|
| Cannot switch between Floodlight/Spotlight/Auxiliary modes. | Side button malfunction or incorrect operation. | Ensure you are single-clicking the side button. If issue persists, contact support. |
| Auxiliary RGB lights are very dim. | This is normal operation for the auxiliary lights. | The auxiliary RGB lights are designed for low output signaling and close-range use, not for illumination. |
9. Specyfikacje
Rysunek 9.1: Detailed technical parameters for the M2-X.
| Funkcja | Szczegół |
|---|---|
| Model | Acebeam Terminator M2-X |
| LED (Floodlight) | 3x Nichia 519A 5000K High CRI90 |
| Maksymalna moc (reflektor) | 2,000 lumenów |
| Max Output (Spotlight) | 900 lumenów |
| Max Runtime (Floodlight Moonlight) | 38 godziny |
| Max Runtime (Spotlight High) | 1 godzina 50 minut |
| Max Beam Distance (Floodlight) | 164 metrów |
| Max Beam Distance (Spotlight) | 500 metrów |
| Max Beam Intensity (Floodlight) | 6724 płyt CD |
| Max Beam Intensity (Spotlight) | 62500 płyt CD |
| Dodatkowe światła | Seven-color cycle, Red, Green, Blue, Green-Signal, Red-SOS (0.5 lumens each) |
| Źródło zasilania | 1x 18650 Lithium-Ion Battery (included) |
| Tworzywo | Aluminium |
| Poziom wodoodporności | Wodoodporny |
| Wymiary (długość x wysokość x szerokość) | 95.4 mm x 48.5 mm x 29 mm (3.75 cala x 1.90 cala x 1.14 cala) |
| Waga (wraz z baterią) | 197.2 g (6.95 uncji) |
10. Gwarancja i wsparcie
For warranty information and customer support, please refer to the official Acebeam website or contact your authorized Acebeam dealer. Keep your purchase receipt as proof of purchase for any warranty claims.
Acebeam Official Webstrona: www.acebeam.com


