1. Wprowadzenie
This manual provides essential information for the safe and efficient installation, operation, and maintenance of your Hörmann Ecostar Liftronic 700-2 garage door motor. Please read these instructions carefully before beginning installation or operation to ensure proper function and safety.
The Hörmann Ecostar Liftronic 700-2 is designed for both tilting and sectional garage doors, offering a pulling force of 700 N and suitable for doors up to 11.25 m².
2. Instrukcje bezpieczeństwa
- Ogólne bezpieczeństwo: Always ensure the garage door area is clear of people and obstructions before operating the motor.
- Bezpieczeństwo instalacji: Installation should be performed by qualified personnel. Disconnect power before any installation or maintenance work.
- Zwolnienie awaryjne: Familiarize yourself with the emergency release mechanism. This allows manual operation of the door during power outagt.j.
- Dzieci i zwierzęta: Keep remote controls out of reach of children. Do not allow children or pets to play near the garage door.
- Wykrywanie przeszkód: The motor features an automatic stop function. However, regularly test this feature to ensure it functions correctly.
3. Zawartość opakowania
Sprawdź, czy w pakiecie znajdują się wszystkie komponenty:
- 1 x Garage Door Motor Unit
- 2 x RSC 4 Handheld Transmitters
- 1 x PB 1 Internal Push-Button
- 1 x Emergency Release Kit (with lock cylinder, keys, and pull rope)
- Akcesoria montażowe (śruby, kołki rozporowe)
- Guide Rail Assembly

Image: The PB 1 internal push-button for wall mounting, including connection cable and screws for installation.

Image: The emergency release kit, featuring a lock cylinder with keys and a pull rope, allows manual operation of the garage door from the outside during power outagt.j.
4. Konfiguracja i instalacja
The Liftronic 700-2 motor is designed for easy installation on both tilting and sectional garage doors. The flat guide rail, measuring only 30 mm, ensures compatibility with most common garage doors, making it suitable for renovation projects.
4.1. Guide Rail Assembly
The guide rail comes in multiple sections. Lay all sections on a flat, level surface (e.g., garage floor) during assembly to ensure proper alignment and tensioning of the drive belt. The sections are connected by hinges; handle with care during assembly.
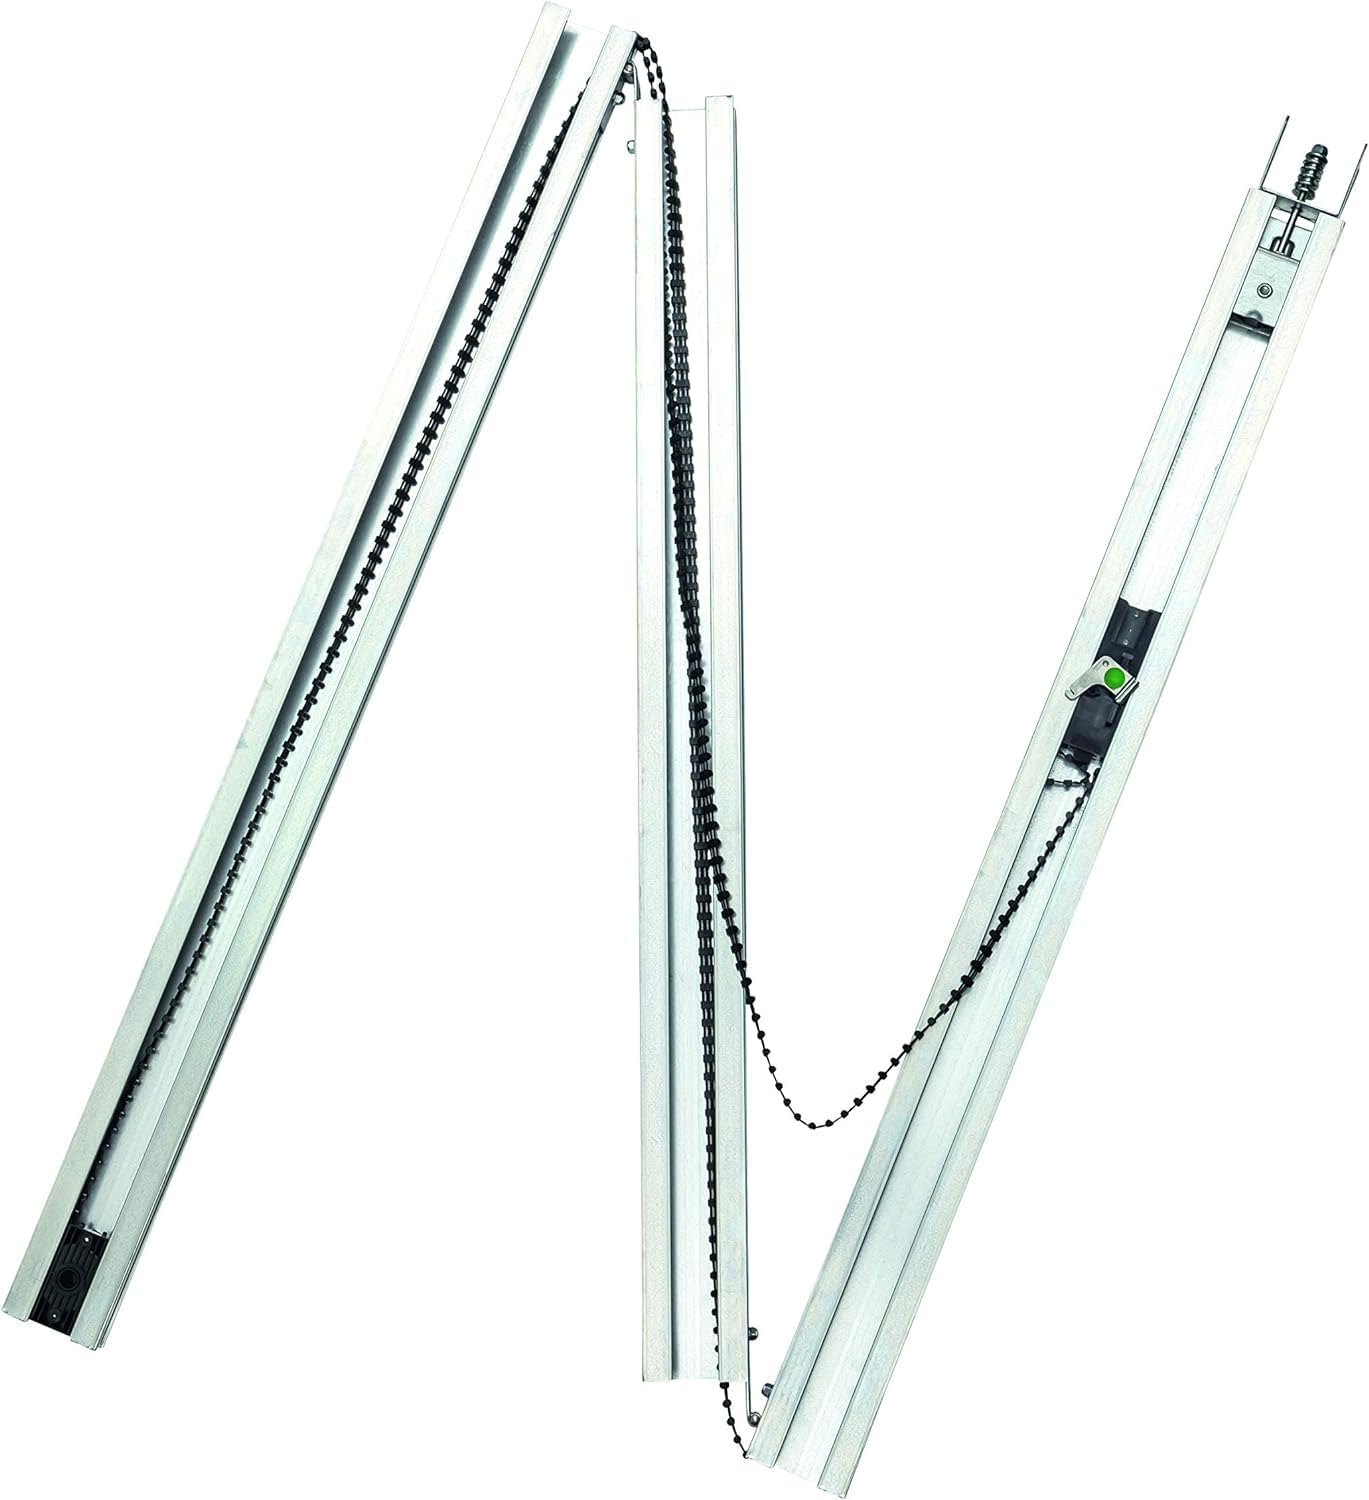
Image: The main motor unit and the multi-part guide rail assembly for the garage door opener.
4.2. Motor and Rail Mounting
- Mount the guide rail to the ceiling using the provided mounting accessories. Ensure the rail is level and securely fastened.
- Attach the motor unit to the guide rail.
- If there is insufficient space between the top edge of the door and the bottom edge of the lintel, the console may need to be mounted in front of the lintel. In such cases, a longer door arm extension (not included) may be required.
4.3. Emergency Release Installation
Install the emergency release mechanism according to the separate instructions provided with the kit. This allows you to manually unlock and open the garage door from the outside in case of a power failure.
4.4. Połączenie elektryczne
The motor unit comes with an approximately 1-meter long cable with a Euro plug. Connect the motor to a suitable power outlet. For permanent wiring, ensure it is done by a qualified electrician.
5. Instrukcja obsługi
5.1. Initial Learning Process
After installation and power connection, the motor needs to learn the 'Open' and 'Closed' positions of your garage door. Refer to the detailed manual for specific steps on initiating this learning process. This typically involves pressing a small button on the motor's circuit board (behind a service flap).
5.2. Remote Control (RSC 4) Programming
To program the RSC 4 handheld transmitters:
- Access the programming button on the motor unit (usually a small button on the circuit board, behind a service cover).
- Press and hold the programming button until the indicator light changes.
- Press the desired button on your RSC 4 transmitter. The indicator light on the motor should confirm successful pairing.
- Test the remote control operation.

Image: One of the two included RSC 4 handheld transmitters for remote operation of the garage door.
5.3. Internal Push-Button (PB 1)
The PB 1 internal push-button can be hardwired to the motor unit for convenient operation from inside your garage. Connect it to the designated terminals behind the service flap on the motor.
5.4. Automatic Stop Feature
The EcoStar drives incorporate a secure automatic stop feature. If the garage door encounters an unexpected obstacle during opening or closing, the motor will automatically stop, preventing damage or injury. Regularly test this safety feature by placing a soft object in the door's path.
5.5. Emergency Operation During Power Failure
W przypadku awarii zasilaniatage, the garage door motor can be manually operated using the emergency release. Pull the emergency release handle (connected to the rope) to disengage the motor from the door, allowing you to open or close it by hand.
6. Konserwacja
To ensure long-term, reliable operation of your Hörmann Ecostar Liftronic 700-2, regular maintenance is recommended:
- Kontrola wizualna: Periodically check all moving parts, cables, and mounting hardware for signs of wear, damage, or loose connections.
- Smarowanie: Lubricate moving parts of the garage door (hinges, rollers, springs) as recommended by your garage door manufacturer. Do not lubricate the motor's drive belt.
- Test funkcji bezpieczeństwa: Regularly test the automatic stop feature and the emergency release mechanism.
- Czyszczenie: Keep the motor unit and guide rail clean from dust and debris.
For detailed maintenance schedules and procedures, please refer to the complete manufacturer's manual.
7. Rozwiązywanie Problemów
If you encounter issues with your garage door motor, consider the following basic troubleshooting steps:
- Silnik nie reaguje: Check the power supply. Ensure the motor is plugged in and the circuit breaker has not tripped.
- Pilot nie działa: Check the battery in the remote control. Reprogram the remote control if necessary. Ensure there are no obstructions blocking the signal.
- Door Stops Unexpectedly: Check for any physical obstructions in the door's path. The automatic stop feature may have been activated.
- Nietypowe dźwięki: Inspect the garage door's moving parts for wear or damage. Ensure all mounting hardware is secure.
For more complex issues or if troubleshooting steps do not resolve the problem, please consult the full manufacturer's manual or contact customer support.
8. Specyfikacje
| Model | Liftronic 700-2 (Special Edition) |
| Pulling and Pushing Force | 700 N |
| Prędkość otwierania | 165 cm/s |
| Max. Door Surface Area | 11.25 m² |
| Częstotliwość | 433 MHz rolling code |
| Moc oświetlenia | Mniej niż 1 W |
| Wymiary produktu (dł. x szer. x wys.) | Wymiary 117 x 26 x 26 cm |
| Waga | 13.2 kilogramów |
| Numer referencyjny producenta | 4511089 |
| Kolor | Czarny |
| Tworzywo | Metal |
| Cechy specjalne | Zwolnienie awaryjne |
9. Gwarancja i wsparcie
9.1. Informacje o gwarancji
For specific warranty terms and conditions, please refer to the warranty documentation provided with your product or visit the official Hörmann webZachowaj dowód zakupu na wypadek roszczeń gwarancyjnych.
9.2. Obsługa klienta
If you require further assistance, technical support, or have questions not covered in this manual, please contact Hörmann customer service. Contact details can typically be found on the manufacturer's webmiejscu lub w opakowaniu produktu.


