1. Wprowadzenie
The Irfora FY128C Smart Digital Multimeter is a compact and intelligent electrical testing instrument designed for professionals, factories, schools, and home users. It is engineered to meet the safety requirements of the International Electrotechnical Safety Standard (IEC-61010) for electronic measuring instruments and handheld digital multimeters. This device offers accurate measurements for AC/DC voltage, resistance, frequency, continuity, live wire checking, and Non-Contact Voltage (NCV) wykrywanie.
Środki ostrożności:
- Przed użyciem należy zawsze upewnić się, że multimetr jest w dobrym stanie technicznym.
- Nie próbuj mierzyć objtagprądów lub natężeń przekraczających określone maksymalne limity.
- Zachowaj szczególną ostrożność podczas pracy z obwodami pod napięciem.
- Wymień baterie niezwłocznie, gdy pojawi się wskaźnik niskiego poziomu naładowania baterii.
- Do not operate the multimeter if the casing jest uszkodzony lub otwarty.
2. Zawartość opakowania
Proszę sprawdzić, czy w paczce znajdują się następujące elementy:
- 1 x Digital Multimeter (FY128C)
- 1 x para przewodów pomiarowych (czerwony i czarny)
- 1 x Instrukcja obsługi (angielski)
3. Koniec produktuview
The FY128C Smart Digital Multimeter features a large, backlit LCD display for clear readings, a built-in flashlight for dark environments, and a support bracket for convenient hands-free operation. Below is an illustration of the instrument's key components and functions.

Figure 3.1: Instrument Functions Overview

Figure 3.2: Large LCD Display for Easy Reading
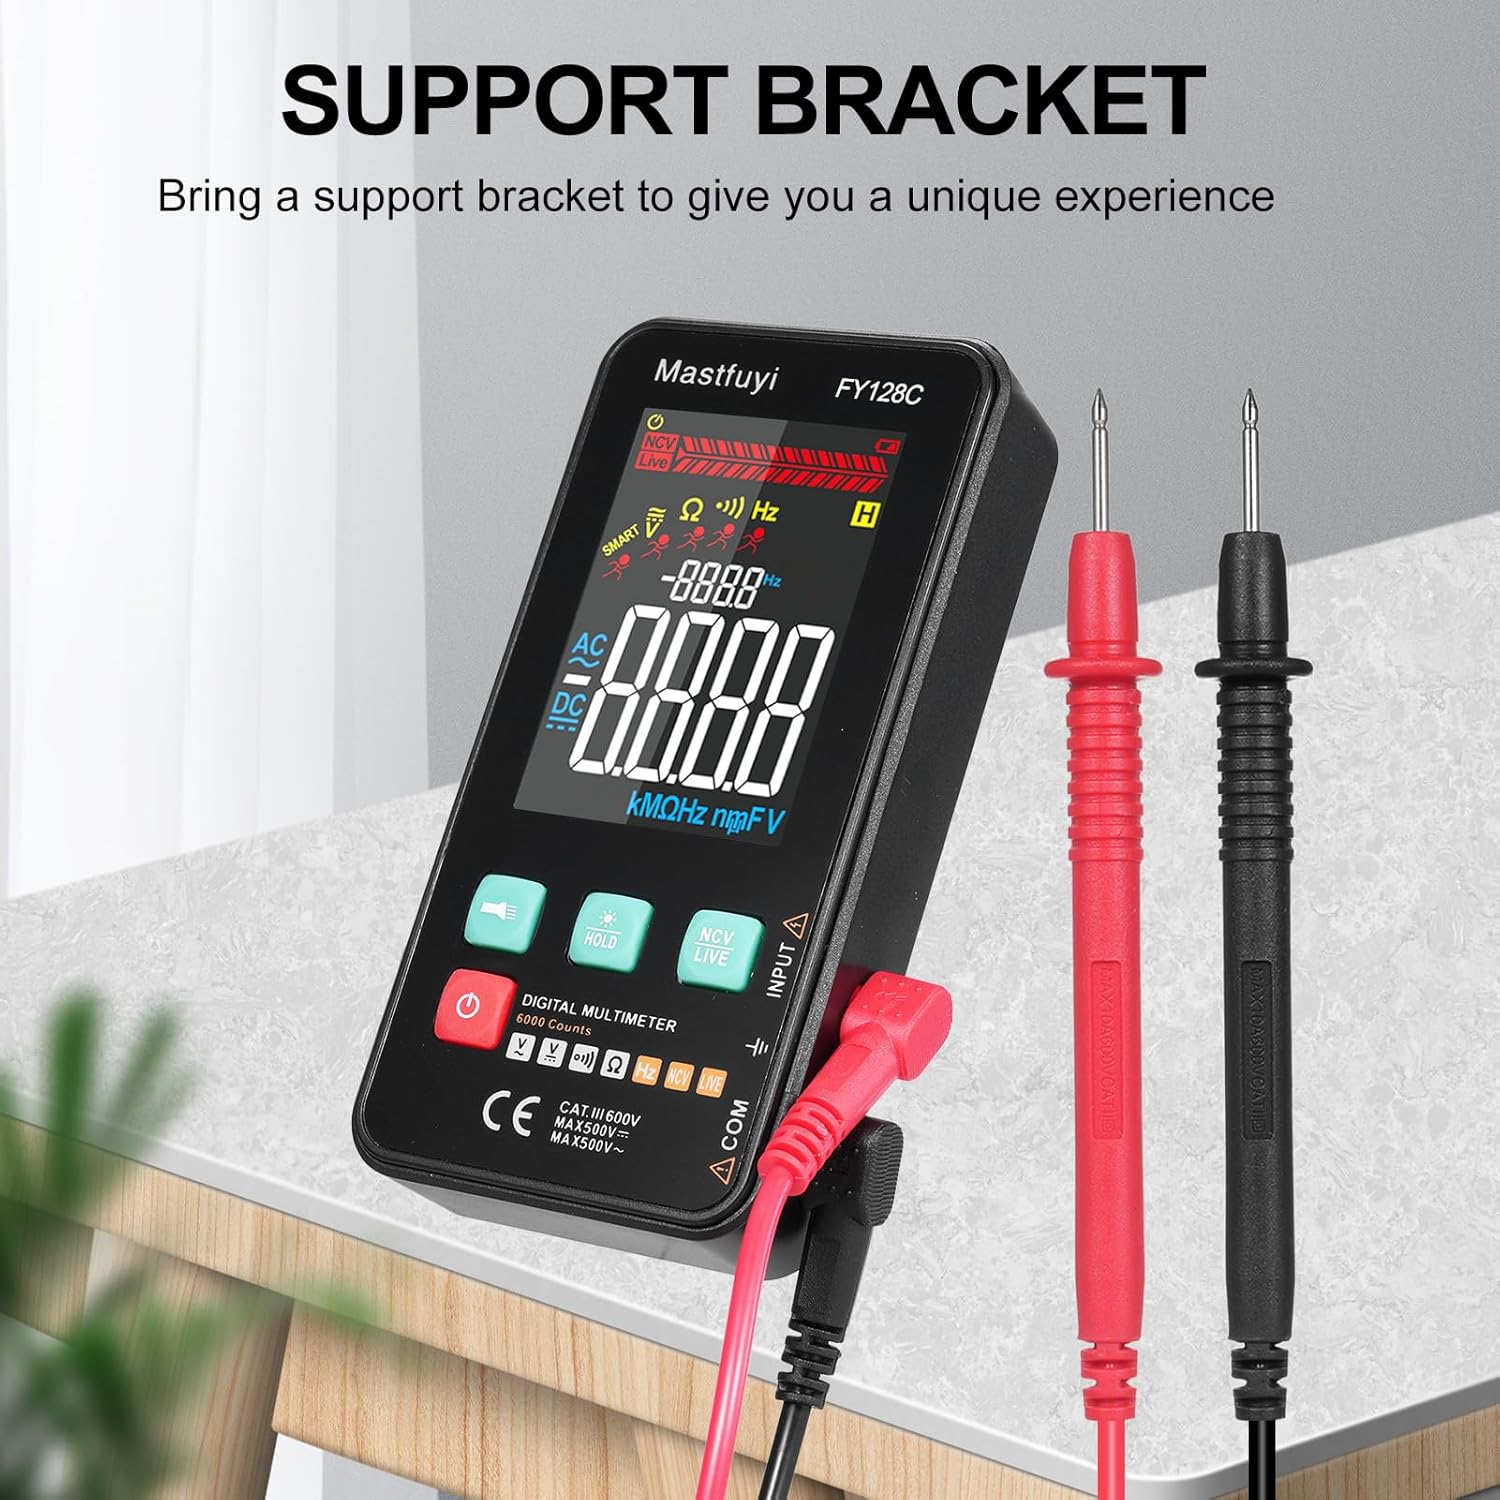
Figure 3.3: Multimeter with Support Bracket and Test Leads
4. Konfiguracja
4.1 Instalacja baterii
- Upewnij się, że multimetr jest wyłączony.
- Znajdź pokrywę komory baterii z tyłu urządzenia.
- Użyj śrubokręta, aby otworzyć komorę baterii.
- Włóż dwie baterie AAA 1.5 V, zwracając uwagę na prawidłową biegunowość (+/-).
- Załóż pokrywę komory baterii i zabezpiecz ją śrubą.
4.2 Podłączanie przewodów pomiarowych
- Włóż czarny przewód pomiarowy do gniazda wejściowego „COM” (wspólnego).
- Insert the red test lead into the 'INPUT' jack for most measurements (voltage, resistance, frequency, continuity).
- Ensure the test leads are securely connected before taking any measurements.
5. Instrukcja obsługi
The FY128C Multimeter offers two primary measurement modes: Auto Identification and Manual Switching.
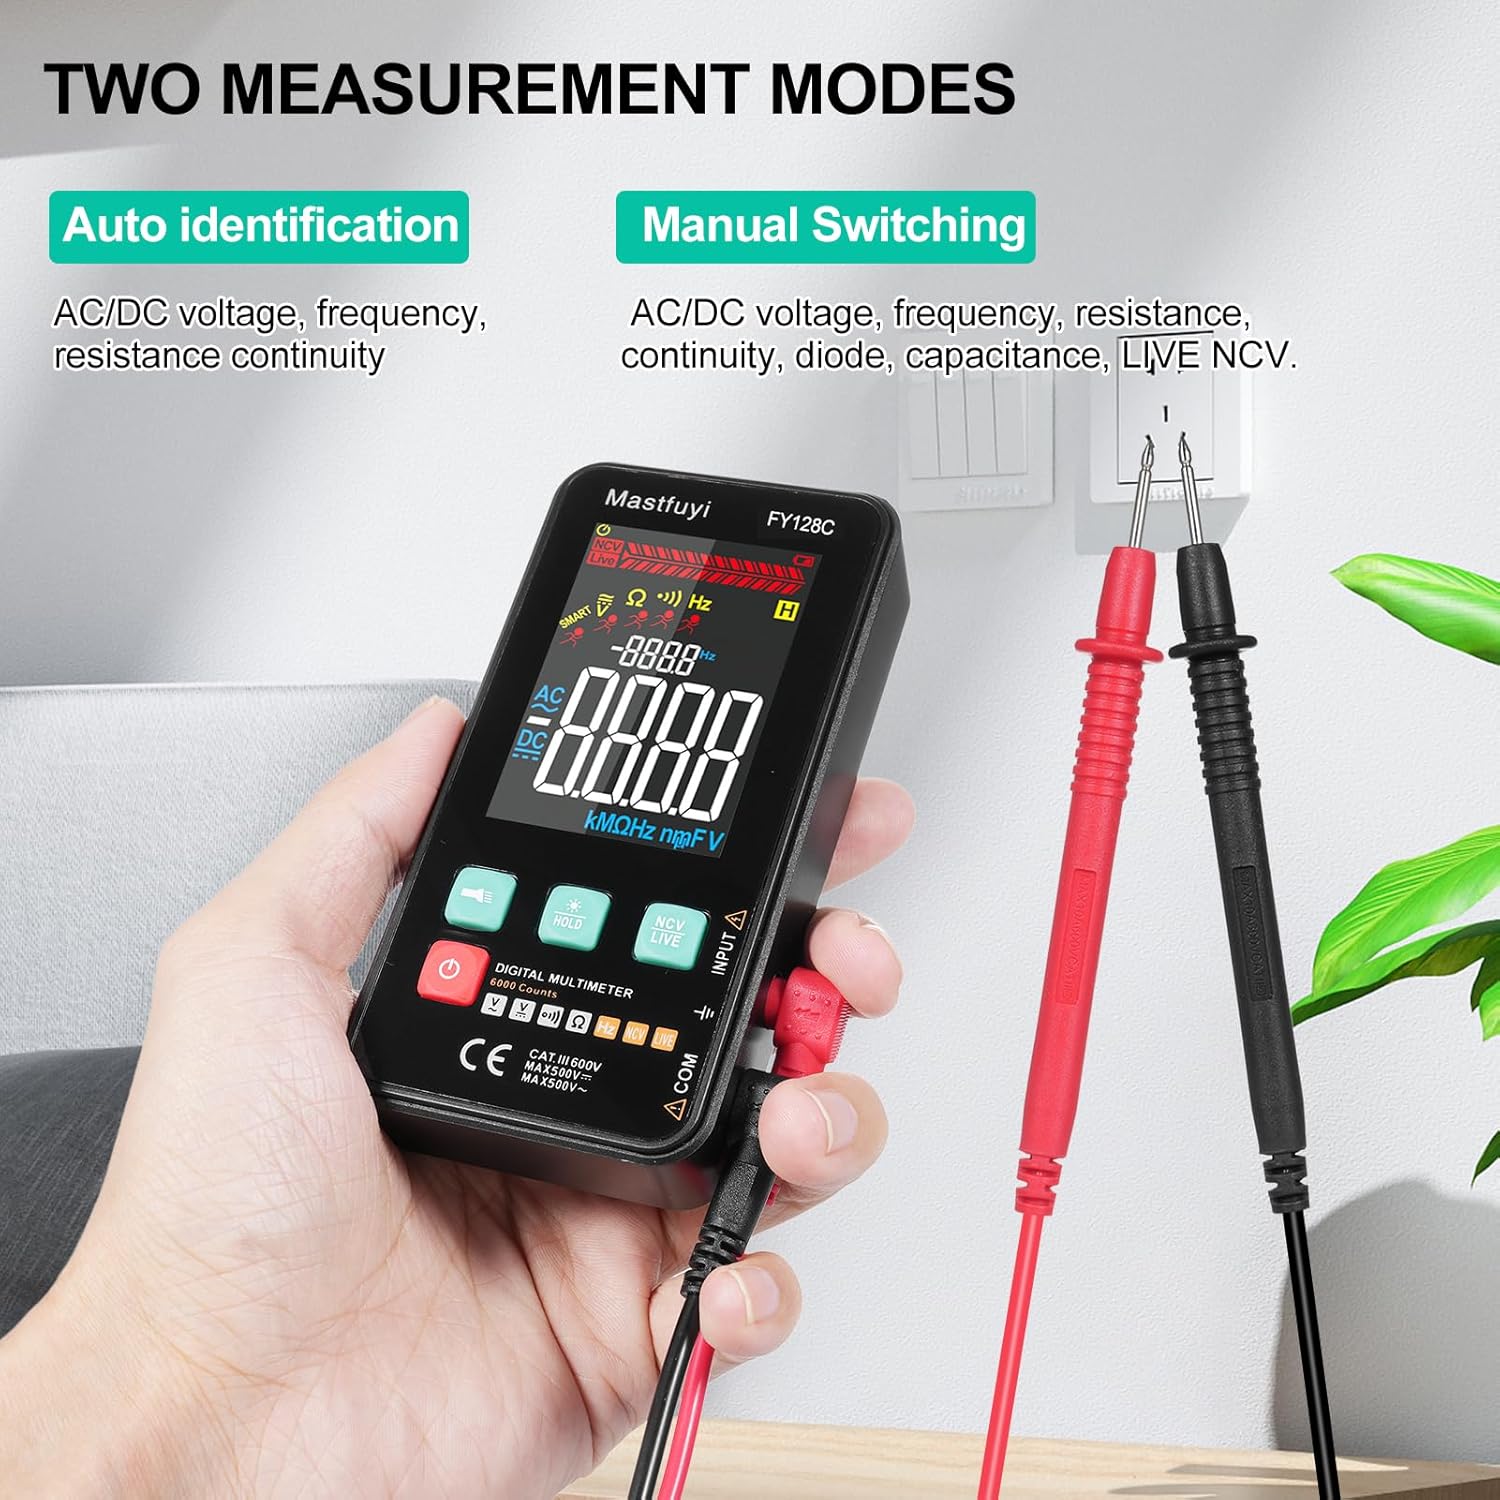
Figure 5.1: Two Measurement Modes
5.1 Włączanie/wyłączanie zasilania
Wciśnij przycisk zasilania (U) to turn the multimeter on or off. The device features an auto-shutdown function to conserve battery power after a period of inactivity.
5.2 Auto Identification Mode
In this mode, the multimeter automatically identifies and measures AC/DC voltage, frequency, resistance, and continuity. Simply connect the test leads to the circuit or component, and the device will display the appropriate measurement.
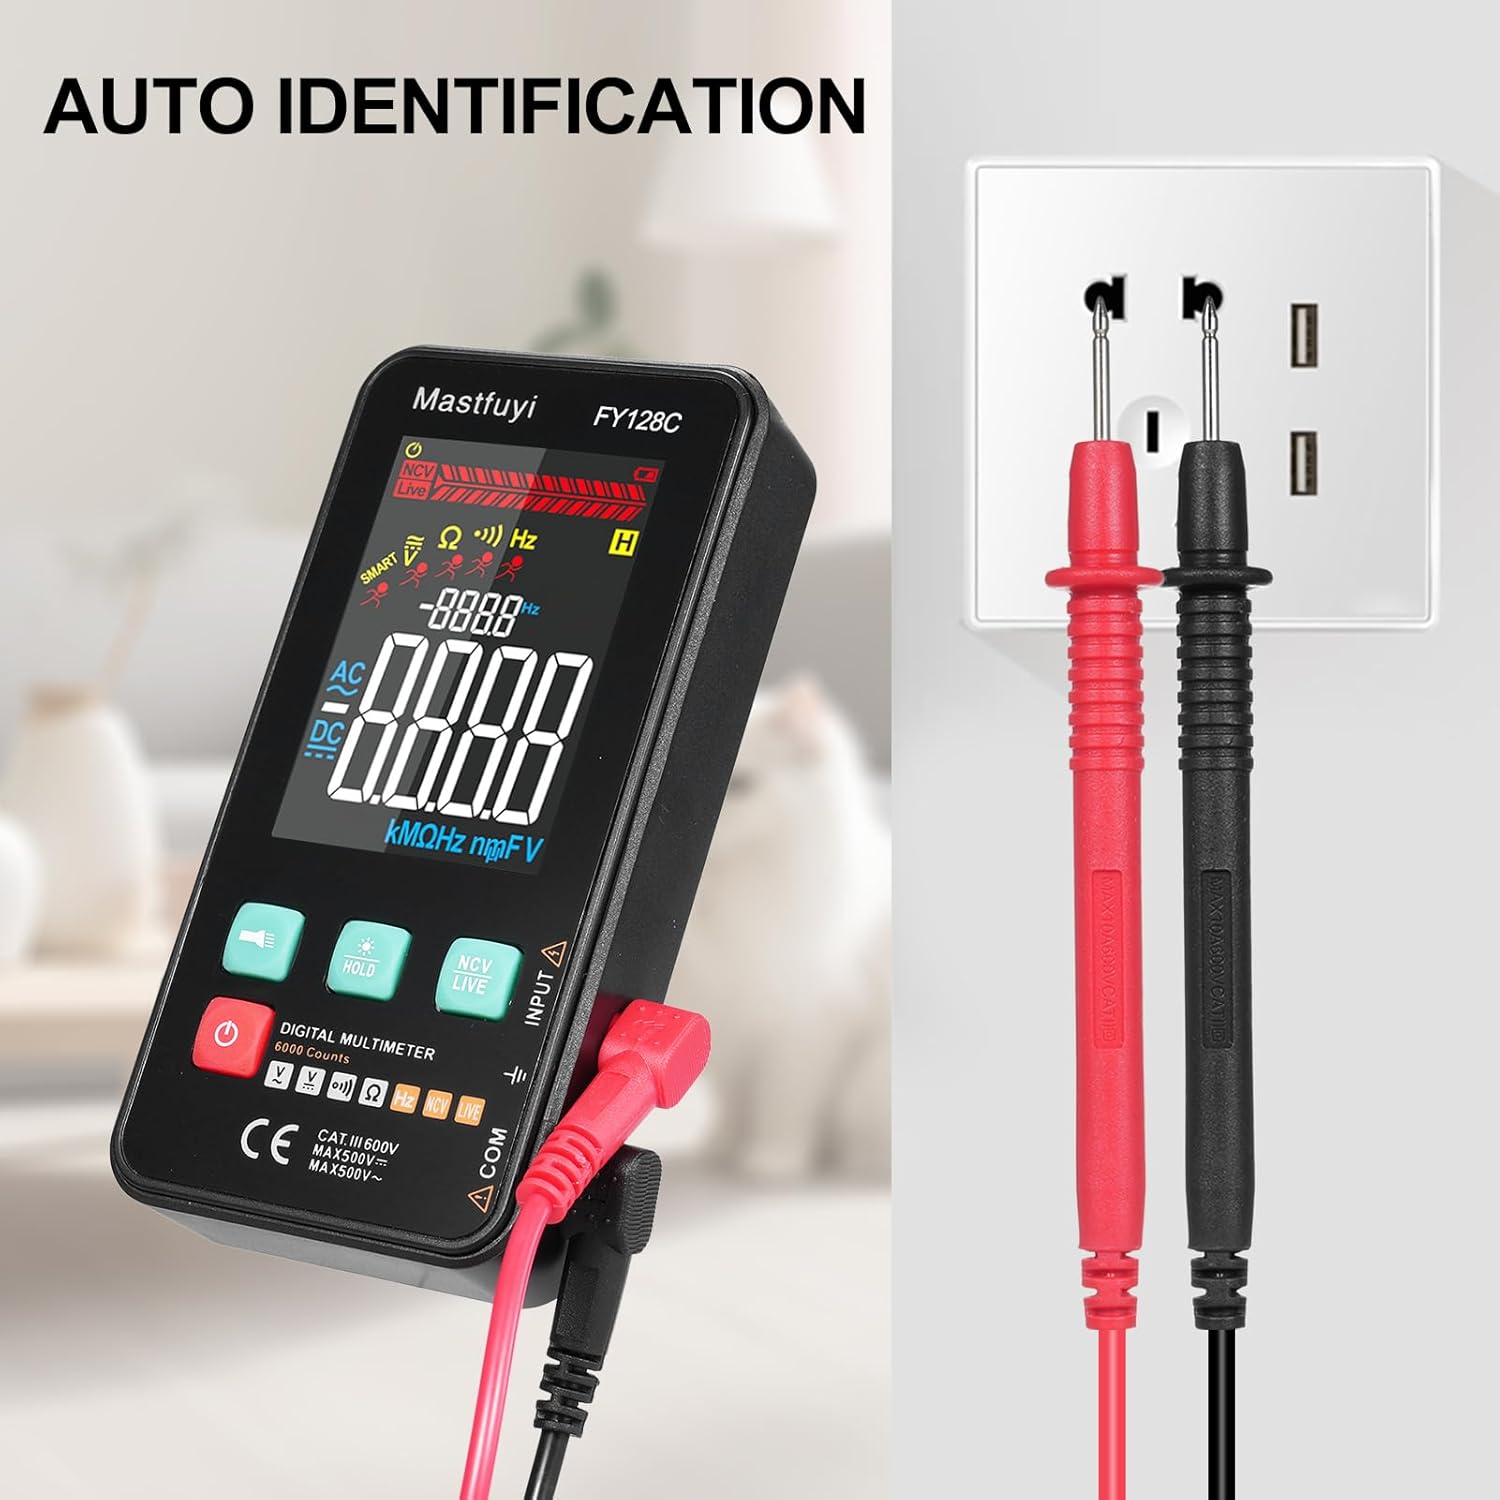
Figure 5.2: Auto Identification in Use
5.3 Manual Switching Mode
For specific measurements or when auto-identification is not desired, you can manually switch between functions. Press the 'MODE' button (often indicated by a symbol like a wave or function icon) to cycle through AC/DC voltage, frequency, resistance, continuity, and NCV/LIVE functions.
5.4 AC/DC objtage Pomiar
- Wybierz odpowiednią objętośćtage mode (AC V or DC V) if in manual mode, or rely on auto-identification.
- Podłącz przewody pomiarowe równolegle do obwodu lub elementu, który chcesz zmierzyć.
- Przeczytaj tomtage wartość na wyświetlaczu LCD.
5.5 Pomiar rezystancji
- Przed pomiarem rezystancji należy upewnić się, że obwód lub element jest odłączony od napięcia.
- Select the resistance mode (Ω) if in manual mode.
- Podłącz przewody pomiarowe do elementu.
- Odczytaj wartość rezystancji na wyświetlaczu LCD.
5.6 Pomiar częstotliwości
- Select the frequency mode (Hz) if in manual mode.
- Connect the test leads to the circuit where you want to measure frequency.
- Odczytaj wartość częstotliwości na wyświetlaczu LCD.
5.7 Test ciągłości
- Upewnij się, że obwód lub element jest odłączony od zasilania.
- Select the continuity mode (often indicated by a buzzer icon).
- Podłącz przewody pomiarowe do elementu lub przewodu.
- If there is continuity (a complete circuit), the multimeter will emit an audible beep.
5.8 Live Wire Checking
This function helps identify live wires without direct contact.
- Select the 'LIVE' mode (often shared with NCV).
- Bring the red test lead probe close to the wire or outlet.
- The multimeter will indicate the presence of a live wire through visual (LED) and/or audible signals.

Figure 5.3: Live Wire Checking in Progress
5.9 NCV (objętość bezkontaktowa)tage) Próba
Funkcja NCV umożliwia bezpieczne wykrywanie objętości prądu przemiennegotagbez kontaktu fizycznego z dyrygentem.
- Wybierz tryb „NCV”.
- Bring the top part of the multimeter (NCV sensor area) close to the suspected voltagŹródło.
- Urządzenie wskaże obecność prądu przemiennegotage with an audible beep and/or visual indicator (e.g., LED lights). The intensity of the signal may vary with voltage strength and proximity.

Figure 5.4: NCV Insulation Safety Test
5.10 Funkcja zatrzymania danych
Naciśnij przycisk „HOLD”, aby zamrozić aktualny odczyt na wyświetlaczu. Naciśnij go ponownie, aby zwolnić blokadę i wznowić pomiary na żywo.
5.11 Latarka i podświetlenie
Press the flashlight button (often indicated by a light bulb icon) to turn on the built-in flashlight. The LCD display also has a backlight for improved visibility in low-light conditions, which typically activates automatically or can be toggled with a dedicated button.
6. Konserwacja
6.1 Czyszczenie
Wytrzyj multimetr casing z reklamąamp cloth and mild detergent. Do not use abrasive cleaners or solvents. Ensure the device is completely dry before use.
6.2 Wymiana baterii
When the low battery indicator appears on the display, replace the batteries as described in Section 4.1. Always use fresh 1.5V AAA batteries.
6.3 Przechowywanie
If the multimeter will not be used for an extended period, remove the batteries to prevent leakage. Store the device in a cool, dry place, away from direct sunlight and extreme temperatures.
7. Rozwiązywanie Problemów
This section addresses common issues you might encounter with your FY128C Smart Digital Multimeter.
| Problem | Możliwa przyczyna | Rozwiązanie |
|---|---|---|
| Brak wyświetlacza lub wyświetlacz jest przyciemniony | Low batteries; Device not powered on; Damaged display. | Replace batteries; Press power button; Contact support if display is damaged. |
| Niedokładne odczyty | Incorrect mode selected; Poor test lead connection; External interference. | Verify mode selection; Ensure leads are firmly connected; Move away from strong electromagnetic fields. |
| Test ciągłości nie wydaje sygnału dźwiękowego | Open circuit; Continuity mode not selected; Faulty test leads. | Check the circuit for breaks; Select continuity mode; Test leads for damage. |
| Auto-shutdown too frequent | Default auto-shutdown setting. | This is a power-saving feature. Ensure you are actively using the device or press a button to reset the timer. |
8. Specyfikacje
Below are the technical specifications for the Irfora FY128C Smart Digital Multimeter.

Rysunek 8.1: Wymiary produktu
| Funkcja | Specification (FY128C) |
|---|---|
| Model | Rok fiskalny 128C |
| Tworzywo | ABS |
| AC Objętośćtage Zakres | 1V~500V, ±(1.5%+3) |
| Objętość DCtage Zakres | 0.5V~500V, ±(1.2%+5) |
| Zakres oporu | 30Ω~10000KΩ, ±(2%+5) |
| Zakres częstotliwości | 40Hz~1000Hz, ±(2.5%+5) |
| Ciągłość | Tak |
| NCV (objętość bez kontaktutage) | Tak |
| Live Wire Checking | Tak |
| Automatyczne wyłączanie | Tak |
| Zasilacz | 2 baterie 1.5 V AAA (brak w zestawie) |
| Rozmiar przedmiotu | 123 * 61 * 24 mm / 4.84 * 2.40 * 0.94 cala |
| Waga przedmiotu | 113g / 3.98 uncji |
| Norma bezpieczeństwa | IEC-61010, KAT. III 600 V |
9. Gwarancja i wsparcie
The Irfora FY128C Smart Digital Multimeter comes with a standard manufacturer's warranty. For specific warranty terms, duration, or to obtain technical support, please refer to the documentation provided with your purchase or contact your retailer. Keep your purchase receipt as proof of purchase for warranty claims.
