1. Wprowadzenie
Thank you for choosing the Mecer 23.8 Inch Full HD LED Monitor. This manual provides essential information for setting up, operating, and maintaining your monitor. Please read it thoroughly before use to ensure proper functionality and longevity of your device.
This monitor features a 23.8-inch Full HD (1920 x 1080) display, offering crisp and clear visuals. It incorporates TFT LED panel technology for energy efficiency and vibrant colors, with a 16:9 aspect ratio suitable for widescreen viewing. Connectivity options include VGA and HDMI, making it compatible with various devices. Built-in speakers provide basic audio, and wide 178° viewing angles ensure comfortable use. With a 2ms response time, it is suitable for general computing and multimedia consumption.
2. Informacje dotyczące bezpieczeństwa
- Źródło zasilania: Używaj wyłącznie zasilacza dołączonego do monitora. Upewnij się, że gniazdko elektryczne jest prawidłowo uziemione.
- Wentylacja: Nie blokuj otworów wentylacyjnych. Zachowaj odpowiednią ilość miejsca wokół monitora, aby zapewnić prawidłowy przepływ powietrza i zapobiec przegrzaniu.
- Umieszczenie: Ustaw monitor na stabilnej, płaskiej powierzchni. Unikaj umieszczania go w bezpośrednim świetle słonecznym, w pobliżu źródeł ciepła lub w miejscach o dużym zapyleniu lub wilgotności.
- Czyszczenie: Disconnect the power cord before cleaning. Use a soft, dry cloth for the screen and a slightly damp cloth for the casing. Unikaj stosowania środków czyszczących o właściwościach ściernych i rozpuszczalników.
- Ekspozycja na płyny: Keep liquids away from the monitor. If liquid enters the monitor, disconnect power immediately and contact qualified service personnel.
- Demontaż: Nie próbuj samodzielnie demontować ani naprawiać monitora. Wszelkie czynności serwisowe zleć wykwalifikowanemu personelowi.
3. Zawartość opakowania
Sprawdź zawartość paczki, aby upewnić się, że znajdują się w niej wszystkie elementy:
- Mecer 23.8 Inch LED Monitor
- Stojak na monitor (podstawa i szyjka)
- Zasilacz i kabel
- Kabel HDMI
- Kabel VGA
- Instrukcja obsługi (ten dokument)
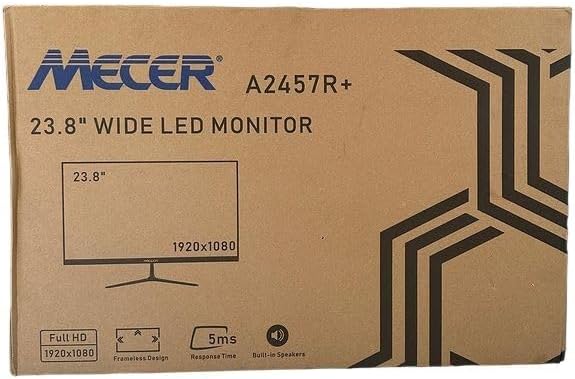
Obraz 3.1: The monitor packaging box, indicating the model A2457R+ and key features like 23.8" display, Full HD 1920x1080 resolution, frameless design, 5ms response time, and built-in speakers.
4. Konfiguracja
4.1. Montaż podstawy monitora
- Ostrożnie wyjmij monitor i elementy stojaka z opakowania.
- Przymocuj podstawę do panelu monitora, dopasowując zaczepy i mocno dociskając, aż do zatrzaśnięcia.
- Attach the stand base to the stand neck, securing it with the provided screw (usually hand-tightened).
- Zmontowany monitor należy umieścić na stabilnej, płaskiej powierzchni.

Obraz 4.1: Przód view of the Mecer 23.8 Inch LED Monitor with its stand assembled, ready for connection.
4.2. Podłączanie do komputera
The monitor supports both HDMI and VGA connections. Choose the appropriate cable for your computer.
- Połączenie HDMI: Connect one end of the HDMI cable to the HDMI port on your computer's graphics card and the other end to the HDMI port on the monitor. HDMI transmits both video and audio signals.
- Połączenie VGA: Connect one end of the VGA cable to the VGA port on your computer's graphics card and the other end to the VGA port on the monitor. VGA transmits only video signals.

Obraz 4.2: Tył view of the Mecer 23.8 Inch LED Monitor, showing the input ports including HDMI and VGA, as well as the power input.
4.3. Podłączenie zasilania
- Connect the power adapter cable to the DC IN port on the back of the monitor.
- Podłącz zasilacz do gniazdka ściennego.
5. Instrukcja obsługi
5.1. Włączanie/wyłączanie zasilania
Press the power button, typically located on the bottom right side or rear of the monitor, to turn the monitor on or off. The power indicator light will illuminate when the monitor is on.
5.2. Wybór źródła wejściowego
If you have multiple devices connected, you may need to manually select the input source. Use the monitor's control buttons (usually located near the power button) to navigate to the input selection menu and choose between HDMI or VGA.
5.3. Menu ekranowe (OSD)
The OSD menu allows you to adjust various display settings. Use the monitor's control buttons to:
- Uzyskaj dostęp do menu OSD.
- Navigate through menu options (e.g., Brightness, Contrast, Color Settings, Input Source).
- Adjust values or select options.
- Wyjdź z menu OSD.
Typowe ustawienia regulowane obejmują:
- Jasność/Kontrast: Dostosuj ogólną jasność i różnicę między obszarami jasnymi i ciemnymi.
- Ustawienia kolorów: Adjust color temperature, RGB values, or select preset color modes.
- Proporcje obrazu: Change between 16:9, 4:3, or other available options.
- Audio: Adjust volume for the built-in speakers.
5.4. Wbudowane głośniki
The monitor includes built-in speakers for basic audio output. If using an HDMI connection, audio will be transmitted automatically. For VGA connections, ensure your computer's audio output is configured correctly. Adjust the volume through the OSD menu or your computer's operating system.
6. Konserwacja
6.1. Czyszczenie monitora
- Przed czyszczeniem należy zawsze odłączyć monitor od gniazdka zasilania.
- Ekran: Delikatnie przetrzyj ekran miękką, niepozostawiającą włókien ściereczką. W przypadku uporczywych zabrudzeń delikatnie przetrzyj.ampen the cloth with water or a specialized screen cleaner (ensure it's alcohol-free and ammonia-free) and wipe carefully. Do not spray liquid directly onto the screen.
- Casing: Do czyszczenia monitora należy używać miękkiej, suchej ściereczki.asing. W razie potrzeby lekkoamp Można użyć ściereczki, a następnie wytrzeć do sucha.
6.2. Przechowywanie
Jeśli monitor będzie przechowywany przez dłuższy okres czasu, odłącz wszystkie kable, zapakuj go do oryginalnego opakowania (jeśli jest dostępne) i przechowuj w chłodnym, suchym miejscu, z dala od bezpośredniego światła słonecznego i ekstremalnych temperatur.
7. Rozwiązywanie Problemów
Jeśli masz problemy z monitorem, zapoznaj się z poniższymi typowymi problemami i ich rozwiązaniami:
- Brak zasilania:
- Ensure the power cable is securely connected to the monitor and the wall outlet.
- Sprawdź, czy gniazdko elektryczne działa prawidłowo, podłączając do niego inne urządzenie.
- Sprawdź czy zasilacz działa prawidłowo.
- Brak sygnału:
- Sprawdź, czy kabel wideo (HDMI lub VGA) jest prawidłowo podłączony do monitora i komputera.
- Verify that the correct input source is selected on the monitor (via the OSD menu).
- Check if your computer is powered on and outputting a video signal.
- Try a different video cable if available.
- Obraz jest rozmazany lub zniekształcony:
- Sprawdź, czy w ustawieniach wyświetlania komputera rozdzielczość monitora jest ustawiona na rozdzielczość natywną (1920 x 1080).
- Adjust the monitor's OSD settings for brightness, contrast, and sharpness.
- For VGA connections, use the 'Auto Adjust' function in the OSD menu if available.
- Brak dźwięku z wbudowanych głośników:
- Sprawdź, czy głośność monitora nie jest wyciszona lub ustawiona zbyt nisko w menu OSD.
- Check your computer's audio output settings to ensure the monitor is selected as the playback device.
- If using VGA, ensure your computer's audio is routed to an external speaker system, as VGA does not carry audio.
8. Specyfikacje
| Funkcja | Specyfikacja |
|---|---|
| Marka | Mecer |
| Numer modelu | A2457R+ |
| Rozmiar wyświetlacza | 23.8 cali |
| Rezolucja | 1920 x 1080 pikseli (Full HD) |
| Typ wyświetlacza | LED (TFT LED Panel) |
| Proporcje obrazu | 16:9 |
| Czas reakcji | 2 milisekund |
| Częstotliwość odświeżania | 75 Hz |
| Viewkąty | 178° w poziomie / 178° w pionie |
| Łączność | 1xHDMI, 1xVGA |
| Wbudowane głośniki | Tak |
| Kolor | Czarny |
| Wymiary produktu (Gł. x Szer. x Wys.) | 560D x 42W x 410H millimetres |
| Cechy specjalne | High performance intelligent multi-frequency scanning, Micro Computer digital technology control, no radiation, no glare, Comply with VESA DPMS international power saving regulation, Support DDC 1/2B and Windows PNP Plug and Play |
9. Gwarancja i wsparcie
This Mecer monitor comes with a 1 rok ograniczonej gwarancji od daty zakupu. Zachowaj dowód zakupu na wypadek roszczeń gwarancyjnych.
For technical support, service, or warranty inquiries, please contact your retailer or the authorized Mecer service center in your region. Do not attempt to repair the product yourself, as this may void your warranty.


