1. Wprowadzenie
Welcome to the user manual for your Natec FURY SHOBO SH4F RGB MIDI TOWER PC Case. This guide provides essential information for the proper assembly, installation, operation, and maintenance of your new computer chassis. Please read this manual thoroughly before beginning installation to ensure optimal performance and longevity of your components.
2. Wytyczne bezpieczeństwa
- Always disconnect the power supply from the wall outlet before installing or removing any components inside the PC case.
- Ostrożnie obchodź się z elementami, aby uniknąć uszkodzeń spowodowanych wyładowaniami elektrostatycznymi (ESD). Rozważ użycie antystatycznej opaski na nadgarstek.
- Keep small parts, such as screws, away from children.
- Aby zapobiec przegrzaniu, należy zapewnić odpowiednią wentylację wokół obudowy komputera.
- Do not expose the case to extreme temperatures, humidity, or direct sunlight.
- Unikaj umieszczania ciężkich przedmiotów na obudowie.
3. Zawartość opakowania
Sprawdź, czy w przesyłce znajdują się wszystkie elementy:
- Natec FURY SHOBO SH4F RGB MIDI TOWER PC Case
- Accessory box (containing screws, cable ties, and other small parts)
- Instrukcja obsługi (ten dokument)
4. Koniec produktuview
The Natec FURY SHOBO SH4F is a MIDI TOWER PC case designed for gaming and general-purpose computing, offering ample space for components and efficient cooling. It features a modern design with RGB lighting.
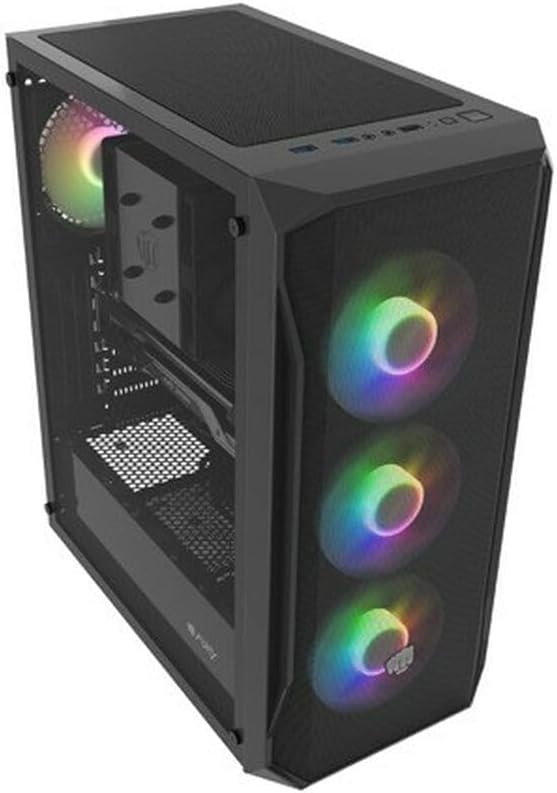
Rysunek 4.1: Kąt view of the Natec FURY SHOBO SH4F RGB MIDI TOWER PC Case, showcasing its black metal and tempered glass construction. The front panel features a mesh design with three illuminated RGB fans, and a single RGB fan is visible at the rear exhaust. The top panel includes I/O ports and a mesh filter.
4.1 Przedni panel wejścia/wyjścia
- Przycisk zasilania
- Przycisk resetowania
- Port USB 2.0 (x1)
- Gniazda audio (słuchawki/mikrofon)
- RGB Control Button (if applicable)
4.2 Internal Layout
The case supports Micro ATX and Mini ATX motherboards and features a bottom-mounted power supply bay. It includes dedicated areas for storage drives and efficient cable management.
5. Konfiguracja i instalacja komponentów
Follow these steps to install your PC components into the FURY SHOBO SH4F case.
5.1 Przygotowanie sprawy
- Połóż obudowę na płaskiej i stabilnej powierzchni.
- Remove the side panels. Typically, the tempered glass side panel is secured with thumbscrews.
5.2 Instalacja płyty głównej
- Zainstaluj osłonę I/O (jeśli nie została zamontowana na płycie głównej) w tylnym otworze obudowy.
- Ensure the motherboard standoffs are correctly aligned for your Micro ATX or Mini ATX motherboard. Adjust or install additional standoffs if necessary.
- Ostrożnie umieść płytę główną na dystansach, dopasowując otwory na śruby.
- Przymocuj płytę główną dołączonymi śrubami. Nie dokręcaj ich zbyt mocno.
5.3 Instalacja zasilania
- Locate the power supply bay at the bottom rear of the case.
- Slide your power supply unit (PSU) into the bay from the rear of the case, ensuring the fan faces downwards (if the case has a bottom vent) or upwards.
- Przymocuj zasilacz za pomocą śrub znajdujących się z tyłu obudowy.
5.4 Instalacja dysku pamięci masowej
Refer to your case's specific drive bay design for 2.5" SSDs and 3.5" HDDs. Typically, these involve trays or direct screw mounting.
5.5 Instalacja karty rozszerzeń (np. karty graficznej)
- Zdejmij niezbędne osłony gniazd PCI-E z tyłu obudowy.
- Insert your expansion card into the corresponding PCI-E slot on the motherboard.
- Secure the card with a screw or the case's retention mechanism.
5.6 Zarządzanie kablami
Wykorzystaj wycięcia i punkty mocowania za tacką płyty głównej, aby poprowadzić i zabezpieczyć kable. Poprawi to przepływ powietrza i estetykę.
5.7 Connecting RGB Fans
The pre-installed RGB fans typically connect to a central RGB controller or directly to your motherboard's RGB headers. Consult your motherboard manual for specific RGB header locations and software control. Ensure all fan power cables are connected to appropriate fan headers on the motherboard or a fan hub.
6. Obsługa obudowy komputera
6.1 Włączanie/wyłączanie
After all components are installed and cables connected, plug your power supply into a wall outlet. Press the power button on the front I/O panel to turn on your system. To turn off, use the operating system's shutdown function or press and hold the power button for several seconds.
6.2 Sterowanie oświetleniem RGB
If your case features an RGB control button on the front I/O panel, press it to cycle through various lighting modes and colors. For advanced customization, use your motherboard's RGB software (e.g., ASUS Aura Sync, MSI Mystic Light, Gigabyte RGB Fusion) if the fans are connected to compatible headers.
7. Konserwacja
Regularna konserwacja pomaga zapewnić optymalną wydajność i wydłużyć żywotność podzespołów komputera.
7.1 Czyszczenie filtra przeciwpyłowego
The FURY SHOBO SH4F case includes dust filters (e.g., on the top and bottom). Periodically remove and clean these filters by rinsing them with water and allowing them to dry completely before re-installing. This prevents dust buildup and maintains airflow.
7.2 Czyszczenie zewnętrzne
Przetrzyj zewnętrzną część obudowy miękką szmatką.amp ściereczką. Unikaj środków czyszczących o działaniu ściernym i rozpuszczalników, które mogłyby uszkodzić wykończenie lub szkło hartowane.
8. Rozwiązywanie Problemów
Jeśli napotkasz problemy, zapoznaj się z poniższymi typowymi krokami rozwiązywania problemów:
- Brak zasilania: Ensure the power supply is properly connected to the wall outlet and the motherboard. Check all internal power cables (24-pin ATX, 8-pin CPU, GPU power). Verify the power button cable is correctly connected to the motherboard's front panel header.
- Wentylatory nie kręcą się: Check if fan power cables are securely connected to the motherboard or fan hub. Ensure the power supply is functioning.
- Oświetlenie RGB nie działa: Verify RGB cables are correctly connected to the RGB controller or motherboard header. If using a button, try cycling through modes. If using software, ensure it's installed and configured correctly.
- Przegrzanie: Ensure all fans are spinning correctly and oriented for proper airflow (intake/exhaust). Clean dust filters and internal components. Verify CPU cooler and GPU cooler are properly installed.
9. Specyfikacje
| Marka | Natec |
| Szereg | SH4F |
| Numer modelu | NFO-2154 |
| Typ sprawy | Wieża Midi |
| Zgodność płyty głównej | Micro ATX, Mini ATX |
| Kolor | Czarny |
| Tworzywo | Metal |
| Wymiary produktu (dł. x szer. x wys.) | 19.69 x 16.93 x 9.84 cala (50 x 43 x 25 cm) |
| Waga przedmiotu | 9.46 funta (4.3 kilograma) |
| Typ montażu zasilacza | Mocowanie dolne |
| Metoda chłodzenia | Powietrze |
| Liczba portów USB 2.0 | 1 |
10. Gwarancja i wsparcie
Natec products are manufactured to high-quality standards. For information regarding warranty terms and conditions, please refer to the warranty card included with your product or visit the official Natec website. If you encounter any issues not covered in this manual or require further assistance, please contact Natec customer support through their official channels.
Producent: Natec