1. Wprowadzenie
The HighPoint SSD7580C is a cutting-edge PCIe Gen4 NVMe RAID Host Bus Adapter (HBA) designed to maximize server efficiency and elevate storage security. This manual provides comprehensive instructions for the installation, operation, and maintenance of your SSD7580C, ensuring optimal performance and data integrity.
Główne cechy:
- Dedicated PCIe 4.0 x16 direct to CPU NVMe RAID Solutions.
- Supports 8x U.2 NVMe PCIe 4.0 SSDs.
- Integrated TCG/OPAL Encryption Technology (SafeStorage) for enhanced data security.
- M.2 compatible (requires compatible host platform backplane).
- Features a Low-Noise Active, Hyper-Cooling Solution for stable operation.
- Hot-Plug/Hot-Swap capability for streamlined field service and maintenance.
- Capable of supporting over 200TB of hot-swappable U.2/U.3 NVMe storage.
- Delivers up to 28,000MB/s of sustained transfer throughput.
- Compact, half-height (low-profile) form factor for versatile installation.
- Compatible with Linux and Windows based operating systems.
2. Koniec produktuview
The SSD7580C is an advanced RAID HBA featuring 8 independent device channels backed by a dedicated PCIe 4.0 x16 host interface. It integrates industry-leading PCIe switch technology and HighPoint's proven NVMe RAID stack.
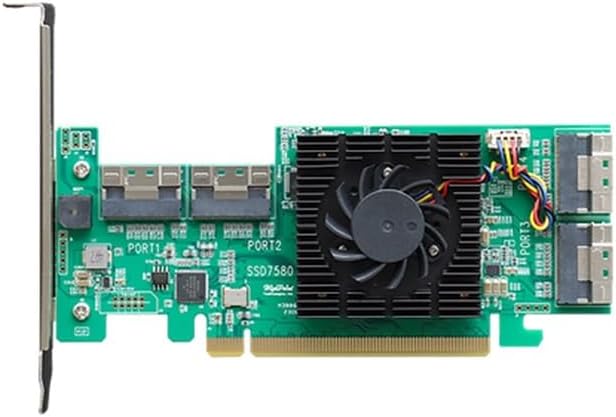
Figure 2.1: HighPoint SSD7580C PCIe 4.0 x16 8-Port U.2 NVMe RAID HBA. This image shows the green circuit board with a central fan and heatsink, and multiple U.2 ports on the left side.
The card's design includes a low-noise active cooling solution to maintain optimal operating temperatures, crucial for high-performance NVMe storage. Its compact form factor allows for easy integration into various server and workstation platforms.
3. Konfiguracja i instalacja
3.1 Wymagania systemowe
- Available PCIe 4.0 x16 slot.
- Compatible operating system: Linux or Windows.
- U.2/U.3 NVMe SSDs for storage.
- Appropriate cabling (SFF-8654, SFF-8643, SFF-8611 OCuLink, MCIO 8i) for connecting to backplanes or direct devices.
3.2 Instalacja sprzętu
- System wyłączania zasilania: Upewnij się, że komputer lub serwer jest całkowicie wyłączony i odłączony od źródła zasilania.
- Otwarte podwozie: Open the computer chassis to access the PCIe slots.
- Zlokalizuj gniazdo PCIe: Identify an available PCIe 4.0 x16 slot.
- Insert HBA: Carefully align the SSD7580C with the PCIe slot and firmly press it down until it is securely seated.
- Secure HBA: Secure the HBA with the chassis retention mechanism or screw.
- Podłącz kable: Connect the appropriate SFF-8654, SFF-8643, SFF-8611 OCuLink, or MCIO 8i cables from the SSD7580C to your U.2/U.3 NVMe SSDs or backplane.

Figure 3.1: Connectivity options for the SSD7580C. This diagram illustrates the various cable types (SFF-8643, SFF-8611, SFF-8654, SFF-1016, SFF-8639) used to connect the SSD7580C to a chassis backplane or directly to U.2 NVMe SSDs.
3.3 Instalacja sterownika
After hardware installation, power on your system. Drivers for the SSD7580C are typically available from the HighPoint Technologies official website. Download and install the latest drivers compatible with your operating system (Linux or Windows) to ensure full functionality and optimal performance.
4. Operating the SSD7580C
4.1 Konfiguracja RAID
The SSD7580C supports various RAID levels to enhance data redundancy and performance. Refer to the HighPoint RAID Management Suite user guide for detailed instructions on creating, managing, and monitoring RAID arrays. This software provides a user-friendly interface for configuring your storage solution.
4.2 Hot-Plug/Hot-Swap Functionality
The SSD7580C features integrated Hot-Plug/Hot-Swap capabilities, allowing administrators to add or remove individual NVMe SSDs, or even an entire RAID array, without powering down the host platform or rebooting the operating system. This streamlines field service, maintenance, and upgrade workflows.

Figure 4.1: Illustration of Hot-Plug and Hot-Removed SSDs. The left side shows SSDs being hot-plugged, with placeholders suspended. The right side shows SSDs being hot-removed, with placeholders reactivated.
4.3 SafeStorage Hardware Encryption (TCG/OPAL)
For critical applications requiring high data security, the SSD7580C employs HighPoint's SafeStorage Hardware Encryption solution, which works with Self-Encrypting Disks (SEDs) that adhere to OPAL SSC TCG specifications. This feature automatically locks down data assets if a drive is physically removed from the host platform, providing robust data protection.

Figure 4.2: HighPoint SafeStorage technology icon, depicting a padlock over a computer screen, symbolizing data security.
5. Konserwacja
The SSD7580C is designed for reliable, long-term operation with minimal maintenance. Regular checks of your system's cooling and ensuring proper airflow around the HBA are recommended. The hot-swap feature simplifies drive replacement, reducing downtime for maintenance tasks.
5.1 aktualizacji oprogramowania sprzętowego
Periodically check the HighPoint Technologies website for firmware updates for your SSD7580C. Firmware updates can provide performance enhancements, bug fixes, and compatibility improvements. Follow the instructions provided with the firmware update package carefully.
5.2 Czyszczenie
If necessary, gently clean the HBA using compressed air to remove dust from the heatsink and fan. Ensure the system is powered off and disconnected from power before cleaning.
6. Rozwiązywanie Problemów
This section provides solutions to common issues you might encounter with your SSD7580C.
6.1 Typowe problemy i rozwiązania
- HBA not detected:
- Ensure the HBA is fully seated in the PCIe slot.
- Verify the PCIe slot is functional.
- Check BIOS/UEFI settings to ensure PCIe slots are enabled.
- SSDs not detected:
- Verify all cables are securely connected between the HBA and SSDs/backplane.
- Ensure SSDs are properly inserted and functional.
- Check for driver installation and proper functioning.
- Problemy z wydajnością:
- Ensure the HBA is installed in a PCIe 4.0 x16 slot.
- Verify SSDs are NVMe PCIe 4.0 compatible.
- Check system cooling to prevent thermal throttling.
- Update drivers and firmware to the latest versions.
- RAID array issues:
- Consult the HighPoint RAID Management Suite user guide for specific RAID error codes and recovery procedures.
- Ensure all drives in the array are healthy.
6.2 Wsparcie techniczne
If you encounter issues that cannot be resolved using this guide, please visit the official HighPoint Technologies support website for further assistance, FAQs, and contact information. Providing detailed information about your system configuration and the issue will help expedite support.
Wsparcie HighPoint Webstrona: www.highpoint-tech.com/support
7. Specyfikacje
| Funkcja | Szczegół |
|---|---|
| Marka | Punkt kulminacyjny |
| Numer modelu | SSD7580C |
| Interfejs sprzętowy | PCI Express x16 (PCIe 4.0), U.2 NVMe |
| Liczba portów | 8 (U.2 NVMe) |
| Obsługiwane systemy operacyjne | Linux, Windows |
| Waga przedmiotu | 9.7 uncji |
| Wymiary opakowania | 7.91 x 7.09 x 1.3 cala |
| Kolor | Zielony |
| Producent | HighPoint Technologies, Inc. |
| UPC | 643653758081 |
8. Gwarancja i wsparcie
HighPoint Technologies products are backed by a manufacturer's warranty. For specific warranty terms and conditions, please refer to the warranty information included with your product packaging or visit the official HighPoint Technologies website. Technical support is available through their online resources, including FAQs, knowledge bases, and direct contact options.
Aby uzyskać najbardziej aktualne informacje dotyczące pomocy technicznej, odwiedź stronę: www.highpoint-tech.com/support


