1. Wprowadzenie
Thank you for choosing the Conentool 21V Cordless Impact Drill/Driver Kit. This tool is designed for various drilling and screwdriving tasks in wood, metal, plastics, and masonry. Please read this manual carefully before operating the tool to ensure safe and efficient use. Keep this manual for future reference.

Image 1.1: The Conentool 21V Cordless Impact Drill/Driver Kit, including the drill, two 2500mAh batteries, charger, and a variety of drill bits and accessories in a carrying case.
2. Ogólne instrukcje bezpieczeństwa
OSTRZEŻENIE: Przeczytaj wszystkie ostrzeżenia dotyczące bezpieczeństwa, instrukcje, ilustracje i dane techniczne dołączone do tego elektronarzędzia. Niezastosowanie się do wszystkich poniższych instrukcji może spowodować porażenie prądem, pożar i/lub poważne obrażenia.
2.1 Bezpieczeństwo w miejscu pracy
- Utrzymuj miejsce pracy w czystości i dobrym oświetleniu. Zagracone lub ciemne obszary sprzyjają wypadkom.
- Nie używaj elektronarzędzi w atmosferach wybuchowych, takich jak obecność łatwopalnych cieczy, gazów lub pyłów. Elektronarzędzia wytwarzają iskry, które mogą zapalić pył lub opary.
- Trzymaj dzieci i osoby postronne z dala od siebie podczas obsługi elektronarzędzia. Rozproszenie uwagi może spowodować utratę kontroli.
2.2 Bezpieczeństwo elektryczne
- Wtyczki elektronarzędzi muszą pasować do gniazdka. Nigdy nie modyfikuj wtyczki w żaden sposób.
- Unikaj kontaktu ciała z uziemionymi powierzchniami, takimi jak rury, grzejniki, kuchenki i lodówki. Istnieje zwiększone ryzyko porażenia prądem, jeśli Twoje ciało jest uziemione.
- Nie wystawiaj elektronarzędzi na deszcz lub mokre warunki. Woda dostająca się do elektronarzędzia zwiększa ryzyko porażenia prądem.
2.3 Bezpieczeństwo osobiste
- Zawsze noś okulary ochronne. Używaj okularów ochronnych, gogli lub osłony twarzy.
- Podczas długotrwałej pracy z narzędziem należy nosić środki ochrony słuchu.
- Ubierz się odpowiednio. Nie noś luźnej odzieży ani biżuterii. Trzymaj włosy i odzież z dala od ruchomych części.
- Zachowaj czujność, zwracaj uwagę na to, co robisz, i kieruj się zdrowym rozsądkiem podczas obsługi elektronarzędzi.
3. Zawartość opakowania
Sprawdź, czy wszystkie wymienione poniżej elementy znajdują się w Twojej paczce. Jeśli brakuje któregokolwiek z nich lub jest on uszkodzony, skontaktuj się z obsługą klienta.
- 1 x Conentool 21V Cordless Impact Drill/Driver
- 2 baterie litowo-jonowe o pojemności 2500 mAh
- 1 x ładowarka
- 1 x Flexible Shaft Extension
- Various Drill Bits (for wood, metal, masonry)
- Various Screwdriver Bits
- Adaptery gniazd
- Etui transportowe
- Instrukcja obsługi

Image 3.1: A complete overview of the kit contents, including the drill, two batteries, charger, flexible shaft, various drill bits, screwdriver bits, and socket adapters, all neatly arranged.
4. Koniec produktuview
Familiarize yourself with the main components of your drill/driver:
- Chuck: Holds drill bits and screwdriver bits.
- Pierścień regulacji momentu obrotowego: Selects the desired torque setting.
- Pierścień wyboru trybu: Switches between screwdriving, drilling, and impact drilling modes.
- Przełącznik wyboru prędkości: Changes between high and low-speed gears.
- Przełącznik spustowy: Włącza narzędzie i steruje prędkością (zmienna prędkość).
- Przełącznik kierunku jazdy do przodu/do tyłu: Zmienia kierunek obrotu.
- Światło robocze LED: Oświetla miejsce pracy.
- Paczka baterii: Zapewnia zasilanie narzędzia.
- Przycisk zwalniający baterię: Do wyjmowania baterii.
- Uchwyt: Ergonomiczny uchwyt zapewniający wygodę użytkowania.

Rysunek 4.1: Wewnętrzny view highlighting the brushless motor, which provides increased power, efficiency, and a quieter operation with no sparks.
5. Konfiguracja
5.1 Ładowanie akumulatora
The battery pack is not fully charged at the time of purchase. It is recommended to fully charge the battery before first use.
- Podłącz ładowarkę do standardowego gniazdka elektrycznego.
- Wsuń akumulator na podstawę ładowarki. Upewnij się, że zatrzasnął się na swoim miejscu.
- The charger indicator light will show the charging status. A red light typically indicates charging, and a green light indicates a full charge.
- Po całkowitym naładowaniu odłącz ładowarkę od gniazdka elektrycznego i wyjmij akumulator.

Image 5.1: The battery charger connected to a wall outlet, with a battery pack inserted for charging. The red light indicates charging, and the green light indicates a completed charge.
5.2 Instalowanie i wyjmowanie baterii
- Aby zainstalować: Wyrównaj akumulator z podstawą uchwytu narzędzia i wsuń go, aż zatrzaśnie się na swoim miejscu.
- Aby usunąć: Press the battery release button (usually located at the front of the battery) and slide the battery pack out of the tool.

Ilustracja 5.2: Przekrój view of the 2500mAh battery pack, illustrating its internal lithium-ion cells and power management system, designed for up to 90 minutes of use per battery.
5.3 Installing and Removing Drill/Screwdriver Bits
- Aby zainstalować: Rotate the chuck counter-clockwise to open the jaws. Insert the desired bit into the chuck as far as it will go. Rotate the chuck clockwise to tighten the jaws firmly around the bit.
- Aby usunąć: Obróć uchwyt w kierunku przeciwnym do ruchu wskazówek zegara, aby poluzować szczęki i wyciągnąć wiertło.
Ensure the bit is securely fastened to prevent it from slipping during operation.
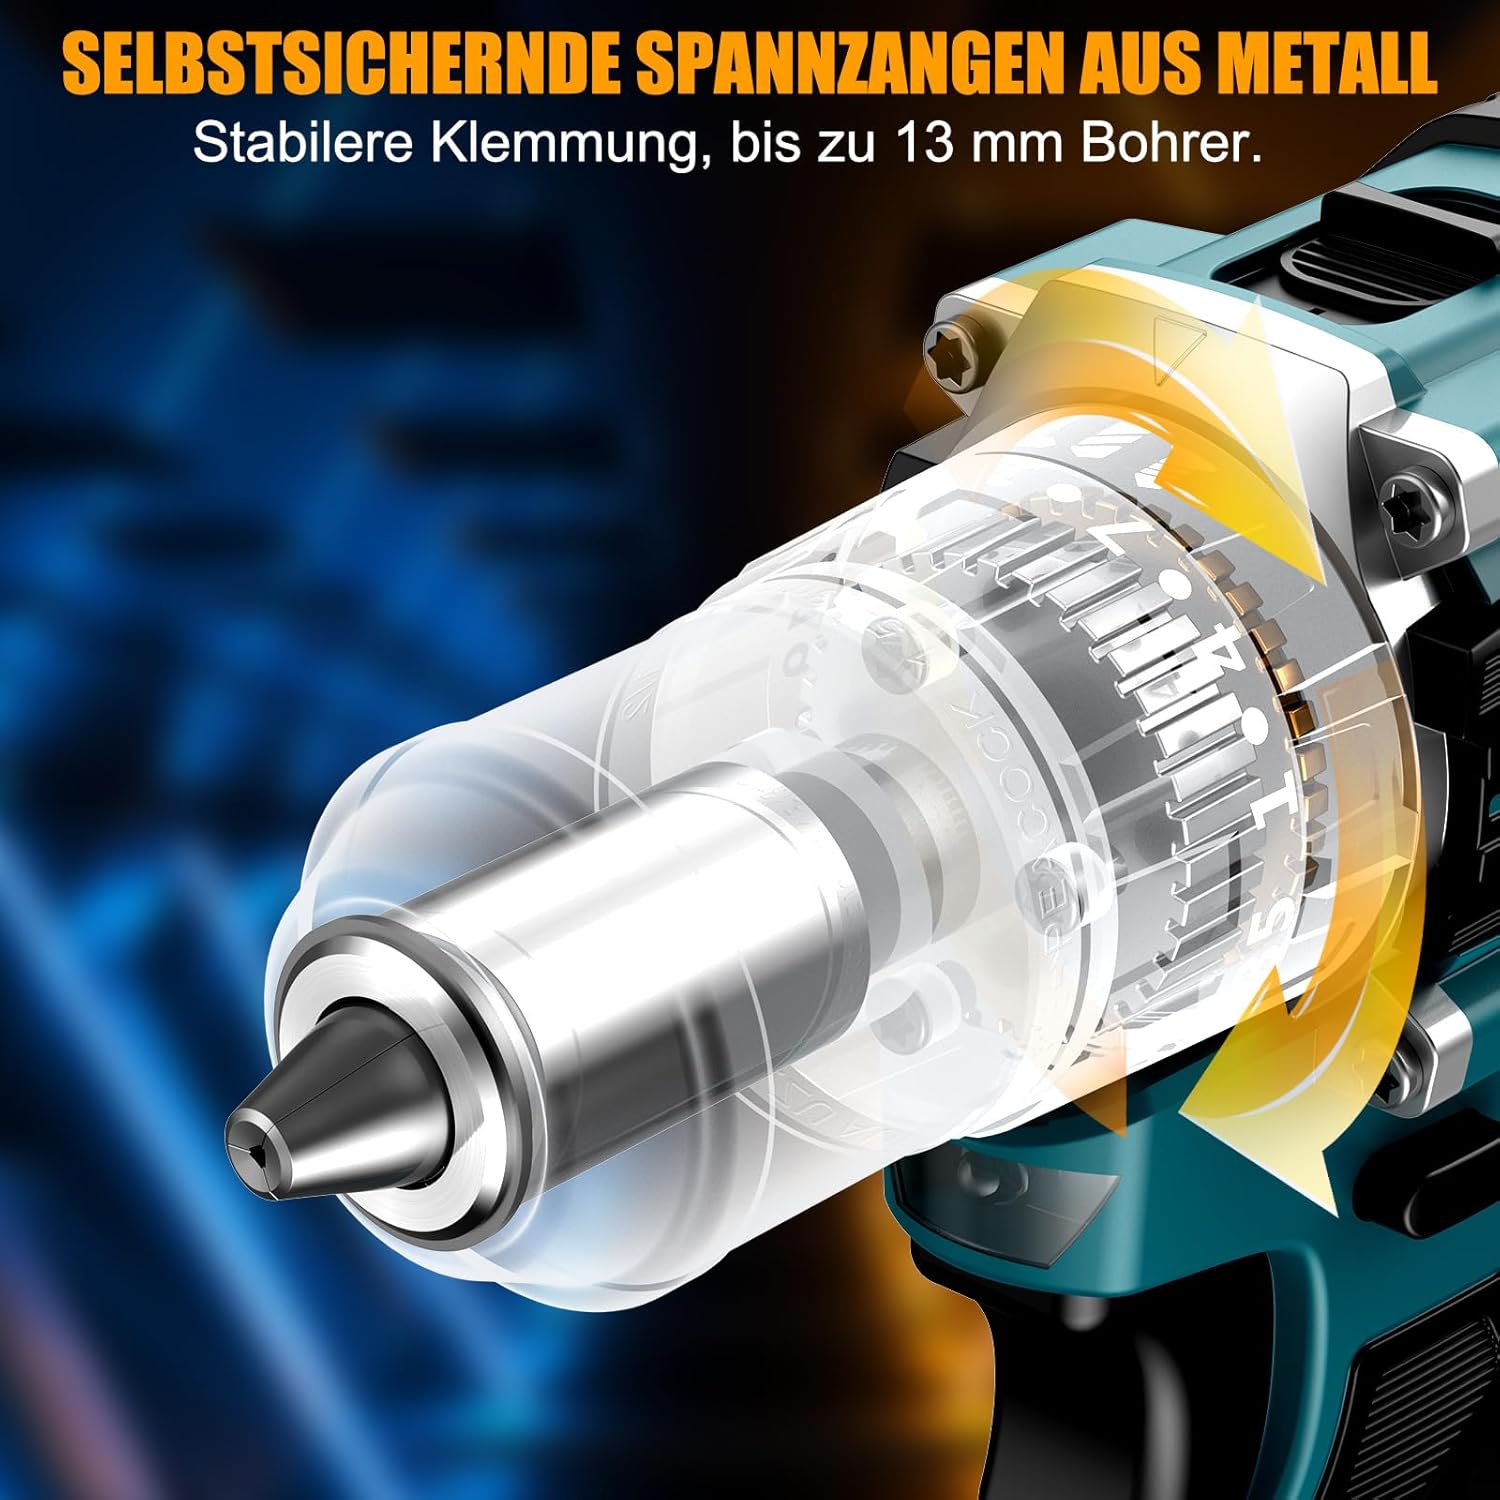
Rysunek 5.3: Szczegółowy view of the self-locking metal chuck, demonstrating its stable clamping mechanism capable of holding drill bits up to 13mm securely.
6. Instrukcja obsługi
6.1 Włączanie/wyłączanie i kontrola prędkości
- To turn the tool ON, press the trigger switch. The speed is variable; press the trigger further for higher speed.
- To turn the tool OFF, release the trigger switch.
- Zintegrowane światło robocze LED włącza się po naciśnięciu spustu, zapewniając widoczność w słabo oświetlonych miejscach.
6.2 Obrót do przodu/do tyłu
The forward/reverse selector switch is located above the trigger. Push it to the left for forward rotation (for screwdriving and drilling) and to the right for reverse rotation (for removing screws or freeing jammed bits). Ensure the tool is stopped before changing direction.
6.3 Speed Gear Selection
The drill features a 2-speed gear selector switch on top of the tool:
- Gear 1 (Low Speed, 0-650 RPM): Ideal for high-torque applications like driving large screws or drilling large holes.
- Gear 2 (High Speed, 0-1850 RPM): Suitable for fast drilling in softer materials and smaller diameter holes.
Always select the appropriate gear for the task. Change gears only when the tool is completely stopped.
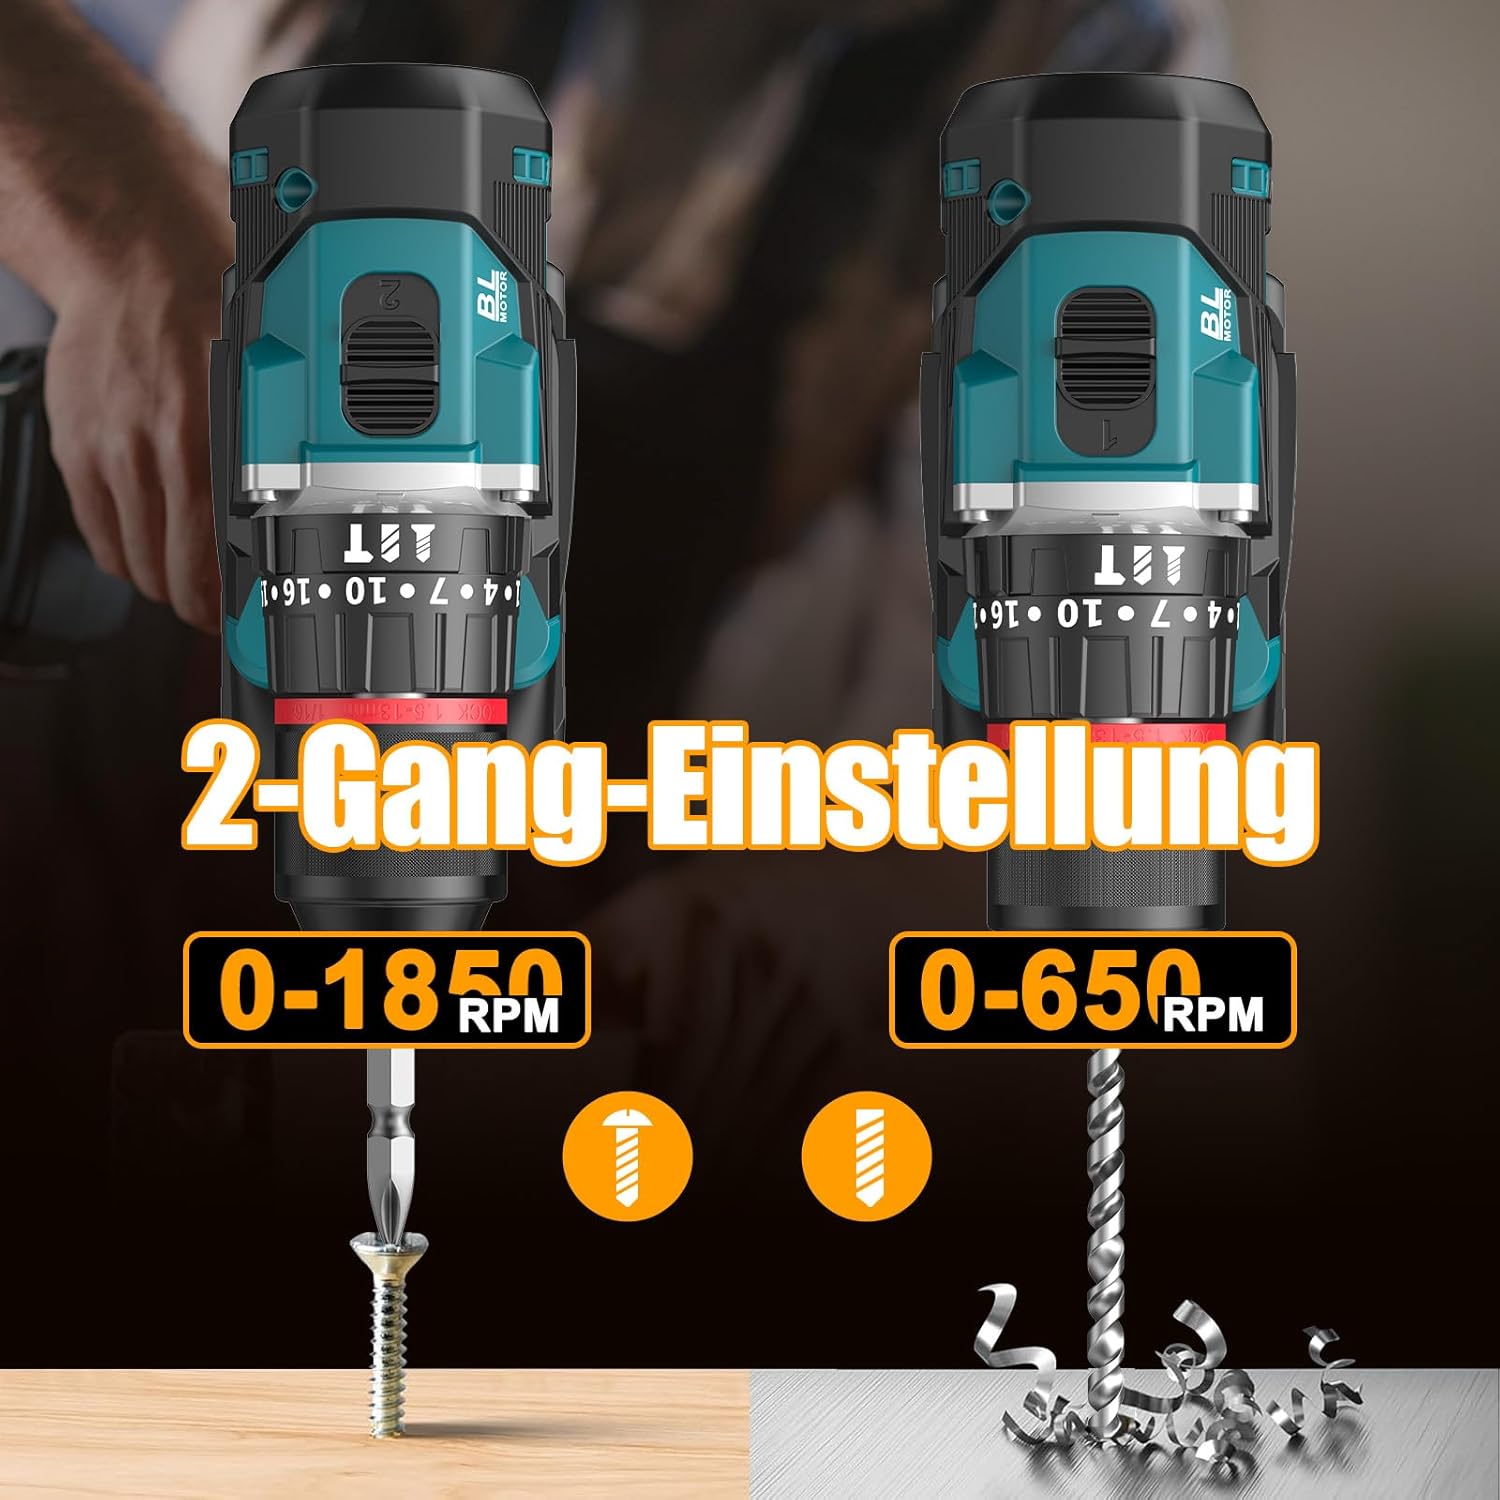
Image 6.1: An illustration demonstrating the two-speed gear settings: Gear 1 (0-650 RPM) for screwdriving and Gear 2 (0-1850 RPM) for drilling, allowing for optimal performance based on the application.
6.4 Regulacja momentu obrotowego i wybór trybu
The torque adjustment ring allows you to set the desired torque for screwdriving applications, preventing overtightening or stripping screws. The mode selector ring allows you to switch between different operating modes.
- Screwdriving Mode (Torque Settings 1-35): Use these settings to match the torque to the screw size and material. Lower numbers for smaller screws/softer materials, higher numbers for larger screws/harder materials.
- Tryb wiercenia (Ikona wiertła): For general drilling without impact. The clutch is disengaged, providing maximum torque.
- Tryb wiercenia udarowego (Ikona młotka): For drilling into masonry or concrete, providing a hammering action in addition to rotation.
The drill offers 35+3 settings, including 35 torque settings for screwdriving and 3 modes (screwdriving, drilling, impact drilling).

Image 6.2: A visual representation of the 35+3 torque and mode settings, indicating precise power control and a maximum torque of 55 N.m, suitable for various materials like wood, brick, plastic, and metal.
7. Konserwacja
7.1 Czyszczenie
- Przed przystąpieniem do czyszczenia lub konserwacji należy zawsze odłączyć akumulator.
- Aby zapobiec przegrzaniu, utrzymuj otwory wentylacyjne narzędzia w czystości.
- Użyj miękkiego, damp ściereczka do czyszczenia narzędzia casing. Nie należy używać silnych środków chemicznych ani ściernych środków czyszczących.
7.2 Przechowywanie
- Przechowuj narzędzie i akumulatory w chłodnym i suchym miejscu, z dala od bezpośredniego światła słonecznego i wilgoci.
- Store the tool in its carrying case to protect it from dust and damage.
- Przechowywać w miejscu niedostępnym dla dzieci.

Image 7.1: A person carrying the Conentool drill kit in its durable black carrying case, designed for convenient storage and transport of the tool and its accessories.
7.3 Pielęgnacja baterii
- Nie przechowuj baterii w stanie rozładowanym. Ładuj je regularnie, zwłaszcza jeśli nie są używane przez dłuższy czas.
- Unikaj wystawiania baterii na działanie ekstremalnych temperatur.
- Nie próbuj demontować ani modyfikować akumulatora.
8. Rozwiązywanie Problemów
| Problem | Możliwa przyczyna | Rozwiązanie |
|---|---|---|
| Narzędzie nie uruchamia się | Akumulator nie jest naładowany lub jest nieprawidłowo zainstalowany. | Sprawdź, czy akumulator jest całkowicie naładowany i prawidłowo włożony. |
| Zmniejszona moc lub prędkość | Poziom naładowania akumulatora jest niski. | Naładuj baterię. |
| Bit ślizga się w uchwycie | Uchwyt nie jest wystarczająco dokręcony. | Tighten the chuck firmly around the bit. Ensure the bit shank is clean. |
| Przegrzanie | Zablokowane otwory wentylacyjne; ciągłe, intensywne użytkowanie. | Wyczyść otwory wentylacyjne. W przypadku dłuższego użytkowania odczekaj, aż narzędzie ostygnie. |
9. Specyfikacje
| Funkcja | Specyfikacja |
|---|---|
| Numer modelu | ebvc-sd-de |
| Tomtage | 21 wolty |
| Typ baterii | Litowo-jonowy |
| Pojemność baterii | 2500 mAh (każdy) |
| Maksymalny moment obrotowy | 55 Nm |
| Ustawienia momentu obrotowego | 35 + 3 Modes (Screwdriving, Drilling, Impact Drilling) |
| Prędkość bez obciążenia (bieg 1) | 0-650 obr./min. |
| Prędkość bez obciążenia (bieg 2) | 0-1850 obr./min. |
| Rozmiar uchwytu | 13 mm (3/8 inch) Keyless |
| Wymiary produktu | Wymiary 35 x 31 x 10 cm |
| Waga (z baterią) | 1.5 kilograma |
10. Gwarancja i wsparcie
Conentool products are manufactured to high-quality standards. In the unlikely event of a defect due to material or manufacturing fault, please contact your retailer or Conentool customer service. Please retain your proof of purchase for warranty claims.
For further assistance, technical support, or to inquire about spare parts, please refer to the contact information provided with your purchase or visit the official Conentool webstrona.


