1. Wprowadzenie
Thank you for choosing the Cherry KW 7100 Mini Multi-Device Compact Keyboard. This manual provides essential information for setting up, operating, and maintaining your new keyboard. Designed for versatility and portability, this keyboard offers seamless connectivity across multiple devices.
2. Co znajduje się w pudełku
- Cherry KW 7100 Mini Multi-Device Compact Keyboard
- USB-C to USB-A Charging/Connection Cable
- 2 baterie AAA
- 2.4 GHz Wireless Nano Receiver (stored magnetically in the keyboard)
- Etui transportowe
- Instrukcja obsługi

Rysunek 1: Widok z góry na dół view of the Cherry KW 7100 Mini Keyboard.
3. Konfiguracja
3.1. Instalacja baterii
- Znajdź komorę baterii na spodzie klawiatury.
- Odsuń pokrywę komory baterii.
- Włóż dwie baterie AAA, zwracając uwagę na prawidłową biegunowość (+/-).
- Dokładnie zamknij pokrywę komory baterii.
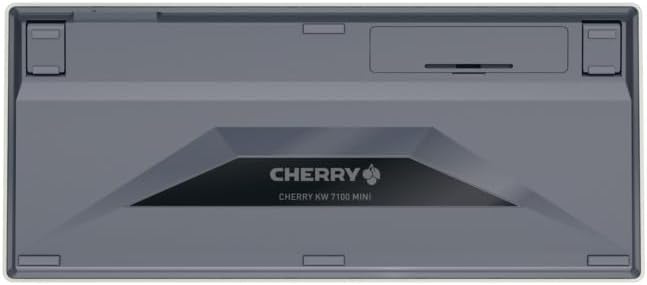
Figure 2: Underside of the keyboard with the battery compartment.
3.2. Podłączanie klawiatury
The Cherry KW 7100 Mini supports three connection methods: Bluetooth, 2.4 GHz Wireless, and Wired USB-C.
3.2.1. Bluetooth Connection (Up to 3 Devices)
- Włącz klawiaturę za pomocą wyłącznika zasilania znajdującego się z boku.
- Press and hold one of the Bluetooth channel keys (F1, F2, or F3) for 3-5 seconds until the corresponding LED indicator blinks rapidly. This indicates pairing mode.
- On your device (laptop, smartphone, tablet), navigate to Bluetooth settings and search for available devices.
- Select "Cherry KW 7100" from the list to pair. The LED will stop blinking and remain solid for a few seconds upon successful connection.
- Repeat for up to two additional devices using the other Bluetooth channel keys (F1, F2, or F3).
3.2.2. Połączenie bezprzewodowe 2.4 GHz
- Locate the 2.4 GHz wireless nano receiver, typically stored magnetically in a slot on the underside of the keyboard.
- Insert the nano receiver into an available USB-A port on your computer.
- Włącz klawiaturę za pomocą włącznika zasilania. Klawiatura powinna automatycznie połączyć się z odbiornikiem.
3.2.3. Połączenie przewodowe USB-C
- Connect one end of the provided USB-C cable to the USB-C port on the keyboard.
- Connect the other end of the USB-C cable to an available USB-A port on your computer.
- The keyboard will function as a wired keyboard.
Video 1: Demonstrating the setup and typing experience of the Cherry KW 7100 Mini Keyboard.
4. Obsługa klawiatury
4.1. Przełączanie między podłączonymi urządzeniami
To switch between paired Bluetooth devices, simply press the corresponding Bluetooth channel key (F1, F2, or F3) that your device is paired to. The keyboard will automatically connect to the selected device.
4.2. Function Keys (FN)
The keyboard features a dedicated FN key, typically located near the right Shift key. This key, in combination with other keys, activates secondary functions such as media controls, screen brightness, and other system commands. Refer to the keycap legends for specific FN key combinations.
4.3. Wskaźniki LED
LED indicators on the keyboard provide information about its status:
- Bluetooth Channel LEDs (F1, F2, F3): Indicate the currently active Bluetooth connection or pairing mode.
- Dioda LED Caps Lock: Świeci się, gdy klawisz Caps Lock jest aktywny.
- Dioda LED stanu baterii: Wskazuje niski poziom naładowania baterii.
4.4. Regulowane stopy
The keyboard is equipped with stable, fold-out feet on the underside. These allow you to adjust the typing angle for improved ergonomics and comfort.
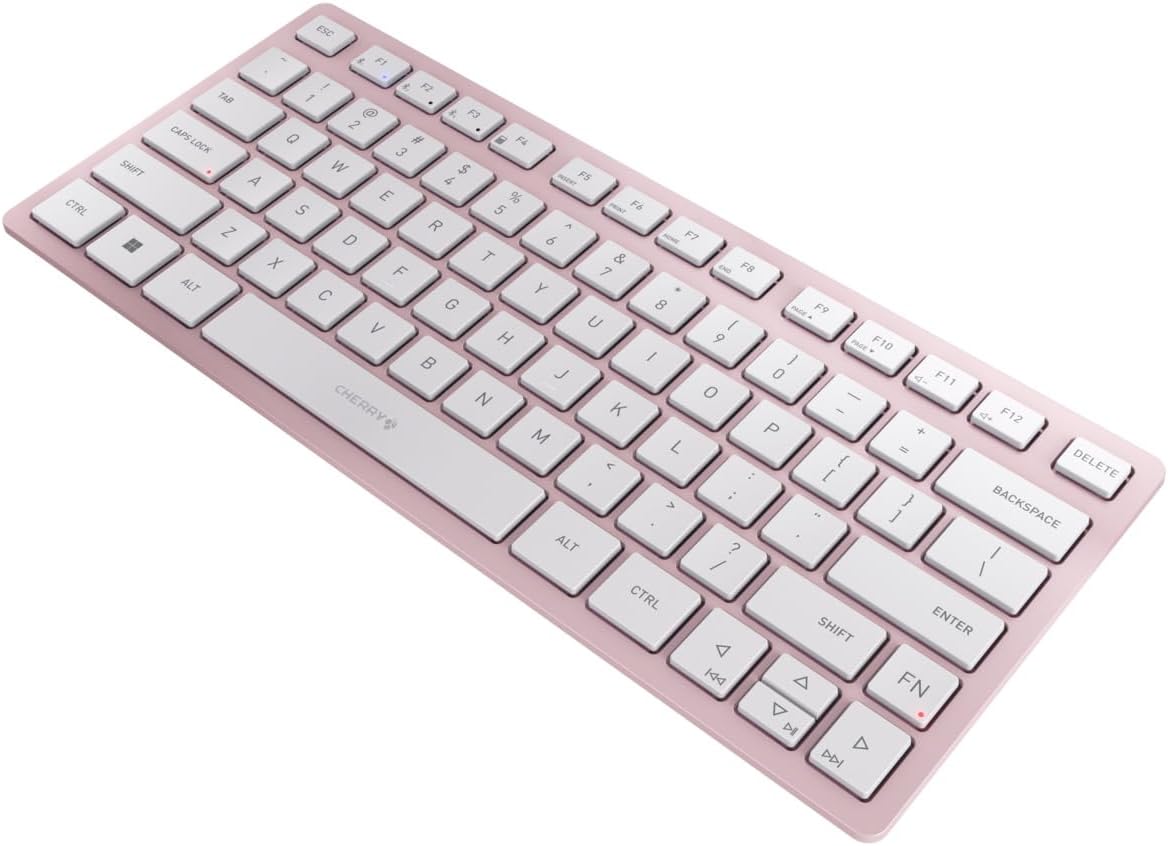
Rysunek 3: Kątowy view of the keyboard, highlighting its slim profile.

Rysunek 4: Strona view showing the adjustable feet extended for an ergonomic typing angle.
5. Konserwacja
5.1. Czyszczenie
To clean your keyboard, gently wipe the keycaps and surface with a soft, lint-free cloth. For stubborn dirt, slightly dampen the cloth with water or a mild, non-abrasive cleaning solution. Avoid excessive moisture and do not spray cleaners directly onto the keyboard.
5.2. Przechowywanie
When not in use, especially during travel, store the keyboard in its included carrying case to protect it from dust, scratches, and minor impacts.

Figure 5: The keyboard stored in its protective carrying case.
6. Rozwiązywanie Problemów
6.1. Klawiatura nie łączy się
- Sprawdź, czy klawiatura jest włączona.
- Sprawdź baterie i wymień je w razie potrzeby.
- For Bluetooth, ensure the correct channel (F1, F2, or F3) is selected and the keyboard is in pairing mode (blinking LED).
- For 2.4 GHz wireless, ensure the nano receiver is securely plugged into a USB-A port.
- Try connecting via the USB-C cable to rule out wireless issues.
- Uruchom ponownie urządzenie i spróbuj ponownie sparować.
6.2. Klawisze nie reagują
- Check the connection as described above.
- Upewnij się, że pod klawiszami nie ma żadnych zanieczyszczeń.
- Jeśli korzystasz z połączenia przewodowego, wypróbuj inny port USB lub kabel.
6.3. Krótki czas pracy baterii
- Upewnij się, że używasz nowych, wysokiej jakości baterii AAA.
- Wyłączaj klawiaturę, gdy jej nie używasz, aby oszczędzać baterię.
7. Specyfikacje
| Funkcja | Specyfikacja |
|---|---|
| Nazwa modelu | KW 7100 |
| Numer modelu przedmiotu | JK-7100US-19 |
| Marka | Wiśniowy |
| Technologia łączności | Bluetooth 5.1 (3 channels), 2.4 GHz Wireless, USB-C Wired |
| Kompatybilne urządzenia | Laptop, smartfon, tablet |
| Opis klawiatury | Compact, Multi-Device |
| Kluczowy mechanizm | Mechanizm nożycowy CHERRY SX |
| Źródło zasilania | 2 baterie AAA |
| Szyfrowanie | AES-128 |
| Wymiary produktu | 11.6 x 5.1 x 0.6 cala |
| Waga przedmiotu | 1.4 funta |
| Tworzywo | Metal, Plastik |
| Kolor | Kwiat wiśni |
8. Gwarancja i wsparcie
This product is covered by Cherry's standard manufacturer warranty. For detailed warranty information, technical support, or service inquiries, please visit the official Cherry webodwiedź witrynę lub skontaktuj się bezpośrednio z działem obsługi klienta.
Producent: Wiśniowy
Webstrona: www.cherry.de


