1. Wprowadzenie
Thank you for choosing the AQQA Aquarium Heater. This device is designed to maintain a stable and optimal temperature in your aquarium, ensuring a healthy environment for your aquatic life. Please read this manual thoroughly before installation and operation to ensure proper use and safety.
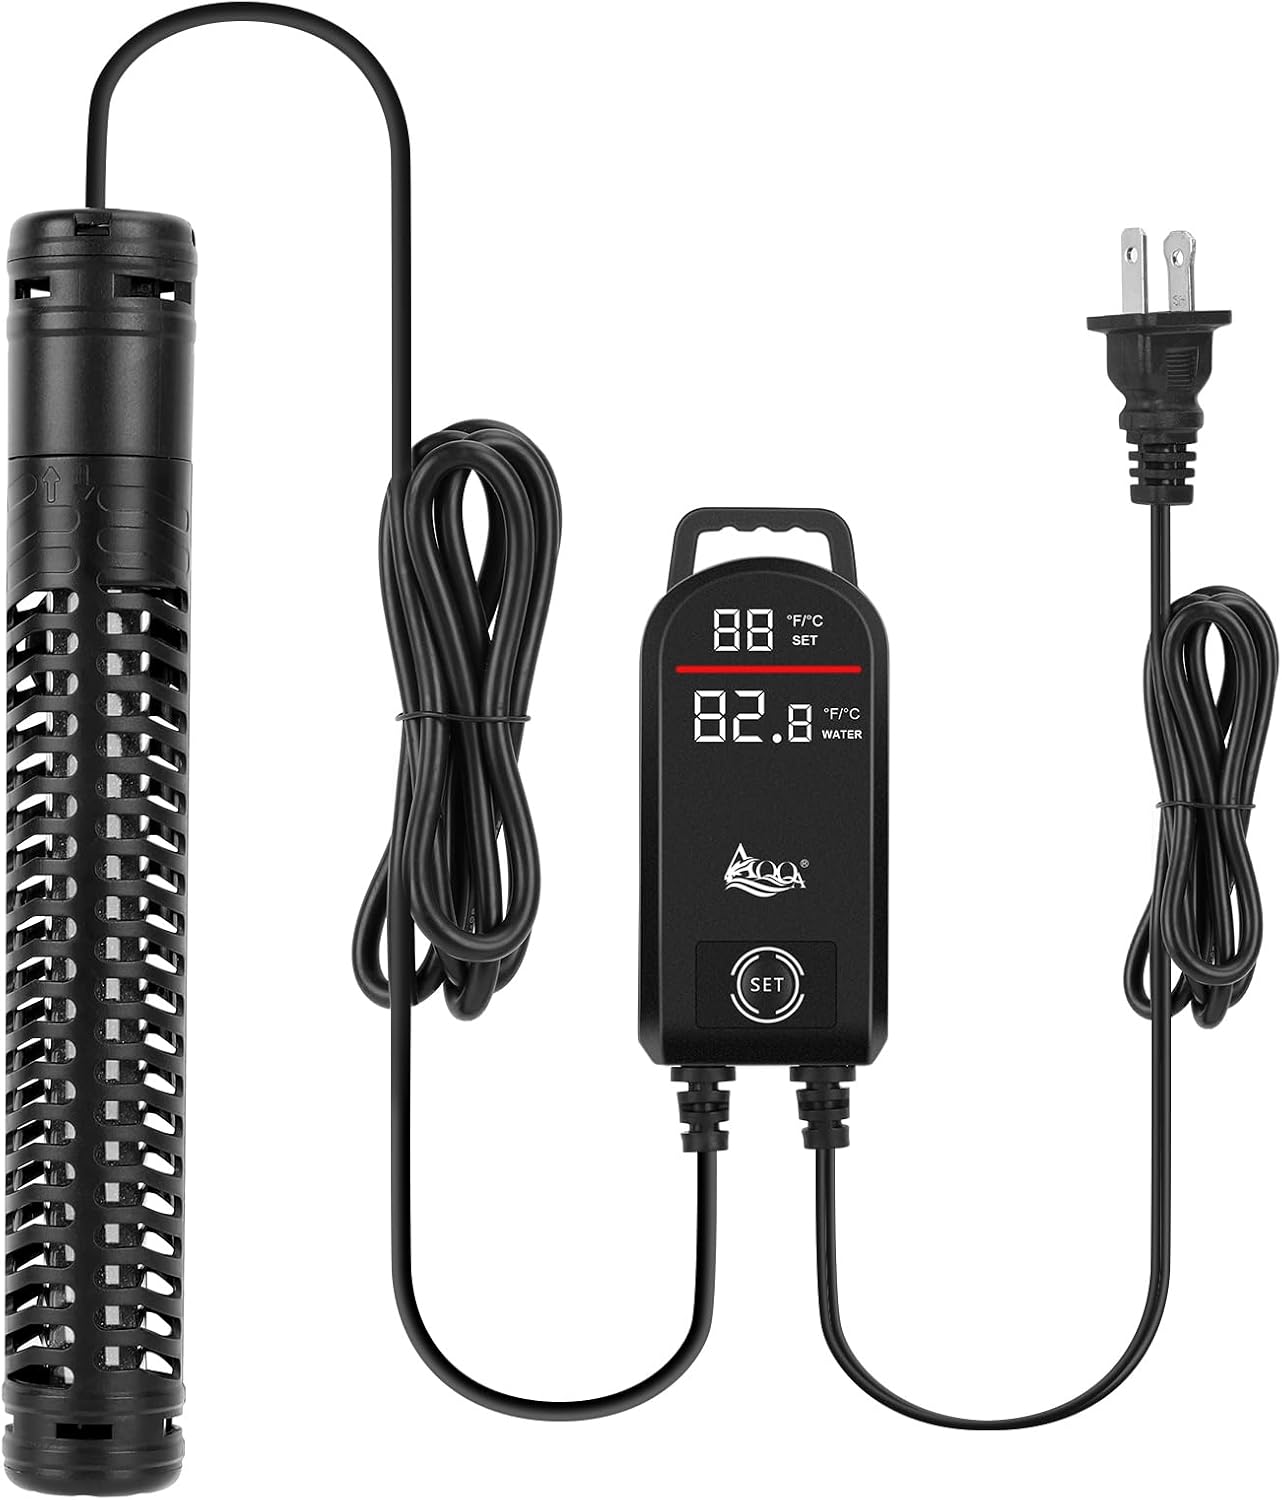
Image 1.1: The AQQA Aquarium Heater and its external temperature controller.
2. Informacje dotyczące bezpieczeństwa
Adhering to these safety guidelines is crucial for preventing accidents and ensuring the longevity of your heater.
- Full Immersion: The heater must be completely immersed in water before being powered on. Operating the heater out of water will trigger the dry burning protection and can damage the unit.
- Wyłącz zasilanie przed przystąpieniem do pracy: Always unplug the heater from the power outlet before performing any maintenance, cleaning, or handling the unit.
- Okres schładzania: After unplugging, allow the heater to cool down completely in the water before removing it. This prevents thermal shock and potential damage.
- Regularne czyszczenie: Scale accumulation on the heating rod can affect heat dissipation and pose safety risks. Regularly disassemble the heating rod shell to clean the rod body.
- Zabezpieczenie przed przegrzaniem: The heater is equipped with an over-temperature protection system. If the water temperature exceeds the set temperature by 3℉/3℃, the display will flash, and heating will stop until the temperature normalizes.
- Ochrona przed suchym spalaniem: If the heating rod leaves the water surface by 2.4 inches or more, it will automatically power off and display an 'E0' error code. The heater will resume normal operation once fully re-immersed.
- Electricity Leakage Protector: This device includes an electricity leakage protector for enhanced safety.
- Umieszczenie: Ensure the heater is placed in an area with good water circulation for accurate temperature readings and even heat distribution.

Image 2.1: Illustration of correct heater immersion in an aquarium.
3. Funkcje produktu
The AQQA Aquarium Heater incorporates several advanced features for reliable and efficient temperature control:
- Szeroki zakres temperatur: Adjustable from 59℉-93℉ (15℃-34℃).
- Intelligent Controller: Automatically heats when water temperature is 1℉/1℃ below the set temperature and stops when the set temperature is reached.
- Clear Indicators: A red light indicates active heating, while a green light signifies that the set temperature has been reached.
- Funkcja pamięci: Retains the last set temperature even after a power outage, eliminując potrzebę ponownego ustawiania.
- Trwała konstrukcja: Features an ABS removable anti-scald shell, high purity nickel chromium heating wire, and a thickened quartz glass tube for safety and longevity.

Image 3.1: Diagram showing the internal components of the heater, including the ABS shell, temperature probe, heating wire, and quartz tube.
4. Specyfikacje
| Funkcja | Opis |
|---|---|
| Numer modelu | AQ068 |
| Opcje zasilania | 300 W, 500 W, 800 W, 1000 W, 1200 W |
| Tomtage/Częstotliwość | AC 110V-120V/60Hz (US Standard) |
| Długość przewodu | 3.6 stopy + 5.5 stopy (1.1 m + 1.7 m) |
| Application Range (Gallons) | 300W: 40-75 Gal (151-283L) 500W: 60-120 Gal (227-454L) 800W: 80-210 Gal (302-795L) 1000W: 135-235 Gal (511-890L) 1200W: 155-265 Gal (586-1003L) |
| Dokładność temperatury | ±1℉ / ±1℃ |
| Zakres temperatur | 59℉-93℉ / 15℃-34℃ |
| Wymiary kontrolera | 4.5in x 2in x 1in (11.5cm x 5cm x 2.5cm) for 300W/500W/800W 5.3in x 2.9in x 1in (13.5cm x 7.5cm x 2.5cm) for 1000W/1200W |
| Item Dimensions (Heater) | 11 x 2 x 2 inches (approximate for 300W) |
| Zawarte komponenty | 1*heater |

Image 4.1: Detailed specifications and dimensions for various wattage modele.
5. Konfiguracja i instalacja
Follow these steps to correctly install your AQQA Aquarium Heater:
- Rozpakować: Ostrożnie wyjmij grzejnik i sterownik z opakowania. Sprawdź, czy nie ma widocznych uszkodzeń.
- Umieszczenie: Position the heater fully submerged in your aquarium. Ensure it is placed vertically or tilted at approximately 30 degrees, in an area with good water flow. This helps in even heat distribution and accurate temperature sensing.
- Bezpieczny: Use the provided suction cups to securely attach the heater to the inside wall of your aquarium.
- Umiejscowienie kontrolera: Mount the external controller in a dry, easily accessible location outside the aquarium. Ensure the power cord and sensor cable are routed safely, avoiding kinks or damage.
- Initial Immersion: Before plugging in the heater, ensure it has been fully immersed in the aquarium water for at least 15-20 minutes. This allows the heater's internal components to acclimate to the water temperature, preventing thermal shock.
- Włączanie: Once fully immersed and acclimated, plug the heater's power cord into a suitable electrical outlet.

Image 5.1: Recommended heater placement with a 30-degree tilt for optimal performance.
6. Instrukcja obsługi
Operating your AQQA Aquarium Heater is straightforward:
- Włączanie: After proper installation and immersion, plug the heater into a power outlet. The controller display will illuminate.
- Ustaw temperaturę: Press the 'SET' button on the controller. Each press will increase the set temperature by 1℉ (or 1℃). The temperature range loops between 59℉ (15℃) and 93℉ (34℃).
- Konwersja Fahrenheita/Celsjusza: To switch between Fahrenheit (℉) and Celsius (℃), press and hold the 'SET' button for 5 seconds.
- Monitorowanie: The controller displays both the set temperature (top) and the real-time water temperature (bottom).
- Wskaźnik ogrzewania: A red light line on the controller indicates that the heater is actively heating the water.
- Wskaźnik osiągnięcia temperatury: A green light line indicates that the aquarium water has reached the set temperature, and the heater has stopped heating.

Obraz 6.1: Koniecview of the intelligent controller display, showing set temperature, real-time temperature, and indicator lights.

Image 6.2: Heater operation in both freshwater and saltwater aquariums, illustrating heating and constant temperature indicators.
7. Konserwacja
Regular maintenance ensures optimal performance and extends the lifespan of your heater:
- Częstotliwość czyszczenia: Due to the formation of scale in water over time, accumulation can affect heat dissipation and lead to safety issues. We recommend regularly disassembling the heating rod shell to clean the rod body.
- Procedura czyszczenia:
- Unplug the heater and allow it to cool completely while still submerged.
- Carefully remove the heater from the aquarium.
- Gently twist and pull the outer protective shell to separate it from the heating element.
- Clean the heating element and the inside of the protective shell using a soft brush or cloth and warm water. For stubborn scale, a mild aquarium-safe descaler can be used, followed by thorough rinsing.
- Reassemble the heater, ensuring all parts are securely fitted.
- Return the heater to the aquarium and follow the 'Initial Immersion' step from Section 5 before plugging it back in.

Image 7.1: Visual guide for disassembling the heater for cleaning.
8. Rozwiązywanie Problemów
Aby poznać typowe problemy i ich rozwiązania, zapoznaj się z tą sekcją:
| Problem | Możliwa przyczyna | Rozwiązanie |
|---|---|---|
| Heater not heating / No red light | Moc outage; Heater reached set temperature; Heater not fully immersed; Faulty unit. | Check power connection. Verify set temperature is above current water temperature. Ensure full immersion. If issues persist, contact support. |
| Display shows 'E0' | Dry burning protection activated (heater out of water). | Immediately unplug the heater. Ensure the heater is fully submerged in water. Allow it to cool, then plug it back in. |
| Water temperature flashing on display | Over-temperature protection activated (water temperature is 3℉/3℃ higher than set temperature). | The heater has stopped heating automatically. Monitor the temperature; it should return to normal once the water cools. Check for external heat sources or incorrect set temperature. |
| Niespójna temperatura | Poor water circulation; Heater placement; Scale buildup. | Ensure adequate water flow around the heater. Adjust heater placement. Clean the heater regularly as per maintenance instructions. |
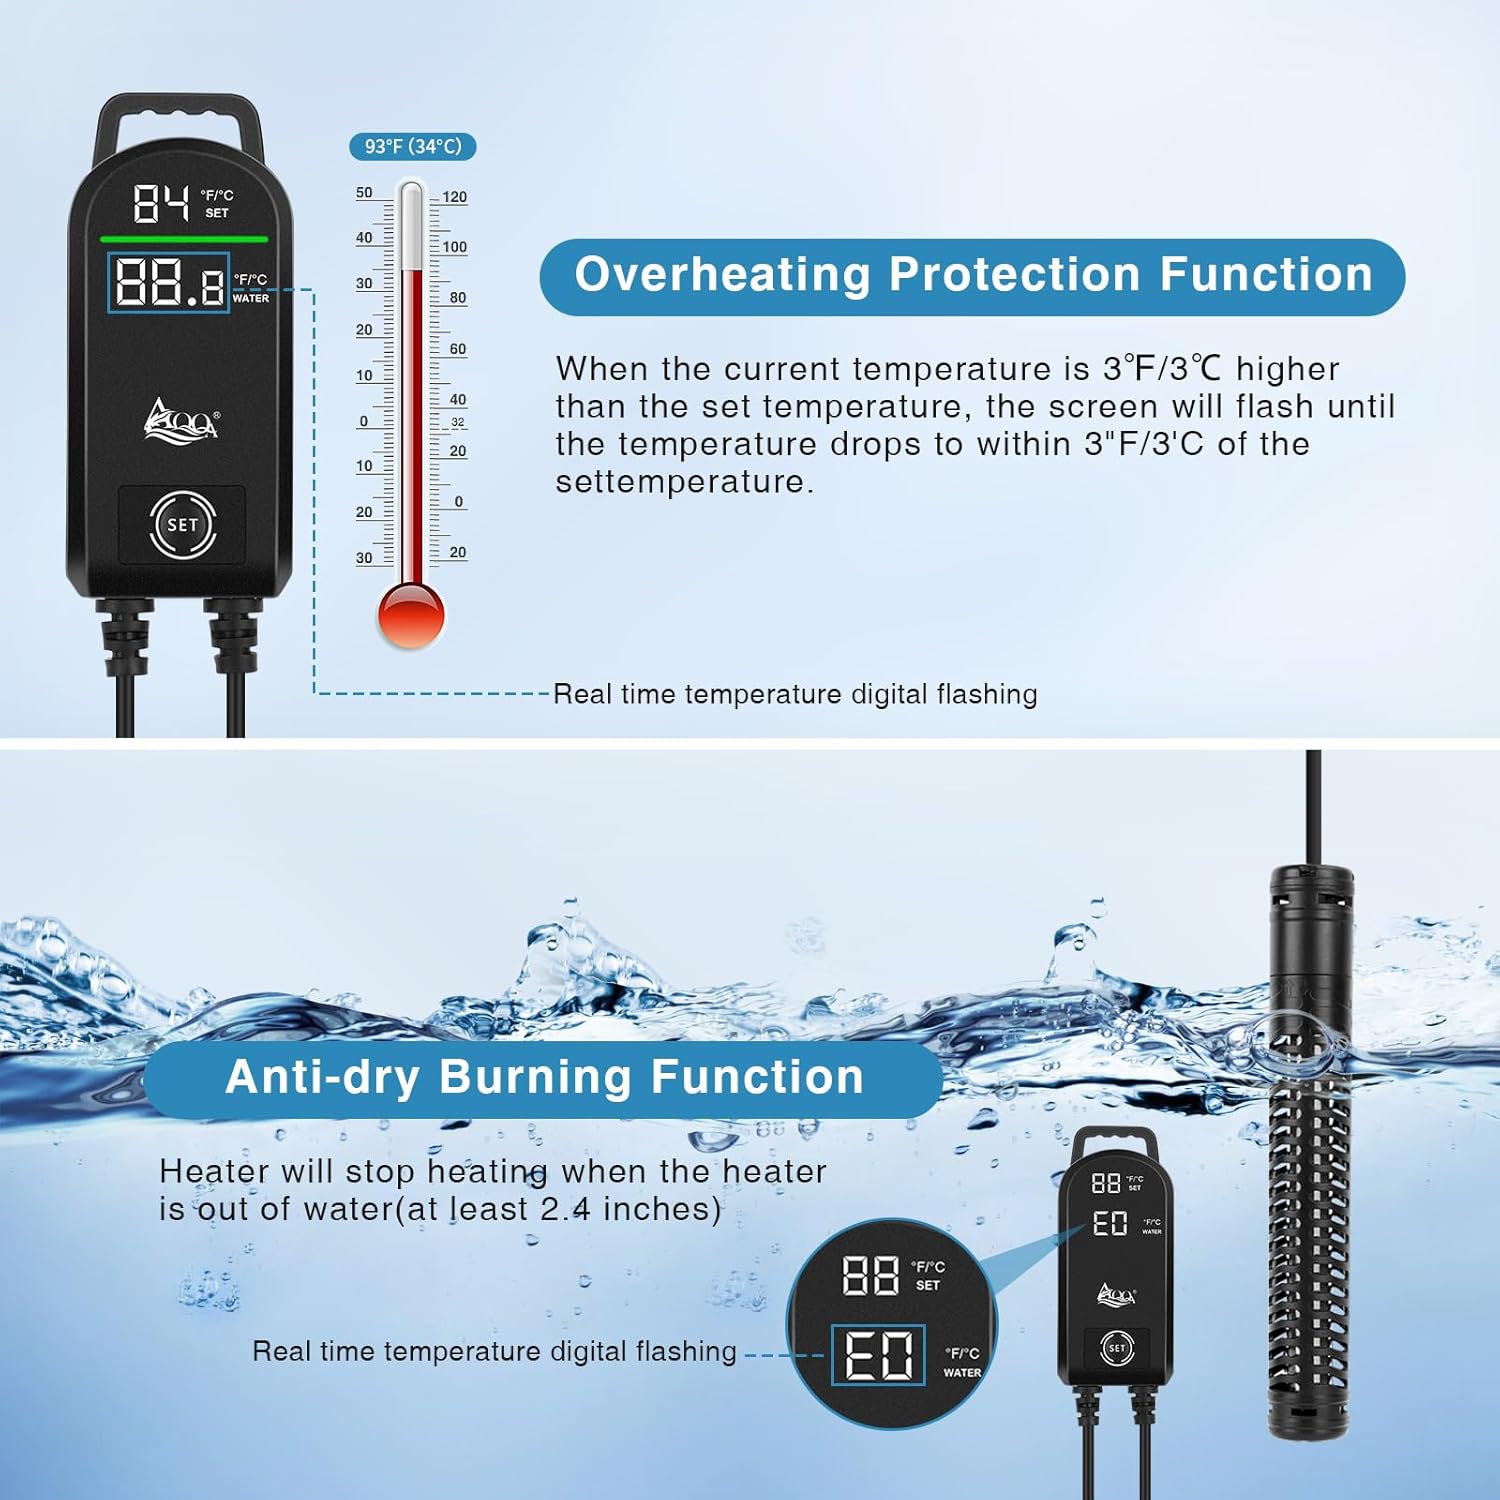
Image 8.1: Visual representation of the overheating protection (flashing temperature) and dry burning protection (E0 error code).
9. Gwarancja i wsparcie
Your AQQA Aquarium Heater comes with a 1-letnia gwarancja producenta od daty zakupu.
This warranty covers defects in materials and workmanship under normal use. It does not cover damage resulting from misuse, accident, modification, or unauthorized repair.
For warranty claims, technical support, or any questions regarding your product, please contact AQQA customer service through the retailer's platform or the official AQQA website. Please have your purchase receipt and product model number (AQ068) available when contacting support.


