1. Koniec produktuview
The FITORCH V10 is a compact and powerful Everyday Carry (EDC) flashlight designed for versatile use. It features a high-brightness main LED, multi-color side lights including UV, red, green, and blue, and a magnetic tail cap. This manual provides instructions for safe and effective operation.

Image 1.1: FITORCH V10 EDC Flashlight, showing the device, a USB-C charging cable, and a keyring. The flashlight is compact and features two main light emitters and side lights.

Obraz 1.2: Koniecview of FITORCH V10 features, including high brightness, beeping warning, multi-source sidelights, USB-C charging, magnetic adsorption, and mini portable design.
2. Zawartość opakowania
Sprawdź, czy w opakowaniu znajdują się wszystkie elementy:
- 1 x FITORCH V10 EDC Flashlight
- Kabel ładujący 1 x USB-C
- 1 x kluczowy pierścień
- 1 x Instrukcja obsługi (ten dokument)
3. Konfiguracja i ładowanie
3.1 Pierwsze ładowanie
Before first use, fully charge the flashlight. The FITORCH V10 features a built-in 1000mAh rechargeable battery.
- Znajdź port ładowania USB-C na urządzeniu.
- Podłącz dołączony kabel USB-C do latarki i kompatybilnego źródła zasilania USB (np. komputera, zasilacza sieciowego).
- Podczas ładowania będzie migać czerwona dioda.
- Po pełnym naładowaniu kontrolka zaświeci się ciągłym zielonym światłem.
Charging time is approximately 120-180 minutes (2-3 hours).

Image 3.1: Illustration of the FITORCH V10's internal 1000mAh built-in battery, highlighting its capacity for extended use.

Image 3.2: The bottom right panel shows the USB-C charging port and the indicator lights: red flashing for charging, green solid for full charge.
4. Instrukcja obsługi
The FITORCH V10 features two main buttons: a Power button (left) and a Mode button (right).
4.1 Działanie głównego światła
The main light provides up to 1000 lumens of brightness with multiple modes.
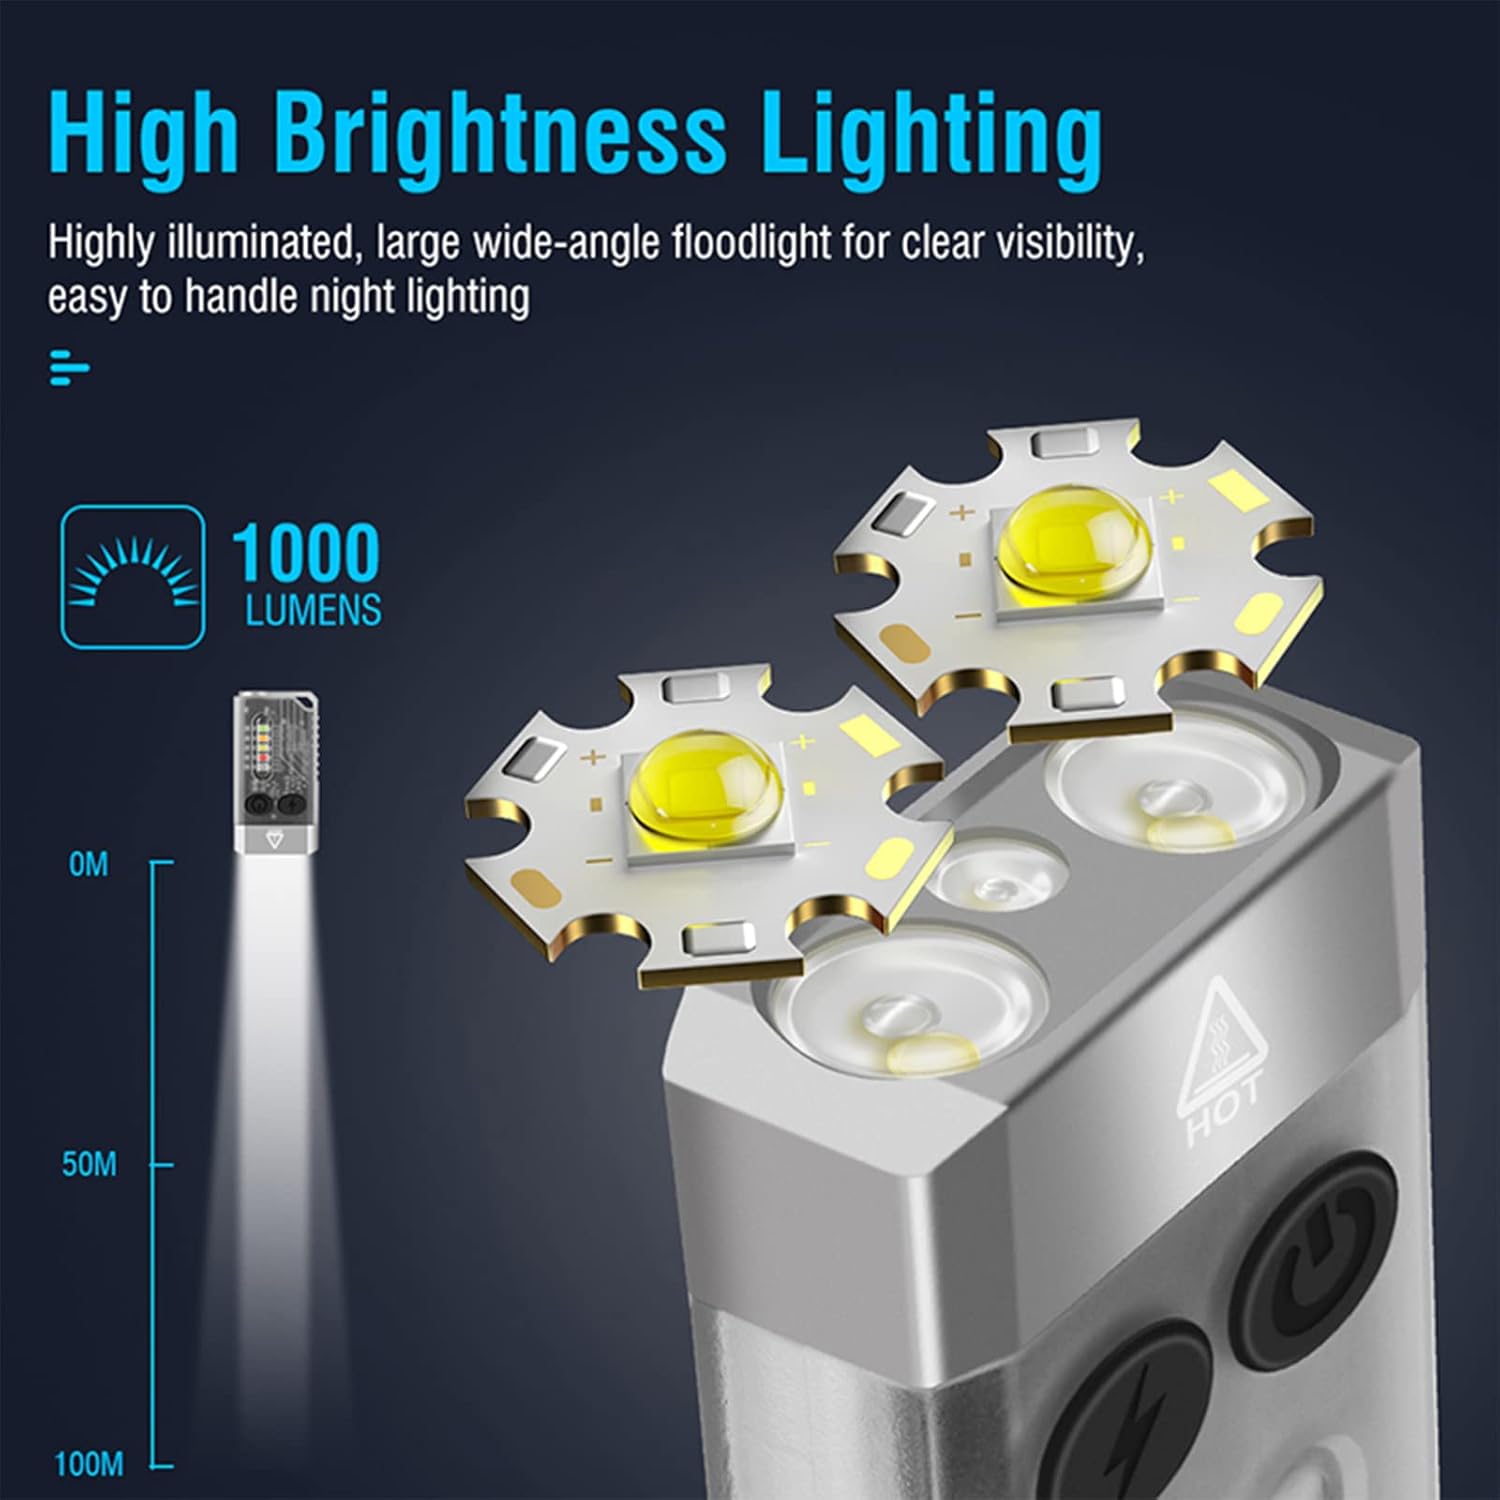
Image 4.1: Illustration of the FITORCH V10's high brightness main light, capable of 1000 lumens and projecting light up to 100 meters.
- Włącz/wyłącz: Double-click the Power button to turn the main light ON. Long press the Power button to turn it OFF.
- Tryby przełączania: While the main light is ON, click the Power button to cycle through High, Medium, Low, and Economic modes.
- Tryb turbo: Long press the Power button from any state to activate Turbo mode. Release the button to turn off Turbo mode.
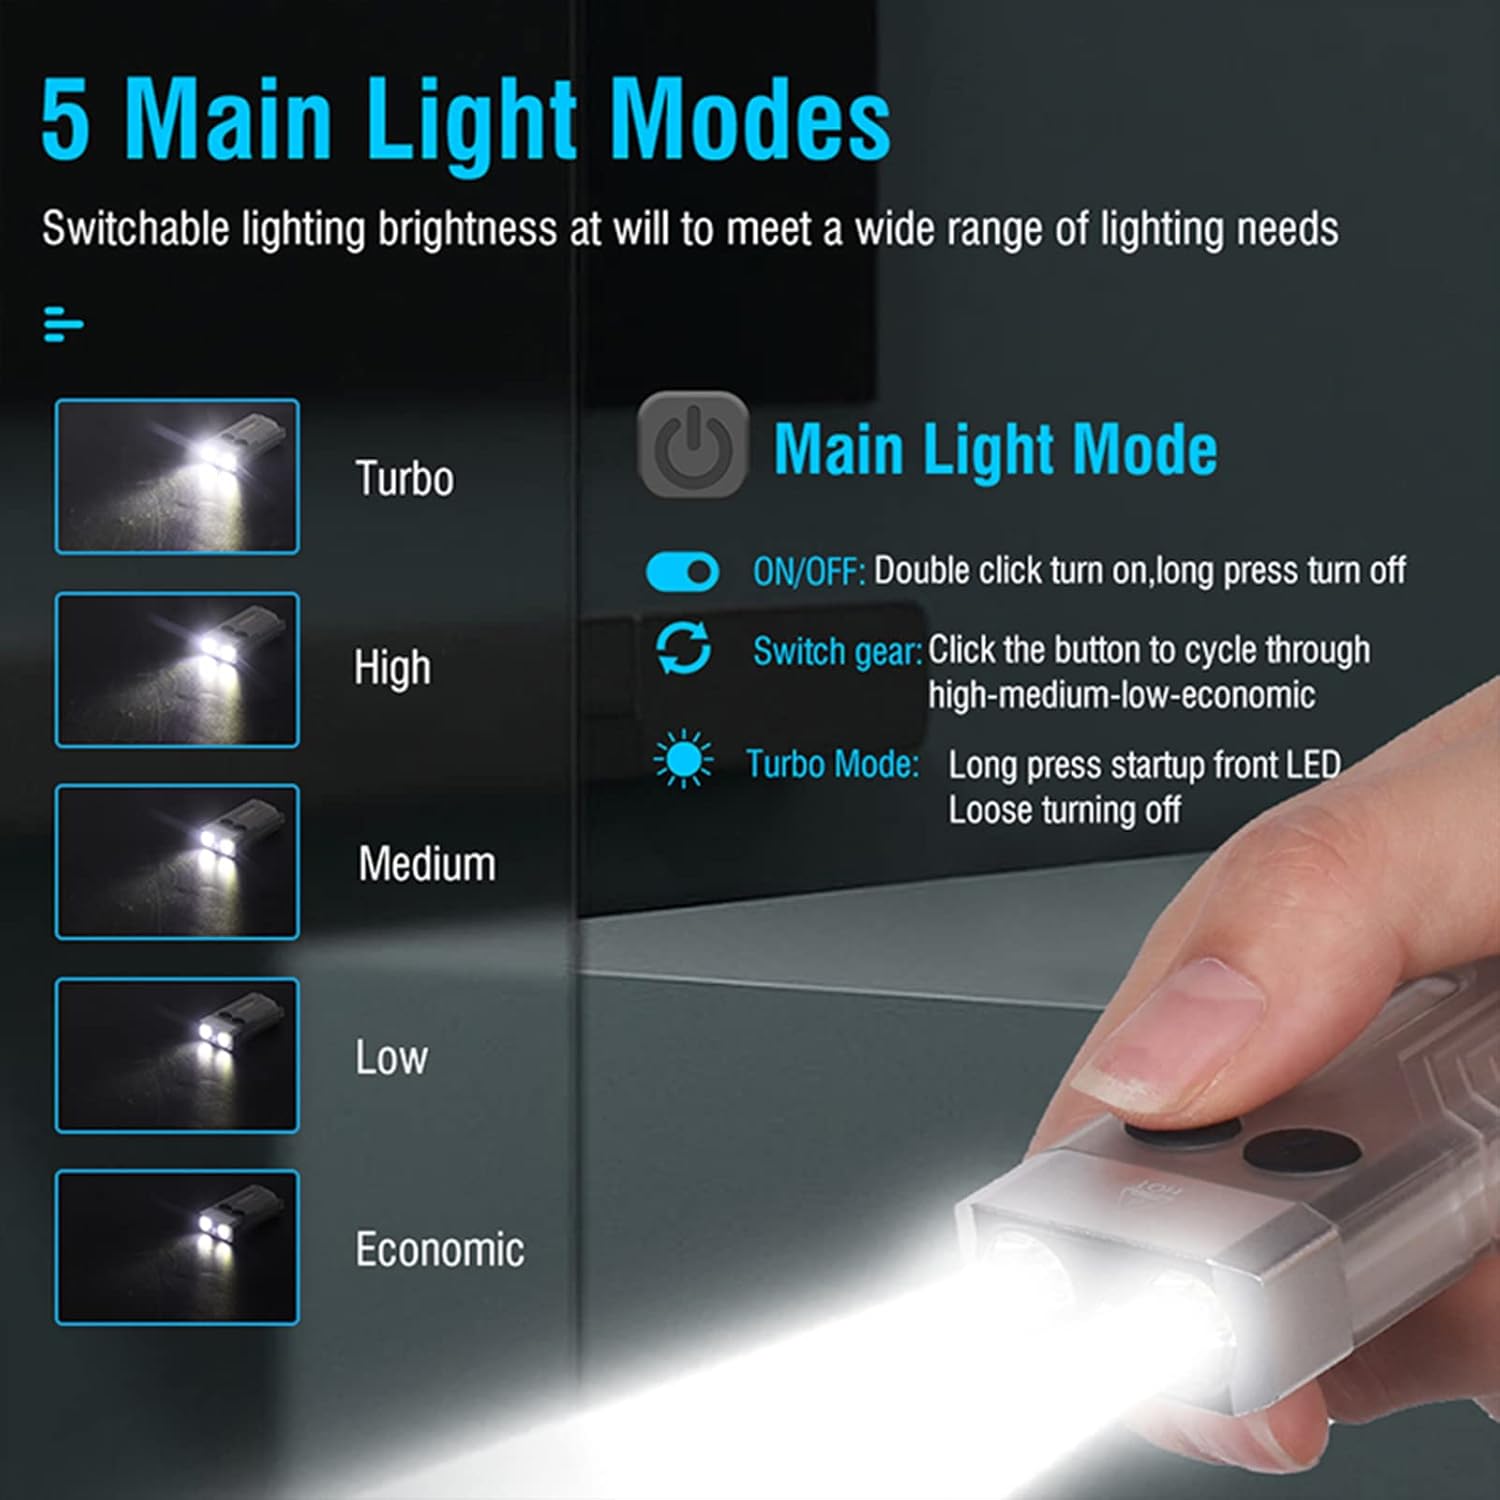
Image 4.2: Diagram illustrating the 5 main light modes (Turbo, High, Medium, Low, Economic) and their activation methods using the Power button.
4.2 Działanie świateł bocznych
The side lights offer various colors and functions, including UV light.
- Włącz/wyłącz: Double-click the Mode button to turn the side light ON. Long press the Mode button to turn it OFF.
- Tryby przełączania: While the side light is ON, click the Mode button to cycle through White, Warm, Green, Red, Blue, Red Flash, Red & Blue Flash.
- Tryb UV: Triple-click the Mode button from any state to enter UV mode.

Image 4.3: Diagram illustrating the multi-source sidelights (White, Warm, Green, Red, Blue, Red Flash, Red & Blue Strobe, UV Light) and their activation methods using the Mode button.

Obraz 4.4: Examples of 365nm UV light applications, including money inspection, antique appraisal, fluorescent agent detection, and treasure hunt.
4.3 funkcja alarmu;
The flashlight includes an 80dB beeping alarm with flashing red and blue lights.
- Aktywuj alarm: Triple-click the Power button from any state to activate the alarm (beeping + red and blue flashing).
- Dezaktywuj alarm: Long press the Power button to turn off the alarm.
4.4 Magnetyczna nasadka ogonowa
The FITORCH V10 features a magnetic tail cap for convenient attachment to metal surfaces, allowing for hands-free operation.
Image 4.5: The top left panel shows the FITORCH V10 attached to a metal surface via its magnetic tail cap, illuminating an engine bay.
5. Konserwacja
5.1 Czyszczenie
- Przetrzyj korpus latarki miękką szmatką.amp płótno.
- Nie należy używać środków czyszczących o właściwościach ściernych ani rozpuszczalników.
- Utrzymuj port ładowania wolny od kurzu i zanieczyszczeń.
5.2 Przechowywanie
- Przechowuj latarkę w chłodnym i suchym miejscu, z dala od bezpośredniego światła słonecznego.
- W przypadku długotrwałego przechowywania ładuj akumulator do około 50% co 3–6 miesięcy, aby zachować jego sprawność.
5.3 Pielęgnacja baterii
- Unikaj częstego całkowitego rozładowywania akumulatora.
- Do ładowania należy używać wyłącznie dołączonego kabla USB-C lub certyfikowanego odpowiednika.
- Nie należy podejmować prób wymiany wbudowanej baterii.
6. Rozwiązywanie Problemów
- Latarka się nie włącza:
- Upewnij się, że akumulator jest naładowany. Podłącz go do źródła zasilania i sprawdź wskaźnik ładowania.
- Verify correct operation: Double-click the Power button for the main light, double-click the Mode button for side lights.
- Moc światła jest słaba:
- Bateria może być słaba. Naładuj latarkę.
- Upewnij się, że soczewka jest czysta i nie ma w niej żadnych przeszkód.
- Latarka nagrzewa się podczas użytkowania:
- It is normal for high-power LED flashlights to generate heat, especially in Turbo or High modes. This is a normal operating characteristic.
- If the flashlight becomes excessively hot, reduce the brightness mode or turn it off to allow it to cool.
- Ładowanie nie działa:
- Sprawdź, czy kabel USB-C nie jest uszkodzony i upewnij się, że jest prawidłowo podłączony do latarki i źródła zasilania.
- Wypróbuj inny kabel USB-C lub zasilacz.
- Upewnij się, że port ładowania jest czysty.
7. Specyfikacje
| Funkcja | Szczegół |
|---|---|
| Model | V10 |
| Marka | FITORCH |
| Tworzywo | Stop aluminium |
| Typ źródła światła | PROWADZONY |
| Jasność | Do 1000 Lumenów |
| Pojemność baterii | 1000mAh (Built-in Rechargeable) |
| Interfejs ładowania | USB-C |
| Objętość ładowaniatage | 4.5 V-5 V |
| Czas ładowania | 120-180 minut |
| Wymiary produktu | 2.6" x 1.3" x 0.6" (66 mm x 33 mm x 15 mm) |
| Waga przedmiotu | 1.76 uncji (50 grama) |
| Odporność na wodę | IPX4 (odporność na zachlapanie) |
| Cechy specjalne | UV Light, Red/Green/Blue Side Lights, Magnetic Tail, Alarm Function |
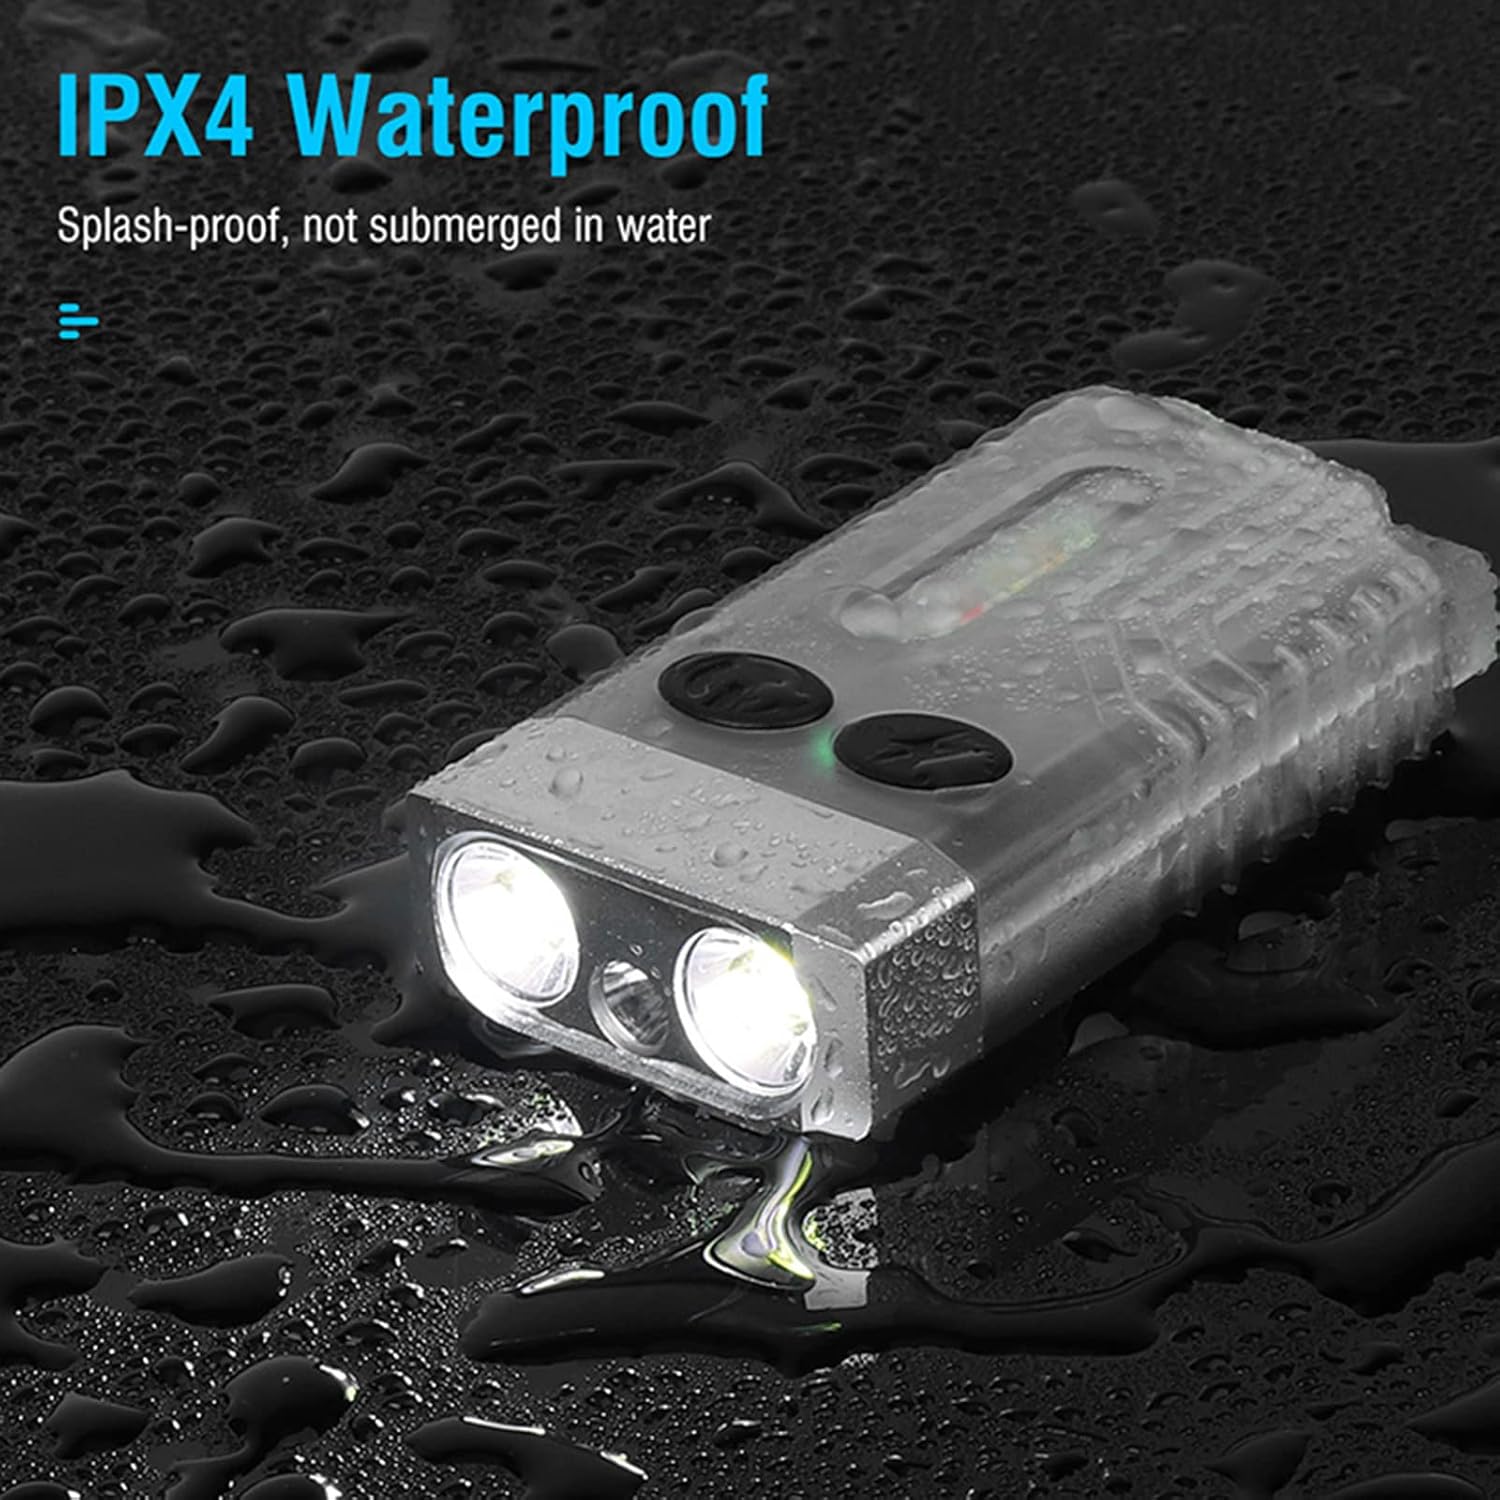
Image 7.1: The FITORCH V10 demonstrating its IPX4 splash-proof water resistance, indicating it is protected against water splashes from any direction.
8. Gwarancja i wsparcie
FITORCH products are manufactured to high-quality standards. For warranty information or technical support, please refer to the official FITORCH webstronie internetowej lub skontaktuj się ze sprzedawcą.
Proszę zachować dowód zakupu na potrzeby roszczeń gwarancyjnych.


