1. Wprowadzenie
Dziękujemy za zakupasing the ADLER AD 1195 Alarm Clock. This device is designed to provide accurate timekeeping, multiple alarm settings, and environmental information including temperature and humidity. Please read this manual carefully before using the product to ensure proper operation and to maximize its lifespan.
2. Zawartość opakowania
- ADLER AD 1195 Alarm Clock
- Instrukcja obsługi
3. Koniec produktuview
Familiarize yourself with the components of your ADLER AD 1195 Alarm Clock.

Rycina 3.1: Przód view of the ADLER AD 1195 Alarm Clock, displaying time, temperature, humidity, and date.
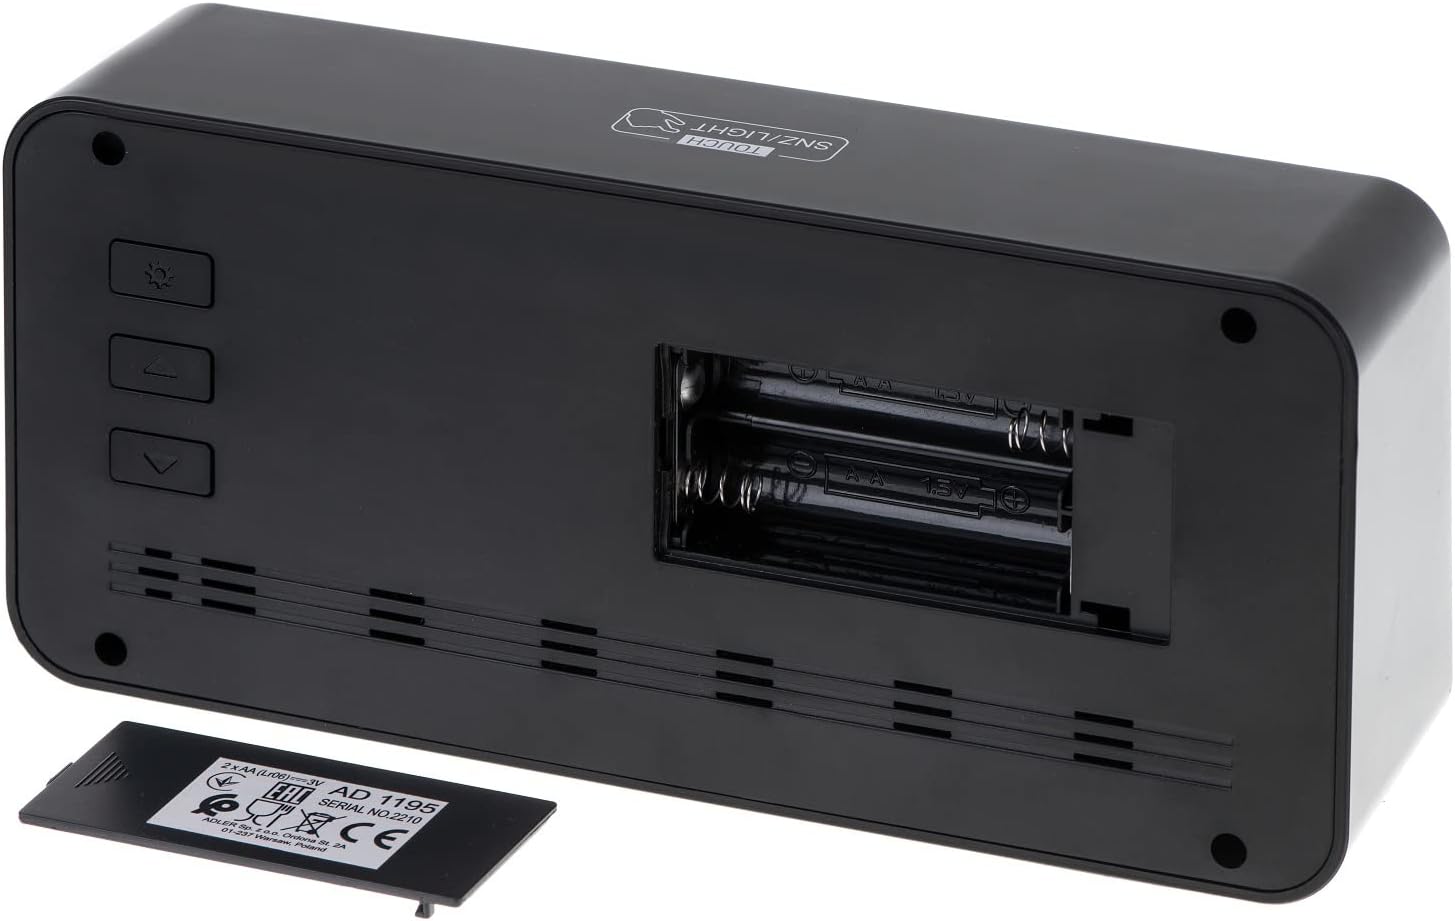
Rysunek 3.2: Tył view of the alarm clock, showing the battery compartment and control buttons.
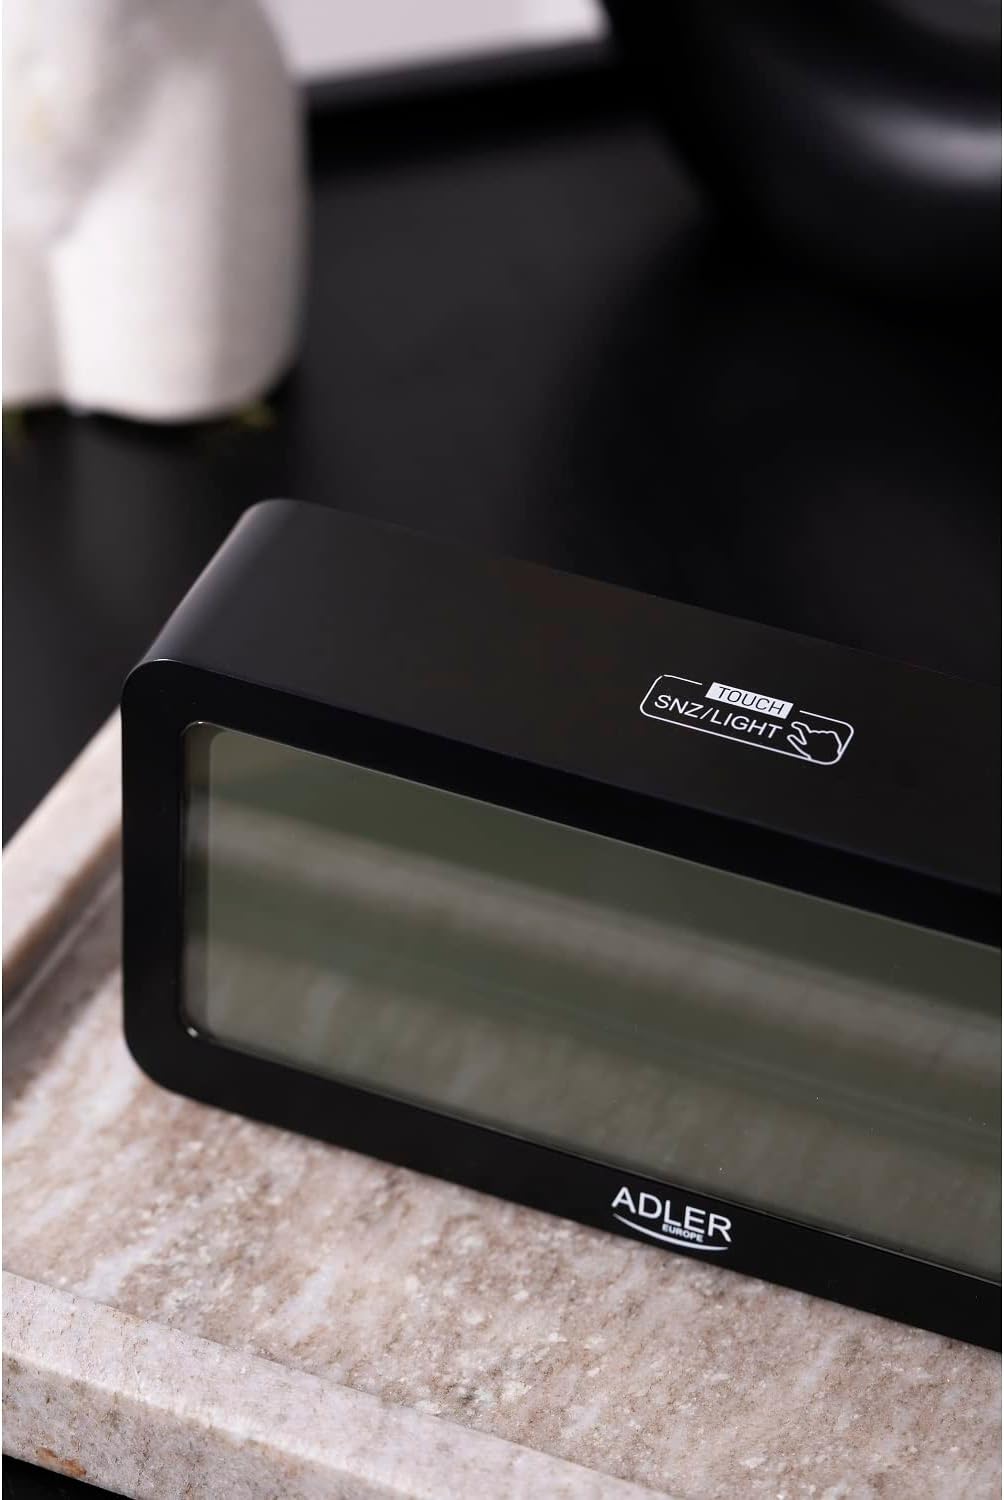
Rysunek 3.3: Góra view, showing the snooze/light touch area.
Kluczowe komponenty:
- Wyświetlacz cyfrowy: Shows time, date, day of the week, indoor temperature, and humidity.
- TOUCH SNZ/LIGHT Button: Located on the top, used for snooze function and activating backlight.
- Control Buttons (Rear): Typically include MODE, UP, and DOWN buttons for setting adjustments.
- Komora baterii: Located on the rear, requires 2 x AA batteries.
4. Konfiguracja
4.1 Instalacja baterii
- Otwórz pokrywę komory baterii z tyłu budzika.
- Włóż dwie (2) baterie AA, zwracając uwagę na prawidłową biegunowość (+ i -).
- Dokładnie zamknij pokrywę komory baterii.
The display will illuminate, and the clock will be ready for initial setup.
5. Instrukcja obsługi
5.1 Ustawianie czasu i daty
- Naciśnij TRYB button repeatedly until the time setting mode is activated (e.g., hour digits flashing).
- Użyj UP I W DÓŁ buttons to adjust the flashing value (hour, minute, year, month, day).
- Naciskać TRYB ponownie, aby potwierdzić ustawienie i przejść do następnego parametru.
- Po zakończeniu wszystkich ustawień naciśnij TRYB aby wyjść z trybu ustawień.
5.2 Ustawianie alarmów
The ADLER AD 1195 supports three separate alarm settings (AL1, AL2, AL3).
- W trybie wyświetlania czasu normalnego naciśnij TRYB to cycle through display modes until you reach an alarm setting (e.g., AL1).
- Naciśnij i przytrzymaj TRYB to enter alarm setting mode for the selected alarm. The hour digits will flash.
- Używać UP I W DÓŁ przyciski umożliwiające ustawienie żądanej godziny i minut alarmu.
- Naciskać TRYB to confirm and move to the next alarm setting or exit.
- To activate or deactivate an alarm, short press the UP Naciśnij przycisk, gdy wyświetlana jest godzina alarmu. Ikona alarmu pojawi się/zniknie na ekranie.
5.3 Funkcja drzemki i podświetlenia
Gdy zabrzmi alarm, dotknij TOUCH SNZ/LIGHT area on the top of the clock to activate the snooze function. The alarm will pause for a few minutes and sound again. To turn off the alarm completely, press any other button on the back of the clock.
To activate the backlight for a few seconds, simply touch the TOUCH SNZ/LIGHT area when the alarm is not sounding. The display has an adjustable backlight, allowing users to choose from different brightness levels for optimal viewing.
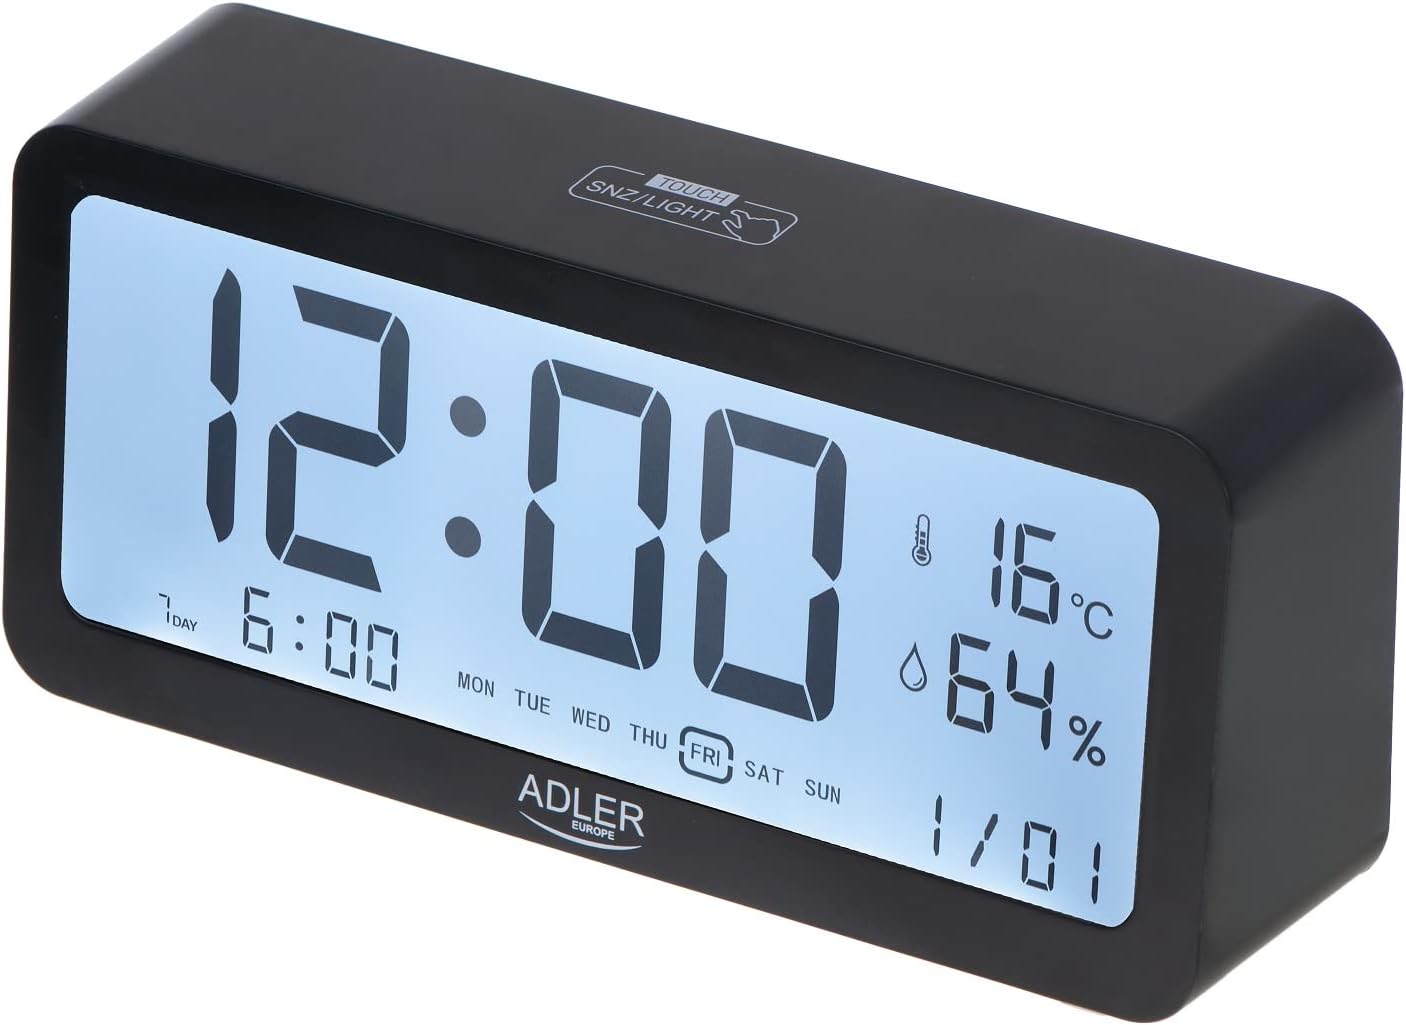
Figure 5.1: Illuminated display for easy readability.
5.4 Wyświetlacz temperatury i wilgotności
The clock continuously displays the current indoor temperature in Celsius and relative humidity percentage. No special action is required to view te odczyty.
6. Konserwacja
6.1 Czyszczenie
Wipe the clock with a soft, dry cloth. Do not use abrasive cleaners or solvents, as they may damage the surface or display.
6.2 Wymiana baterii
When the display dims or functions become erratic, it is time to replace the batteries. Follow the instructions in Section 4.1 for battery installation. Always replace both batteries at the same time with new ones.
7. Rozwiązywanie Problemów
| Problem | Możliwa przyczyna | Rozwiązanie |
|---|---|---|
| Wyświetlacz jest pusty lub przyciemniony. | Baterie są słabe lub nieprawidłowo zainstalowane. | Wymień baterie na nowe baterie AA, zwracając uwagę na prawidłową biegunowość. |
| Alarm nie włącza się. | Alarm nie jest włączony lub głośność jest zbyt niska. | Ensure the alarm icon is displayed. Check if there's a volume setting (if applicable, though not specified for this model). |
| Nieprawidłowa data/godzina. | Data i godzina nie zostały ustawione prawidłowo po zainstalowaniu baterii lub przerwie w dostawie prądu. | Aby zresetować godzinę i datę, zapoznaj się z sekcją 5.1. |
8. Specyfikacje
| Funkcja | Szczegół |
|---|---|
| Marka | Adler |
| Numer modelu | AD 1195 black |
| Kolor | Czarny |
| Wymiary produktu | 19.2 x 3.81 x 9.3 cm (dł. x szer. x wys.) |
| Waga przedmiotu | 190 gramów |
| Tworzywo | Szkło plastikowe |
| Źródło zasilania | Zasilany bateryjnie (2 baterie AA) |
| Typ wyświetlacza | Cyfrowy |
| Cechy specjalne | Clear illuminated display, 3 Alarm Settings, Multiple alarm time settings, Comprehensive display information (Time, Date, Temperature, Humidity) |
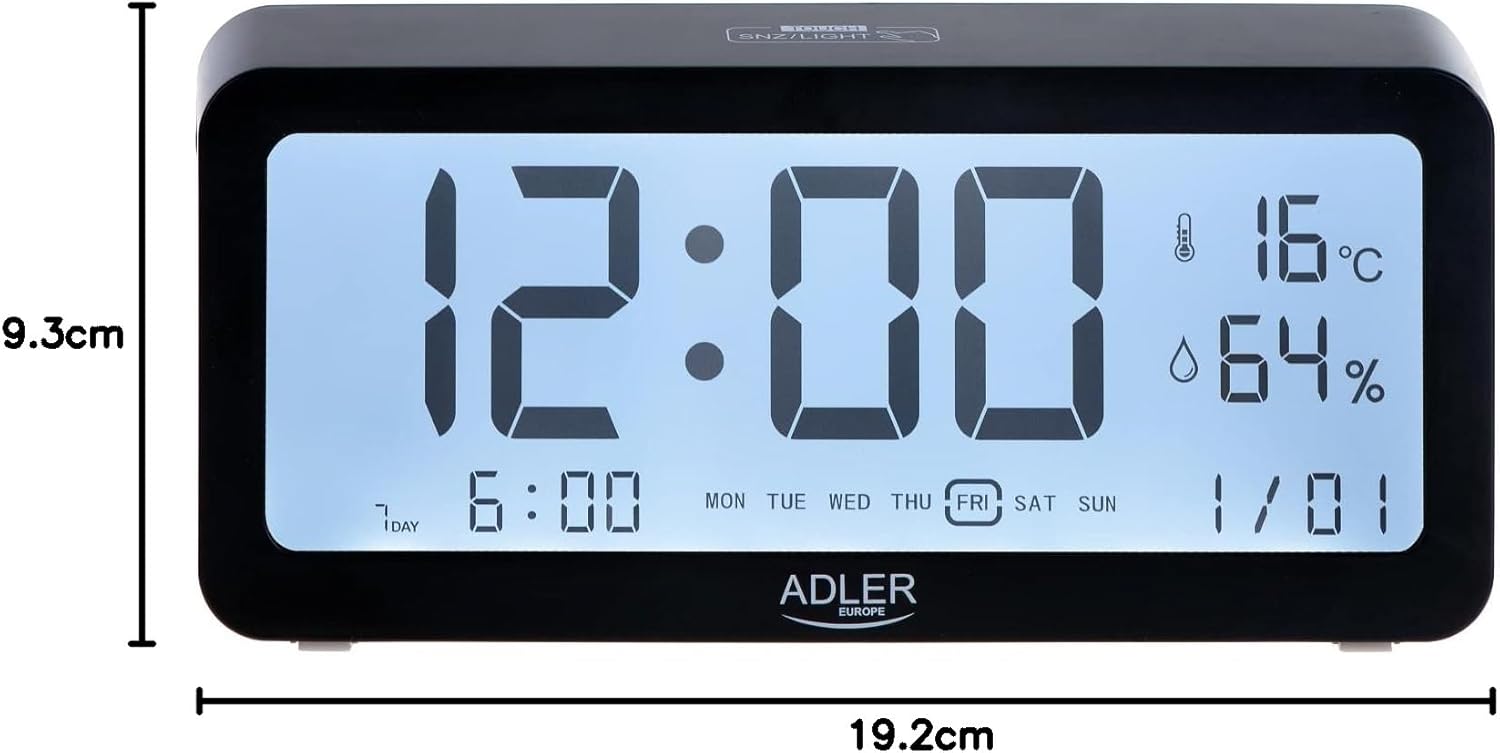
Rysunek 8.1: Wymiary produktu.
9. Gwarancja i wsparcie
For warranty information and technical support, please refer to the product packaging or contact Adler customer service directly. Contact details can typically be found on the manufacturer's official webna stronie internetowej lub na opakowaniu detalicznym produktu.
Adler Europe Group
ul. Ordona 2A
01-237 Warszawa, Polska
Telefon: +48 728 595 006
E-mail: info@adlereurope.com


