1. Wprowadzenie
The Sonic Blast Digital Alarm Clock with Projection is designed to provide a reliable and effective wake-up experience, especially for heavy sleepers. It combines an extra-loud alarm with a bright strobe light, time projection, Bluetooth audio, and a USB charging port. This manual will guide you through the setup, operation, and maintenance of your device.

Image 1.1: The Sonic Blast Digital Alarm Clock with Projection, showing its display, time projection, and USB charging capability.
2. Informacje dotyczące bezpieczeństwa
- Przed przystąpieniem do obsługi urządzenia przeczytaj wszystkie instrukcje.
- Trzymaj urządzenie z dala od wody i nadmiernej wilgoci.
- Nie wystawiaj urządzenia na działanie ekstremalnych temperatur ani bezpośredniego światła słonecznego.
- Używaj wyłącznie dołączonego zasilacza.
- Nie próbuj samodzielnie demontować ani naprawiać urządzenia. Wszelkie czynności serwisowe zlecaj wykwalifikowanemu personelowi.
- Zapewnij odpowiednią wentylację wokół urządzenia.
3. Zawartość opakowania
- Sonic Blast Digital Alarm Clock with Projection (Model SB775B)
- Zasilacz
- Instrukcja obsługi
4. Koniec produktuview: Controls and Indicators
Familiarize yourself with the various buttons, ports, and indicators on your Sonic Blast alarm clock.

Obraz 4.1: Przód view of the Sonic Blast alarm clock highlighting display and feature icons.
Panel przedni
- Wyświetlacz LED: Shows current time, alarm status (AL1, AL2), PM indicator, and Bluetooth (BT) status.
- Światło stroboskopowe: Flashes during alarm.
Panel górny

Image 4.2: Top panel controls, including the SNOOZE/DIMMER button.
- Przycisk zasilania: Włącza/wyłącza urządzenie.
- VOL- / VOL+ Buttons: Dostosuj głośność.
- AL.SET Button: Used to set alarms.
- Przycisk ŚCIEMNIACZ: Reguluje jasność wyświetlacza (5 poziomy).
- HOUR / MIN Buttons: Adjust time and alarm settings.
- Przycisk drzemki: Activates snooze function.
- BUZZER/TONE Switch: Selects alarm sound type.
- ALM1 / ALM2 / VIB Switch: Selects alarm mode (Alarm 1, Alarm 2, or Vibration).
- PROJECTION IMAGE ON/OFF / ROTATE Button: Controls the projection feature.
- FOCUSING Wheel: Dostosowuje przejrzystość wyświetlanego czasu.
Panel tylny

Obraz 4.3: Tył view of the Sonic Blast alarm clock, showing USB and AUX ports.
- Gniazdo DC IN: Do podłączenia zasilacza.
- Port ładowania USB: Do ładowania urządzeń zewnętrznych.
- Wejście AUX IN: Do podłączania zewnętrznych źródeł dźwięku.
- VIBRATOR Jack: For connecting an optional bed shaker (sold separately).
5. Konfiguracja
5.1 Połączenie zasilania
- Plug the power adapter into the DC IN jack on the rear of the alarm clock.
- Podłącz drugi koniec adaptera do standardowego gniazdka ściennego.
- The clock display will illuminate.
5.2 Instalacja baterii zapasowej
A CR2032 lithium battery (not included) can be installed to maintain time and alarm settings during a power outage.

Image 5.1: Illustration of the CR2032 battery for backup power.
- Znajdź komorę baterii na spodzie urządzenia.
- Otwórz pokrywę komory baterii.
- Włóż jedną baterię litową CR2032, zwracając uwagę na prawidłową biegunowość (+/-).
- Dokładnie zamknij pokrywę komory baterii.
5.3 Ustawianie czasu
- Naciśnij i przytrzymaj CZAS Naciskaj przycisk, aż wyświetlacz zacznie migać.
- Użyj GODZINA I MIN buttons to set the current hour and minute.
- Naciśnij CZAS ponownie, aby potwierdzić ustawienie.
6. Instrukcja obsługi
6.1 Ustawianie alarmów (Alarm 1 i Alarm 2)
Zegar obsługuje dwa niezależne alarmy.

Image 6.1: The Sonic Blast alarm clock supporting dual alarms.
- Naciśnij i przytrzymaj AL.ZESTAW button. AL1 will flash on the display.
- Użyj GODZINA I MIN przyciski umożliwiające ustawienie żądanej godziny alarmu dla Alarmu 1.
- Naciskać AL.ZESTAW again to set Alarm 2, repeating the process.
- After setting both alarms, press AL.ZESTAW jeszcze raz, aby wyjść z trybu ustawiania alarmu.
- To activate an alarm, slide the ALM1 / ALM2 / VIB switch to the desired alarm (AL1 or AL2). The corresponding indicator will light up.
- To select the alarm sound, slide the BUZZER/TONE switch to BUZZER or TONE.
6.2 Funkcja drzemki
Gdy zabrzmi alarm, naciśnij DRZEMKA button to temporarily silence the alarm for a preset duration.

Image 6.2: Adjustable snooze feature for customized wake-up delays.
- The snooze duration is adjustable. Refer to the full manual for specific steps to adjust snooze time.
6.3 Regulacja głośności i tonu
Customize your alarm sound to your preference.

Image 6.3: Graphic illustrating the adjustable volume feature.
- Użyj TOM- I Objętość + buttons to adjust the alarm volume.
- Przesuń BUZZER/TONE switch to select between a standard buzzer or an adjustable tone.

Image 6.4: Close-up of the tone adjustment controls.
6.4 Funkcja projekcji
Wyświetlaj czas na suficie lub ścianie, aby ułatwić sobie pracę. viewing.
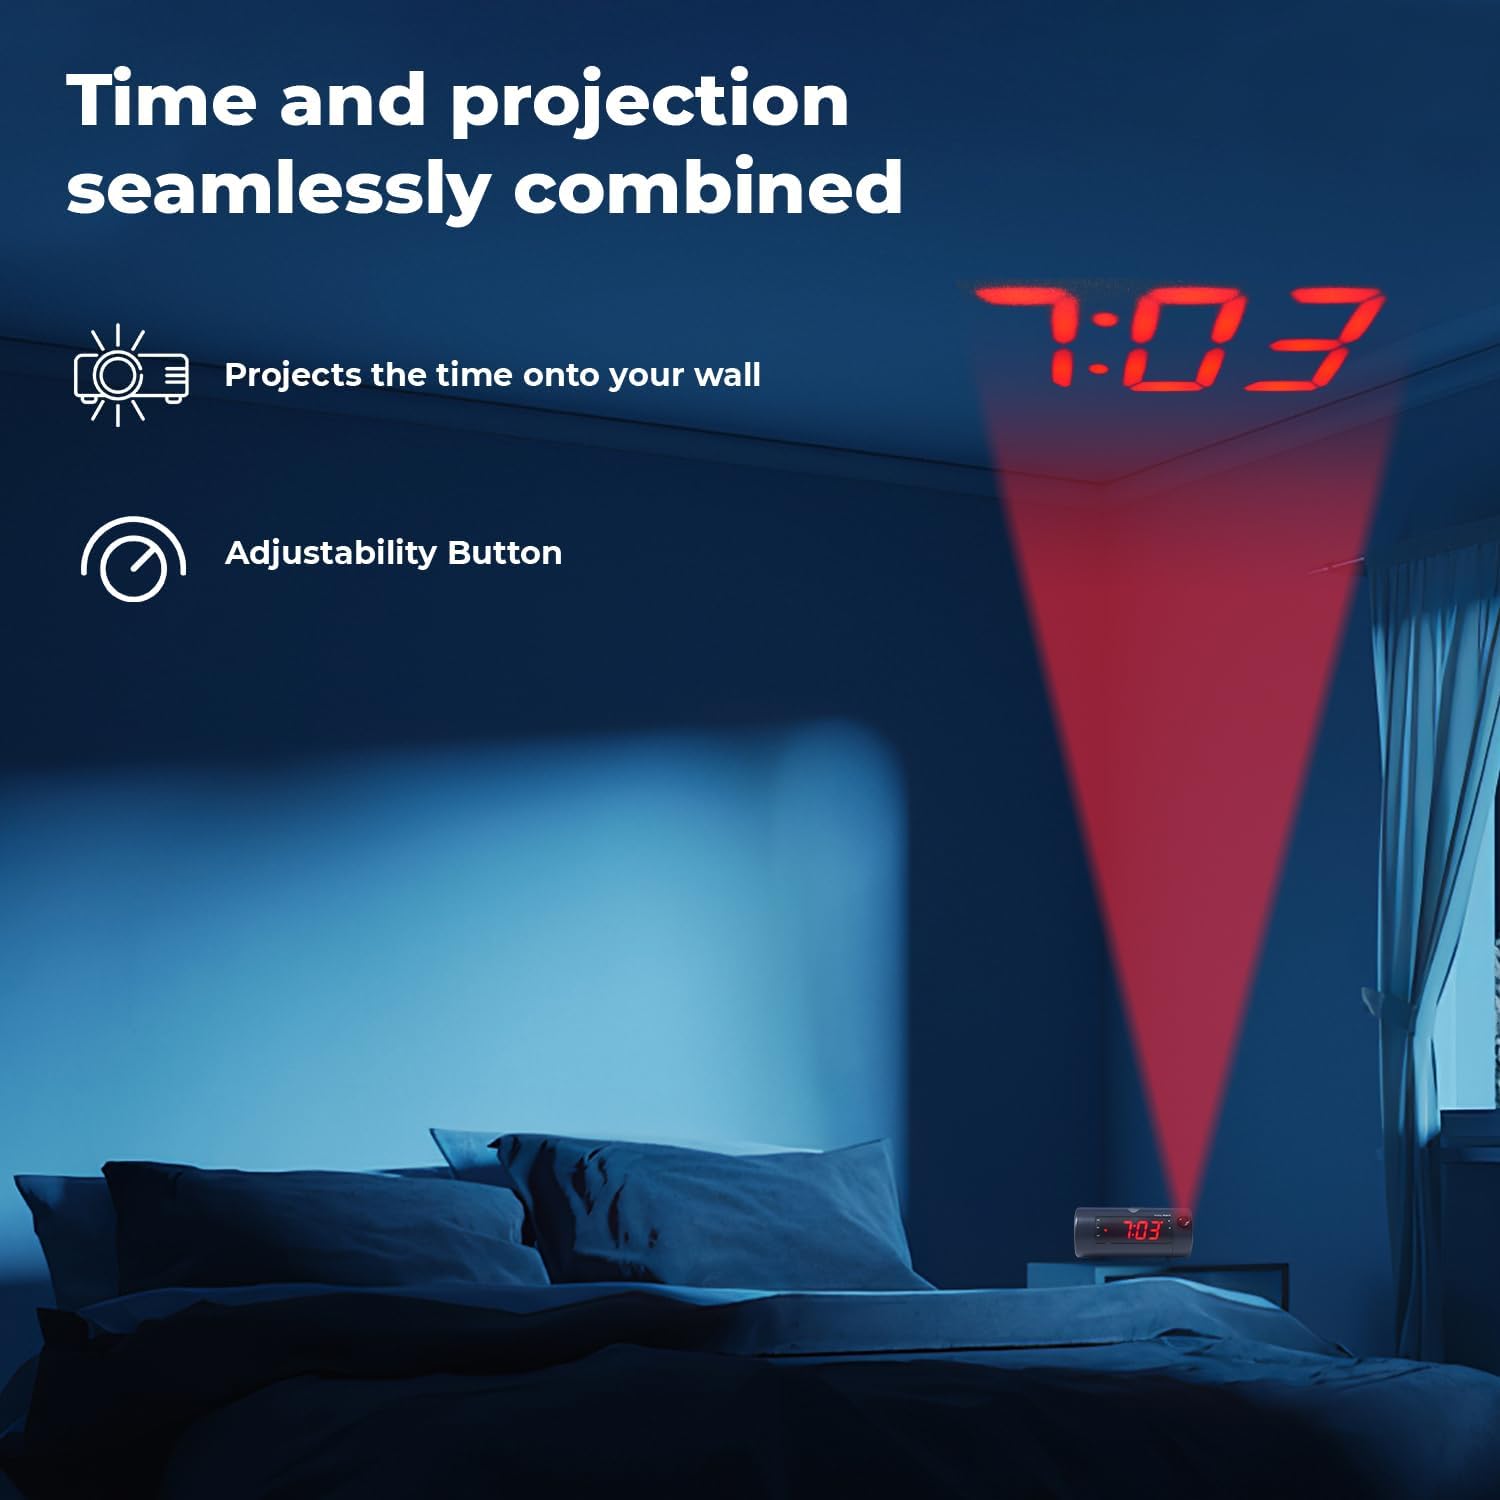
Image 6.5: Time projected onto a bedroom wall.
- Naciśnij PROJECTION IMAGE ON/OFF przycisk, aby włączyć lub wyłączyć projekcję.
- Użyj SKUPIENIE wheel to adjust the clarity of the projected image.
- Naciśnij i przytrzymaj PROJECTION IMAGE ROTATE button to rotate the projected time to the desired orientation.

Image 6.6: Close-up of the projection focus, on/off, and rotation controls.
6.5 Parowanie głośników Bluetooth
Connect your smartphone or tablet to play audio through the alarm clock's speaker.
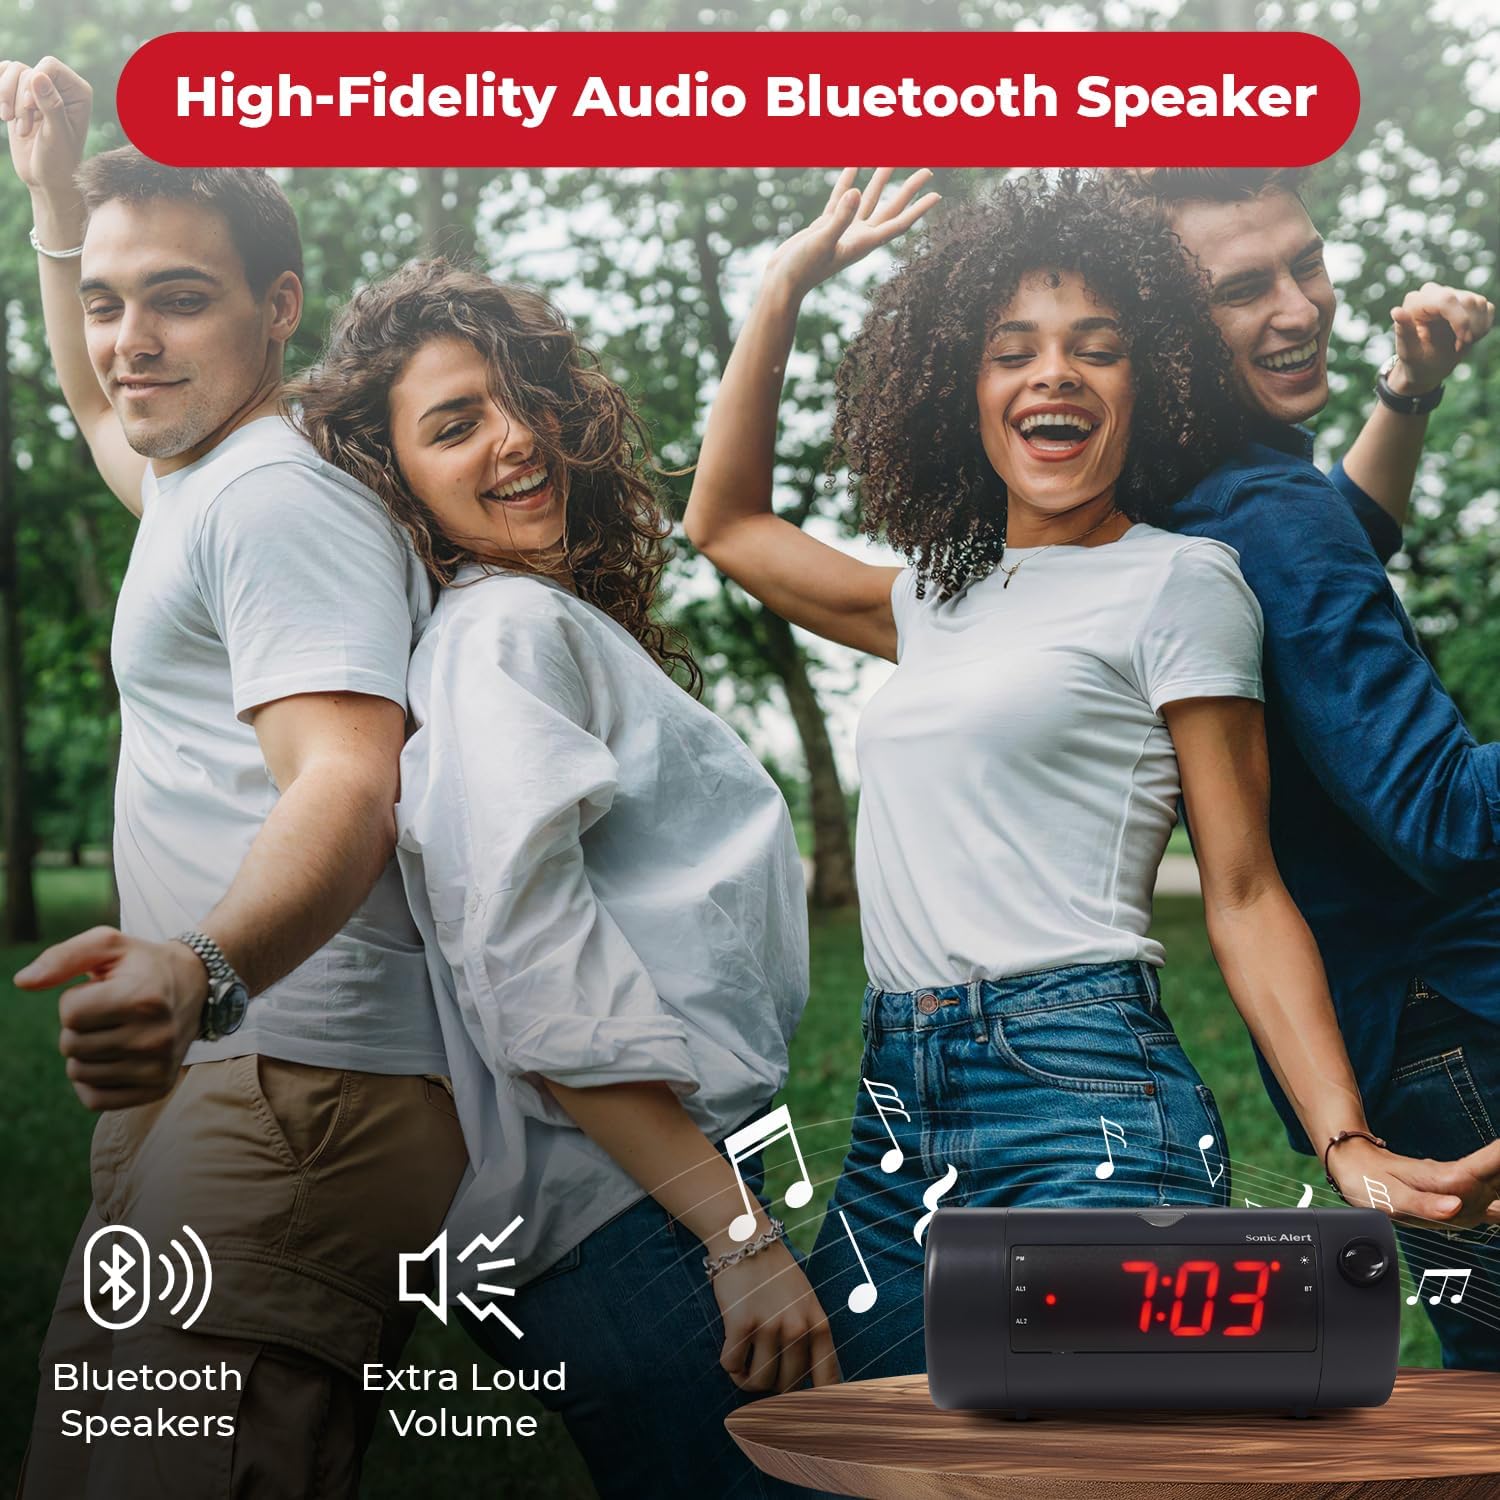
Image 6.7: The Sonic Blast alarm clock functioning as a Bluetooth speaker.
- Sprawdź, czy budzik jest włączony.
- Aktywuj Bluetooth na swoim urządzeniu mobilnym.
- Szukaj "Sonic Blast" in your device's Bluetooth settings and select it to pair.
- The "BT" indicator on the clock display will illuminate when successfully paired.
6.6 USB Charging Port Usage
Use the built-in USB port to charge your compatible devices.

Image 6.8: Smartphone charging via the alarm clock's USB port.
- Connect your device's USB charging cable to the USB port on the rear of the alarm clock.
- The alarm clock must be connected to power for the USB charging port to function.
6.7 Recordable Alarm
The Sonic Blast allows you to record a custom alarm message.

Image 6.9: The recordable alarm feature in use.
- Refer to the detailed instructions in the full manual for recording and setting your custom alarm message.
6.8 12/24 Hour Display
- To switch between 12-hour and 24-hour time format, press the CZAS naciśnij krótko przycisk, gdy wyświetlany jest czas.
7. Konserwacja
- Czyść urządzenie miękką, suchą ściereczką. Nie używaj płynnych środków czyszczących ani materiałów ściernych.
- Chroń urządzenie przed kurzem i zanieczyszczeniami.
- If the battery backup is used, replace the CR2032 battery annually or when the low battery indicator appears.
8. Rozwiązywanie Problemów
| Problem | Rozwiązanie |
|---|---|
| Wyświetlacz zegara jest wyłączony. | Ensure the power adapter is securely connected. Check the wall outlet. Press the POWER button to turn the unit on. |
| Alarm nie włącza się. | Verify that the alarm is activated (AL1 or AL2 indicator is on). Check alarm volume. Ensure the correct alarm mode (BUZZER/TONE) is selected. |
| Projection is blurry or not visible. | Dostosuj SKUPIENIE wheel. Ensure the projection is turned on. Check the distance to the projection surface. |
| Nie można sparować urządzenia Bluetooth. | Ensure Bluetooth is enabled on your device and the alarm clock. Move devices closer. Try restarting both devices. |
| Ładowanie przez USB nie działa. | Ensure the alarm clock is connected to a power source. Check the USB cable and the device being charged. |
9. Specyfikacje
| Funkcja | Szczegół |
|---|---|
| Numer modelu | SB775B |
| Marka | Alarm dźwiękowy |
| Głośność alarmu | Do 113 dB |
| Typ wyświetlacza | Digital LED with 5-level dimmer |
| Cechy specjalne | Adjustable Projection Clock, Bluetooth Wireless Audio, USB Charging Port, Dual Alarm, Bright Flashing Light, Adjustable Volume & Tone, Adjustable Snooze, Recordable Alarm, Vibrating Bed Shaker Port (for optional SS5V shaker) |
| Źródło zasilania | Elektryczny przewodowy |
| Zapasowa bateria | 1 x CR2032 Lithium Cell (not included) |
| Wymiary produktu | Approximately 1"W x 1"H (Note: This dimension seems incorrect based on typical alarm clock sizes and product images. Please refer to product packaging for accurate dimensions.) |
| Waga przedmiotu | 1.39 funta (0.63 kilograma) |
10. Gwarancja i wsparcie
For warranty information and customer support, please refer to the official Sonic Alert webOdwiedź witrynę lub skontaktuj się z działem obsługi klienta. Zachowaj paragon zakupu na wypadek reklamacji.
Informacje kontaktowe: Please visit the Sonic Alert webna tej stronie znajdziesz najbardziej aktualne dane kontaktowe.


