Wstęp
Thank you for choosing the Sharp Big Bang Alarm Clock. This manual provides detailed instructions to help you set up, operate, and maintain your new alarm clock. Please read this manual thoroughly before use and retain it for future reference.
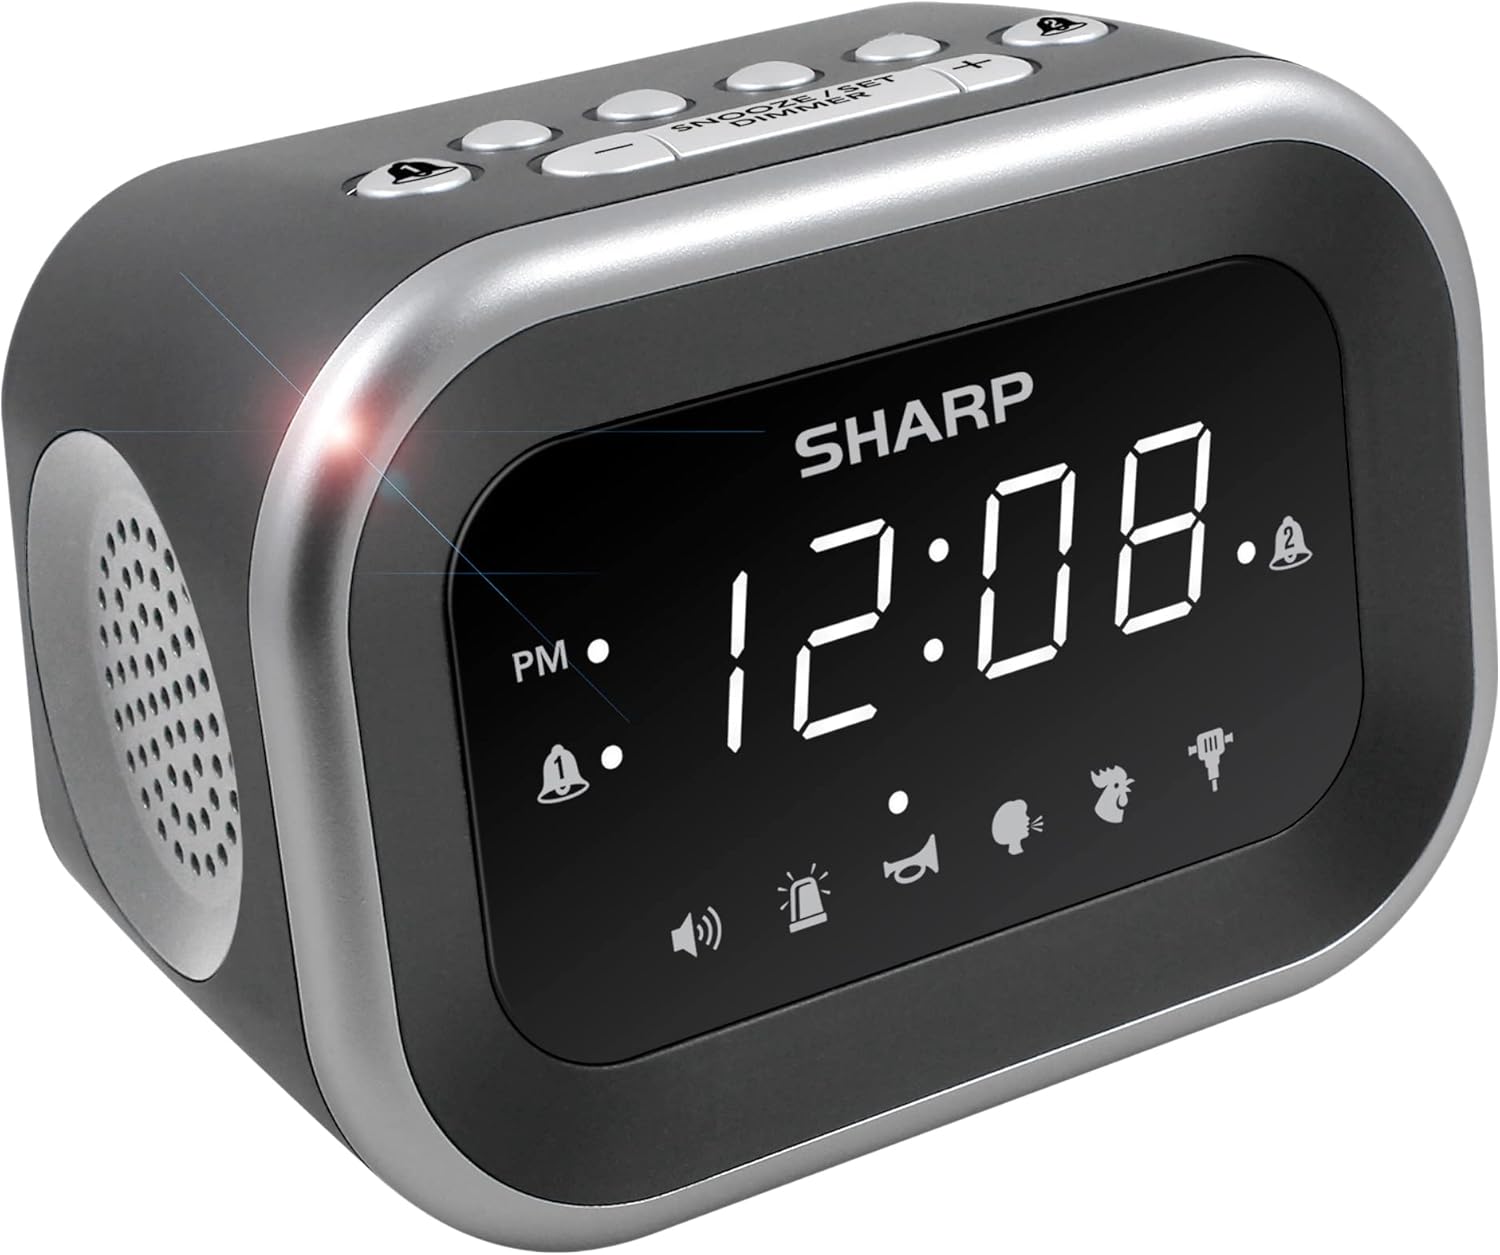
Obraz: Przód view of the Sharp Big Bang Alarm Clock, showing the digital display and speaker grille.
Informacje dotyczące bezpieczeństwa
- Nie wystawiaj urządzenia na działanie ekstremalnych temperatur, bezpośredniego światła słonecznego i wysokiej wilgotności.
- Trzymaj urządzenie z dala od wody i innych płynów.
- Używaj wyłącznie wskazanego zasilacza.
- Nie należy podejmować prób rozmontowywania lub modyfikowania urządzenia.
- Przechowywać w miejscu niedostępnym dla dzieci.
Zawartość opakowania
- Sharp Big Bang Alarm Clock
- Zasilacz sieciowy
- Instrukcja obsługi (ten dokument)
Produkt ponadview
Familiarize yourself with the various components and controls of your alarm clock.
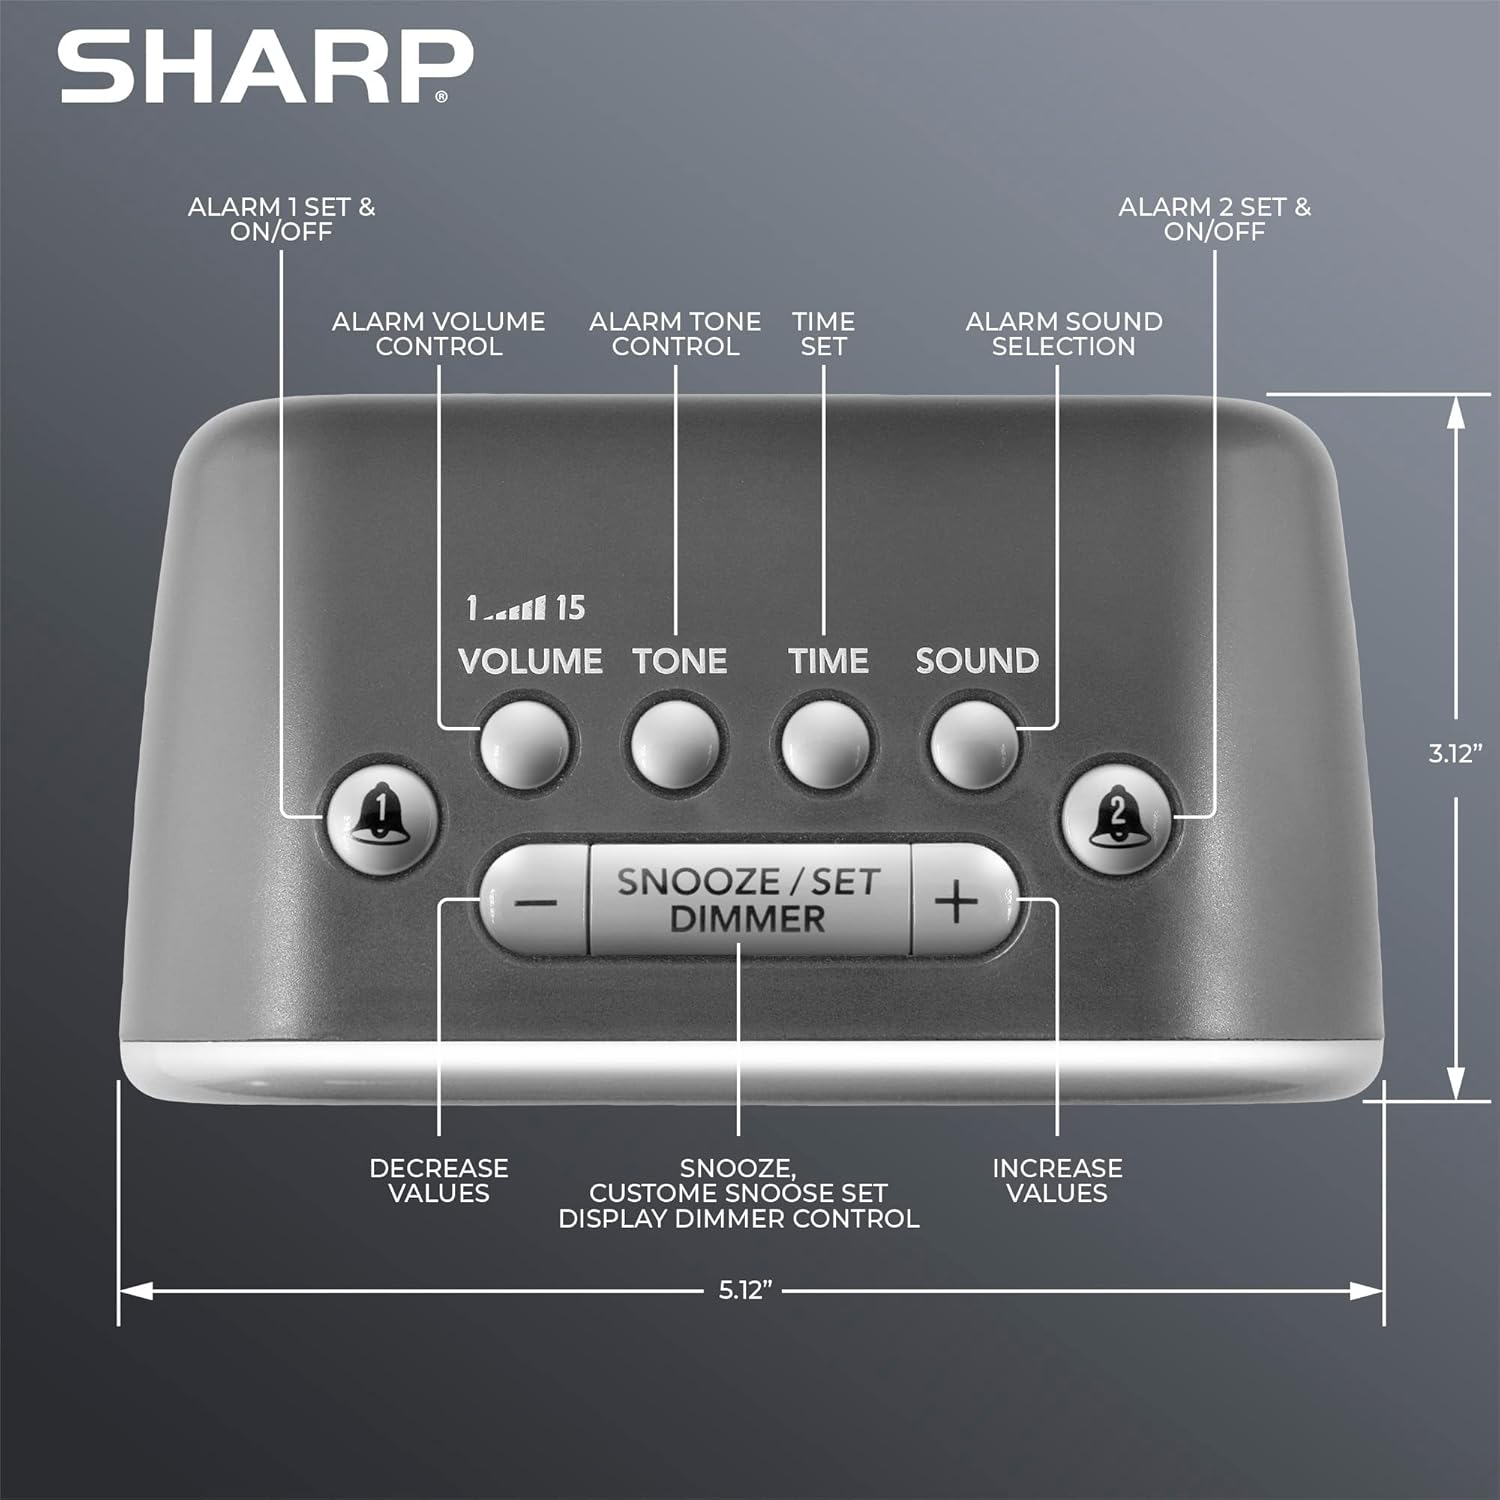
Obraz: Góra view of the alarm clock, highlighting buttons for Alarm 1, Alarm 2, Volume, Tone, Time, Sound, Snooze/Set/Dimmer, and +/- controls.
- Wyświetlacz: Large white LED display for time and settings.
- Alarm 1 & 2 Buttons: Aktywuj/dezaktywuj i ustaw indywidualne alarmy.
- Przycisk głośności: Adjusts alarm volume (levels 1-15).
- Przycisk tonu: Dostosowuje dźwięk alarmu.
- Przycisk czasu: Służy do ustawiania aktualnego czasu.
- Przycisk dźwięku: Selects one of the six alarm sounds.
- Snooze/Set/Dimmer Button: Activates snooze, confirms settings, and adjusts display brightness.
- Przyciski +/-: Adjust values for time, volume, tone, and snooze duration.
Organizować coś
1. Podłączenie zasilania
- Plug the AC power adapter into the DC IN jack on the back of the alarm clock.
- Plug the other end of the adapter into a standard 110V/120V household wall outlet.
- Wyświetlacz zaświeci się, wskazując, że zasilanie jest podłączone.
2. Instalacja baterii zapasowej
The alarm clock requires 2 x AAA batteries (not included) for battery backup. This feature stores your time and alarm settings during a power interruption. The display will not be lit during battery backup mode.
- Otwórz pokrywę komory baterii znajdującą się na spodzie urządzenia.
- Insert 2 new AAA batteries, observing the correct polarity (+ and -).
- Dokładnie zamknij pokrywę komory baterii.

Image: The alarm clock positioned on a nightstand, ready for use.
Instrukcja obsługi
1. Ustawianie aktualnego czasu
- Naciśnij i przytrzymaj CZAS Naciskaj przycisk, aż zaczną migać cyfry godziny.
- Użyj + or - Użyj przycisków, aby ustawić godzinę. Zwróć uwagę na wskaźnik PM.
- Naciśnij CZAS Naciśnij przycisk ponownie, aby potwierdzić godzinę, a cyfry minut zaczną migać.
- Użyj + or - przyciski, aby ustawić minuty.
- Naciśnij CZAS Naciśnij przycisk jeszcze raz, aby zapisać ustawienie czasu.
2. Ustawianie alarmów (Alarm 1 i Alarm 2)
This clock features two independent alarms.
- Naciśnij i przytrzymaj ALARM 1 or ALARM 2 Naciskaj przycisk, aż zaczną migać cyfry godziny alarmu.
- Użyj + or - buttons to adjust the alarm hour. Observe the PM indicator.
- Naciśnij odpowiedni ALARM Naciśnij przycisk ponownie, aby potwierdzić godzinę, a cyfry minut zaczną migać.
- Użyj + or - przyciski do regulacji minut alarmu.
- Naciśnij ALARM button once more to save the alarm time. The alarm indicator (bell icon) for the set alarm will appear on the display.
- To activate or deactivate an alarm, simply press the ALARM 1 or ALARM 2 button briefly. The bell icon indicates if the alarm is active.
3. Selecting Alarm Sounds
The clock offers 6 distinct alarm sounds: Rooster, Bugle, Nagging Mom, Jackhammer, Siren, and Beep.

Image: Visual representation of the six available alarm sounds.
- With an alarm set, press the DŹWIĘK button. The current sound icon will flash.
- Użyj + or - buttons to cycle through the available sounds.
- Naciśnij DŹWIĘK ponownie, aby potwierdzić wybór.
4. Adjusting Alarm Volume and Tone
You can customize the volume (up to 115dB) and tone of your chosen alarm sound.

Image: Decibel reference scale illustrating the loudness of the alarm clock compared to common sounds.
- Naciśnij TOM button. The current volume level (1-15) will flash.
- Użyj + or - Przyciski do regulacji głośności.
- Naciśnij TOM Naciśnij przycisk ponownie, aby potwierdzić.
- Naciśnij TON button. The current tone setting will flash.
- Użyj + or - buttons to adjust the tone.
- Naciśnij TON Naciśnij przycisk ponownie, aby potwierdzić.
5. Funkcja drzemki
Gdy zabrzmi alarm, naciśnij duży przycisk SNOOZE/SET/DIMMER button on top of the clock to temporarily silence the alarm. The default snooze time is 9 minutes.
Customizing Snooze Duration:
- While the alarm is sounding, press and hold the SNOOZE/SET/DIMMER button until the snooze time flashes.
- Użyj + or - buttons to set your desired snooze duration (1-59 minutes).
- Naciśnij SNOOZE/SET/DIMMER button again to save the custom snooze time.
6. Sterowanie przyciemnianiem wyświetlacza
The display has 3 brightness levels (Off, Low, High).
- Naciśnij krótko SNOOZE/SET/DIMMER button (when the alarm is not sounding) to cycle through the brightness levels: High > Low > Off.

Obraz: Ponadview of key features including display, volume, sounds, and controls.
Konserwacja
Czyszczenie
- Przed czyszczeniem odłącz budzik od gniazdka elektrycznego.
- Wytrzyj powierzchnie zewnętrzne miękką, suchą ściereczką.
- Nie należy używać środków czyszczących o właściwościach ściernych, wosków ani rozpuszczalników.
Wymiana baterii
- If the clock loses time or alarm settings during a power outage, the AAA backup batteries may need replacement.
- Follow the battery installation steps in the Setup section to replace the batteries.
Rozwiązywanie problemów
| Problem | Możliwa przyczyna | Rozwiązanie |
|---|---|---|
| Alarm nie włącza się lub włącza się zbyt cicho. | Alarm is not activated; Volume is too low; Incorrect sound selected. | Ensure the alarm bell icon is displayed. Adjust the volume using the VOLUME button. Verify the selected alarm sound. |
| Display is off during a power outage. | Battery backup only retains settings, not display power. | This is normal operation. The display will relight when power is restored. Ensure backup batteries are fresh to retain settings. |
| Time or alarm settings are lost. | Power interruption and/or dead backup batteries. | Replace the 2 x AAA backup batteries. Reset the time and alarm settings. |
| Przyciski nie reagują. | Tymczasowy błąd oprogramowania. | Odłącz urządzenie od gniazdka elektrycznego na kilka minut, a następnie podłącz je ponownie. |
Specyfikacje
- Marka: Ostry
- Model: B0BDPQNVMR
- Źródło zasilania: Przewodowy elektryczny (kompatybilny z 110 V/120 V)
- Zapas baterii: 2 baterie AAA (brak w zestawie)
- Głośność alarmu: Do 115dB
- Dźwięki alarmu: 6 (Rooster, Bugle, Nagging Mom, Jackhammer, Siren, Beep)
- Wyświetlacz: White LED with 3-level dimmer (High, Low, Off)
- Wymiary (w przybliżeniu): 5.12" (szerokość) x 3.12" (wysokość) x 3.55" (głębokość)
- Waga: 12.5 uncji
- Tworzywo: Akrylonitryl-butadien-styren (ABS)
- Kod UPC: 049353008608
Gwarancja i wsparcie
For warranty information and customer support, please refer to the documentation provided at the time of purchase or contact Sharp customer service directly. You can also visit the official Sharp store for more information:


