1. Wprowadzenie
This manual provides detailed instructions for the installation, operation, and maintenance of your Rosewill FBM-X2-400-HELIX Micro ATX Mini Tower PC Case. This versatile case is designed to accommodate Micro ATX and Mini ITX motherboards, offering a compact yet spacious solution for both office and gaming PC builds. It comes equipped with a pre-installed 400W power supply unit and features excellent airflow design.
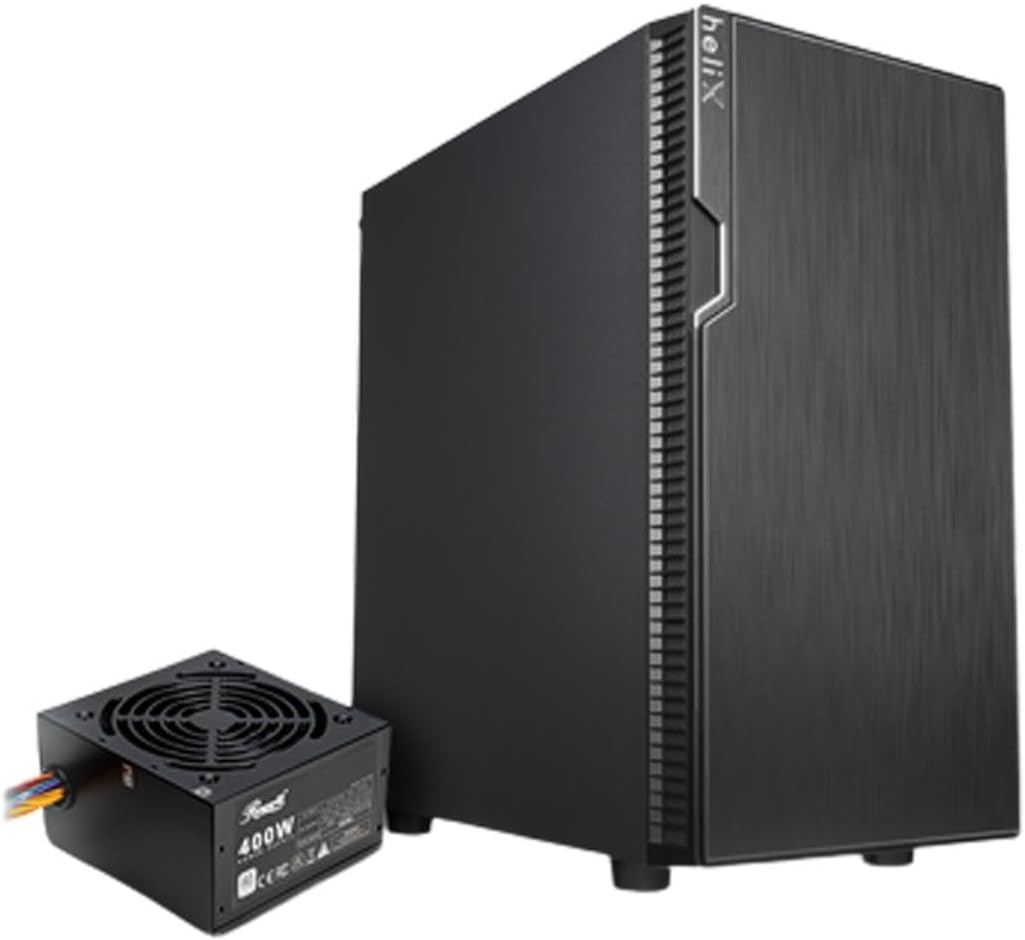
Figure 1: Rosewill FBM-X2-400-HELIX Micro ATX Mini Tower PC Case with included 400W Power Supply Unit.
2. Informacje dotyczące bezpieczeństwa
- Przed instalacją lub serwisowaniem jakichkolwiek podzespołów wewnątrz obudowy komputera należy zawsze odłączyć zasilacz od gniazdka ściennego.
- Handle all components with care to prevent damage from electrostatic discharge (ESD). Consider using an anti-static wrist strap.
- Trzymaj małe części i śruby poza zasięgiem dzieci.
- Aby zapobiec przegrzaniu, należy zapewnić odpowiednią wentylację wokół obudowy komputera.
- Nie należy podejmować prób modyfikacji obudowy ani jej elementów, gdyż może to spowodować unieważnienie gwarancji i zagrożenie bezpieczeństwa.
3. Główne cechy
- Elegancki design: A versatile, compact, and sturdy steel/plastic mini case suitable for office or gaming PC systems.
- Przestronne wnętrze: Features four expansion slots, one internal 3.5" drive bay, and three internal 2.5" drive bays. Supports Micro ATX or Mini ITX motherboards.
- Pre-Installed 400W Power Supply Unit: Includes a CE and FCC certified non-modular 400W PSU for convenience.
- Great Cable Management: Designed for easy organization of internal cables and wires.
- Excellent Airflow: Comes with one pre-installed 120mm fan in the rear. Supports two additional 120mm fans in the front and two 120mm fans on top, or one 240mm radiator in the front.
4. Specyfikacje
| Funkcja | Specyfikacja |
|---|---|
| Marka | Róża |
| Nazwa modelu | FBM-X2-400-HELIX |
| Typ sprawy | Mini-Tower |
| Zgodność płyty głównej | MikroATX, MiniITX |
| Pre-Installed PSU | 400W (Non-Modular, CE/FCC Certified) |
| Zewnętrzne zatoki dyskowe | Nic |
| Wewnętrzne zatoki dysków 3.5" | 1 |
| Wewnętrzne zatoki dysków 2.5" | 3 |
| Gniazda rozszerzeń | 4 |
| Przednie porty we / wy | 2x USB 2.0, 1x USB 3.0, wejście/wyjście audio |
| Wstępnie zainstalowane wentylatory | 1x 120mm Rear Fan |
| Wspornik wentylatora (przód) | 2x 120mm |
| Wsparcie fanów (góra) | 2x 120mm |
| Wspornik chłodnicy (przód) | 1x 240mm |
| Tworzywo | Stal stopowa, tworzywo sztuczne |
| Kolor | Czarny |
| Wymiary (dł. x szer. x wys.) | 16.75 x 16.65 x 10 cala |
| Waga przedmiotu | 11.82 funta |
5. Zawartość opakowania
Po rozpakowaniu należy sprawdzić zawartość opakowania, aby upewnić się, że znajdują się w nim wszystkie elementy:
- Rosewill FBM-X2-400-HELIX PC Case
- Pre-installed 400W Power Supply Unit
- Pudełko z akcesoriami (zawiera śruby, dystanse, opaski kablowe itp.)
- Instrukcja obsługi (ten dokument)
6. Konfiguracja i instalacja
Follow these steps to assemble your PC within the Rosewill FBM-X2-400-HELIX case.
6.1. Przygotowanie
- Unpack the PC case and place it on a stable, flat surface.
- Remove the side panels by unscrewing the thumbscrews at the rear of the case.
- Gather all necessary components: motherboard, CPU, RAM, storage drives, graphics card (if applicable), and any additional fans or radiators.

Figure 2: Internal layout of the PC case, highlighting the pre-installed power supply and available drive bays.
6.2. Instalacja płyty głównej
- Install the CPU, CPU cooler, and RAM onto your Micro ATX or Mini ITX motherboard before placing it into the case.
- Align the motherboard with the standoffs inside the case. Ensure the I/O shield is properly seated in the rear opening.
- Secure the motherboard with the appropriate screws from the accessory kit.
6.3. Zasilacz (PSU)
The 400W PSU is pre-installed in the bottom rear section of the case. Connect the necessary power cables to your motherboard (24-pin ATX, 4/8-pin CPU), graphics card (if required), and storage drives.

Figure 3: Included PSU connectors for various components.
6.4. Instalacja dysku pamięci masowej
The case supports one 3.5" HDD and three 2.5" SSDs/HDDs.
- For 3.5" HDD: Locate the 3.5" drive bay and secure the drive using the provided screws.
- For 2.5" SSD/HDD: Mount the 2.5" drives to the designated mounting points using the provided screws.
- Connect SATA data and power cables to each installed drive.
6.5. Instalacja karty rozszerzeń
The case provides four expansion slots for graphics cards or other PCI-E devices.
- Remove the necessary slot covers from the rear of the case.
- Insert your graphics card or other expansion card into the appropriate PCI-E slot on the motherboard.
- Secure the card with a screw.
6.6. Zarządzanie kablami
Utilize the cable routing cutouts and tie-down points behind the motherboard tray to organize cables. This improves airflow and gives your build a cleaner appearance.
6.7. Połączenia na panelu przednim
Connect the front panel cables (USB 2.0, USB 3.0, HD Audio, Power Switch, Reset Switch, Power LED, HDD LED) to the corresponding headers on your motherboard. Refer to your motherboard manual for exact header locations.

Figure 4: Front I/O panel with USB 3.0, USB 2.0, and audio ports.
6.8. Układ chłodzenia
The case includes one pre-installed 120mm rear fan. Additional fans or a 240mm AIO radiator can be installed for enhanced cooling.
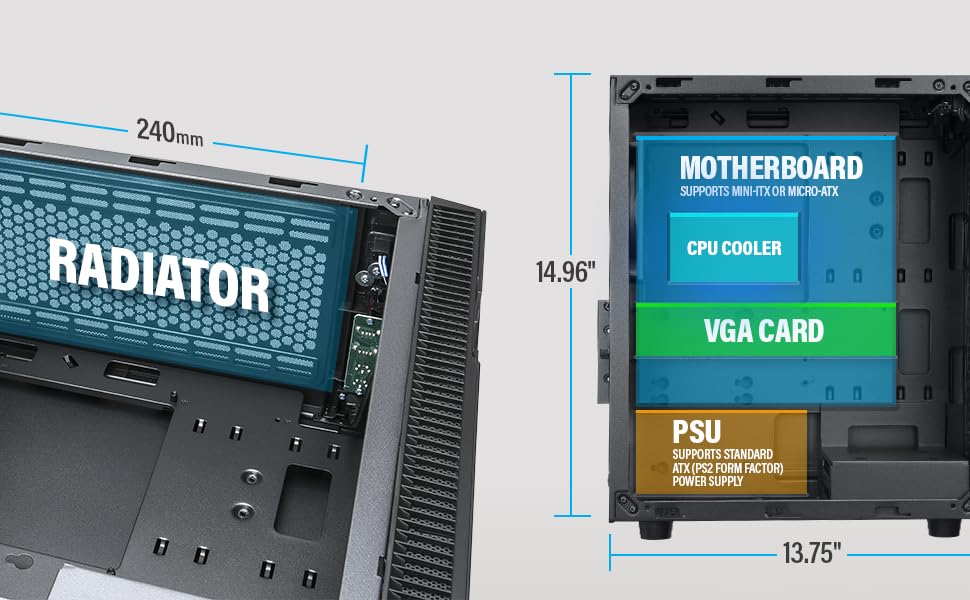
Figure 5: Diagram illustrating component clearance and radiator support.
6.9. Montaż końcowy
- Po zainstalowaniu wszystkich komponentów i uporządkowaniu kabli należy ponownie założyć panele boczne.
- Connect your monitor, keyboard, mouse, and power cable to the PC.
6.10. Official Product Video: Installation Overview
Wideo 1: Overview of the Rosewill Micro ATX Mini Tower Case, including its pre-installed 400W PSU and internal features. This video provides a visual guide to the case's design and component layout.
7. Instrukcja obsługi
After completing the setup, you can power on your PC.
- Ensure all external cables (power, monitor, peripherals) are securely connected.
- Press the power button located on the front I/O panel of the case.
- The power LED will illuminate, indicating the system is powered on.
- To shut down, use the operating system's shutdown function or press and hold the power button for a few seconds.
8. Konserwacja
Regularna konserwacja pomaga zapewnić optymalną wydajność i długowieczność podzespołów komputera.
- Filtry przeciwpyłowe: Periodically check and clean any removable dust filters (e.g., front, top, bottom) to maintain good airflow and prevent dust buildup inside the case.
- Czyszczenie wewnętrzne: Every few months, open the side panels and use compressed air to gently remove dust from fans, heatsinks, and other components.
- Kontrola kabla: Ensure all internal cables remain securely connected and are not obstructing airflow.
9. Rozwiązywanie Problemów
Jeśli napotkasz problemy, zapoznaj się z poniższymi wskazówkami dotyczącymi rozwiązywania problemów:
- Brak zasilania: Check if the power cable is securely connected to both the PSU and the wall outlet. Ensure the power switch on the PSU is in the 'ON' position. Verify front panel power switch connection to the motherboard.
- Brak wyświetlacza: Ensure your monitor is connected to the graphics card (or motherboard if using integrated graphics) and is powered on. Reseat the graphics card and RAM modules.
- Przegrzanie: Check if all case fans and CPU cooler fans are spinning. Ensure dust filters are clean and there is adequate airflow. Verify thermal paste application on the CPU.
- Porty USB nie działają: Check the front panel USB cable connections to the motherboard. Ensure drivers are installed for your operating system.
10. Gwarancja i wsparcie
For warranty information, technical support, or service inquiries, please refer to the official Rosewill webOdwiedź witrynę lub skontaktuj się z działem obsługi klienta. Zachowaj dowód zakupu na wypadek reklamacji.


