1. Wprowadzenie
Dziękujemy za zakupasing the OLIGHT S2R Baton II LED Flashlight. This compact and powerful EDC (Everyday Carry) flashlight is designed for versatility and reliability, featuring a maximum output of 1150 lumens, multiple lighting modes, magnetic charging, and a convenient magnetic tailcap for hands-free use. This manual provides detailed instructions for the safe and effective operation, setup, and maintenance of your S2R Baton II flashlight.

Image 1.1: The OLIGHT S2R Baton II LED Flashlight in green, showcasindzięki kompaktowej konstrukcji i teksturowanej obudowie.
2. Informacje dotyczące bezpieczeństwa
Please read this manual carefully before using the product. Failure to follow these instructions may result in injury or damage to the product.
2.1 Ostrzeżenia ogólne
- NIE shine the light directly into human or animal eyes. The powerful beam can cause temporary blindness or permanent eye damage.
- NIE cover the flashlight head when it is on, or place the flashlight head close to any object. The heat generated by the flashlight can cause the object to burn or even result in unexpected disasters.
- NIE use non-rechargeable batteries.
- NIE immerse the flashlight in water. This product is Nie jest wodoodporny.
- Przechowywać w miejscu niedostępnym dla dzieci.
- Przechowuj latarkę w chłodnym i suchym miejscu.
3. Zawartość opakowania
Sprawdź, czy w przesyłce znajdują się wszystkie elementy:
- OLIGHT S2R Baton II LED Flashlight (with included battery)
- MCC 1A Magnetic Charging Cable
- Pocket Clip (two reversible clips)
- Smycz/pasek na nadgarstek
- Instrukcja obsługi
4. Koniec produktuview
The OLIGHT S2R Baton II features a compact design with a side switch for easy operation and a magnetic tailcap for versatile mounting.

Obraz 4.1: Koniecview of the S2R Baton II highlighting key specifications such as 1150 lumens max output, 60 days max runtime, 135 meters max throw, and compact dimensions.
4.1 Składniki
- Emiter LED: High-performance cool white LED.
- Soczewka optyczna TIR: Provides a balanced beam.
- Przełącznik boczny: Controls all functions.
- Wskaźnik poziomu baterii: Integrated into the side switch.
- Magnetyczna nasadka tylna: For hands-free attachment and charging.
- Klip kieszonkowy: Reversible for multiple carrying options.
5. Konfiguracja
5.1 First Use & Battery Installation
Before first use, please unscrew the tailcap and remove the insulating film from the battery compartment. Ensure the battery is inserted with the positive (+) end facing the head of the flashlight.
5.2 Ładowanie
The S2R Baton II uses a magnetic charging system. Connect the MCC 1A magnetic charging cable to a USB power source (e.g., computer, power bank, USB wall adapter) and attach the magnetic end to the tailcap of the flashlight. The indicator on the charging cable will glow red during charging and turn green when fully charged.

Image 5.1: The highly efficient MCC 1A charger connected to the flashlight's magnetic tailcap, demonstrating various charging options including computer, car charger, power bank, and USB phone charger.
6. Instrukcja obsługi
6.1 Podstawowa obsługa
- Włącz/wyłącz: Single click the side switch to turn the flashlight ON/OFF.
- Zmień poziomy jasności: Gdy latarka jest włączona, naciśnij i przytrzymaj boczny przełącznik, aby przełączać się między trybami: niskim, średnim i wysokim. Puść przełącznik, aby wybrać żądany tryb.
- Tryb księżyca: When the flashlight is OFF, press and hold the side switch for over one second to activate Moonlight mode.
- Tryb turbo: Kliknij dwukrotnie przełącznik boczny, aby aktywować tryb Turbo. Kliknij dwukrotnie ponownie, aby powrócić do poprzedniego trybu.
- Tryb stroboskopowy: Trzykrotnie kliknij boczny przełącznik, aby włączyć tryb stroboskopowy. Pojedyncze kliknięcie lub naciśnięcie i przytrzymanie spowoduje wyjście.
- Zablokuj/Odblokuj: When the flashlight is OFF, press and hold the side switch for approximately two seconds until the moonlight mode briefly turns on and then off. The flashlight is now locked out. To unlock, press and hold the side switch for approximately two seconds until the moonlight mode turns on.
6.2 Wskaźnik poziomu baterii
The LED indicator located under the side switch provides real-time battery status:
- Zielony: Battery remaining > 70%
- Żółty: Battery remaining 15% - 70%
- Czerwony: Battery remaining < 15%

Image 6.1: The S2R Baton II on a tree branch, illustrating the three-color power level indication (green, yellow, red) on the side switch.
6.3 Korzystanie z zestawu głośnomówiącego
The S2R Baton II features a strong magnet in its tailcap, allowing it to be attached to ferrous metal surfaces for hands-free illumination. The reversible pocket clip also offers multiple carrying options, such as clipping to a pocket, backpack strap, or hat brim.
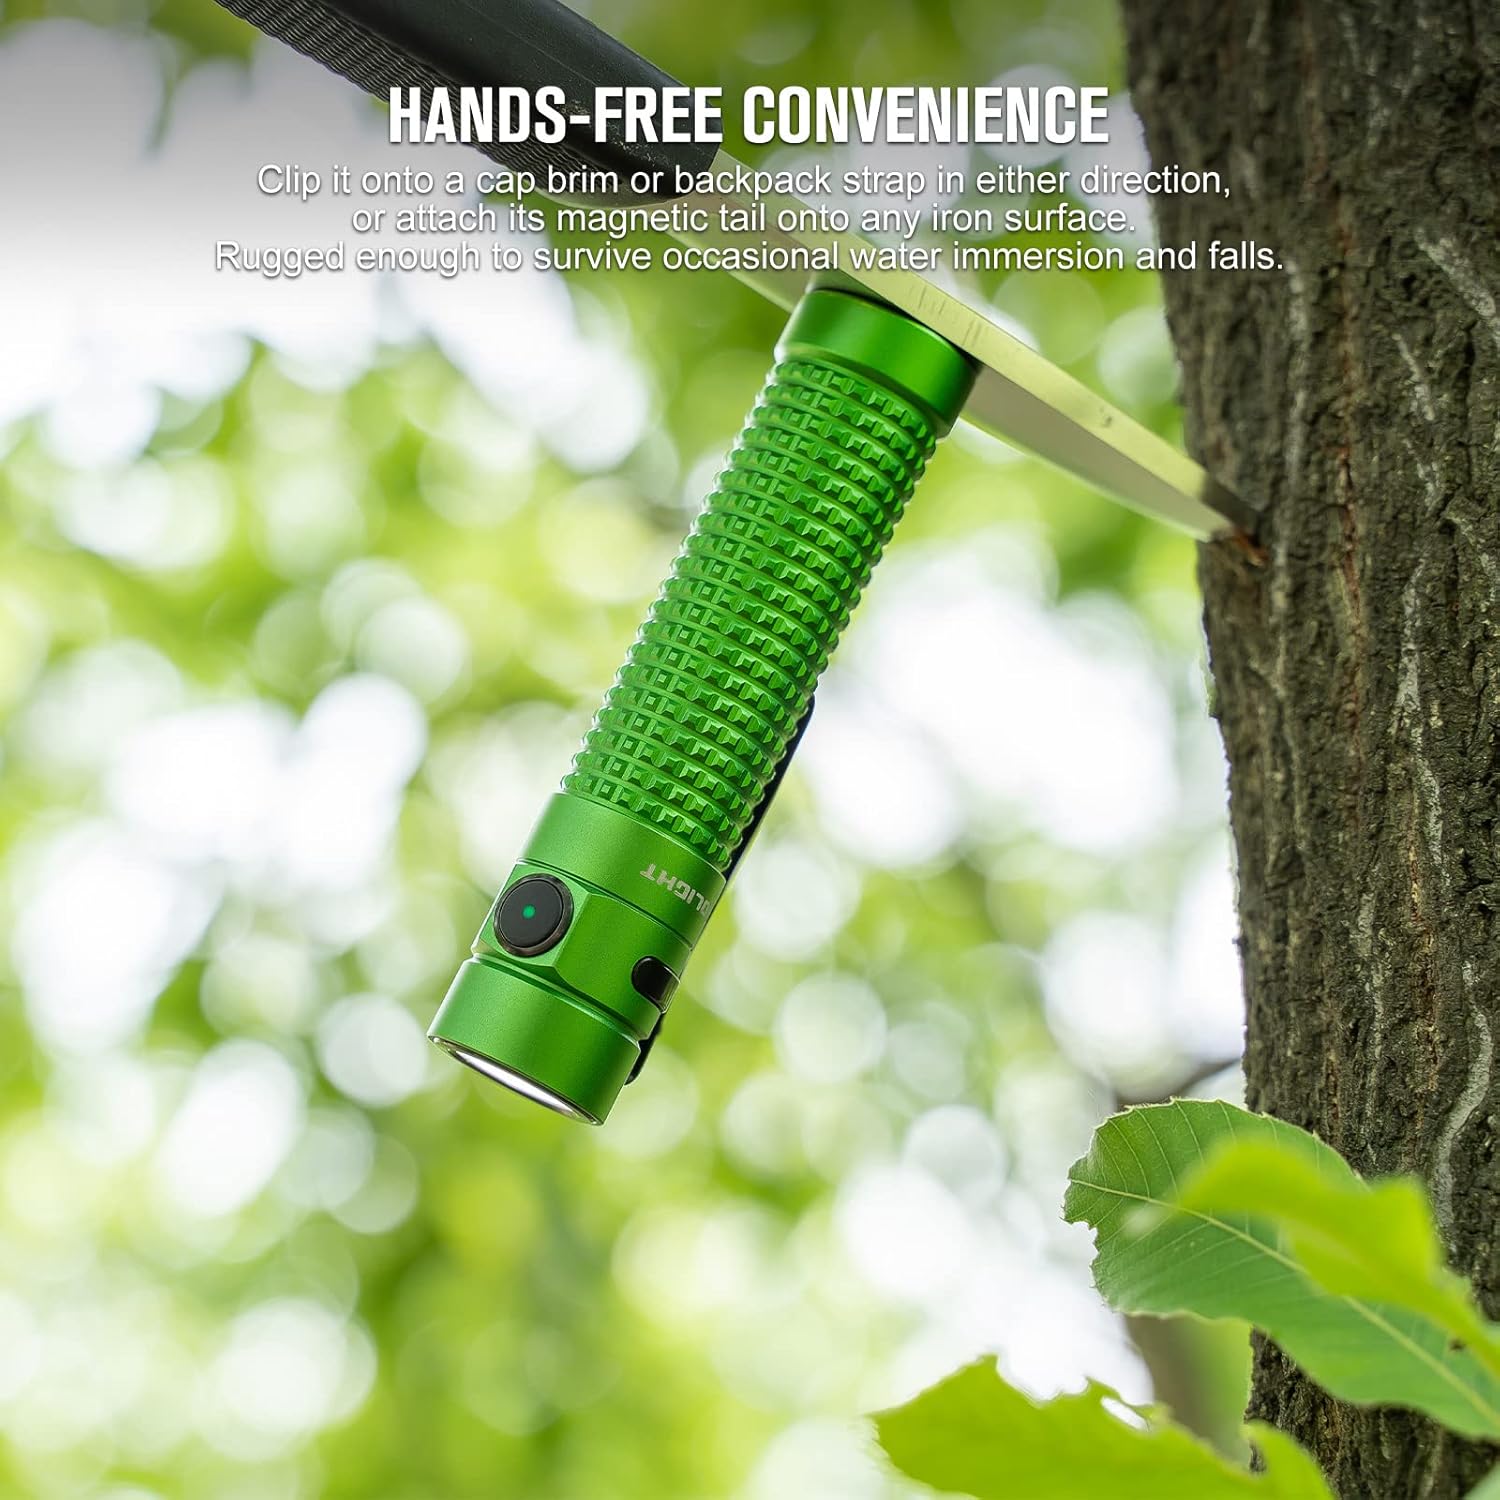
Image 6.2: The S2R Baton II attached magnetically to a metal surface, demonstrating its hands-free convenience.

Obraz 6.3: Zbliżenie view of the S2R Baton II's new pocket clip finish, showing how it can be attached to various items for easy access.
7. Konserwacja
7.1 Czyszczenie
Regularly clean the threads and O-rings with a clean cloth. Lubricate the threads with silicone grease to prevent wear and tear.
7.2 Pielęgnacja baterii
- Przed długotrwałym przechowywaniem naładuj całkowicie akumulator.
- Recharge the battery every 3-6 months to maintain optimal performance.
- Jeśli latarka nie będzie używana przez dłuższy czas, należy wyjąć baterię, aby zapobiec potencjalnemu wyciekowi.
8. Rozwiązywanie Problemów
If your OLIGHT S2R Baton II is not functioning correctly, please refer to the following common issues and solutions:
| Problem | Możliwa przyczyna | Rozwiązanie |
|---|---|---|
| Latarka się nie włącza. | Niski poziom naładowania baterii lub jej wyczerpanie. Insulating film not removed. Bateria włożona nieprawidłowo. Latarka jest w trybie blokady. | Naładuj baterię. Zdejmij folię izolacyjną. Sprawdź, czy bieguny baterii są prawidłowe. Unlock the flashlight (press and hold side switch for ~2 seconds). |
| Moc światła jest słaba lub migocze. | Niski poziom naładowania baterii. Loose tailcap. Brudne kontakty. | Naładuj baterię. Dokręć nasadkę tylną. Wyczyść styki i gwinty akumulatora. |
| Ładowanie magnetyczne nie działa. | Kabel ładujący nie jest prawidłowo podłączony. USB power source issue. Brudne styki ładowania. | Ensure magnetic end is firmly attached to tailcap. Spróbuj użyć innego portu USB lub adaptera. Clean the magnetic charging contacts on both the cable and flashlight. |
If the issue persists after attempting these solutions, please contact OLIGHT customer support for further assistance.
9. Specyfikacje
| Funkcja | Szczegół |
|---|---|
| Model | S2R Baton II |
| Źródło światła | Zimna biała dioda LED |
| Maksymalna wydajność | 1150 lumenów |
| Maksymalna odległość wiązki | 135 metrów |
| Źródło zasilania | Customized Rechargeable Lithium-Ion Battery |
| Maksymalny czas pracy | Up to 60 Days (Moonlight mode) |
| Typ ładowania | Magnetic Charging (MCC 1A) |
| Tworzywo | Stop aluminium |
| Kolor | Zielony |
| Waga | 5.6 uncji (około 158.7 g) |
| Wymiary | 5.79 x 2.01 x 1.54 cala (wymiary opakowania) |
| Poziom wodoodporności | Nie jest wodoodporny |
| Cechy specjalne | Magnetic Tailcap, Battery Indicator, Reversible Pocket Clip |
10. Gwarancja i wsparcie
OLIGHT offers a comprehensive warranty for its products. For detailed warranty information and customer support, please visit the official OLIGHT webOdwiedź naszą stronę internetową lub skontaktuj się bezpośrednio z działem obsługi klienta. Zachowaj dowód zakupu na wypadek reklamacji.
For further assistance or inquiries, please refer to the OLIGHT official webstrona: www.olightstore.com


