1. Koniec produktuview
The Weiser Prescott/Katella Handleset in Satin Nickel offers a blend of modern design and reliable functionality for exterior doors. This handleset is designed for keyed entry and security, but it does not include a deadbolt. It is intended to be paired with a separate Weiser deadbolt, which can be electronic or mechanical, allowing for personalized security solutions.
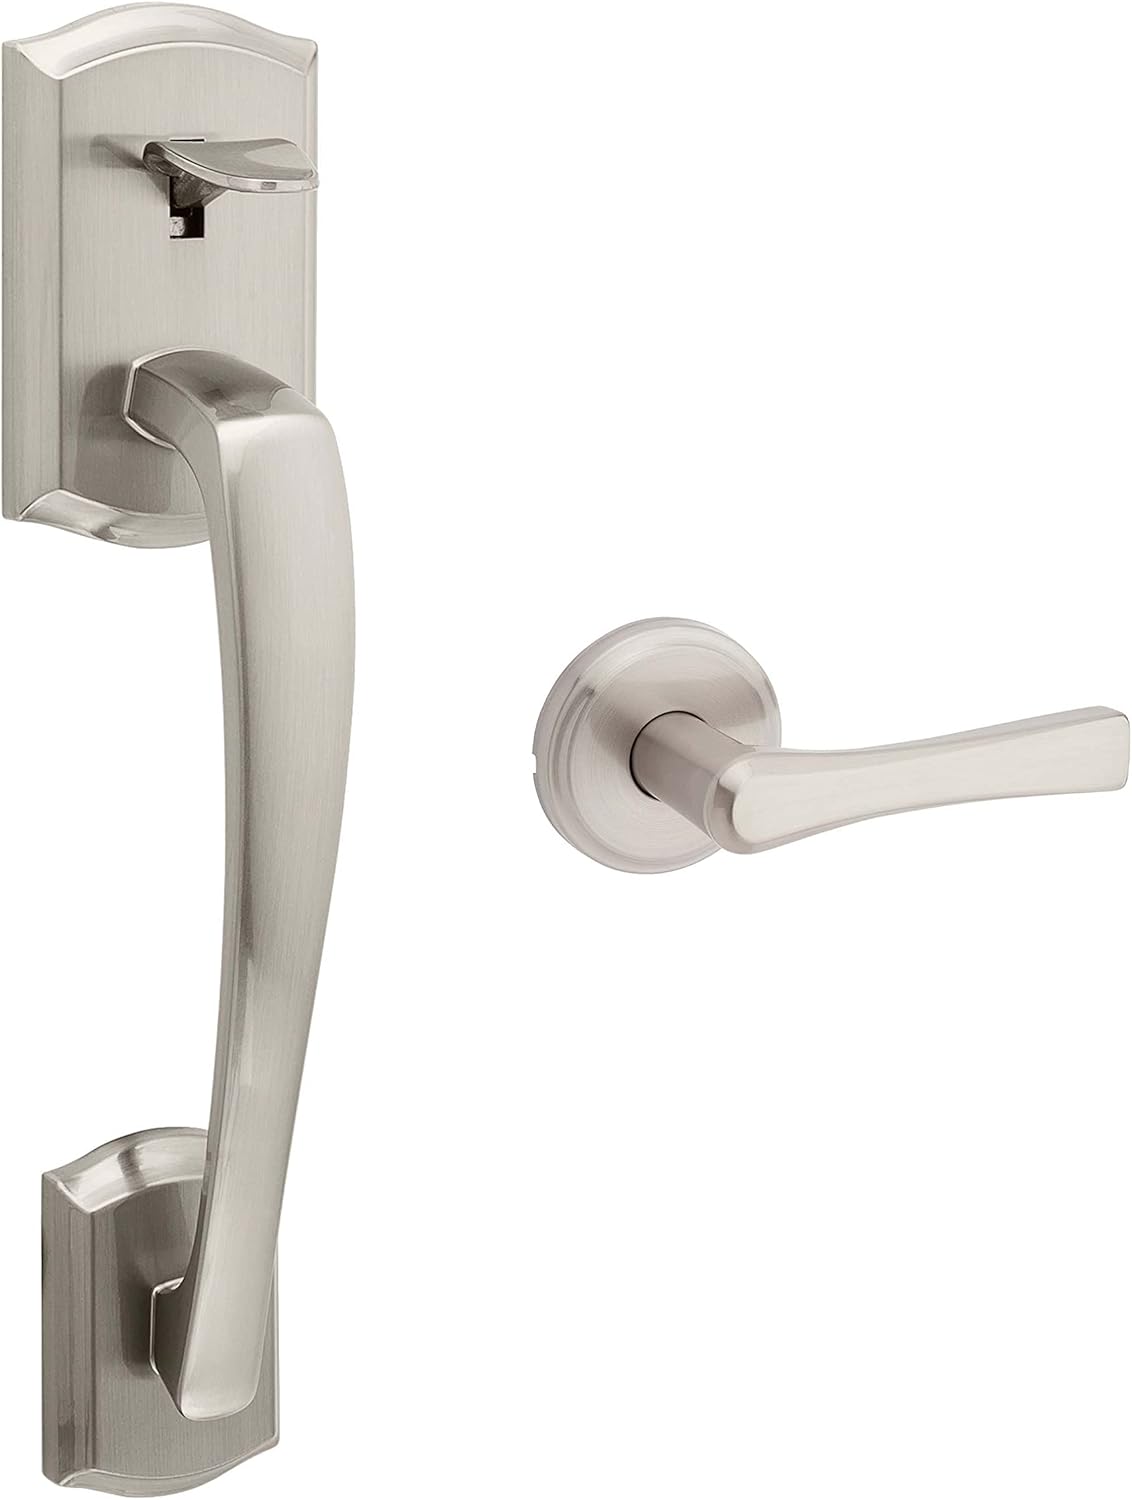
Rysunek 1: Zewnętrzny view of the Weiser Prescott/Katella Satin Nickel Handleset.
The handleset is reversible, accommodating both left-handed and right-handed door configurations. Its satin nickel finish provides a clean and contemporary aesthetic, complementing various home decors.
2. Co znajduje się w pudełku
Przed rozpoczęciem instalacji należy upewnić się, że wszystkie elementy są obecne:
- Klamka (zewnętrzna)
- Dźwignia (wewnętrzna)
- Zatrzaski
- Strajki
- Hardware (screws, pins, etc.)
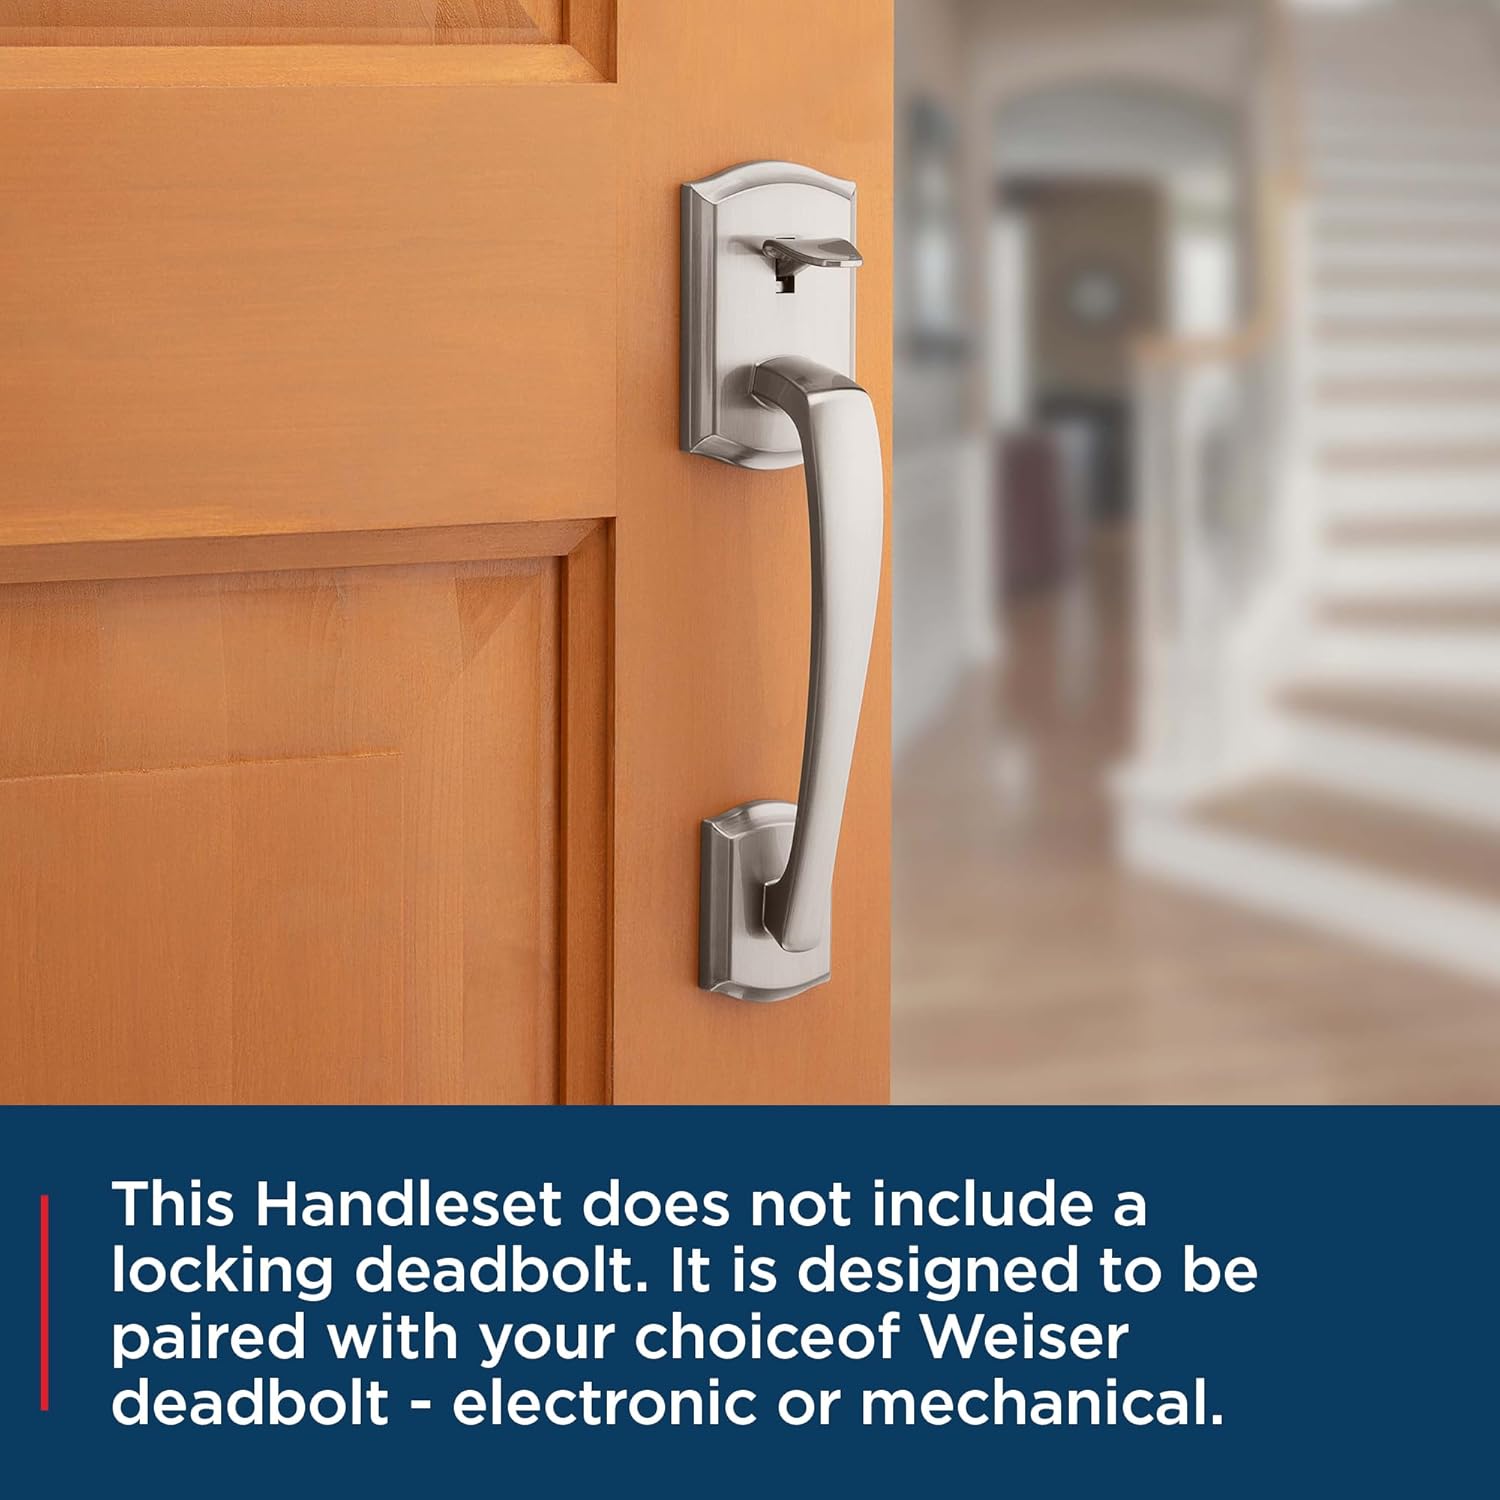
Figure 2: Weiser Prescott/Katella Handleset on a door, ready for a separate deadbolt installation.
3. Instalacja
3.1. Door Specifications & Preparation
Before installation, verify your door meets the following specifications:
- Grubość drzwi: 1-3/8" to 1-3/4"
- Latch Backset: 2-3/8" to 2-3/4"
- Otwór poprzeczny: 2-1/8"
This handleset is designed for easy installation with basic tools, typically a screwdriver. No additional holes are required if your door is pre-drilled to standard specifications.

Figure 3: Illustrative image of door handle installation using a screwdriver.
3.2. Kroki instalacji
Follow these general steps for installing your handleset. Refer to the detailed video for visual guidance.
- Install the latch into the door edge.
- Install the exterior handle assembly, ensuring the spindle aligns with the latch.
- Install the interior lever, aligning it with the exterior assembly.
- Przymocuj wszystkie elementy za pomocą dostarczonych śrub.
- Zamontować listwę zaczepową na ościeżnicy drzwi.
Video 1: General Handleset Installation Guide (Tinewa Brand). This video demonstrates the typical steps for installing a handleset, which are applicable to the Weiser Prescott/Katella model.

Rysunek 4: Wnętrze view of the handleset lever.
4. Działanie
The Weiser Prescott/Katella Handleset provides secure entry for your exterior door. To operate:
- To Open from Exterior: Insert your key into the keyhole and turn to unlock. Depress the thumb latch to retract the bolt and open the door.
- To Open from Interior: Simply depress the interior lever to retract the bolt and open the door.
- Aby zablokować od zewnątrz: Close the door. Ensure the latch is fully extended. If paired with a deadbolt, engage the deadbolt.
- Aby zablokować od wewnątrz: Close the door. Depress the interior lever to ensure the latch is fully extended. If paired with a deadbolt, engage the deadbolt.
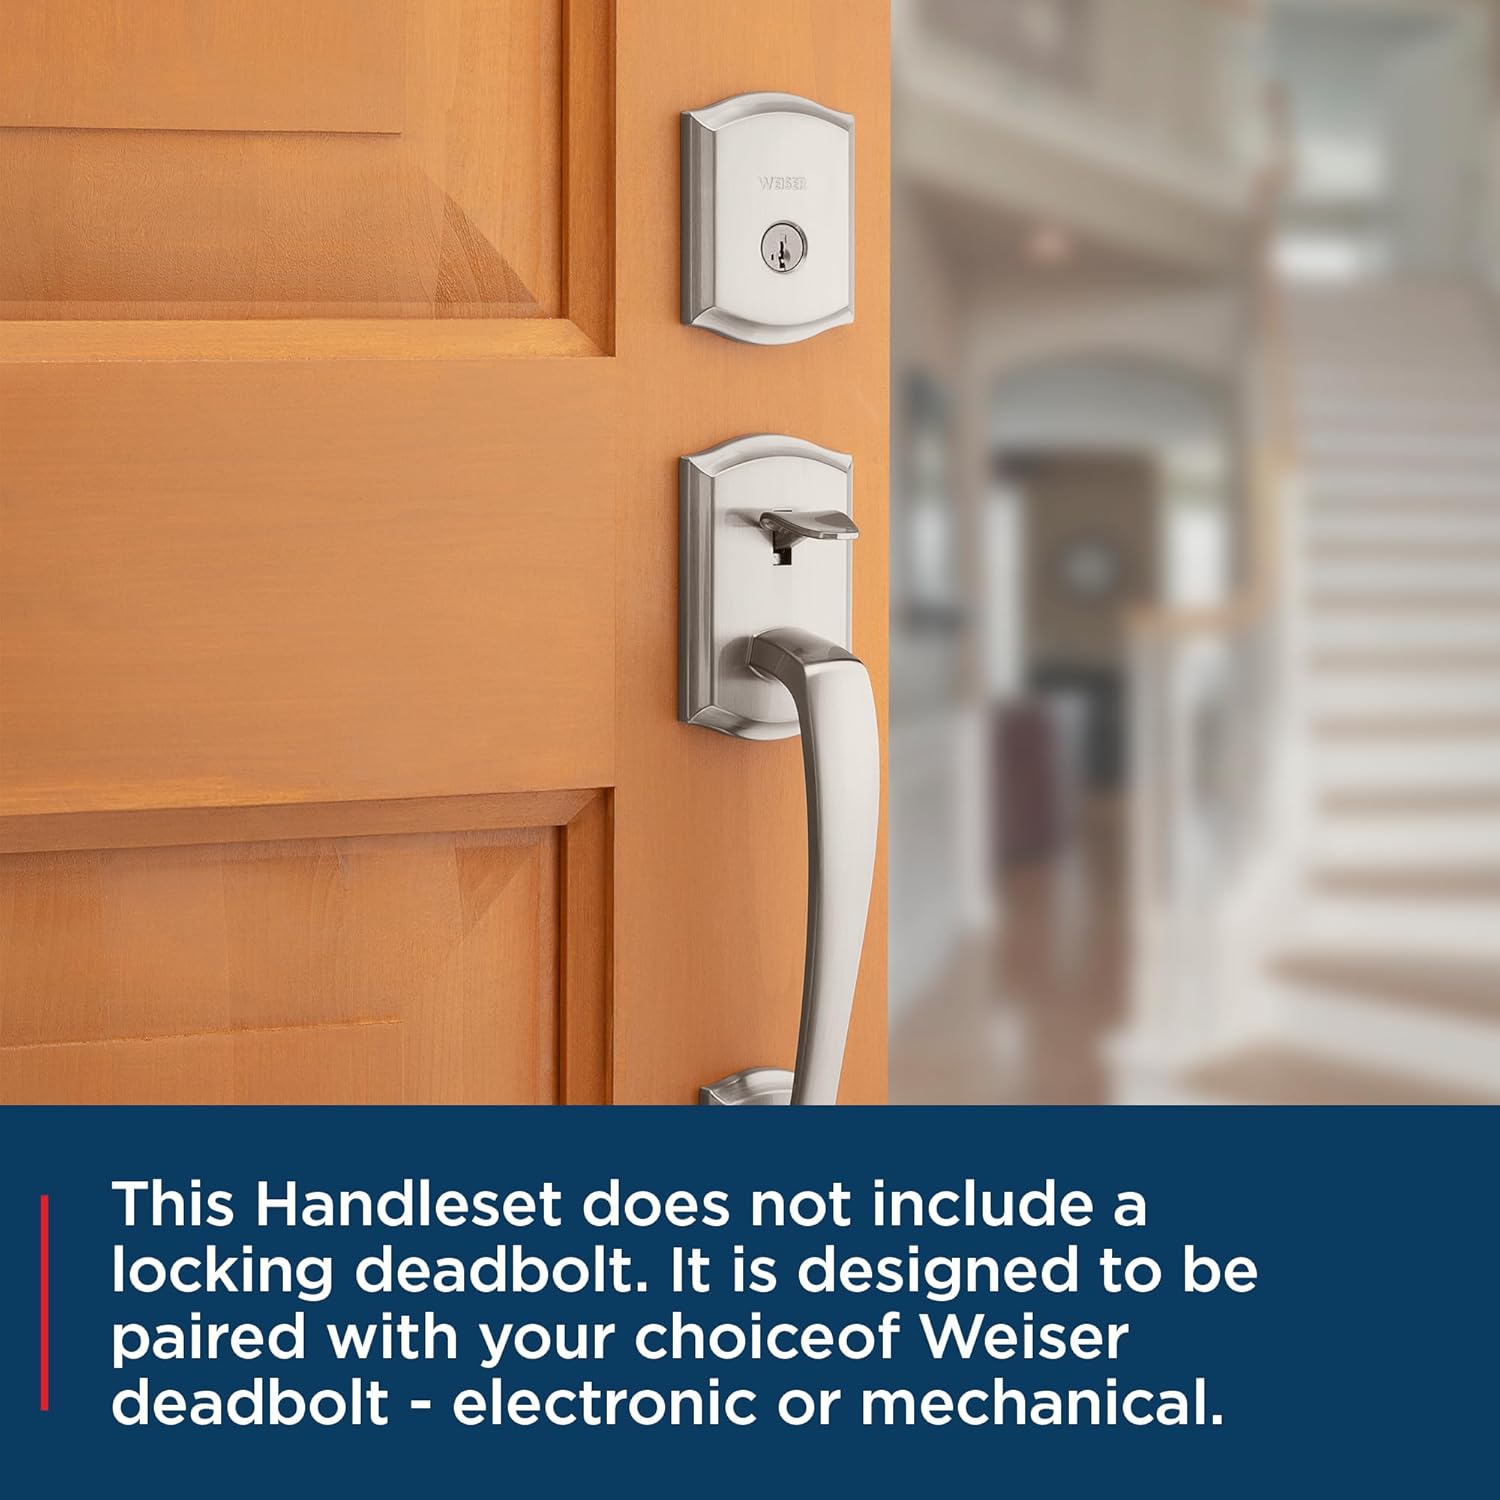
Figure 5: Handleset shown with a separate deadbolt (not included with this product).
5. SmartKey Security Feature
This Weiser handleset is compatible with SmartKey Security technology, allowing you to re-key your lock yourself in seconds. This feature provides convenience and enhanced security, enabling you to match your handleset key to other Weiser SmartKey locks you may own.
5.1. Re-Keying Your Lock
To re-key your lock using SmartKey technology:
- Insert your functioning key and turn it 1/4 turn clockwise.
- Insert the SmartKey Learn Tool fully and firmly into the SmartKey hole. Remove the SmartKey Learn Tool.
- Wyjmij działający klucz.
- Insert your new key fully and firmly into the keyhole. Turn it 1/2 turn counter-clockwise.
- Your lock is now re-keyed. Test the new key to ensure proper operation.
Video 2: Weiser SmartKey Tutorial - Re-Key Your Lock In Seconds. This official Weiser video demonstrates the quick and easy process of re-keying your SmartKey compatible lock.

Figure 6: Weiser SmartKey Security features.

Figure 7: Visual steps for re-keying your SmartKey lock.
6. Konserwacja
To ensure the longevity and optimal performance of your Weiser handleset, follow these maintenance guidelines:
- Czyszczenie: Regularnie czyść klamkę miękką,amp szmatką. Unikaj środków czyszczących o działaniu ściernym, rozpuszczalników i silnych środków chemicznych, ponieważ mogą one uszkodzić wykończenie.
- Smarowanie: Periodically apply a silicone-based lubricant to the latch mechanism and key cylinder to ensure smooth operation. Do not use oil-based lubricants.
- Śruby dokręcające: Check all mounting screws periodically and tighten them if necessary to prevent looseness.
7. Rozwiązywanie Problemów
If you encounter issues with your handleset, consider the following common solutions:
- Uchwyt jest luźny: Check and tighten all visible screws on both the interior and exterior components.
- Latch Not Retracting Smoothly: Apply a silicone-based lubricant to the latch mechanism. Ensure no debris is obstructing the latch.
- Kluczyk się nie obraca: Ensure the key is fully inserted. Check for any obstructions in the keyway. If using SmartKey, ensure the re-keying process was completed correctly.
- Drzwi się nie zatrzaskują: Verify the strike plate on the door frame is properly aligned with the latch. Adjust the strike plate if needed.
For persistent issues, contact Weiser customer support.
8. Specyfikacje
| Funkcja | Specyfikacja |
|---|---|
| Producent | Weiser |
| Numer części | 9GLA77710-010 |
| Wymiary produktu | Wymiary 7.78 x 6.83 x 6.83 cm |
| Waga przedmiotu | 1.83 kilogramów |
| Rozmiar | Prescott/Katella |
| Kolor | Nikiel satynowy |
| Styl | Handleset Minus Deadbolt |
| Skończyć | Błyszczący |
| Tworzywo | Metal |
| Metoda instalacji | Natynkowy |
| Ilość w opakowaniu przedmiotu | 1 |
| Liczba sztuk | 2 |
| Materiał uchwytu | Metal |
| Cechy specjalne | Łatwy w instalacji |
| Stosowanie | Exterior doors |
| Zawarte komponenty | Hardware, Latch, Strike, Passage Door Handle (Deadbolt not included) |
| Czy potrzebne są baterie? | NIE |
| Kraj pochodzenia | Chiny |
9. Gwarancja i pomoc techniczna
Your Weiser Prescott/Katella Handleset is backed by a Ograniczona dożywotnia gwarancja mechaniczna i na wykończenie. This warranty covers defects in material and workmanship for the lifetime of the original residential user.
For warranty claims, technical assistance, or further inquiries, please contact Weiser customer support. Refer to the official Weiser webna tej stronie znajdziesz najnowsze dane kontaktowe i szczegółowe warunki gwarancji.


