Instrukcja obsługi reduktorów tlenu i acetylenu serii ESAB Victor G250
Model: G250 Series | Brand: ESAB
1. Wprowadzenie i koniecview
This manual provides essential information for the safe and effective use of your ESAB Victor G250 Series Oxygen and Acetylene Regulators. These single-stage regulators are designed for applications where slight delivery pressure increases will not significantly affect work performance or test results. The G250 series is engineered for everyday gas regulation needs with no reduction in quality, making them suitable for medium-duty industrial applications.
G250-15-510 Acetylene Regulator: Specifically designed for acetylene gas.
G250-150-540 Oxygen Regulator: Specifically designed for oxygen gas.
Ergonomic Color-Coded Adjustment Knob: Facilitates easy and intuitive pressure adjustments.
High Contrast Gauge Face: Ensures clear readability of pressure readings.
Kompaktowa konstrukcja: Allows for easier handling and integration into various setups.
Image 1.1: A set of Victor G250 Oxygen (green knob) and Acetylene (red knob) regulators, showing their compact design and clear gauges.
2. Informacje dotyczące bezpieczeństwa
OSTRZEŻENIE: Failure to follow these safety instructions can result in serious injury or death. Always refer to local safety regulations and standards for gas handling and welding operations.
Przeczytaj wszystkie instrukcje: Before installing, operating, or maintaining these regulators, read and understand all instructions and safety warnings in this manual and on the gas cylinders.
Środki ochrony osobistej (PPE): Always wear appropriate PPE, including safety glasses, gloves, and protective clothing, when handling gas cylinders and regulators.
Wentylacja: Ensure adequate ventilation in the work area to prevent the accumulation of hazardous gases.
Kompatybilność z gazem: Use only the correct regulator for the specific gas. Oxygen regulators are for oxygen only; acetylene regulators are for acetylene only. Never interchange regulators between different gases.
Cylinder Handling: Secure gas cylinders in an upright position to prevent tipping. Handle cylinders with care; never drop or strike them.
Badania szczelności: Always perform a leak test using a non-flammable leak detection solution after connecting regulators and before opening cylinder valves. Never use an open flame to check for leaks.
Pressure Relief Devices: Nie tamper with or bypass any pressure relief devices on the regulators or cylinders.
Materiały łatwopalne: Keep regulators and gas cylinders away from sources of ignition, heat, and flammable materials.
Konserwacja: Only qualified personnel should perform maintenance or repairs on gas regulators.
3. Zawartość opakowania
Your ESAB Victor G250 Series Regulators package typically includes:
1 x Victor G250 Oxygen Regulator (CGA 540 inlet connection)
1 x Victor G250 Acetylene Regulator (CGA 510 inlet connection)
Inspect all components for any signs of damage during shipping. If any items are missing or damaged, contact your supplier immediately.
4. Instrukcje konfiguracji
Follow these steps carefully to set up your Victor G250 regulators:
Prepare the Cylinder Valve: Before attaching the regulator, briefly open and close the cylinder valve (known as 'cracking' the valve) to blow out any dust or debris from the outlet. Stand to the side of the valve opening when doing this.
Attach the Oxygen Regulator:Image 4.1: Close-up of the Victor G250 Oxygen Regulator with its green adjustment knob and two gauges.Connect the Victor G250 Oxygen Regulator (green knob) to the oxygen cylinder valve. Ensure the threads align correctly (CGA 540 for oxygen). Hand-tighten first, then use an appropriate wrench to securely tighten the connection. Do not overtighten.
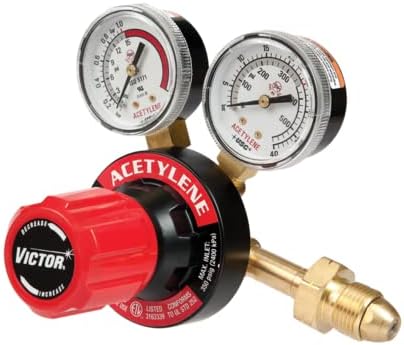
Attach the Acetylene Regulator:Image 4.2: Close-up of the Victor G250 Acetylene Regulator with its red adjustment knob and two gauges.Connect the Victor G250 Acetylene Regulator (red knob) to the acetylene cylinder valve. Ensure the threads align correctly (CGA 510 for acetylene). Hand-tighten first, then use an appropriate wrench to securely tighten the connection. Acetylene connections are typically left-hand threaded.
Podłącz węże: Attach the appropriate hoses to the regulator outlets. Ensure all hose connections are tight and secure.
Close Regulator Adjustment Knobs: Before opening the cylinder valves, turn the regulator adjustment knobs counter-clockwise until they feel loose. This ensures no pressure is applied to the system when the cylinder valve is opened.
5. Instrukcja obsługi
Follow these steps for safe operation of your Victor G250 regulators:
Otwórz zawory cylindrów: Slowly open the oxygen cylinder valve all the way. For acetylene, open the cylinder valve no more than 1.5 turns (or until the valve is fully open, whichever is less) to allow for quick shut-off in an emergency. The high-pressure gauge on each regulator will now show the cylinder pressure.
Sprawdź, czy nie ma wycieków: Apply a non-flammable leak detection solution to all connections (cylinder to regulator, regulator to hose). Look for bubbles, which indicate a leak. If a leak is detected, close the cylinder valve, relieve pressure, and re-tighten the connection. Repeat the leak test.
Ustaw ciśnienie robocze: Slowly turn the regulator adjustment knob clockwise until the desired working pressure is indicated on the low-pressure gauge. Adjust gradually to avoid sudden pressure surges.
Rozpoczęcie pracy: Once the desired pressures are set and no leaks are present, you can begin your welding or cutting operation according to your equipment's instructions.
Procedura zamykania: When finished, first close the cylinder valves. Then, open the torch valves (or other downstream equipment) to bleed off all gas from the hoses and regulators until both regulator gauges read zero. Finally, turn the regulator adjustment knobs counter-clockwise until they are loose to release spring tension.
6. Konserwacja
Proper maintenance ensures the longevity and safe operation of your regulators.
Regularna kontrola: Periodically inspect regulators for any signs of damage, such as bent gauges, damaged threads, or cuts in the diaphragm. Replace damaged regulators immediately.
Czystość: Keep regulators clean and free from oil, grease, and other contaminants, especially oxygen regulators, as these can react violently with oxygen.
Składowanie: When not in use, store regulators in a clean, dry place, protected from physical damage and extreme temperatures.
Serwis profesjonalny: Regulators should be serviced or repaired only by qualified technicians using genuine replacement parts. Do not attempt to repair regulators yourself.
7. Rozwiązywanie Problemów
This section addresses common issues you might encounter with your regulators.
Problem
Możliwa przyczyna
Rozwiązanie
No pressure reading on high-pressure gauge
Cylinder valve closed or empty cylinder
Open cylinder valve fully (oxygen) or 1.5 turns (acetylene). Check cylinder contents.
No pressure reading on low-pressure gauge
Regulator adjustment knob not turned in (clockwise)
Slowly turn adjustment knob clockwise to set desired working pressure.
Wyciek gazu na połączeniach
Loose connection or damaged sealing surface
Close cylinder valve, relieve pressure, re-tighten connection. Perform leak test. Inspect threads and sealing surfaces for damage.
Fluctuating delivery pressure
Cylinder pressure too low or internal regulator issue
Check cylinder pressure; replace if low. If problem persists, regulator may require professional servicing.
If you encounter issues not listed here or if solutions do not resolve the problem, discontinue use and contact a qualified technician or ESAB customer support.
8. Specyfikacje
Key specifications for the ESAB Victor G250 Series Regulators (Model 0781-3287):
Image 8.1: Product sheet detailing features and specifications of Victor G250 Oxygen and Acetylene Regulators.
Funkcja
Szczegół
Producent
ESAB
Numer części
0781-3287
Waga przedmiotu
6.98 pounds (set)
Wymiary opakowania
9.25 x 9.25 x 9.06 cala
Numer modelu przedmiotu
0781-3287 (G250 Series)
Typ regulatora
Syngieltage
Oxygen Regulator Model
G250-150-540
Acetylene Regulator Model
G250-15-510
Cylinder Gas Compatibility
Oxygen, Acetylene
Średnica miernika
2 cali (50.8 mm)
9. Gwarancja i wsparcie
For warranty information and customer support regarding your ESAB Victor G250 Series Regulators, please contact ESAB directly or refer to the official ESAB webWarunki gwarancji mogą się różnić w zależności od regionu i daty zakupu.
You can visit the official ESAB store for more information: ESAB Store on Amazon
ESAB TRACFINDER WHEEL: Betjeningsvejledning og Teknisk Information Denne betjeningsvejledning daje szczegółowe instrukcje dotyczące instalacji, driftu, vedligeholdelse i fejlfinding ESAB TRACFINDER WHEEL svejsetraktor. Lær om tekniske specifikationer, sikkerhedsprocedurer og tilbehør.
Guía de funcionamiento del TRACFINDER WHEEL de ESAB Manual de funcionamiento y guía de instalación para el carro de soldadura autónomo ESAB TRACFINDER WHEEL. Cubre especificaciones técnicas, operaciones, mantenimiento y solución de problemas.
ESAB TRACFINDER RAIL: Manual de Operação e Instalação Este manual fornece instruções detalhadas sobre a instalação, operação, segurança, manutenção e solução de problemas do sistema de soldagem automatizada ESAB TRACFINDER RAIL, projetado para aplicações industriais.
Manual de Instrucciones ESAB TRACFINDER WHEEL Manual de instrucciones completo para el carro de soldadura ESAB TRACFINDER WHEEL. Cubre instalación, operación, panel de control, mantenimiento, resolución de averías y especificaciones técnicas.