PPLEE Extra Loud Vibrating Alarm Clock with Bed Shaker
Model: CR1018I
1. Koniec produktuview
The PPLEE Extra Loud Vibrating Alarm Clock is designed to provide effective wake-up solutions for deep sleepers, individuals with hearing impairment, and the deaf. It features multiple wake-up modes, a large digital display, dual alarm settings, and convenient charging capabilities.

Image 1.1: The PPLEE Extra Loud Vibrating Alarm Clock with its bed shaker accessory.
Główne cechy:
- Strong Bed Shaker & Loud Alarm Buzzer: Offers three wake-up modes: loud buzzer, strong bed shaker, or a combination of both.
- 8.7" Large Mirror LED Display: Provides clear time visibility and can also function as a makeup mirror.
- Dual Alarms with Snooze Function: Allows setting two independent alarms with a 9-minute snooze option.
- Adjustable Brightness & Volume: Features 8 levels of display brightness and 7 levels of alarm volume.
- Port ładowania USB: Conveniently charge your mobile devices directly from the clock.
- Zapas baterii: Utrzymuje ustawienia czasu i alarmu podczas wyłączania zasilaniatages (CR2032 battery included).
- 12/24H Mode & DST Function: Supports both 12-hour and 24-hour time formats, along with Daylight Saving Time adjustment.
2. Zawartość opakowania
Proszę zaznaczyć pole dotyczące następujących elementów:
- 1 x PPLEE Mirror Alarm Clock
- 1 x Wstrząsacz do łóżek
- 1 x Power Plug with USB Cable
- 1 x Instrukcja obsługi
- 1 x CR2032 Cell Coin Battery (pre-installed or separate)

Ilustracja 2.1: Wszystkie elementy zawarte w opakowaniu produktu.
3. Przewodnik konfiguracji
3.1 Połączenie zasilania
- Connect the USB cable to the alarm clock's power input port.
- Podłącz zasilacz do standardowego gniazdka elektrycznego. Wyświetlacz zegara się podświetli.
- Ensure the CR2032 backup battery is installed in its compartment. This battery preserves time and alarm settings during power interruptions.

Obraz 3.1: Tył view of the alarm clock showing the AC power input and backup battery compartment.
3.2 Umiejscowienie wibratora łoża
The bed shaker provides a strong vibration to assist in waking. For optimal effectiveness, place the bed shaker in one of the following locations:
- Pod poduszką.
- Pod prześcieradłem z gumką.
- Pomiędzy materacem a stelażem.

Image 3.2: Recommended placements for the bed shaker to maximize vibration effectiveness.
4. Instrukcja obsługi
4.1 Ustawianie czasu
- Naciśnij i przytrzymaj USTAWIENIE CZASU Naciskaj przycisk, aż cyfry godziny zaczną migać.
- Użyj GODZINA I CHWILA przyciski, aby ustawić czas.
- Naciskać USTAWIENIE CZASU ponownie, aby potwierdzić i wyjść z trybu ustawiania czasu.
4.2 Ustawianie alarmów (Alarm 1 i Alarm 2)
Zegar obsługuje dwa niezależne alarmy.
- Naciśnij i przytrzymaj ALARM 1 or ALARM 2 Naciskaj przycisk, aż zaczną migać cyfry czasu alarmu.
- Użyj GODZINA I CHWILA przyciski umożliwiające ustawienie żądanej godziny alarmu.
- Naciskać ALARM 1 or ALARM 2 ponownie, aby potwierdzić godzinę alarmu.
- To activate or deactivate an alarm, short press the corresponding ALARM 1 or ALARM 2 przycisk. Ikona alarmu pojawi się/zniknie na wyświetlaczu.

Image 4.1: The dual alarm feature allows setting two separate wake-up times.
4.3 Funkcja drzemki
Gdy zabrzmi alarm, naciśnij przycisk DRZEMKA button to temporarily silence the alarm for 9 minutes. The alarm will sound again after the snooze period.
4.4 Turning Off Alarms
- Temporary Turn Off: Naciśnij ALARM WYŁĄCZONY button once when the alarm is sounding to stop it for the current day. It will reactivate the next day.
- Permanent Turn Off: Naciśnij i przytrzymaj ALARM WYŁĄCZONY button to deactivate the alarm permanently. The alarm icon will disappear from the display.
4.5 Regulacja jasności wyświetlacza
The display has 8 levels of brightness. Short press the OPORNIK button repeatedly to cycle through the brightness levels (OFF, Level 1-7). When in 'OFF' mode, the red indicator on top will remain on.
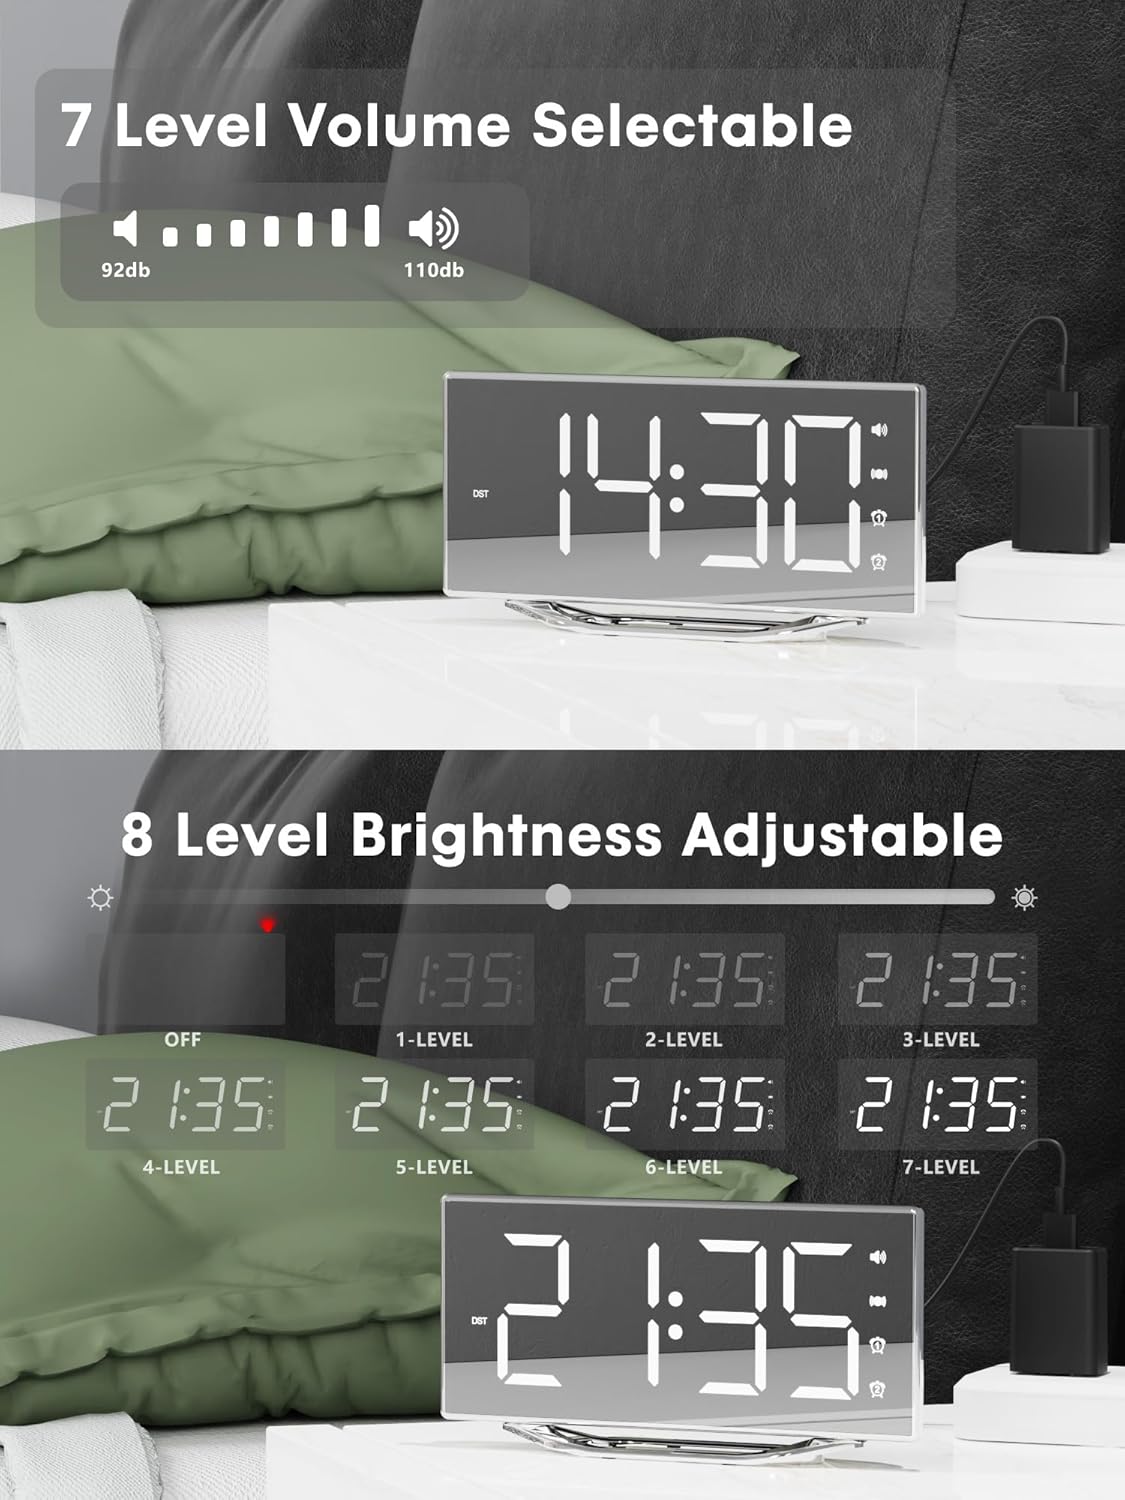
Image 4.2: Visual representation of the 8-level brightness adjustment for the LED display.
4.6 Regulacja głośności alarmu
The alarm buzzer has 7 adjustable volume levels. Short press the TOM button repeatedly to cycle through the volume levels.

Image 4.3: The alarm volume can be adjusted across 7 levels, from 92dB to 110dB.
4.7 Selecting Wake-Up Mode
Naciśnij BRZĘCZENIE/WIBRACJA button to select your preferred wake-up method:
- Loud Buzzer only
- Strong Bed Shaker only
- Both Buzzer and Shaker

Image 4.4: The alarm clock offers three distinct wake-up modes for personalized use.
4.8 12/24 Hour Format & DST
- Format 12/24-godzinny: Naciśnij krótko 12/24 godziny button to switch between 12-hour and 24-hour time display.
- Funkcja czasu letniego: Naciśnij krótko Czas letni button to activate or deactivate Daylight Saving Time.

Image 4.5: The clock supports both 12-hour and 24-hour time formats, and features a USB charging port.
4.9 porty USB do ładowania
The integrated USB charging port allows you to charge your smartphone or other USB-powered devices directly from the alarm clock. Simply connect your device's USB charging cable to the port on the clock.
5. Konserwacja
- Czyść powierzchnię zegara miękką, suchą ściereczką. Unikaj stosowania środków czyszczących o właściwościach ściernych i rozpuszczalników.
- Trzymaj zegar z dala od wody i wilgoci.
- Nie wystawiaj zegara na bezpośrednie działanie promieni słonecznych ani ekstremalnych temperatur.
- If the clock will not be used for an extended period, consider removing the backup battery to prevent leakage.
6. Rozwiązywanie Problemów
| Problem | Możliwa przyczyna | Rozwiązanie |
|---|---|---|
| Wyświetlacz zegara jest wyłączony. | No power supply; power cable loose. | Ensure the power adapter is securely plugged into the clock and a working outlet. Check if the dimmer is set to 'OFF'. |
| Alarm nie wydaje dźwięku/nie wibruje. | Alarm not activated; volume too low; bed shaker not connected or placed incorrectly. | Verify alarm is activated (icon visible). Increase alarm volume. Ensure bed shaker is securely plugged in and properly placed. |
| Resetowanie czasu/ustawień po wyłączeniu zasilaniatage. | Bateria zapasowa jest rozładowana lub nie została zainstalowana. | Replace the CR2032 backup battery. Ensure it is installed correctly. |
| Ładowanie przez USB nie działa. | Device not compatible; cable faulty; clock not powered. | Ensure the clock is powered. Try a different USB cable. Verify your device is compatible with standard USB charging. |
7. Specyfikacje
| Funkcja | Szczegół |
|---|---|
| Marka | OSOBY |
| Numer modelu | CR1018I |
| Kolor | Silver Surface (with Bed Shaker) |
| Typ wyświetlacza | Cyfrowa dioda LED |
| Wymiary produktu | 8.7"W x 8.7"H (Display size) |
| Źródło zasilania | Elektryczny przewodowy |
| Bateria zapasowa | 1 x CR2032 (w zestawie) |
| Tworzywo | Plastikowy |
| Waga przedmiotu | 7 uncji (0.2 kilograma) |
| Tryby alarmowe | Buzzer, Vibration, Buzzer + Vibration |
| Jasność wyświetlacza | 8 Levels (including OFF) |
| Głośność alarmu | 7 poziomów |
| Format czasu | Możliwość wyboru 12H/24H |
| Cechy specjalne | Dual Alarms, Snooze, USB Charging Port, DST Function, Mirror Surface |
8. Gwarancja i wsparcie
PPLEE is committed to providing high-quality products and customer satisfaction.
- 1-letnia gwarancja: The product is covered by a 1-year warranty from the date of purchase against manufacturing defects.
- 90-dniowa gwarancja zwrotu pieniędzy: If you are unsatisfied with the product, you may be eligible for a full refund within 90 days of purchase.
- Lifetime Free Support: PPLEE offers free lifetime user support for any questions or concerns regarding the product.
- 24-Hour Response Service: For any inquiries, please contact us via Amazon. We aim to respond within 24 hours.

Image 8.1: Summary of warranty and support offerings.


