1. Wprowadzenie
Thank you for choosing the Perel Radio-Controlled Wall Clock. This clock is designed for precise timekeeping, automatically synchronizing with the DCF77 atomic clock signal. It also features integrated analog displays for temperature and humidity, making it a versatile addition to any room.
1.1 Instrukcje bezpieczeństwa
- Przed użyciem należy uważnie przeczytać wszystkie instrukcje.
- Nie wystawiaj zegara na działanie ekstremalnych temperatur, bezpośredniego światła słonecznego i wysokiej wilgotności.
- Use only the specified battery type (1 x AA, not included).
- Zużytych baterii należy pozbywać się w sposób odpowiedzialny, zgodnie z lokalnymi przepisami.
- Przechowywać w miejscu niedostępnym dla dzieci.
2. Koniec produktuview
2.1 Główne cechy
- Radio-Controlled (DCF77): Automatic time synchronization with the atomic clock in Frankfurt, Germany.
- Automatic Summer/Winter Time Adjustment: Seamless transition between daylight saving and standard time.
- Zintegrowany termometr: Analog display for room temperature.
- Integrated Hygrometer: Analog display for air humidity.
- Duży, czytelny wyświetlacz: 35.5 cm diameter with clear numbers.
- Ponadczasowy design: Minimalist black dial with silver-grey aluminum frame.
2.2 Składniki
Familiarize yourself with the clock's components:
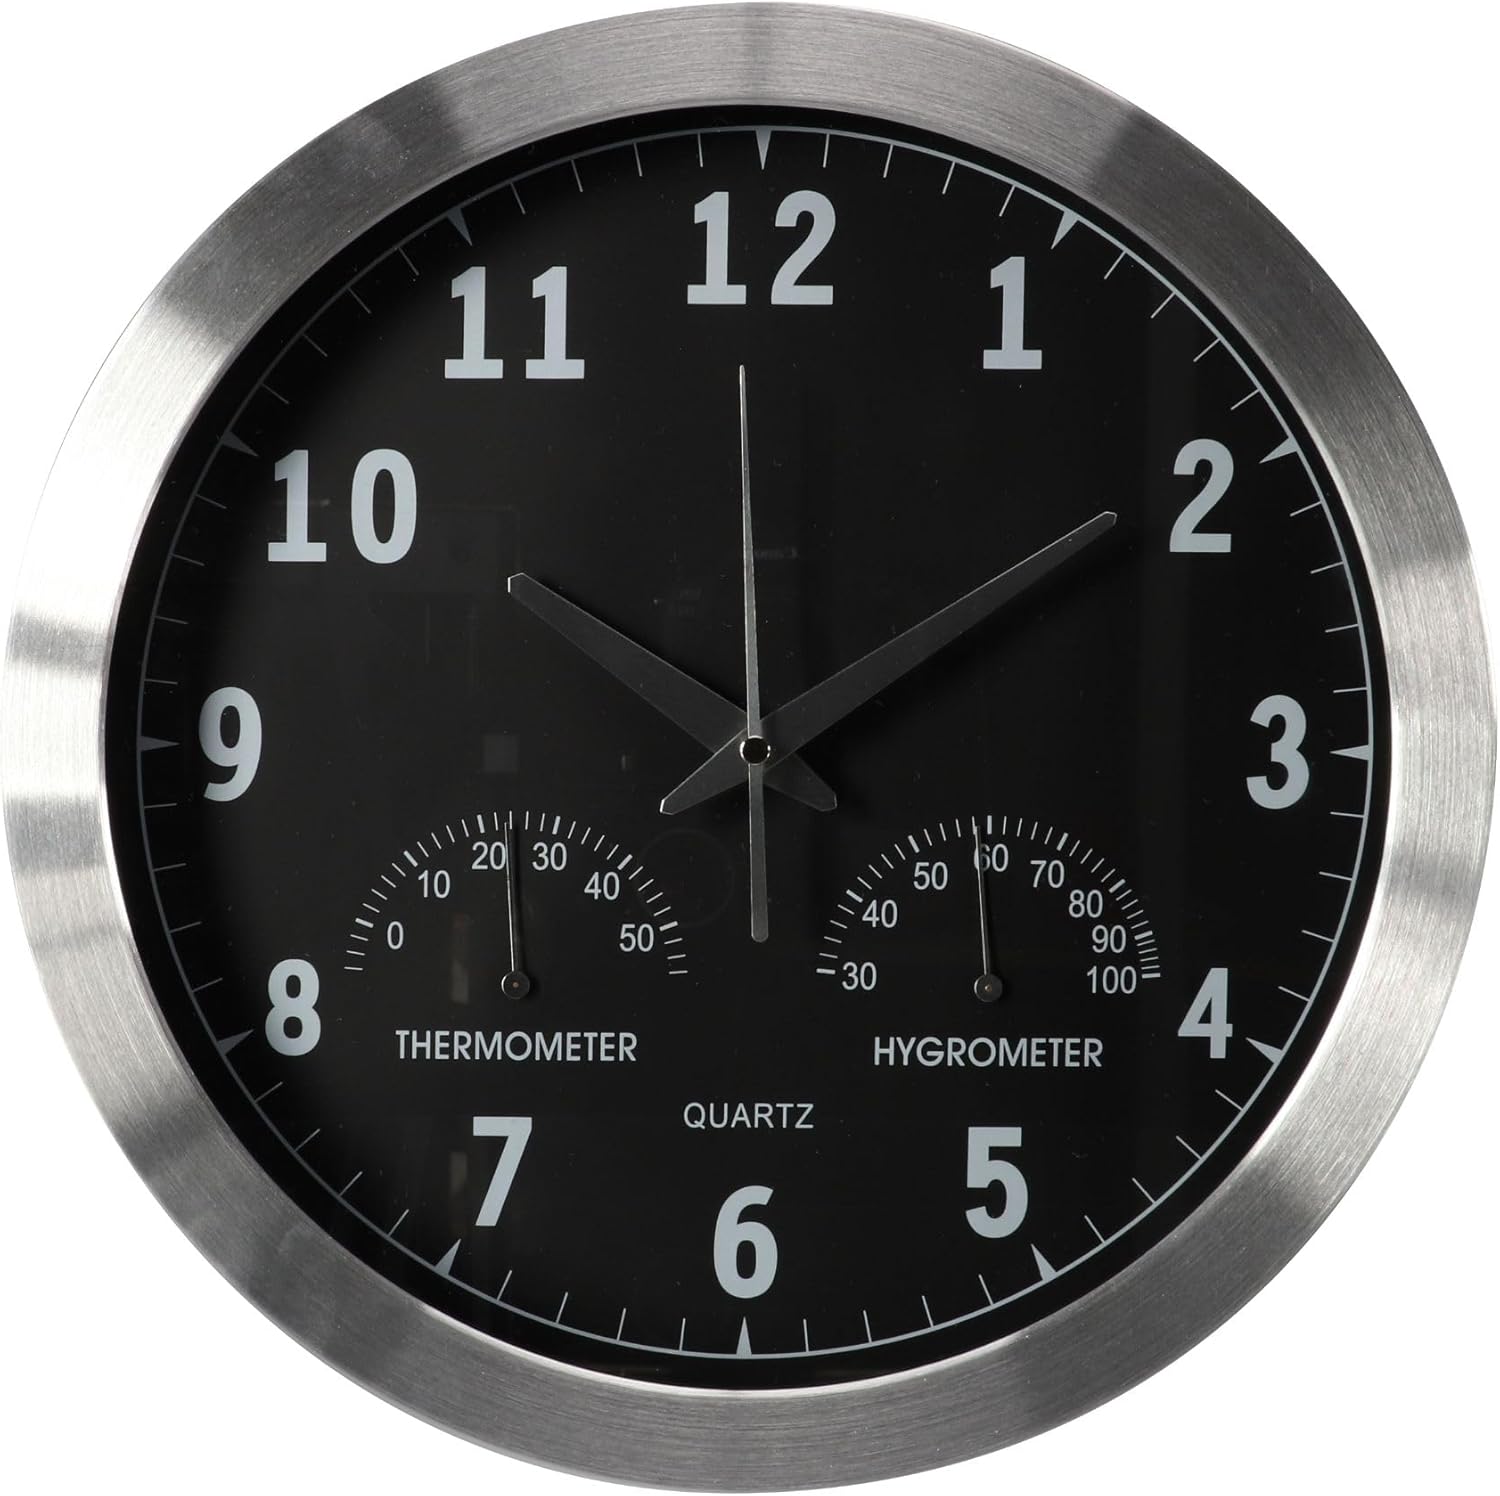
Rycina 2.1: Przód view of the Perel Radio-Controlled Wall Clock, showing the main clock face with hour, minute, and second hands, and the smaller thermometer and hygrometer dials at the bottom.

Rysunek 2.2: Tył view of the clock, illustrating the battery compartment and control buttons. Key components are labeled:
- Manual Setting Button (SET)
- Reset Pinhole (RESET)
- Forced Reception Button (REC)
- Battery Compartment (1.5V AA/LR6/R6P)
- Safety Pin (for transport)
3. Konfiguracja i instalacja
3.1 Instalacja baterii
- Zdejmij pokrywę komory baterii znajdującą się z tyłu zegara.
- Insert one (1) AA 1.5V battery, ensuring the correct polarity (+/-).
- Załóż z powrotem pokrywę komory baterii.
3.2 Initial Time Synchronization (DCF77)
After inserting the battery, the clock will automatically attempt to receive the DCF77 radio signal. The hands will move to the 12 o'clock position and then begin searching for the signal. This process can take several minutes, or up to 24 hours in areas with weak reception.
- Place the clock near a window or in an open area for best reception.
- Avoid placing it near electronic devices that may cause interference (e.g., TVs, computers, microwaves).
- Po odebraniu sygnału zegar automatycznie ustawi się na właściwy czas.
To manually initiate a signal search, press the 'REC' (Forced Reception) button on the back of the clock (see Figure 2.2).
3.3 Montaż zegara
The clock features a central universal hanging system for easy installation.
- Choose a suitable location on a wall, ensuring it is sturdy enough to support the clock's weight (approx. 1.07 kg).
- Install a screw or hook into the wall at the desired height.
- Zawieś zegar stabilnie, korzystając z otworu do zawieszania znajdującego się z tyłu.
4. Działanie
4.1 Automatyczna regulacja czasu
The Perel Radio-Controlled Wall Clock automatically adjusts its time based on the DCF77 signal. This includes automatic switching between summer and winter time (Daylight Saving Time and Standard Time).

Figure 4.1: The clock automatically adjusts for summer and winter time changes via the DCF77 radio signal.
4.2 Odczyt wyświetlacza
- Czas: Read the time using the large hour, minute, and second hands on the main dial.
- Temperatura: The left small dial indicates the ambient temperature in degrees Celsius.
- Wilgotność: The right small dial indicates the relative air humidity in percentagmi (%).
4.3 Manual Time Setting (If Needed)
In rare cases where the DCF77 signal cannot be received (e.g., outside the reception range), you can manually set the time:
- Press and hold the 'SET' (Manual Setting) button on the back of the clock (see Figure 2.2).
- The hands will start to move. Release the button when the hands reach the desired time.
- Note: Manual setting will be overridden once the DCF77 signal is successfully received.
5. Konserwacja
5.1 Czyszczenie
- Przetrzyj powierzchnię zegara miękką, suchą ściereczką.
- Nie należy używać środków czyszczących o działaniu ściernym, rozpuszczalników ani środków chemicznych w sprayu, gdyż mogą one uszkodzić powłokę.
5.2 Wymiana baterii
Gdy wskazówki zegara przestają się poruszać lub czas staje się niedokładny, prawdopodobnie nadszedł czas na wymianę baterii.
- Wyjmij starą baterię z komory.
- Insert a new AA 1.5V alkaline battery, observing polarity.
- The clock will automatically attempt to re-synchronize with the DCF77 signal after battery replacement.
6. Rozwiązywanie Problemów
If you experience issues with your Perel Radio-Controlled Wall Clock, consult the table below for common problems and solutions.
| Problem | Możliwa przyczyna | Rozwiązanie |
|---|---|---|
| Zegar nie ustawia czasu automatycznie. | Weak or no DCF77 signal reception. | Relocate the clock to an area with better reception (e.g., near a window, away from electronics). Press the 'REC' button to force a signal search. |
| Clock hands are stuck or not moving. | Niski poziom naładowania baterii lub jej rozładowanie. | Replace the battery with a new AA 1.5V alkaline battery. |
| Po wstępnej konfiguracji czas jest nieprawidłowy. | Initial signal reception failed or was interrupted. | Press the 'RESET' button (using a thin object like a paperclip) to restart the clock and initiate a new signal search. Ensure good reception conditions. |
| Thermometer/Hygrometer readings seem inaccurate. | Sensors need time to adjust to new environment; extreme conditions. | Allow the clock to acclimate to the room temperature and humidity for at least 30 minutes. Ensure the clock is not placed in direct sunlight or near heat/cold sources. |
7. Specyfikacje techniczne
| Funkcja | Specyfikacja |
|---|---|
| Numer modelu | WC118 |
| Marka | Perel |
| Producent | Grupa Velleman |
| Wymiary (średnica x głębokość) | 35.5 cm x 4.5 cm (całkowite wymiary produktu ok. 36.5 x 37 x 37 cm) |
| Waga | 1.07 kilogramów |
| Tworzywo | Metal (Aluminum frame) |
| Kolor | Black (dial), Silver-grey (frame) |
| Typ wyświetlacza | Analog |
| Źródło zasilania | 1 x AA 1.5V Battery (Alkaline recommended, not included) |
| Cechy specjalne | Radio-controlled (DCF77), Thermometer, Hygrometer, Automatic Summer/Winter Time Adjustment |
| Typ montażu | Montaż ścienny |

Rysunek 7.1: Strona view of the clock highlighting its dimensions (diameter 35.5 cm, depth 4.5 cm) and weight (930g).
8. Gwarancja i wsparcie
Perel products are manufactured to high-quality standards. For information regarding warranty terms, technical support, or service, please refer to the contact information provided with your purchase or visit the official Perel webstrona.
Proszę zachować dowód zakupu na wypadek ewentualnych roszczeń gwarancyjnych.


