Wstęp
Thank you for choosing the Xgody 3-Channel Dash Cam. This manual provides detailed instructions for the installation, operation, and maintenance of your new dash camera. Please read this manual thoroughly before using the product to ensure proper function and to maximize your user experience. Keep this manual for future reference.
Produkt ponadview i co jest w pudełku
The Xgody 3-Channel Dash Cam is designed to record video from the front, inside, and rear of your vehicle simultaneously, providing comprehensive coverage. It features high-definition recording, infrared night vision, G-sensor for emergency locking, loop recording, and parking monitoring.
Zawartość opakowania:
- Xgody Dash Cam Unit
- Tył View Camera (6M cable)
- Ładowarka samochodowa
- Kabel danych USB
- Instrukcja obsługi
- Karta SD 64 GB
- Naklejka samoprzylepna
- Pin karty
- Screws (for rear camera installation)
- 3M Glue Stick Card Line
- Łom (do prowadzenia kabli)

Figure 1: Xgody Dash Cam and Included Accessories
Główne cechy
Three-Channel Recording
The dash cam simultaneously records video from three perspectives: front (1080p), inside (720p), and rear (720p). For clearer internal and external footage, the front and cabin dual-lens cameras can operate independently at 1080p+1080p.

Figure 2: Three-Channel Recording Overview
Infrared (IR) Night Vision
The inside-facing camera is equipped with 4 IR LED lights and an F/2.0 aperture. This technology automatically increases exposure in low-light or dark conditions, ensuring clear video footage of the vehicle's interior. The operating temperature range is -31°F to 167°F (-35°C to 75°C).

Figure 3: Infrared Night Vision in Operation
Nagrywanie w pętli
Continuous loop recording automatically overwrites the oldest unlocked video files when the memory card is full. This ensures that recording never stops due to a full card, providing uninterrupted surveillance.

Rysunek 4: Funkcja nagrywania w pętli
Czujnik G (blokada awaryjna)
The built-in G-sensor detects sudden shocks or collisions. When such an event occurs, the dash camera automatically locks the current video footage, zapobiegając nadpisaniu przez nagrywanie w pętli. Zapewnia to zachowanie kluczowych dowodów.
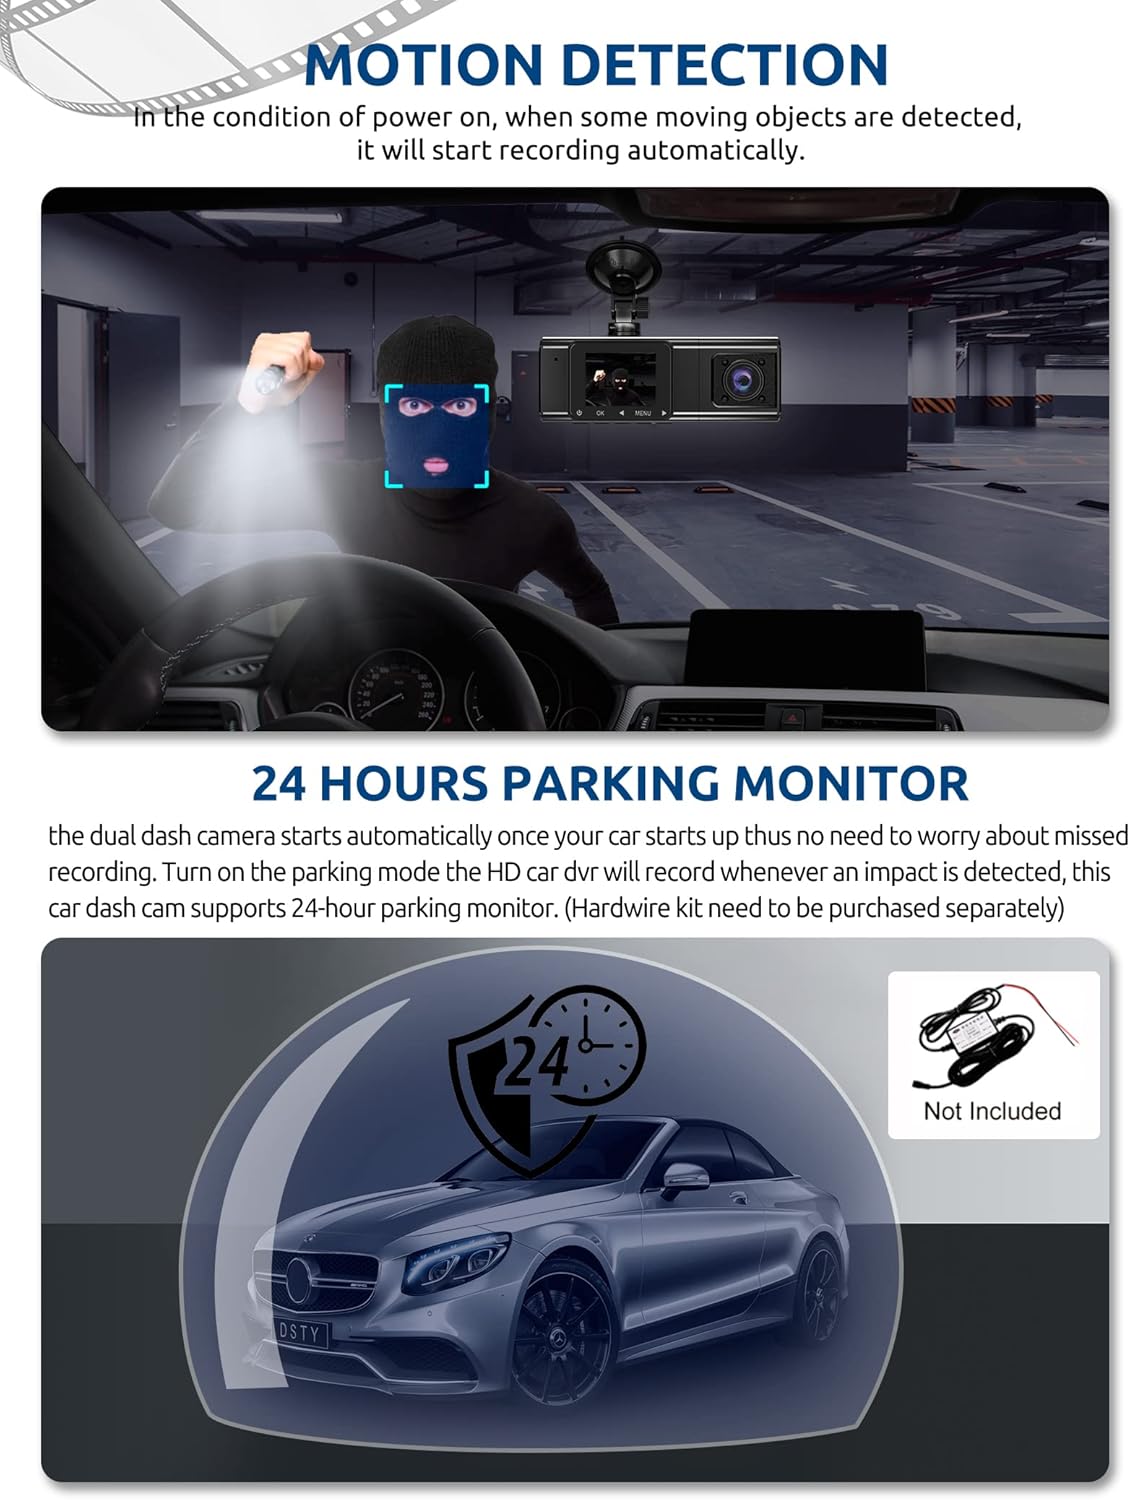
Figure 5: G-Sensor Activating During an Impact
Motion Detection & 24-Hour Parking Mode
In motion detection mode, the video recorder begins recording automatically when it detects movement in front of the camera. For continuous 24-hour surveillance, even when the car is off, the dash cam can be connected to the car battery via a hardwire kit (not included). This enables parking mode, which records when an impact is detected.

Figure 6: Motion Detection and Parking Monitoring
Instrukcje konfiguracji
1. Insert the SD Card
- Znajdź gniazdo karty SD z boku kamery samochodowej.
- Insert the provided 64GB SD card with the gold contacts facing the back of the camera until it clicks into place.
- Sprawdź, czy karta jest włożona całkowicie.
2. Mount the Dash Cam
- Wyczyść obszar przedniej szyby w miejscu, w którym zamierzasz zamontować kamerę samochodową.
- Przymocuj uchwyt z przyssawką do kamery samochodowej.
- Press the suction cup firmly against the windshield and lock it into place. Position the camera to ensure a clear view drogi przed Tobą, nie ograniczając widoczności podczas jazdy.
3. Zainstaluj tylną kamerę
- Podłącz kabel tylnej kamery do głównego urządzenia kamery samochodowej.
- Route the cable neatly along the vehicle's headliner and trim to the rear of the car. Use the provided crowbar to tuck the cable under panels.
- Mount the rear camera on the rear windshield using the adhesive sticker or screws, ensuring it has a clear view drogi z tyłu.
4. Podłącz zasilanie
- Podłącz ładowarkę samochodową do gniazda zapalniczki w pojeździe.
- Connect the other end of the car charger cable to the dash cam's power input port.
- Kamera samochodowa zazwyczaj włącza się automatycznie po uruchomieniu pojazdu i wyłącza się po jego wyłączeniu.
Instrukcja obsługi
Włączanie/wyłączanie zasilania
- Automatyczny: The dash cam powers on and starts recording automatically when connected to power and the vehicle ignition is on. It powers off automatically when the ignition is turned off.
- Manual: Press and hold the power button for a few seconds to manually turn the device on or off.
Tryby nagrywania
- Nagrywanie normalne: The default mode, continuously recording video in segments.
- Nagrywanie awaryjne (czujnik G): Automatically activated upon impact, locking the current video file.
- Nagrywanie z wykrywaniem ruchu: Records when motion is detected while the vehicle is parked (requires activation in settings).
- Monitorowanie parkowania: Records when an impact is detected while the vehicle is parked (requires hardwire kit and activation in settings).
Nawigacja po menu
- Aby uzyskać dostęp do ustawień, użyj przycisku „MENU”.
- Use the 'UP' and 'DOWN' arrow buttons to navigate through menu options.
- Aby potwierdzić wybór, naciśnij przycisk „OK”.
- Common settings include video resolution, loop recording duration, G-sensor sensitivity, parking mode, date/time, and language.
Vieww Footage
- Na urządzeniu: Wejdź do trybu odtwarzania za pomocą menu, aby view recorded videos directly on the dash cam screen.
- Na komputerze: Remove the SD card from the dash cam and insert it into a computer's card reader. The video files can then be accessed and played using standard media player software.
Konserwacja
Formatowanie karty SD
It is recommended to format the SD card regularly (e.g., once a month) to ensure optimal performance and prevent data corruption. This can typically be done through the dash cam's menu settings. Formatting will erase all data on the card, so back up any important filejest pierwszy.
Czyszczenie obiektywu
Periodically clean the lenses of the front, inside, and rear cameras with a soft, lint-free cloth. Avoid using abrasive cleaners that could scratch the lens surface. Clean lenses ensure clear video quality.
Aktualizacje oprogramowania układowego
Check the official Xgody website periodically for any available firmware updates. Updates can improve performance, add new features, or fix bugs. Follow the instructions provided with the firmware update carefully.
Rozwiązywanie problemów
| Problem | Możliwa przyczyna | Rozwiązanie |
|---|---|---|
| Kamera samochodowa nie włącza się. | Brak zasilania, uszkodzona ładowarka samochodowa, luźne połączenie. | Sprawdź podłączenie ładowarki samochodowej; upewnij się, że gniazdo zapalniczki w pojeździe działa; jeśli to możliwe, spróbuj użyć innego źródła zasilania. |
| Nagrywanie zatrzymuje się lub filesą uszkodzone. | Karta SD jest pełna; błąd karty SD; niekompatybilna karta SD. | Format the SD card regularly; use a high-speed (Class 10 or U3) SD card; replace the SD card if issues persist. |
| Screen is unresponsive or distorted. | Extreme temperatures; software glitch. | Allow the device to return to normal operating temperature; perform a factory reset (refer to manual for specific steps); ensure the device is not exposed to direct sunlight for extended periods in hot climates. |
| Jakość wideo jest słaba. | Soczewka brudna; na soczewce nadal znajduje się folia ochronna; nieprawidłowe ustawienie rozdzielczości. | Clean camera lenses; remove any protective film; check video resolution settings in the menu. |
| Czujnik G jest zbyt czuły/niewystarczająco czuły. | Czułość czujnika G jest ustawiona za wysoko/za nisko. | Adjust G-sensor sensitivity in the dash cam's settings menu. |
Specyfikacje
| Funkcja | Specyfikacja |
|---|---|
| Wymiary produktu | 4.25 x 1.77 x 1.57 cala |
| Waga przedmiotu | 1.26 funta |
| Technologia łączności | USB, Bezprzewodowy |
| Rozdzielczość przechwytywania wideo | 1080p (Front), 720p (Inside), 720p (Rear) |
| Rozmiar ekranu | 1.5 cali |
| Typ pamięci flash | SD |
| Temperatura pracy | -31°F do 167°F (-35°C do 75°C) |
| Zawarte komponenty | Karta pamięci (64 GB) |
| Kolor | Czarny |
Gwarancja i wsparcie
Xgody provides 18 months of service for this product. If you have any questions or require assistance regarding your Xgody Dash Cam, please contact our customer support. We aim to respond with helpful advice within 24 hours.
For support, please refer to the contact information provided in the packaging or on the official Xgody webstrona.


