1. Ważne instrukcje bezpieczeństwa
Always observe basic safety precautions to reduce the risk of fire, electric shock, and personal injury when operating power tools. Read all instructions carefully before use.
- Bezpieczeństwo w miejscu pracy: Utrzymuj swoje miejsce pracy w czystości i dobrym oświetleniu. Zagracone lub ciemne pomieszczenia sprzyjają wypadkom. Nie używaj elektronarzędzi w atmosferach wybuchowych, takich jak łatwopalne ciecze, gazy lub pyły.
- Bezpieczeństwo elektryczne: Wtyczki elektronarzędzi muszą pasować do gniazdek. Nigdy nie modyfikuj wtyczki w żaden sposób. Unikaj kontaktu fizycznego z uziemionymi powierzchniami, takimi jak rury, grzejniki, kuchenki i lodówki.
- Bezpieczeństwo osobiste: Zawsze noś okulary ochronne. Podczas długotrwałej pracy stosuj ochronę słuchu. Ubieraj się stosownie; nie noś luźnej odzieży ani biżuterii. Trzymaj włosy, ubranie i rękawice z dala od ruchomych części.
- Używanie i konserwacja narzędzia: Nie używaj elektronarzędzia na siłę. Używaj elektronarzędzia odpowiedniego do danego zastosowania. Odłącz wtyczkę od źródła zasilania przed dokonywaniem jakichkolwiek regulacji, wymianą akcesoriów lub przechowywaniem elektronarzędzia.
- Konserwacja: Konserwuj elektronarzędzia. Sprawdź, czy nie ma niewspółosiowości lub zakleszczenia ruchomych części, pęknięć części i wszelkich innych warunków, które mogą wpływać na działanie elektronarzędzia. W przypadku uszkodzenia, przed użyciem oddaj elektronarzędzie do naprawy.
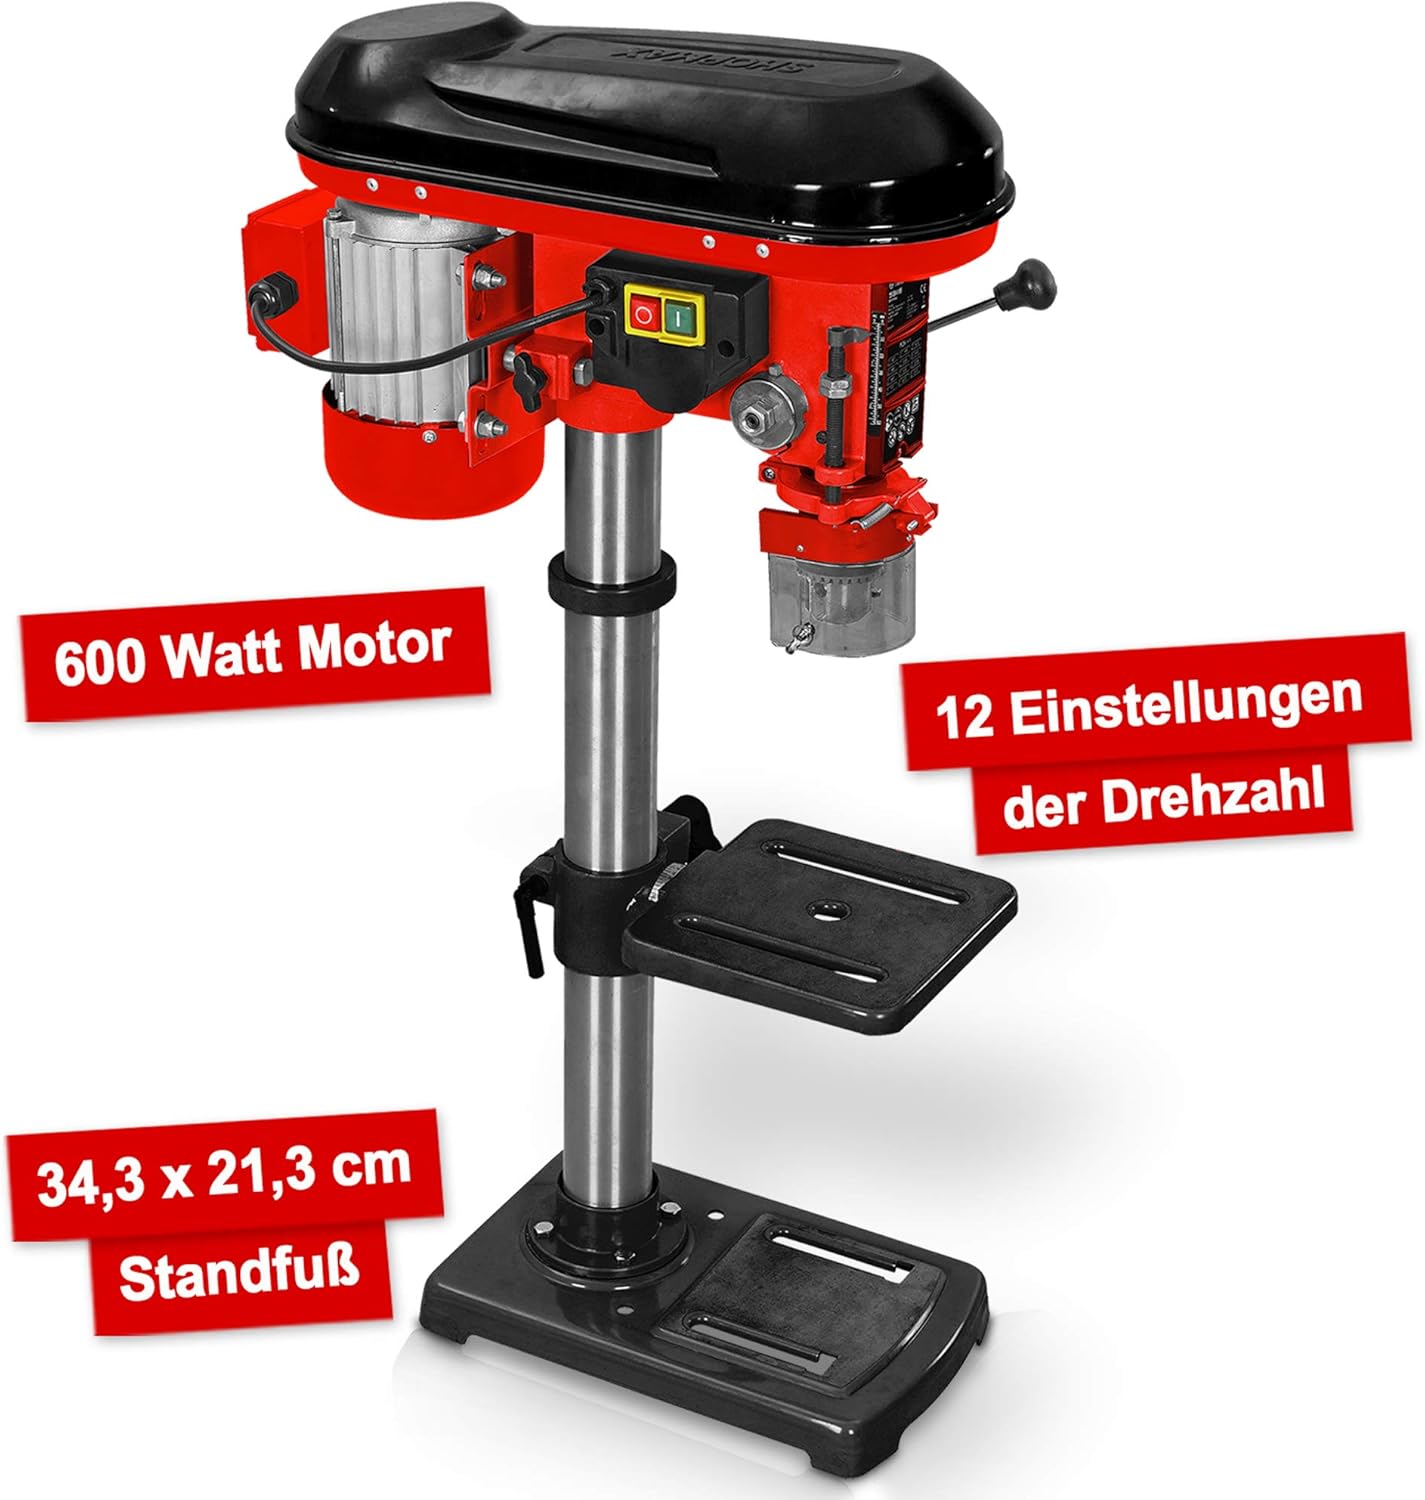
2. Koniec produktuview i komponenty
The Hecht Professional Pillar Drill is designed for precise drilling operations. Familiarize yourself with its main components for safe and effective use.

- Obudowa silnika: Contains the 600W motor and belt drive system.
- Zespół głowicy: Includes the chuck, spindle, and depth stop.
- Kolumna: The main support structure for the head assembly and drilling table.
- Drilling Table: Adjustable in height and angle for versatile drilling.
- Płyta bazowa: Provides stability and features mounting slots for securing to a workbench.
- Chuck: Holds the drill bits securely (3-16 mm capacity).
- Speed Adjustment Lever: Used to change the drilling speed.
- Uchwyty podawania: Used to lower the chuck and drill bit into the workpiece.
- Przełącznik włączania/wyłączania: Power control for the drill.
- Chip Protection Guard: Transparent guard for safety during operation.
3. Instalacja i montaż
Follow these steps to assemble and set up your pillar drill before initial use.
- Rozpakowywanie: Ostrożnie wyjmij wszystkie elementy z opakowania. Sprawdź, czy nie ma uszkodzeń lub brakujących części.
- Montaż płyty bazowej: Place the base plate on a stable, level workbench. Secure it using appropriate bolts through the elongated slots on the base.
- Montaż kolumny: Mount the column securely onto the base plate according to the provided hardware.
- Drilling Table Attachment: Slide the drilling table assembly onto the column. Adjust its height and secure it with the locking handle.
- Head Assembly Mounting: Carefully place the head assembly onto the top of the column and secure it.
- Montaż uchwytu: Insert the chuck onto the spindle taper. Use a rubber mallet to gently tap it into place, ensuring a firm fit.
- Chip Guard: Attach the transparent chip protection guard around the chuck area.

4. Instrukcja obsługi
Understand how to properly operate your pillar drill for optimal performance and safety.
4.1 Selecting Drill Bits
Choose the appropriate drill bit for the material and desired hole size. The chuck accommodates bits from 3 mm to 16 mm. Ensure the drill bit is sharp and free from damage.
4.2 Montaż wierteł
- Upewnij się, że wiertarka jest odłączona od zasilania.
- Otwórz szczęki uchwytu za pomocą klucza uchwytowego.
- Insert the drill bit into the chuck, ensuring it is centered and seated firmly.
- Tighten the chuck jaws securely with the chuck key. Remove the chuck key immediately after tightening.
4.3 Regulacja prędkości
The drill features 12 speed settings, adjustable via a belt drive system. Select the speed appropriate for your material and drill bit size. Lower speeds are generally for larger bits and harder materials, while higher speeds are for smaller bits and softer materials.


4.4 Adjusting Drilling Table
The drilling table can be adjusted in height and tilted up to +/- 45 degrees. Loosen the locking handle, position the table as required, and then securely tighten the handle.

4.5 Ustawianie głębokości wiercenia
Use the depth stop mechanism to set the desired drilling depth. This ensures consistent hole depths for repetitive tasks.
4.6 Procedura wiercenia
- Secure the workpiece firmly to the drilling table using clamps or a vise. Never hold the workpiece by hand.
- Adjust the table height and angle, and set the drilling depth.
- Wybierz odpowiednią prędkość.
- Turn on the drill using the On/Off switch.
- Slowly lower the drill bit into the workpiece using the feed handles, applying steady, even pressure.
- Po osiągnięciu żądanej głębokości należy wycofać wiertło z obrabianego przedmiotu.
- Wyłącz wiertarkę.
5. Konserwacja
Regularna konserwacja gwarantuje długowieczność i bezpieczną pracę wiertarki kolumnowej.
- Czyszczenie: After each use, clean the drill of dust and chips. Use a brush or compressed air. Do not use solvents that may damage plastic parts.
- Smarowanie: Periodically lubricate moving parts such as the column, spindle, and depth stop mechanism with light machine oil.
- Napięcie pasa: Check the tension of the drive belt regularly. Adjust if necessary to prevent slippage and ensure proper power transmission. Refer to the belt diagram inside the motor housing cover.
- Konserwacja uchwytu: Keep the chuck jaws clean and free of debris. If the chuck becomes stiff, clean and lightly lubricate it.
- Przewód elektryczny: Inspect the power cord for any damage. Replace if frayed or cut.
6. Rozwiązywanie Problemów
W tej sekcji omówiono typowe problemy, jakie mogą wystąpić podczas użytkowania wiertarki kolumnowej.
| Problem | Możliwa przyczyna | Rozwiązanie |
|---|---|---|
| Wiertło się nie uruchamia | Brak zasilania; Wadliwy przełącznik; Problem z silnikiem | Check power connection and circuit breaker; Inspect switch for damage; Consult qualified service personnel. |
| Nadmierne wibracje | Loose mounting; Unbalanced drill bit; Worn bearings | Tighten mounting bolts; Replace or re-center drill bit; Consult service personnel for bearing replacement. |
| Wiertło ślizga się w uchwycie | Chuck not tightened sufficiently; Oily chuck jaws; Damaged chuck jaws | Tighten chuck firmly with key; Clean chuck jaws; Replace chuck if damaged. |
| Silnik się przegrzewa | Overloading; Insufficient ventilation; Prolonged use | Reduce load; Ensure clear ventilation; Allow motor to cool down. |
| Niedokładne wiercenie | Loose workpiece; Worn drill bit; Misaligned table | Secure workpiece firmly; Replace drill bit; Check and adjust table alignment. |
7. Specyfikacje
Technical data for the Hecht Professional Pillar Drill.
| Funkcja | Specyfikacja |
|---|---|
| Producent | Hecht |
| Numer modelu przedmiotu | Standbohrmaschine Hecht |
| Źródło zasilania | Elektryczny przewodowy |
| Tomtage | 230 wolty |
| Maksymalna moc | 600 waty |
| Maksymalna prędkość obrotowa | 2700 obr./min. |
| Liczba prędkości | 12 |
| Maksymalny rozmiar uchwytu | 16 mm |
| Tworzywo | Metal |
| Kolor | Red Pillar Drill |
| Wymiary opakowania | Wymiary 71 x 45 x 27 cm |
| Waga | 23 kilograms (approx.) |
| Środowisko użytkowania | Wnętrz |
| Numer referencyjny | 8595614925655 |
8. Gwarancja i wsparcie
For warranty information, please refer to the documentation provided with your purchase or contact the retailer. For technical support or spare parts inquiries, please contact Hecht customer service or your authorized dealer.
Please have your model number (Standbohrmaschine Hecht) and reference number (8595614925655) available when contacting support.


