Wstęp
Dziękujemy za wybór lampy Lepro LED Camping Lantern. This compact and versatile lantern is designed to provide reliable illumination for various outdoor activities, emergencies, and general use. Please read this manual carefully to ensure proper use and maintenance of your lantern.

Figure 1: Lepro LED Camping Lanterns (2-pack).
Cechy produktu
- 4 tryby oświetlenia: Includes 6000K cool white (up to 280 lumen), 3000K warm light (70 lumen), combined mode (up to 350 lumen), and a flashing mode for emergencies.
- Lekki i przenośny: Designed for easy transport and minimal footprint, ideal for travel.
- Wysoka jasność: Delivers up to 350 lumens, ensuring ample light for various settings.
- Wodoodporność: IPX4 rated, providing protection against splashing water from all angles.
- Szerokie zastosowanie: Nadaje się do camping, reading, emergency lighting, and other activities.
Organizować coś
Instalacja baterii
The Lepro LED Camping Lantern requires 3 AA batteries (not included). Follow these steps to install the batteries:
- Znajdź pokrywę komory baterii na spodzie latarki.
- Aby odblokować i zdjąć pokrywę, przekręć ją w kierunku przeciwnym do ruchu wskazówek zegara.
- Insert 3 AA batteries into the compartment, ensuring the correct polarity (+/-) as indicated inside the compartment.
- Replace the battery compartment cover and twist it clockwise to secure it.
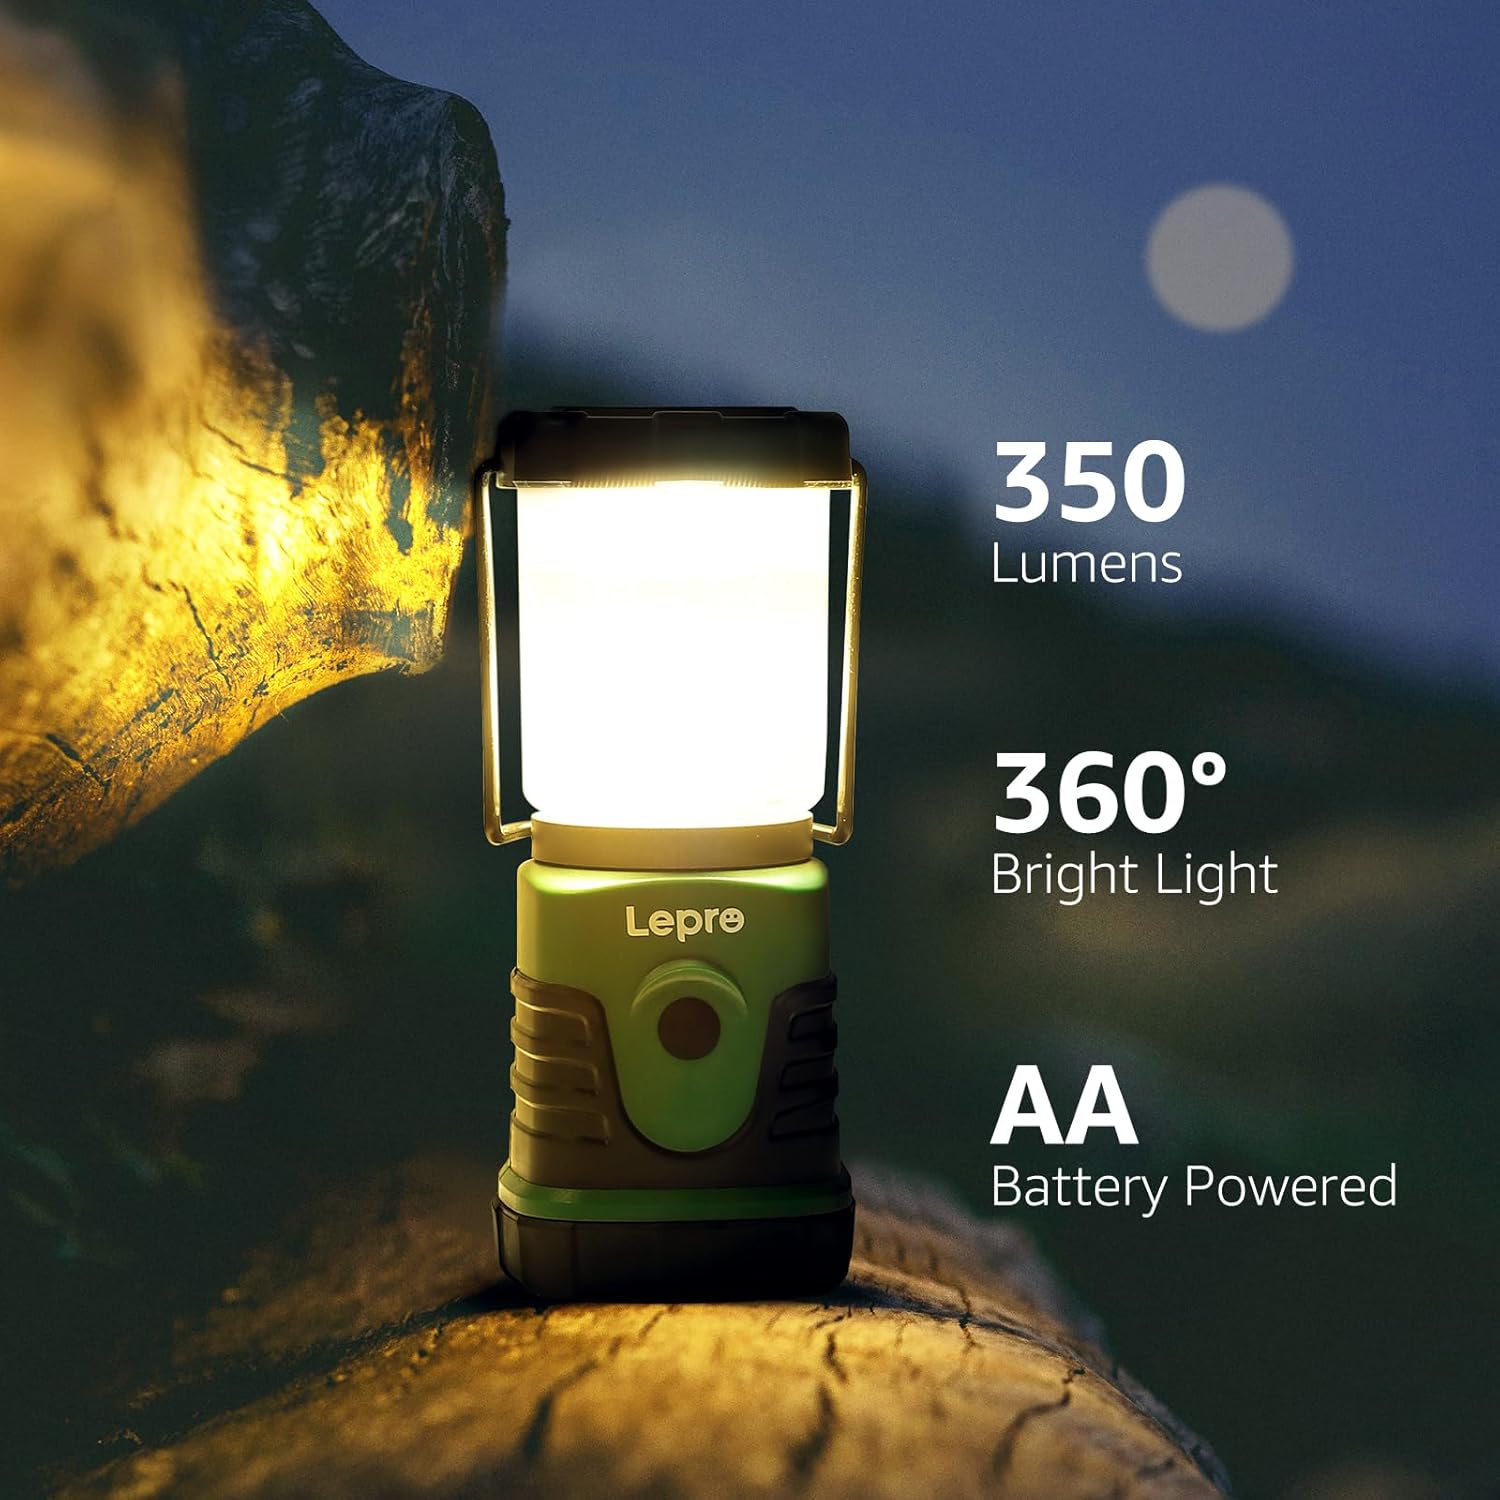
Figure 2: Lantern powered by AA batteries, providing 350 lumens and 360-degree light.
Instrukcja obsługi
Włączanie/wyłączanie zasilania i wybór trybu
The lantern is operated by a single button located on the front of the unit.
- Krótkie naciśnięcie: Press the button briefly to cycle through the four lighting modes:
- 6000K Cool White (Daylight)
- Ciepłe światło 3000K
- Combined Mode (Cool White + Warm Light)
- Flashing Mode (for emergencies)
- Długie naciśnięcie: Press and hold the button to activate the stepless dimming function. The brightness will gradually increase or decrease. Release the button when the desired brightness level is reached.

Figure 3: Operating the lantern's dimming and mode selection functions.
Scenariusze użytkowania
The lantern is designed for versatile use:
- Wiszące: Utilize the top handle or the bottom hook to hang the lantern inside a tent, from a backpack, or any suitable elevated point for overhead lighting.
- Blat stołu: Place the lantern on a flat surface for ambient lighting.
- Przenośny: Its compact size and lightweight design make it easy to carry by hand or store in a bag.
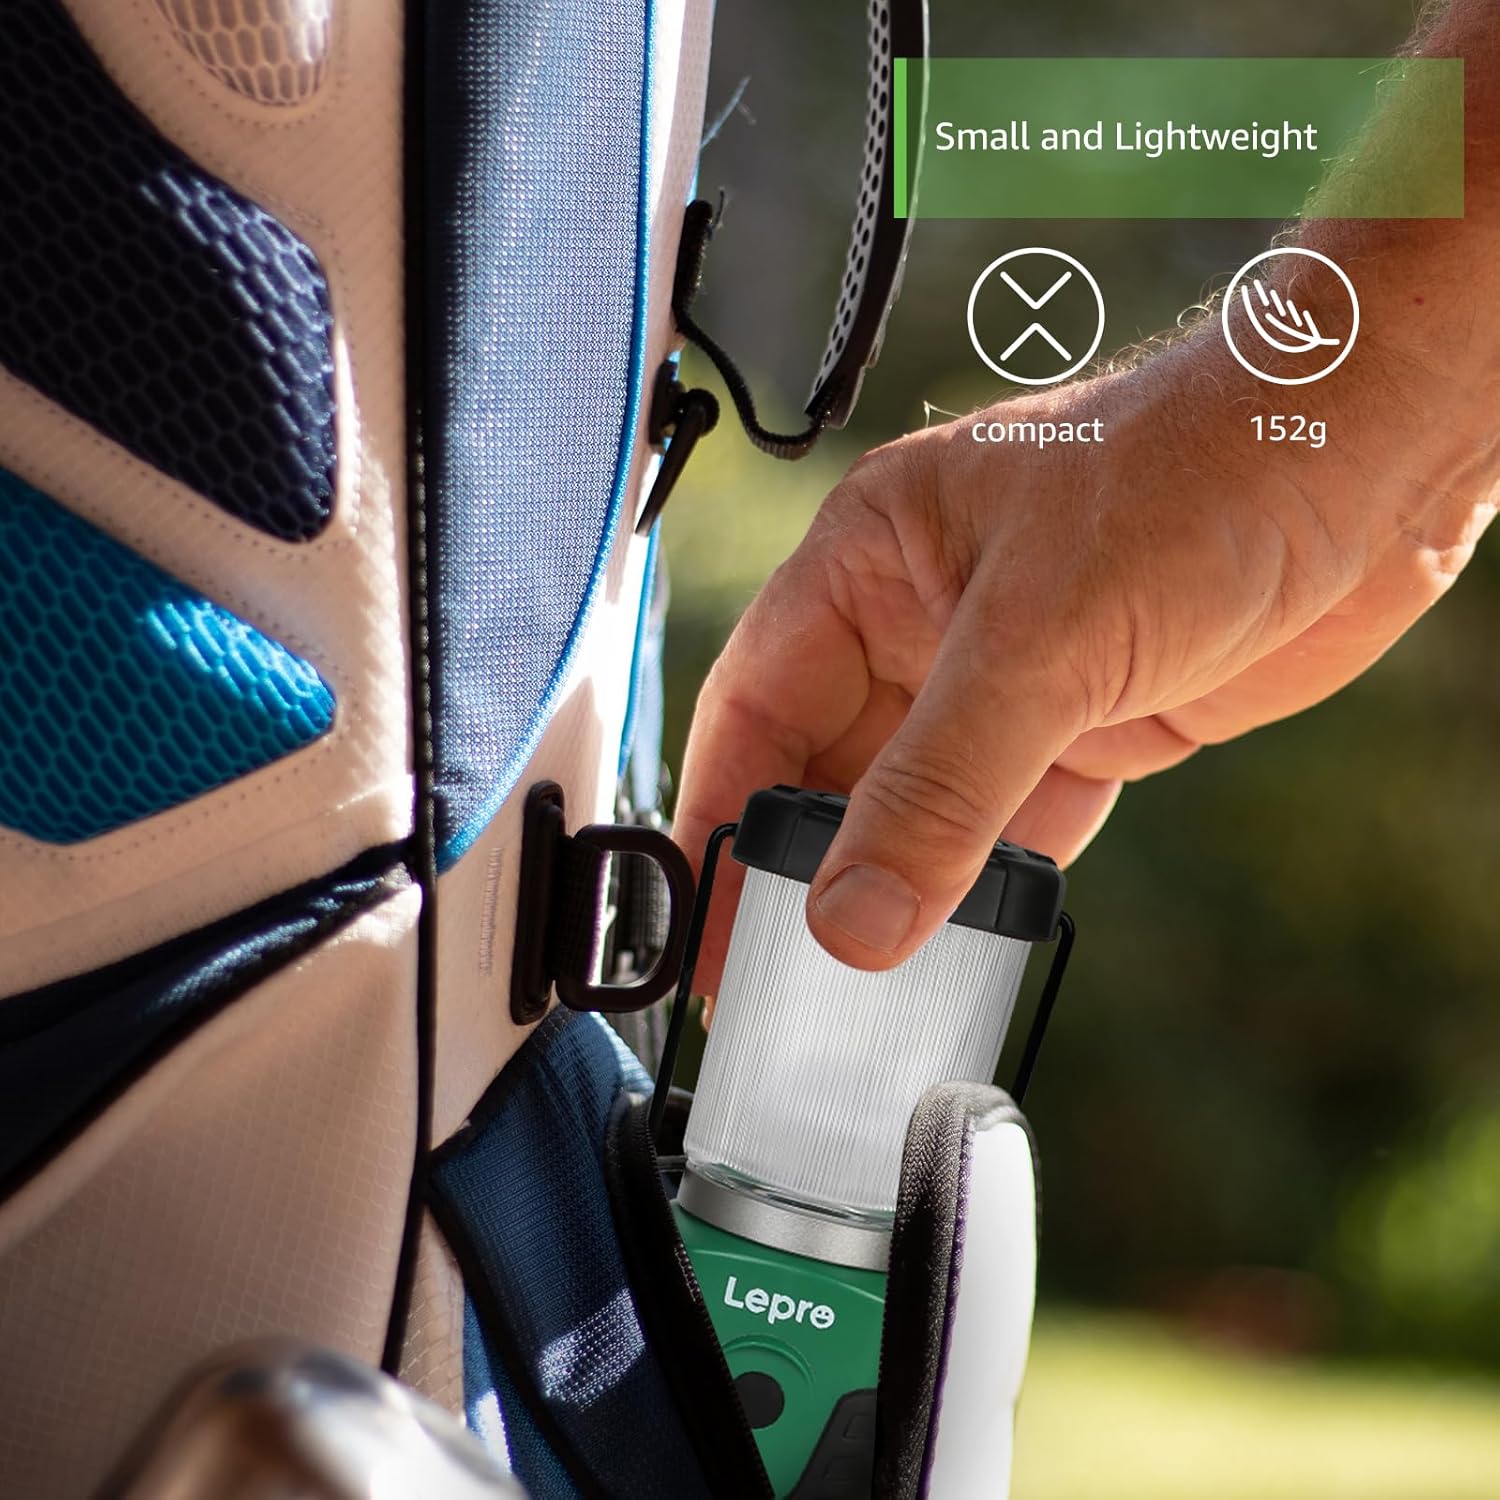
Figure 4: Versatile mounting options using the bottom hook and top handle.
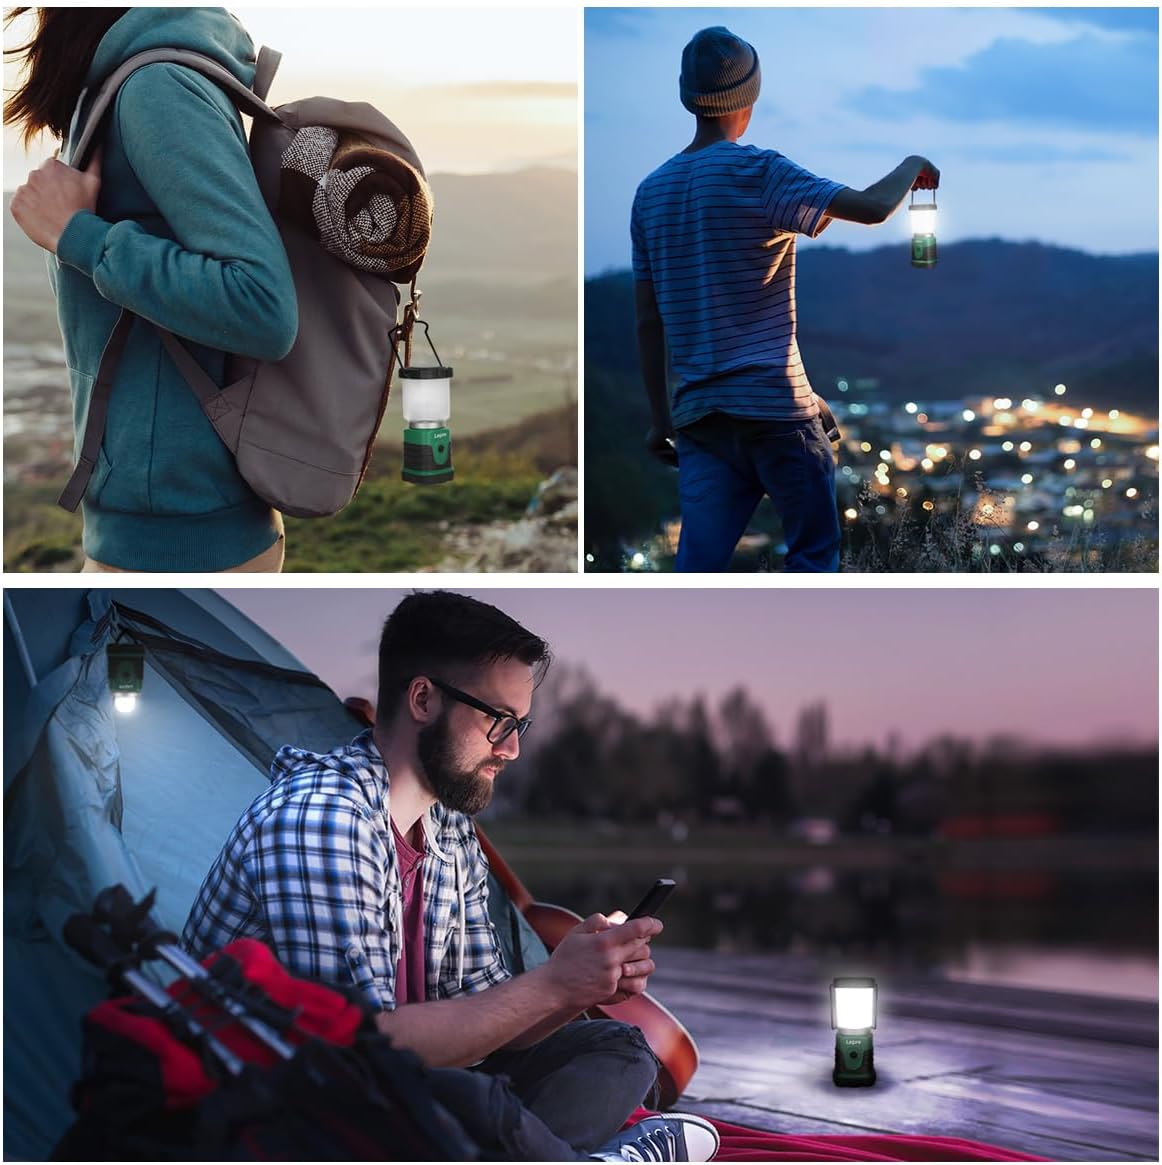
Rysunek 5: Examples of the lantern's practical applications in various outdoor settings.
Konserwacja
Wymiana baterii
When the light output becomes dim or the lantern stops functioning, it is time to replace the batteries. Refer to the "Battery Installation" section under Setup for detailed instructions.
Czyszczenie i przechowywanie
- Clean the exterior of the lantern with a soft, damp ściereczka. Nie należy używać środków czyszczących o właściwościach ściernych ani rozpuszczalników.
- Ensure the lantern is completely dry before storing.
- For long-term storage, remove the batteries to prevent leakage and corrosion.
- Przechowuj latarnię w chłodnym, suchym miejscu, z dala od bezpośredniego światła słonecznego i ekstremalnych temperatur.
Odporność na wodę
The lantern has an IPX4 water resistance rating, meaning it is protected against splashing water from any direction. It is suitable for use in light rain or snowy conditions. However, it is nie designed for submersion in water.

Figure 6: The lantern's IPX4 water resistance in action.
Rozwiązywanie problemów
| Problem | Możliwa przyczyna | Rozwiązanie |
|---|---|---|
| Latarnia się nie włącza. | Baterie są rozładowane lub nieprawidłowo zainstalowane. | Wymień baterie na nowe, zwracając uwagę na prawidłową biegunowość. |
| Światło jest słabe lub migocze. | Niski poziom naładowania baterii. | Wymień baterie. |
| Nie można zmienić trybów oświetlenia. | Awaria przycisków lub niski poziom baterii. | Upewnij się, że baterie są sprawne. Jeśli problem będzie się powtarzał, skontaktuj się z obsługą klienta. |
| Wnikanie wody na skutek wystawienia na działanie deszczu. | Lantern was submerged or exposed to heavy, prolonged rain beyond IPX4 rating. | Dry the lantern thoroughly. Avoid submersion. If damage occurs, contact customer support. |
Specyfikacje
| Funkcja | Szczegół |
|---|---|
| Numer modelu | PR330032-2 |
| Typ źródła światła | PROWADZONY |
| Jasność | Do 350 Lumenów |
| Źródło zasilania | Zasilany bateryjnie |
| Typ baterii | 3 baterie AA (wymagane) |
| Cotage | 5 watów |
| Tomtage | 4.5 wolty |
| Poziom wodoodporności | IPX4 (odporność na wodę) |
| Waga przedmiotu | 5.4 uncji (ok. 153 gramów) |
| Wymiary produktu (DxSxW) | 2.6 x 2.36 x 5.75 cala (ok. 6.6 x 6.0 x 14.6 cm) |
| Tworzywo | Plastikowy |
| Typ montażu | Uchwyt na blat |

Figure 7: Compact dimensions of the Lepro Mini LED Campw Latarni.
Gwarancja i wsparcie
Informacje o gwarancji
Lepro products are manufactured with high-quality standards. For specific warranty details regarding your LED Camping Lantern, please refer to the warranty card included with your product or visit the official Lepro webZachowaj paragon jako dowód zakupu na wypadek reklamacji.
Obsługa klienta
If you encounter any issues or have questions about your Lepro LED Camping Lantern, please contact Lepro customer support. You can find contact information on the official Lepro webna stronie internetowej lub za pośrednictwem sprzedawcy, u którego zakupiłeś produkt.
For additional resources, you may also refer to the official Lepro store on Amazon: Sklep Lepro Amazon.
Wersję instrukcji obsługi w formacie PDF można również pobrać: Pobierz instrukcję obsługi (PDF).


