1. Wprowadzenie
Thank you for choosing the Strex 12 LED Universal RCA Reversing Camera. This manual provides essential information for the proper installation, operation, and maintenance of your new reversing camera. Please read this manual thoroughly before use to ensure optimal performance and safety.
2. Informacje dotyczące bezpieczeństwa
- Always ensure your vehicle is turned off and the parking brake is engaged before attempting any installation or maintenance.
- Disconnect the vehicle's battery before connecting any electrical components to prevent short circuits or damage.
- Ensure all wiring is properly insulated and secured to prevent damage from vibration, heat, or moisture.
- Nie zasłaniaj kamery view with dirt, snow, or ice. Regularly clean the lens for clear visibility.
- This camera is designed as an aid for reversing and parking. Always check your surroundings visually and use your mirrors.
3. Zawartość opakowania
Sprawdź, czy w opakowaniu znajdują się wszystkie elementy:
- 1x Strex 12 LED Reversing Camera
- 1x Mounting material with 6M RCA cable
- 1x Instrukcja obsługi

Rysunek 3.1: Zawartość opakowania. The image displays the Strex 12 LED reversing camera, the included 6-meter RCA cable and power cable, and the product packaging.
4. Specyfikacje
| Funkcja | Specyfikacja |
|---|---|
| Marka | Stres |
| Numer modelu | SP97 |
| Tomtage | Prąd stały 12 V |
| Rozdzielczość nagrywania wideo | 720p |
| Rzeczywisty Viewing kąt | 140 stopni |
| Typ soczewki | Szerokokątny |
| Technologia czujnika optycznego | CMOS |
| Rozmiar czujnika optycznego | 1/4 cala |
| Typ złącza | RCA |
| Typ instalacji | Tył-view uchwyt |
| Kompatybilne urządzenia | Monitor |
| Wymiary produktu | 40 dł. x 23 szer. x 23 wys. milimetrów |

Figure 4.1: Camera Dimensions. This image illustrates the physical dimensions of the Strex reversing camera, including its mounting bracket.
5. Konfiguracja i instalacja
The Strex 12 LED Reversing Camera is designed for a plug-and-play installation. Follow these general steps:
- Wybierz miejsce montażu: Select a suitable location at the rear of your vehicle, typically above the license plate, ensuring a clear view and that the camera does not obstruct any vehicle lights or features.
- Zamontuj kamerę: Use the provided mounting hardware to securely attach the camera. Ensure it is firmly fixed to prevent movement from vibrations.
- Podłącz zasilanie: Connect the camera's power cable to your vehicle's DC 12V system. It is recommended to connect it to the reverse light circuit so the camera activates automatically when the vehicle is put into reverse.
- Podłącz kabel wideo: Route the 6-meter RCA video cable from the camera to your in-car monitor or head unit. Ensure the cable is routed safely, avoiding moving parts, sharp edges, and excessive heat.
- Funkcjonalność testu: Once all connections are made, turn on your vehicle and engage reverse gear to test the camera's functionality. Adjust the camera angle if necessary for optimal viewing.
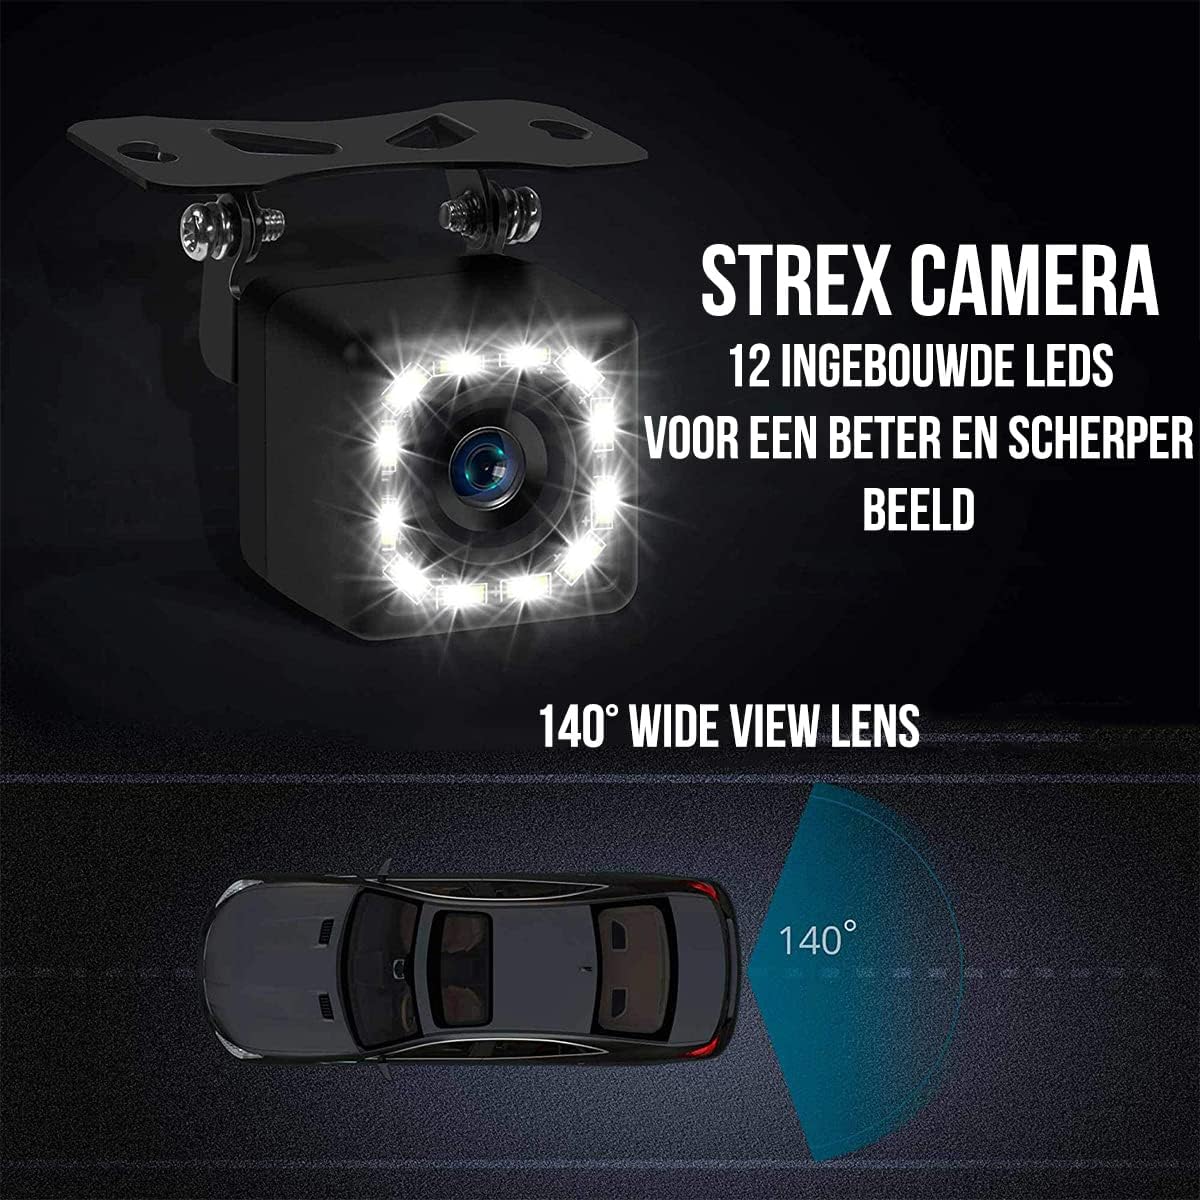
Rysunek 5.1: Funkcje aparatu. This image highlights the 12 built-in LEDs and the 140-degree wide-angle lens of the Strex camera, crucial for installation and operation.
6. Instrukcja obsługi
The Strex 12 LED Reversing Camera provides clear visibility to assist with parking and reversing maneuvers.
- Aktywacja automatyczna: When properly installed, the camera will automatically activate and display the rear view on your connected monitor when you shift your vehicle into reverse gear.
- Jasne View: The camera features a 140° wide-angle lens, providing an expansive field of view to detect obstacles and other vehicles.
- Ulepszone widzenie w nocy: Equipped with 12 powerful LED lights and 720P resolution, the camera ensures a clear image even in low-light or completely dark conditions.

Figure 6.1: Ultra Clear Image. The camera's advanced lens and chip technology ensure a clear image both during the day and at night.

Figure 6.2: Improved Night Vision. This comparison demonstrates the superior clarity and brightness provided by the Strex camera's night vision capabilities.
7. Konserwacja
To ensure the longevity and optimal performance of your Strex Reversing Camera, follow these maintenance guidelines:
- Regularne czyszczenie: Okresowo czyść obiektyw aparatu miękką,amp Ściereczką usuń brud, kurz i plamy wodne. Unikaj środków czyszczących o działaniu ściernym, które mogłyby zarysować soczewkę.
- Sprawdź połączenia: Od czasu do czasu należy sprawdzać wszystkie połączenia kablowe, aby mieć pewność, że są solidne i nie są skorodowane ani uszkodzone.
- Odporność na warunki atmosferyczne: The camera features an IP68 waterproof rating, making it resistant to rain, snow, and other extreme weather conditions. However, avoid direct high-pressure water jets on the camera.

Figure 7.1: Robust and Waterproof Design. The image emphasizes the camera's durable construction and IP68 waterproof rating, ensuring reliable performance in all weather conditions.
8. Rozwiązywanie Problemów
If you encounter issues with your Strex Reversing Camera, refer to the following common problems and solutions:
- Brak obrazu na monitorze:
- Check all power connections to ensure the camera is receiving 12V power.
- Verify the RCA video cable is securely connected to both the camera and the monitor.
- Ensure your monitor is set to the correct input source for the camera.
- Check the vehicle's reverse light circuit for proper function if the camera is wired to it.
- Słaba jakość obrazu:
- Wyczyść obiektyw aparatu, aby usunąć wszelkie zabrudzenia, kurz i wilgoć.
- Upewnij się, że w polu widzenia kamery nie ma żadnych przeszkód. view.
- Sprawdź, czy kabel wideo nie jest uszkodzony lub zagięty.
- Verify the monitor's display settings (brightness, contrast) are correctly adjusted.
- Sygnał przerywany:
- Sprawdź wszystkie połączenia kablowe pod kątem luzu i korozji.
- Upewnij się, że zasilanie kamery jest stabilne.
Jeśli powyższe kroki nie rozwiążą problemu, skontaktuj się z obsługą klienta.
9. Gwarancja i wsparcie
This Strex product comes with a standard manufacturer's warranty. Please refer to the warranty card included in your package or contact your retailer for specific warranty terms and conditions.
For technical support, troubleshooting assistance, or warranty claims, please contact Strex customer service through the retailer where you purchased the product or visit the official Strex webwitryna do informacji kontaktowych.


