Wstęp
This manual provides comprehensive instructions for the assembly, operation, and maintenance of your RAIJINTEK NYX PRO Showcase Big-Tower chassis. Please read this manual thoroughly before beginning installation to ensure proper setup and safe usage. This chassis is designed for high-performance PC builds, offering extensive compatibility and a unique aesthetic.
Informacje dotyczące bezpieczeństwa
Zawsze przestrzegaj następujących środków ostrożności:
- Ensure all power is disconnected from components before installation or maintenance.
- Aby zapobiec stłuczeniu paneli ze szkła hartowanego, należy obchodzić się z nimi ostrożnie.
- Wear anti-static wrist straps when handling sensitive electronic components.
- Małe części i narzędzia należy trzymać z dala od dzieci.
- Do not attempt to modify the chassis structure.
Zawartość opakowania
Przed przystąpieniem do montażu należy sprawdzić, czy wszystkie elementy są obecne:
- RAIJINTEK NYX PRO Showcase Big-Tower Chassis
- Skrzynka z akcesoriami (śruby, dystanse, opaski kablowe itp.)
- Instrukcja obsługi (ten dokument)

Image: The RAIJINTEK NYX PRO Showcase Big-Tower chassis in white, showcasing its unique open-frame design and tempered glass panels.
Specyfikacje
| Funkcja | Szczegół |
|---|---|
| Nazwa modelu | NYX PRO (0R20B00183) |
| Typ sprawy | Big-Tower / Showcase |
| Tworzywo | Szkło hartowane, stal |
| Kolor | White (Blanc) |
| Wymiary produktu (dł. x szer. x wys.) | Wymiary 59.5 x 26.5 x 65.8 cm |
| Waga przedmiotu | 14.17 kilogramów |
| Zgodność płyty głównej | Rozszerzony ATX, ATX, Micro-ATX, Mini-ITX |
| Metoda chłodzenia | Water, Air (supports various fan sizes up to 120mm) |
| Zalecane zastosowanie | Gaming PC Builds |
Konfiguracja i instalacja
Follow these steps for proper assembly of your PC components within the NYX PRO chassis.
1. Przygotowanie podwozia
Carefully unbox the chassis and place it on a stable, flat surface. Identify the various access points and removable panels.
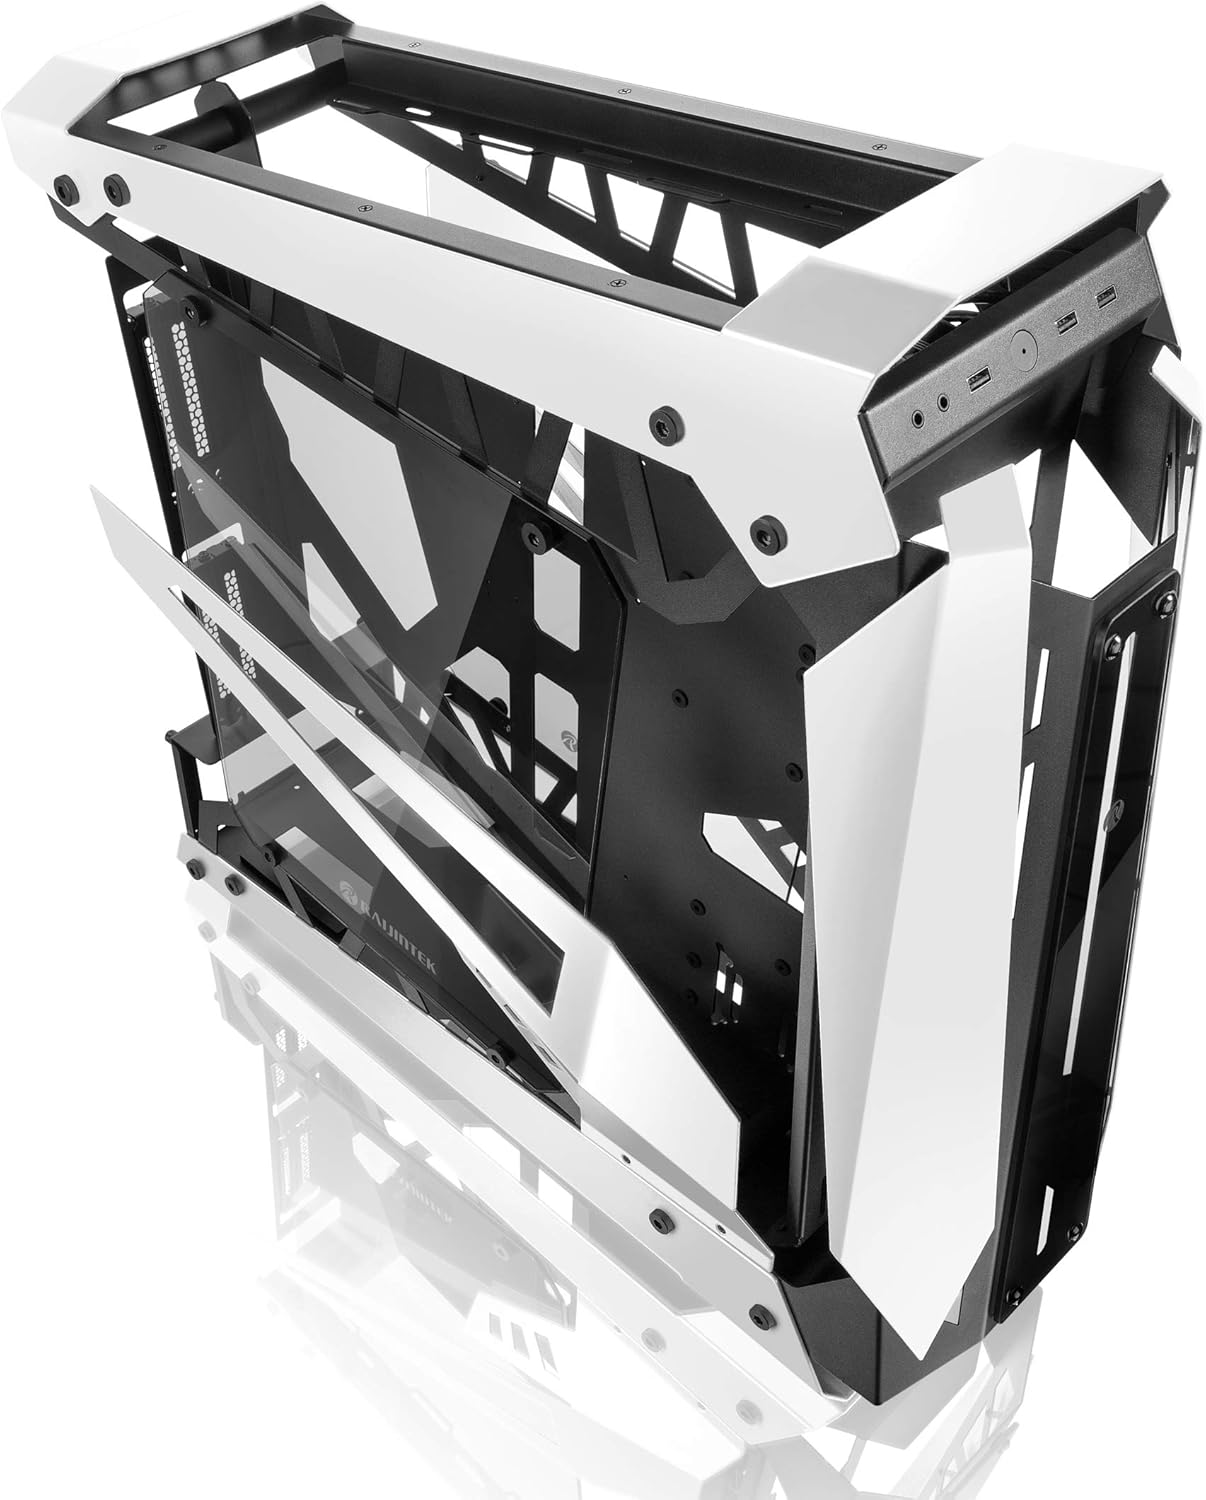
Image: The RAIJINTEK NYX PRO chassis with its top and front panels opened, revealing the internal structure and component mounting areas.
2. Instalacja płyty głównej
- Install the necessary motherboard standoffs into the motherboard tray according to your motherboard's form factor (E-ATX, ATX, Micro-ATX, Mini-ITX).
- Ostrożnie umieść płytę główną na dystansach, dopasowując otwory na śruby.
- Przymocuj płytę główną za pomocą dołączonych śrub.

Obraz: Wnętrze view of the RAIJINTEK NYX PRO chassis, showing the spacious interior for motherboard and component installation.
3. Instalacja zasilacza (PSU)
Locate the PSU mounting area, typically at the rear or bottom of the chassis. Secure the PSU with screws.
4. Instalacja dysku pamięci masowej
The NYX PRO supports multiple storage drives. Identify the 2.5" and 3.5" drive bays and secure your SSDs/HDDs using the provided mounting hardware.
5. Instalacja karty graficznej (GPU)
Insert your graphics card into the appropriate PCIe slot on the motherboard. Secure it with the retention mechanism and screws. Note the vertical GPU mounting option for showcase builds.

Image: The RAIJINTEK NYX PRO chassis showcasing installed components with RGB lighting, highlighting the open design and visibility of internal parts.
6. Cooling System Installation (Fans/Radiators)
Install case fans or liquid cooling radiators in the designated mounting points. Ensure proper airflow direction for optimal cooling.
7. Zarządzanie kablami
Utilize the cable routing cutouts and tie-down points to manage cables neatly. This improves airflow and aesthetics.

Obraz: strona A view of the RAIJINTEK NYX PRO chassis, emphasizing its angular design and the large tempered glass side panel.
8. Przednie złącza I/O
Connect the front panel USB, audio, power, and reset headers to the corresponding pins on your motherboard.
Instrukcja obsługi
Once all components are installed and secured, and all cables are connected:
- Connect your monitor, keyboard, mouse, and other peripherals to the appropriate ports on your motherboard and graphics card.
- Podłącz kabel zasilający do zasilacza i gniazdka ściennego.
- Przełącz wyłącznik zasilania na zasilaczu do pozycji „ON”.
- Press the power button on the front panel of the chassis to power on your system.

Obraz: Zbliżenie view of the front I/O ports on the RAIJINTEK NYX PRO chassis, including USB and audio jacks.
Konserwacja
Regular maintenance helps ensure the longevity and optimal performance of your PC and chassis.
- Czyszczenie kurzu: Periodically clean dust filters and internal components using compressed air or a soft brush. Ensure the system is powered off and unplugged before cleaning.
- Pielęgnacja szkła hartowanego: Czyść panele ze szkła hartowanego miękką, niepozostawiającą włókien ściereczką i nieściernym środkiem do czyszczenia szkła. Unikaj agresywnych środków chemicznych.
- Kontrola zarządzania kablami: Od czasu do czasu należy sprawdzać ułożenie kabli, aby mieć pewność, że żaden z nich nie blokuje przepływu powietrza lub łopatek wentylatora.
Rozwiązywanie problemów
Jeśli napotkasz problemy, rozważ poniższe typowe kroki rozwiązywania problemów:
- System się nie włącza:
- Sprawdź czy przełącznik zasilacza jest w pozycji "ON".
- Upewnij się, że kabel zasilający jest solidnie podłączony do zasilacza i gniazdka ściennego.
- Sprawdź, czy złącze przycisku zasilania na panelu przednim jest prawidłowo podłączone do płyty głównej.
- Confirm all internal power cables (24-pin ATX, CPU, GPU) are firmly seated.
- Brak wyjścia wyświetlacza:
- Ensure your monitor is connected to the graphics card (not the motherboard's integrated graphics, unless you are using integrated graphics).
- Ponownie włóż kartę graficzną do gniazda PCIe.
- Sprawdź wybór wejścia monitora.
- Przegrzanie:
- Ensure all case fans are spinning and oriented correctly for airflow.
- Clean dust from fans and radiators.
- Verify CPU cooler is properly seated and making good contact with the CPU.
Gwarancja i wsparcie
For warranty information and technical support, please refer to the official Raijintek webOdwiedź witrynę lub skontaktuj się z działem obsługi klienta. Zachowaj dowód zakupu na wypadek reklamacji.
Official Raijintek Webstrona: www.raijintek.com


