1. Wprowadzenie
Thank you for choosing the Kungfuking Surge Protector Power Strip with USB Ports. This device is designed to provide convenient power access and surge protection for your electronic devices. It features two AC outlets and two USB ports, along with a 6.56 ft extension cord and a flat plug for versatile placement. This manual provides essential information for safe installation, operation, and maintenance of your power strip.

Figure 1: Kungfuking Surge Protector Power Strip (Model: Kungfuking 2AC+2USB)
2. Ważne instrukcje bezpieczeństwa
Przed użyciem produktu należy przeczytać i zrozumieć wszystkie instrukcje bezpieczeństwa. Nieprzestrzeganie tych instrukcji może spowodować porażenie prądem, pożar lub poważne obrażenia.
- NIE exceed the electrical ratings of 120V, 12A, 60Hz, and 2.1A for USB ports.
- NIE use in wet environments or near water.
- NIE rozmontowywać lub modyfikować urządzenia.
- NIE use with aquariums or other water-related products.
- NIE podłączyć do innego przenośnego kranu zasilania.
- NIE Używaj, jeśli przewód lub wtyczka są uszkodzone.
- Przechowywać w miejscu niedostępnym dla dzieci.
- Upewnij się, że wtyczka jest całkowicie włożona do gniazdka ściennego.
- Produkt przeznaczony jest wyłącznie do użytku wewnątrz pomieszczeń.
3. Funkcje produktu
The Kungfuking Surge Protector Power Strip is designed for convenience and safety, offering multiple power options in a compact form factor.
- 2 gniazdka prądu przemiennego: Provides standard power for electronic devices.
- 2 porty USB-A: Delivers 5V/2.1A for charging smartphones, tablets, and other USB-powered devices.
- 6.56 FT Extension Cord: Offers flexibility in placement, reaching distant outlets.
- Płaska konstrukcja wtyczki: Minimizes obstruction and allows furniture to be placed closer to the wall.
- Ochrona przeciwprzepięciowa: Chroni podłączone urządzenia przed przepięciami i skokami napięcia.
- Trwała konstrukcja: Built with fireproof ABS+PC materials for enhanced safety.
- Konstrukcja do montażu: Can be easily mounted on or under desks, walls, or other surfaces.

Rysunek 2: Główne cechy i specyfikacje

Figure 3: All-in-One Charging Station in use
4. Konfiguracja i instalacja
The power strip can be installed in various locations to suit your needs. Mounting screws are included for secure installation.
4.1 Opcje montażu
The power strip offers flexible mounting options:
- Under Desk/Table: Mount horizontally or vertically under a desk or table to keep surfaces clear.
- Mocowanie ścienne: Secure to a wall for convenient access, such as near a TV or bedside.
- Side of Cabinets/Headboards: Install vertically on the side of furniture for discreet power access.

Figure 4: Installation Options and Dimensions
4.2 Kroki instalacji
- Wybierz lokalizację: Select a flat, stable surface for mounting, ensuring it is within reach of a wall outlet and your devices.
- Zaznacz otwory na śruby: Place the power strip in the desired position and mark the locations for the mounting screws using a pencil.
- Wywierć otwory pilotażowe (opcjonalnie): For wood surfaces, you may pre-drill small pilot holes to prevent wood splitting.
- Secure the Power Strip: Use the provided screws to firmly attach the power strip to the surface. Ensure it is securely fastened before use.
- Podłącz do zasilania: Plug the power strip's flat plug into a standard 120V wall outlet. The flat plug design allows for placement behind furniture.
4.3ample Instalacje
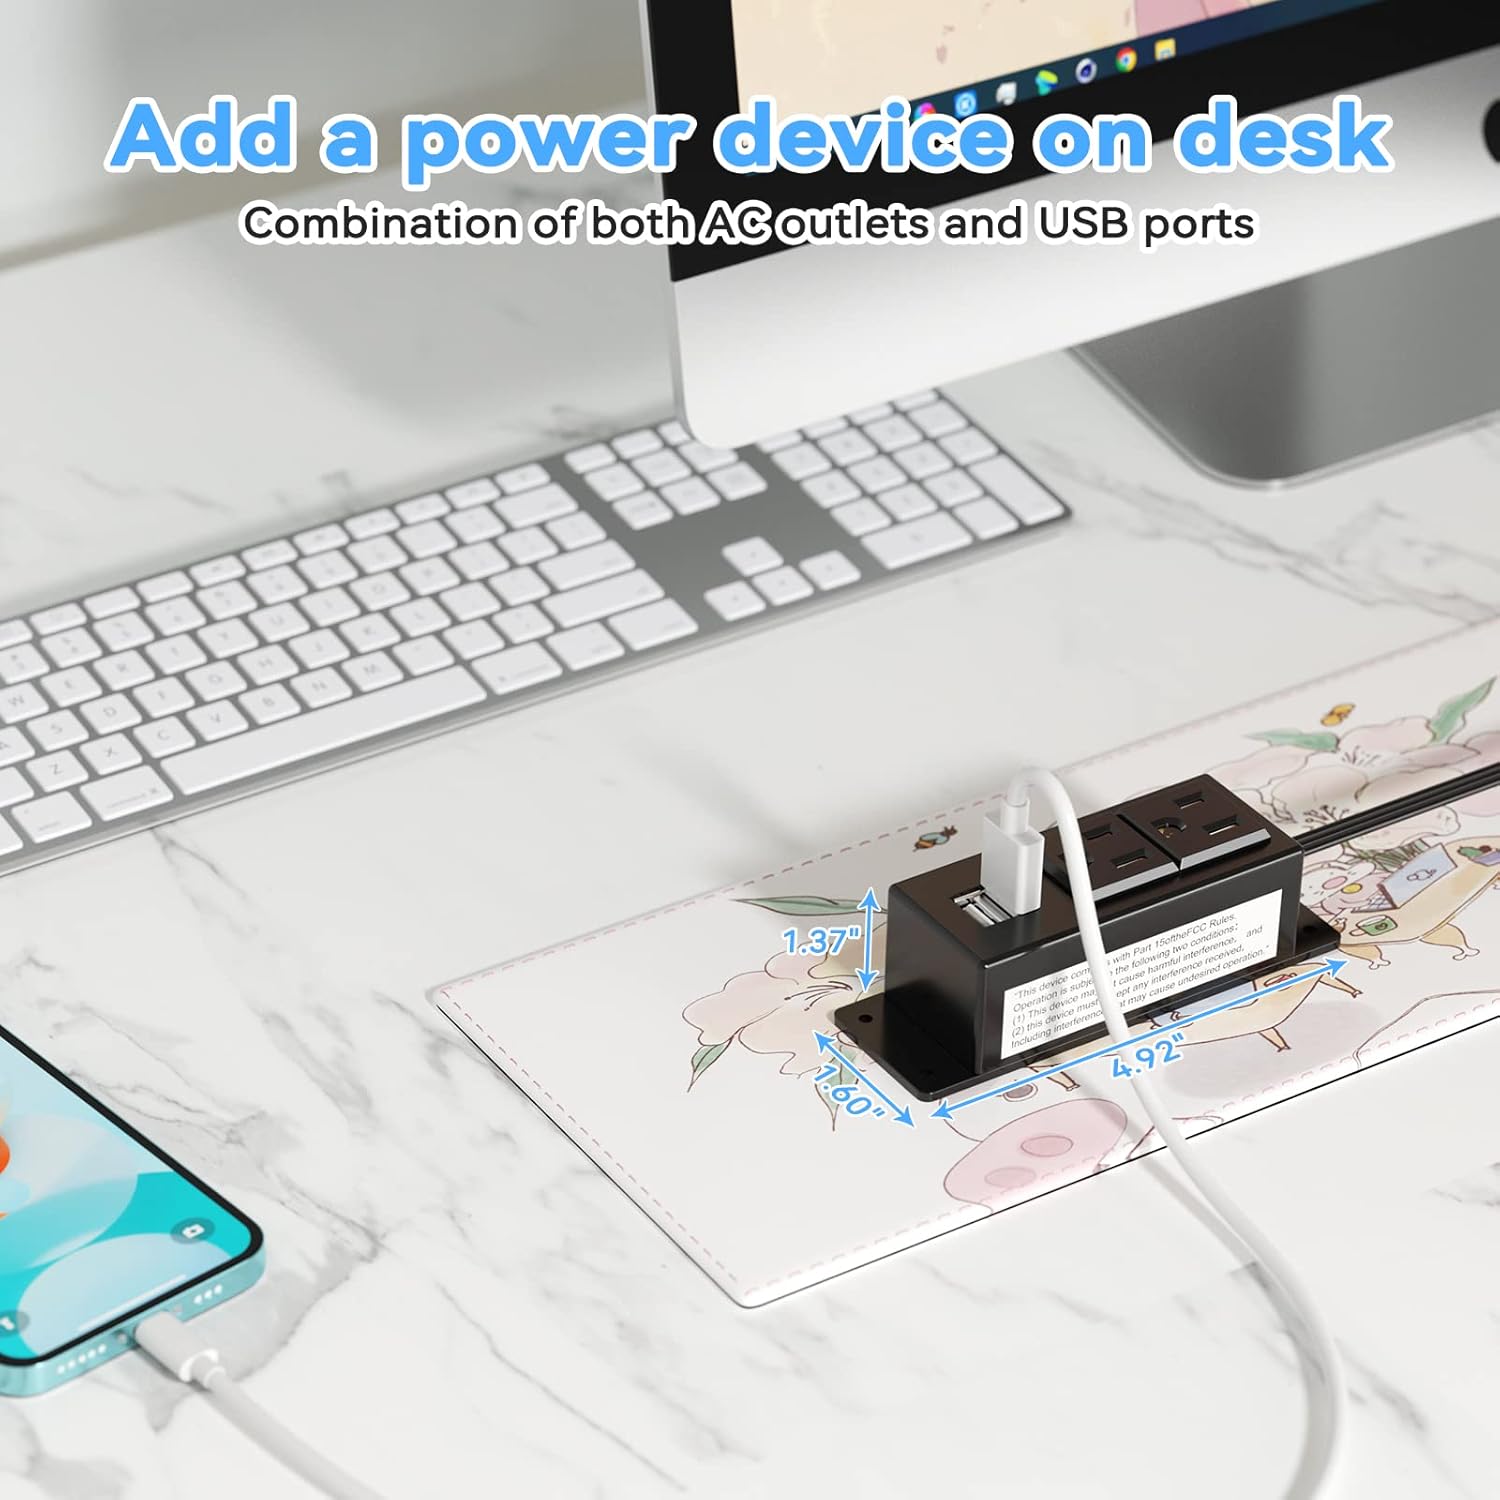
Figure 5: Desk Surface Installation

Figure 6: Under-Desk Installation

Figure 7: Wall-Mounted for TV

Figure 8: Nightstand Installation

Figure 9: Kitchen Cabinet Installation

Figure 10: Flat Plug for Space-Saving Placement
5. Instrukcja obsługi
Using your Kungfuking Surge Protector Power Strip is straightforward:
- Podłącz do gniazdka ściennego: Ensure the power strip's flat plug is securely connected to a grounded 120V AC wall outlet.
- Podłącz urządzenia prądu zmiennego: Insert the power cords of your electronic devices into the two AC outlets.
- Podłącz urządzenia USB: Plug your USB charging cables into the two USB-A ports to charge compatible devices.
- Włączanie: The power strip is designed for continuous operation once plugged in. There is no on/off switch.
- Monitoruj użycie: Avoid overloading the power strip by ensuring the total power consumption of connected devices does not exceed the rated capacity (12A, 120V).
6. Rozwiązywanie Problemów
Jeśli masz problemy z listwą zasilającą, zapoznaj się z poniższymi typowymi problemami i ich rozwiązaniami:
| Problem | Możliwa przyczyna | Rozwiązanie |
|---|---|---|
| Brak zasilania z gniazdek prądu zmiennego i portów USB. |
|
|
| Urządzenia USB nie ładują się. |
|
|
| Listwa zasilająca jest gorąca. |
|
|
7. Specyfikacje
| Funkcja | Szczegół |
|---|---|
| Model | Kungfuking 2AC+2USB |
| Gniazda prądu przemiennego | 2 |
| Porty USB | 2 (USB typu A) |
| Wejście Voltage | 120 V prądu zmiennego |
| Wartość prądu AC | 12A |
| Częstotliwość | 60 Hz |
| Wyjście USB | 5 V / 2.1 A (łącznie) |
| Długość przewodu | 6.56 stopy (2 metrów) |
| Typ wtyczki | Wtyczka płaska |
| Tworzywo | Ognioodporny ABS+PC |
| Wymiary (w przybliżeniu) | 4.92 x 3.74 x 1.37 cali (dł. x szer. x wys.) |
| Waga (w przybliżeniu) | 10.5 uncji |
| Cechy specjalne | Surge Protection, Mountable Design |
8. Konserwacja
Prawidłowa konserwacja gwarantuje długowieczność i bezpieczne działanie listwy zasilającej:
- Czyszczenie: Disconnect the power strip from the wall outlet before cleaning. Use a dry, soft cloth to wipe the exterior. Do not use liquid cleaners or sprays.
- Kontrola: Periodically inspect the power cord, plug, and housing for any signs of damage, such as cuts, fraying, or cracks. If damage is found, discontinue use immediately.
- Składowanie: Jeśli listwa zasilająca nie będzie używana przez dłuższy czas, należy ją przechowywać w chłodnym i suchym miejscu, z dala od bezpośredniego światła słonecznego i wilgoci.
9. Gwarancja i wsparcie
Kungfuking products are designed for reliability and performance. For warranty information, technical support, or any questions regarding your product, please refer to the contact information provided at the point of purchase or visit the official Kungfuking webstrona.
Proszę zachować dowód zakupu na potrzeby roszczeń gwarancyjnych.


