1. Koniec produktuview
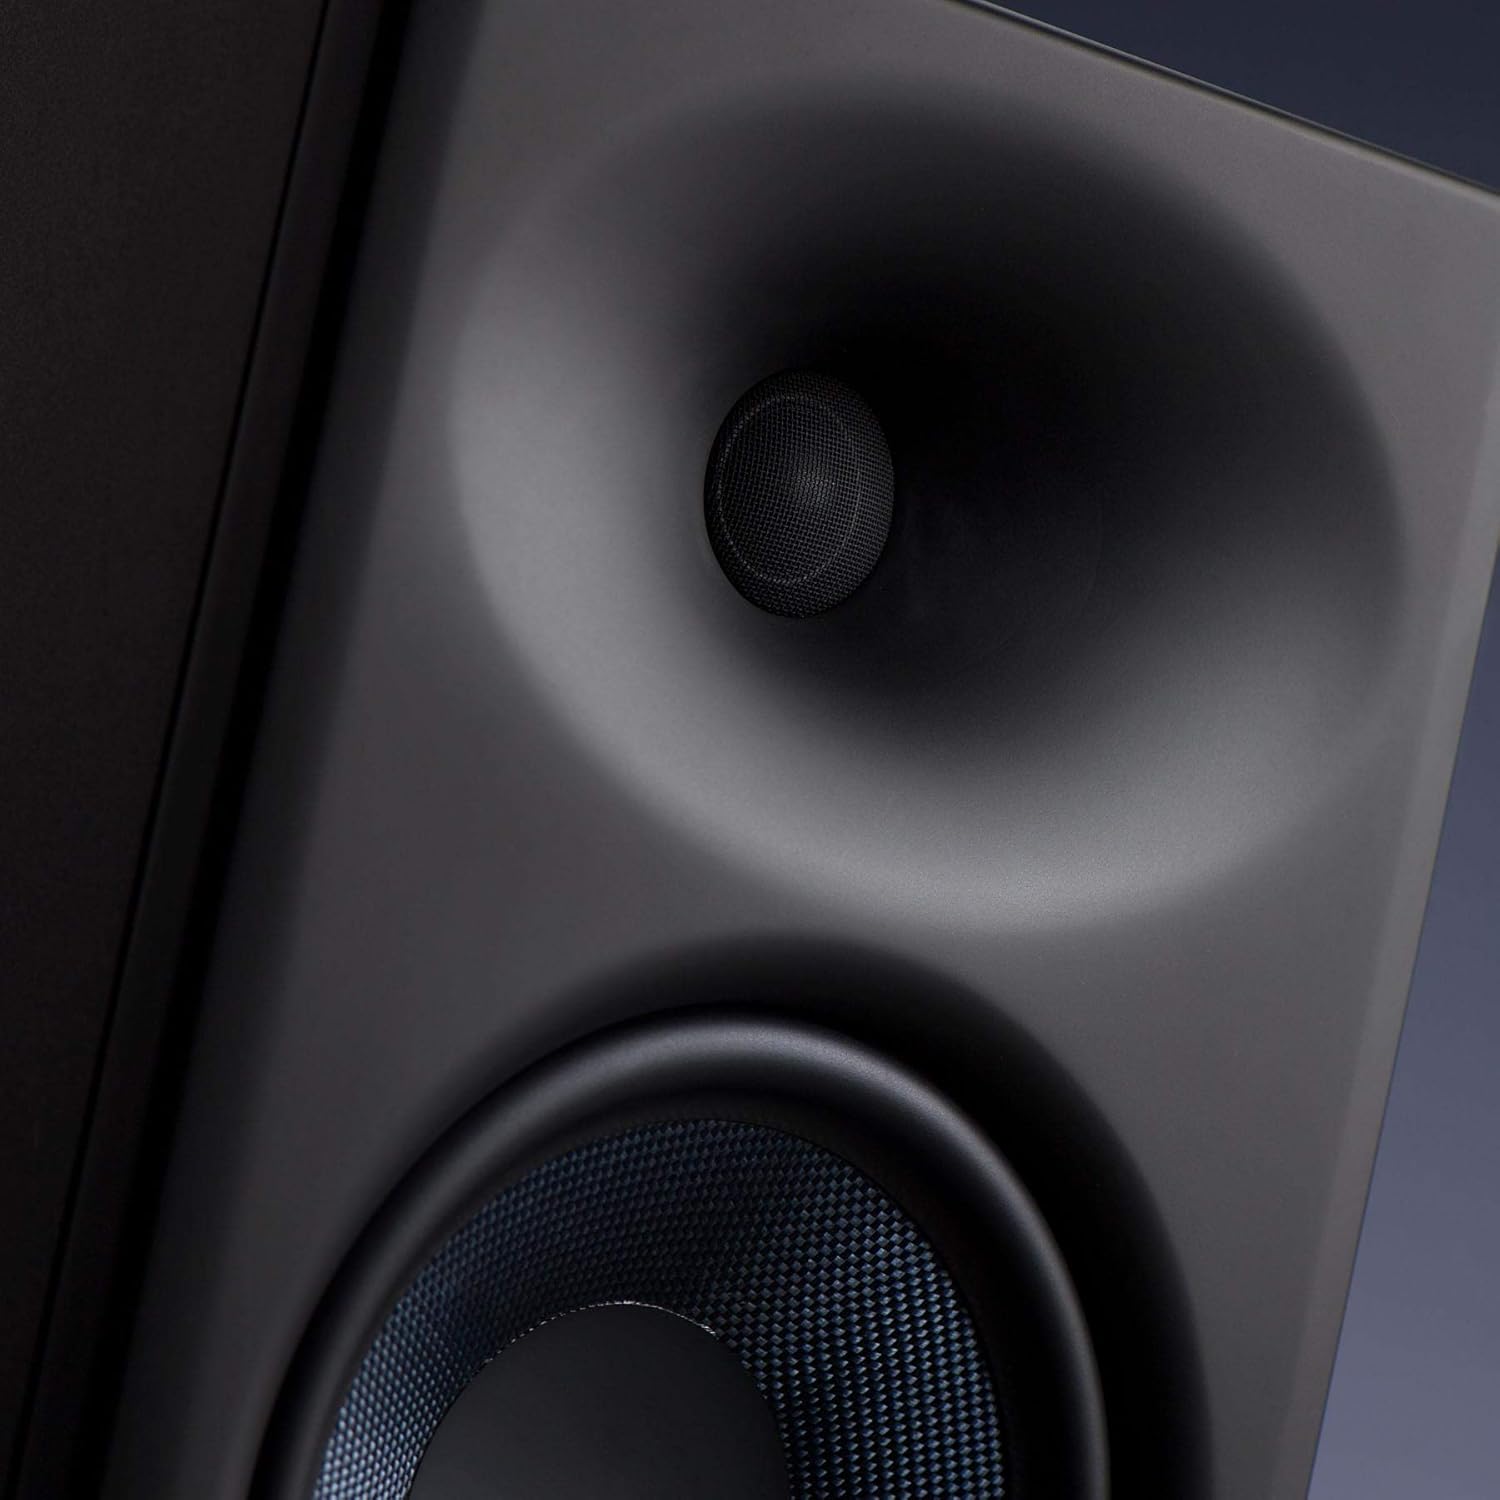
The PreSonus Eris E8 XT studio monitor is an advanced 2-way near field studio monitor designed for accurate audio reproduction in professional and home studio environments. It features a robust 8-inch woven composite low-frequency transducer for deep lows and a 1.25-inch silk-dome, high-frequency transducer for smooth highs. The monitor incorporates a Hugh Sarvis-designed EBM waveguide, which provides a wider and more controlled sweet spot, enhancing group listening and collaboration. Its larger, ported enclosure extends bass response without introducing muddiness. Acoustic tuning controls allow users to tailor the frequency response to their specific mix environment.
- 8-inch Woven Composite Low-Frequency Transducer: Delivers deep and clear bass frequencies.
- 1.25-inch Silk-Dome High-Frequency Transducer: Provides smooth and detailed high-frequency reproduction.
- EBM Waveguide: Innovative 100°(H)x60°(V) EBM waveguide horn ensures a wide sweet spot and minimized vertical reflections.
- Front-Ported Enclosure: State-of-the-art design for tight and extended bass response.
- Elementy sterujące strojeniem akustycznym: Includes Level, HPF (High-Pass Filter), LF Trim (Low-Frequency Trim), HF Trim (High-Frequency Trim), and Acoustic Space controls to optimize sound for any room.
- 140 Watt Class AB Bi-amplifikacja: Delivers up to 105 dB SPL for powerful and clear sound.
- Wszechstronna łączność: Balanced XLR, TRS (1/4-inch), and unbalanced RCA inputs for compatibility with various audio sources.
- Zintegrowana ochrona: Features protection against RF interference, extreme output current, over-temperature, external mains fuse, subsonic, and transient issues.
2. Informacje dotyczące bezpieczeństwa
Please read and follow all safety instructions before operating your PreSonus Eris E8 XT studio monitor. Failure to do so may result in electric shock, fire, or other hazards. Keep this manual for future reference.
- Źródło zasilania: Connect the unit to a power supply of the type specified in the operating instructions or as marked on the appliance.
- Wentylacja: Nie blokuj żadnych otworów wentylacyjnych. Zainstaluj zgodnie z instrukcjami producenta.
- Woda i wilgoć: Nie należy używać urządzenia w pobliżu wody lub wilgoci.
- Ciepło: Nie należy instalować w pobliżu źródeł ciepła, takich jak grzejniki, kratki wentylacyjne, piece lub inne urządzenia (w tym amp(lifiers) wytwarzające ciepło.
- Czyszczenie: Czyścić wyłącznie suchą szmatką.
- Serwisowanie: Wszelkie prace serwisowe należy zlecać wykwalifikowanemu personelowi serwisowemu. Serwisowanie jest wymagane, gdy urządzenie zostało w jakikolwiek sposób uszkodzone, np. przewód zasilający lub wtyczka są uszkodzone, płyn został wylany lub przedmioty wpadły do urządzenia, urządzenie zostało wystawione na działanie deszczu lub wilgoci, nie działa normalnie lub zostało upuszczone.
- Ochrona słuchu: This loudspeaker is capable of delivering sound pressure levels of more than 85 dB, which may cause permanent hearing damage. Use hearing protection when operating at high volumes.
3. Konfiguracja
3.1 Rozpakowanie i wstępna inspekcja
Carefully remove the monitor from its packaging. Inspect the unit for any signs of damage that may have occurred during shipping. If any damage is found, contact your dealer immediately.
3.2 Umieszczenie
Proper placement of your studio monitors is crucial for accurate monitoring. Position the monitors to form an equilateral triangle with your listening position. The tweeters should be at ear level. Avoid placing monitors directly against walls or in corners, as this can exaggerate bass frequencies. Utilize the Acoustic Space controls on the rear panel to compensate for boundary effects.

3.3 Połączenia
The Eris E8 XT offers flexible input options. Ensure all audio connections are made before powering on the speakers.
- Wejście XLR: Do zbalansowanych połączeń z profesjonalnymi interfejsami audio lub mikserami.
- TRS (1/4-inch) Input: For balanced or unbalanced connections from audio interfaces, mixers, or other audio equipment.
- Wejście RCA: For unbalanced connections from consumer audio devices.

3.4 Włączanie/wyłączanie zasilania
After making all audio connections, plug the power cables into the power inputs on the back of the speakers. Then, flip the power switches to the 'On' position. The PreSonus logo on the front will illuminate.
4. Obsługa
4.1 Regulacja głośności
Adjust the overall output level of the monitor using the 'Level' knob on the rear panel. Start with a low volume and gradually increase it to your desired listening level.
4.2 Kontrola strojenia akustycznego
The Eris E8 XT features several acoustic tuning controls on the rear panel to help you optimize the monitor's response for your specific listening environment.
- Filtr górnoprzepustowy (HPF): Cuts frequencies below a selected point (Flat, 80 Hz, or 100 Hz) to integrate with a subwoofer.
- Low-Frequency Trim (LF Trim): Adjusts frequencies below 1 kHz by -6 dB, -3 dB, or 0 dB to compensate for room acoustics.
- High-Frequency Trim (HF Trim): Adjusts frequencies above 10 kHz by -6 dB, -3 dB, or 0 dB to fine-tune the high-end response.
- Przestrzeń akustyczna: Compensates for bass buildup that can occur when monitors are placed near walls or in corners. Options include 0 dB (flat), -2 dB (middle of room), and -4 dB (close to wall/corner).
5. Konserwacja
To ensure the longevity and optimal performance of your PreSonus Eris E8 XT monitors, follow these maintenance guidelines:
- Czyszczenie: Use a soft, dry, lint-free cloth to clean the exterior of the monitors. Avoid using abrasive cleaners, waxes, or solvents.
- Pył: Regularly dust the speaker cones and ports to prevent accumulation that could affect sound quality.
- Środowisko: Keep the monitors in a clean, dry environment away from extreme temperatures, direct sunlight, and excessive humidity.
- Wentylacja: Ensure adequate airflow around the rear panel to prevent overheating.
- Transport: When moving the monitors, use original packaging or suitable protective materials to prevent damage.
6. Rozwiązywanie Problemów
If you encounter issues with your Eris E8 XT monitors, refer to the following common troubleshooting steps:
- Brak dźwięku:
- Check if the power cable is securely connected and the power switch is ON.
- Verify that the audio input cables are correctly connected to both the monitor and the audio source.
- Ensure the volume knob on the monitor and your audio source is turned up.
- Przeprowadź test przy użyciu innego źródła dźwięku lub kabla, aby wykluczyć uszkodzenie sprzętu.
- Zniekształcony dźwięk:
- Reduce the input level from your audio source or the monitor's volume knob to prevent clipping.
- Sprawdź, czy kable audio nie są uszkodzone.
- Ensure the acoustic tuning controls are not set to extreme values that might cause distortion in your room.
- Brzęczenie lub szum:
- Ensure all audio cables are balanced (XLR or TRS) if possible, especially for longer runs.
- Try connecting the monitors to a different power outlet or a power conditioner.
- Move audio cables away from power cables or other electrical interference sources.
7. Specyfikacje
| Funkcja | Wartość |
|---|---|
| Nazwa modelu | Eris E8 XT |
| Typ montażu | Stały podłogowe |
| Tworzywo | Composite, Plastic |
| Typ głośnika | Multimedia |
| Zalecane zastosowania produktu | Muzyka |
| Kompatybilne urządzenia | Komputer stacjonarny, laptop |
| Średnica głośnika niskotonowego | 8 cali |
| Średnica głośnika wysokotonowego | 1.25 cali |
| Liczba jednostek | 1.0 Liczba |
| Kolor | Czarny |
| Zawarte komponenty | 1 Eris E8 XT Monitor |
| Wymiary produktu | 11" gł. x 9" szer. x 8" wys. |
| Waga przedmiotu | 24.8 funtów |
| jest wodoodporny | FAŁSZ |
| Liczba elementów | 1 |
| Metoda kontroli | Dotykać |
| Technologia komunikacji bezprzewodowej | Częstotliwość radiowa |
| Maksymalna moc wyjściowa głośnika | 140 watów |
| Odpowiedź częstotliwościowa | 20 KHz (Note: This is likely the upper limit, actual range is wider) |
| Technologia łączności | XLR, TRS, RCA |
| Tryb wyjścia audio | Mononukleoza |
8. Gwarancja i wsparcie
The PreSonus Eris E8 XT Studio Monitor comes with a Limited Warranty. For specific terms and conditions, please refer to the warranty card included with your product or visit the official PreSonus webstrona.
For technical support, product registration, or service inquiries, please visit the PreSonus support page or contact their customer service directly. Keep your purchase receipt and serial number (located on the rear panel of the monitor) handy for any warranty claims.


