1. Wprowadzenie
Niniejsza instrukcja zawiera podstawowe informacje dotyczące bezpiecznej i wydajnej obsługi urządzenia. AMPINVT AP40C MPPT Solar Charge Controller. Please read this manual thoroughly before installation and use to ensure optimal performance and longevity of the product. This controller is designed to manage power flow from solar panels to batteries, ensuring efficient charging and protection for various battery types and system voltagt.j.
2. Koniec produktuview
Ten AMPINVT AP40C MPPT Solar Charge Controller is a high-efficiency device designed for solar power systems. It features Maximum Power Point Tracking (MPPT) technology to optimize solar energy harvesting.
Główne cechy:
- 12V/24V/36V/48V Auto identifying system voltage.
- Automatic control system to limit charging power and current.
- Maks. głośność wejściowatage: 150V PV.
- MPPT best working voltage range: DC18V-DC80V (12V); DC30V-DC100V (24V); DC65V-DC150V (48V).
- Supports 4 battery types: Lead-acid (Sealed, AGM, Gel, Flooded) and User-defined (Lithium Battery).
- Displays daily power generation and current curves.
- Multiple protections: overcharge, over discharge, overload, short circuit, reverse polarity, over heat, and battery undervoltage.
- Tracking rate of maximum power: ≥99%.
- Maximum conversion rate: >98%.
- RS485 communication: Capable of Wi-Fi remote monitoring (additional purchase required) for real-time wireless monitoring via APP (Android & iOS).

Rycina 2.1: Przód view z AMPINVT MPPT Solar Charge Controller AP40C.
Identyfikacja komponentu:

Figure 2.2: Labeled components of the controller. 1. Cooling Fan, 2. Hang Bracket, 3. LCD Display, 4. Menu Button, 5. Down Button, 6. Up Button, 7. Enter Button, 8. Temperature Interface, 9. Solar Panel Terminals, 10. Battery Terminals, 11. DC Load Terminals, 12. RS485 Port.
3. Instrukcje bezpieczeństwa
OSTRZEŻENIE: Nieprzestrzeganie tych instrukcji bezpieczeństwa może spowodować poważne obrażenia ciała lub uszkodzenie produktu.
- Always connect the battery first. Ensure sufficient battery voltage, aby kontroler rozpoznał prawidłową objętość systemutage.
- NEVER connect the solar panel array to the controller without a battery connected.
- The disassembly sequence is contrary to the wiring order (disconnect solar, then battery, then load).
- DO NOT connect any inverter, wind turbine, alternator, or charger directly to the charge controller. Connect inverters directly to the battery.
- Zapewnij odpowiednią ilość energii słonecznejtage jest co najmniej o 3 V wyższe niż napięcie akumulatoratage i całkowita moc wejściowa mieści się w określonym zakresie.
- The charging indicator may turn on and off, and charging current may fluctuate on cloudy days or in low light conditions. This is normal operation.
- If the controller is buzzing, the fan is operating to dissipate heat. This is normal.
- DO NOT install the charging controller in direct sunlight to avoid power loss due to overheating.
- Ensure adequate ventilation around the controller (approx. 20cm space) for heat dissipation.
- Ensure all connections to and from the controller are tight.
- DO NOT allow the positive (+) and negative (-) terminals of the battery to touch each other.
4. Konfiguracja i instalacja
Follow these steps for proper installation of your MPPT solar charge controller.
Sekwencja okablowania:
- Podłącz akumulator: Connect the battery to the controller's battery terminals. Ensure correct polarity. The controller will automatically detect the system voltagnp. (12V/24V/36V/48V).
- Podłącz panele słoneczne: Connect the solar panel array to the controller's solar panel terminals. Ensure correct polarity and that the PV input voltage and power are within the controller's specifications.
- Podłącz obciążenie DC (opcjonalnie): Connect your DC load to the controller's DC load terminals. Ensure correct polarity.

Figure 4.1: Connection diagram showing solar panels, battery, DC load, and optional WiFi module connected to the controller.
Montowanie:
Mount the controller vertically on a wall or suitable surface, ensuring adequate clearance for ventilation, especially around the cooling fan. Avoid direct sunlight and areas with high humidity or dust.
Figure 4.2: Product dimensions for mounting reference: 160mm (width), 250mm (depth), 290mm (height).
5. Instrukcja obsługi
The controller features an LCD display and four buttons for navigation and settings adjustment: Menu, Down, Up, and Enter.
Wyświetlacz LCD:
The LCD displays real-time system information including solar panel voltage, pojemność bateriitage, charging current, power generation, and load status.

Rysunek 5.1: Zbliżenie wyświetlacza LCD i przycisków sterujących.
Nawigacja i ustawienia:
Use the Menu button to cycle through different display screens or enter the settings menu. Use the Up and Down buttons to navigate options or adjust values. Press Enter to confirm selections or changes.
Video 5.1: Demonstration of navigating the AMPINVT MPPT Solar Charge Controller's menu and adjusting settings. This video shows how to access and modify various parameters, including battery type and charge current limits.
6. Ustawienia typu baterii
The controller supports various battery types. It is crucial to select the correct battery type for optimal charging and battery longevity.
Obsługiwane typy baterii:
- Lead-acid: Sealed, AGM, Gel, Flooded
- Określony przez użytkownika: For Lithium batteries or custom settings.
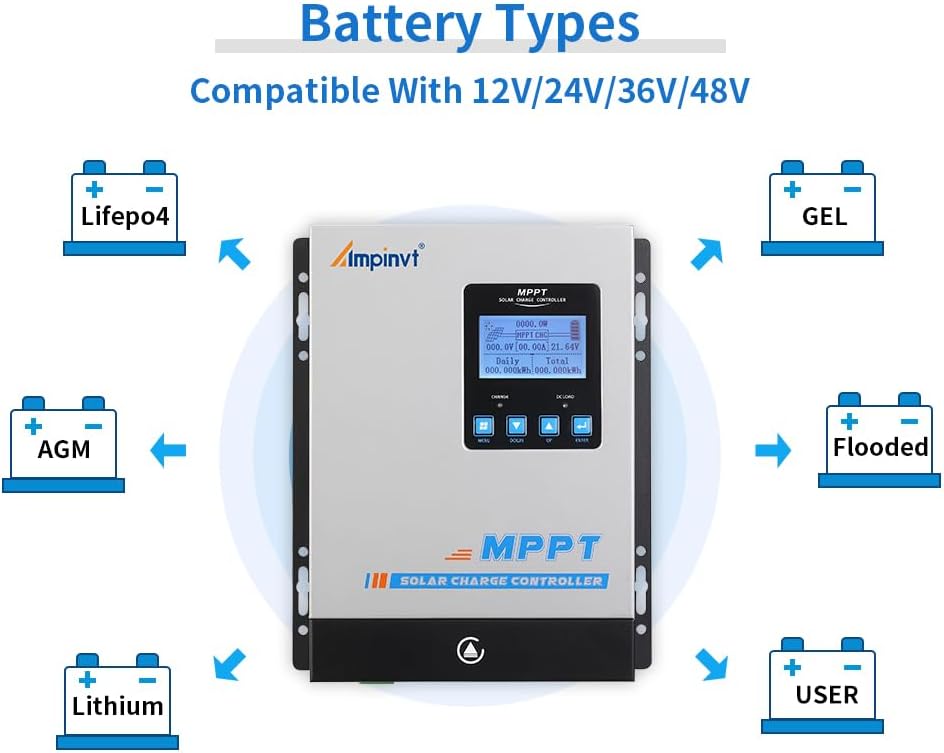
Figure 6.1: Visual representation of compatible battery types including LifePO4, AGM, Lithium, GEL, Flooded, and User-defined.
To change battery type settings, navigate to the 'Battery Type Setting' option in the menu. Use the Up/Down buttons to select your battery type and press Enter to confirm. For user-defined settings, you can adjust specific voltage parametry.
7. Konserwacja
Regular maintenance ensures the long-term reliability and performance of your solar charge controller.
- Sprawdź połączenia: Periodically inspect all wiring connections to ensure they are tight and free from corrosion. Loose connections can cause overheating and damage.
- Wyczyść kontroler: Keep the controller clean and free from dust and debris. Pay particular attention to the cooling fan and ventilation openings to ensure proper airflow.
- Monitoruj wydajność: Regularly check the LCD display for normal operation and any error messages. Monitor charging and load parameters to ensure the system is functioning as expected.
- Kontrola baterii: Inspect batteries for any signs of damage, swelling, or leakage. Ensure battery terminals are clean.

Figure 7.1: Close-up of the cooling fan, which should be kept clear of obstructions for optimal performance.
8. Rozwiązywanie Problemów
This section provides guidance on common issues you might encounter with your solar charge controller.
Typowe problemy i rozwiązania:
- Brak wyświetlacza/brak zasilania: Sprawdź połączenia akumulatora i upewnij się, że jego pojemność jest odpowiedniatage jest powyżej minimalnej objętości roboczejtage. Verify all fuses and circuit breakers.
- Brak ładowania: Upewnij się, że panele słoneczne są prawidłowo podłączone i otrzymują wystarczającą ilość światła słonecznego. Sprawdź moc wejściową PV.tage on the display. Verify battery type settings are correct.
- Przegrzanie: Ensure the controller is installed in a well-ventilated area, away from direct sunlight. Clean the cooling fan and vents. Reduce load if consistently overheating.
- Ładowanie nie działa: Check DC load connections and ensure the load is within the controller's specifications. Verify load control settings (e.g., always on, timer).
- Niedokładne odczyty: Ensure all connections are secure. If issues persist, contact support.
For more detailed troubleshooting or issues not covered here, please refer to the comprehensive manual provided with the product or contact AMPINVT customer support.
9. Specyfikacje
| Funkcja | Specyfikacja |
|---|---|
| Marka | AMPZaproszenie |
| Numer modelu | AP40C |
| Obecna ocena | 40A |
| Objętość systemutage | Automatyczne 12V/24V/36V/48V |
| Maks. Objętość wejścia PVtage | 150 V |
| Maksymalna moc wejściowa PV (12 V) | 570 W |
| Maksymalna moc wejściowa PV (24 V) | 1130 W |
| Maksymalna moc wejściowa PV (36 V) | 1710 W |
| Maksymalna moc wejściowa PV (48 V) | 2270 W |
| MPPT Working VoltagZasięg (12 V) | Prąd stały 18 V-prąd stały 80 V |
| MPPT Working VoltagZasięg (24 V) | Prąd stały 30 V-prąd stały 100 V |
| MPPT Working VoltagZasięg (48 V) | Prąd stały 65 V-prąd stały 150 V |
| Obsługiwane typy baterii | Lead-acid (Sealed, AGM, Gel, Flooded), User-defined (Lithium) |
| Wydajność śledzenia | ≥99% |
| Współczynnik konwersji | >98% |
| Komunikacja | RS485 (Wi-Fi remote monitoring optional) |
| Wymiary produktu | 6.3 x 3.1 x 8.7 cala (160 x 79 x 221 mm) |
| Waga przedmiotu | 5.79 funtów (2.63 kg) |
| Typ wyświetlacza | PROWADZONY |
10. Gwarancja i wsparcie
For warranty information, technical support, or service inquiries, please contact AMPINVT-US directly through their official channels or the retailer where the product was purchased. Keep your purchase receipt as proof of purchase for warranty claims.