1. Wprowadzenie
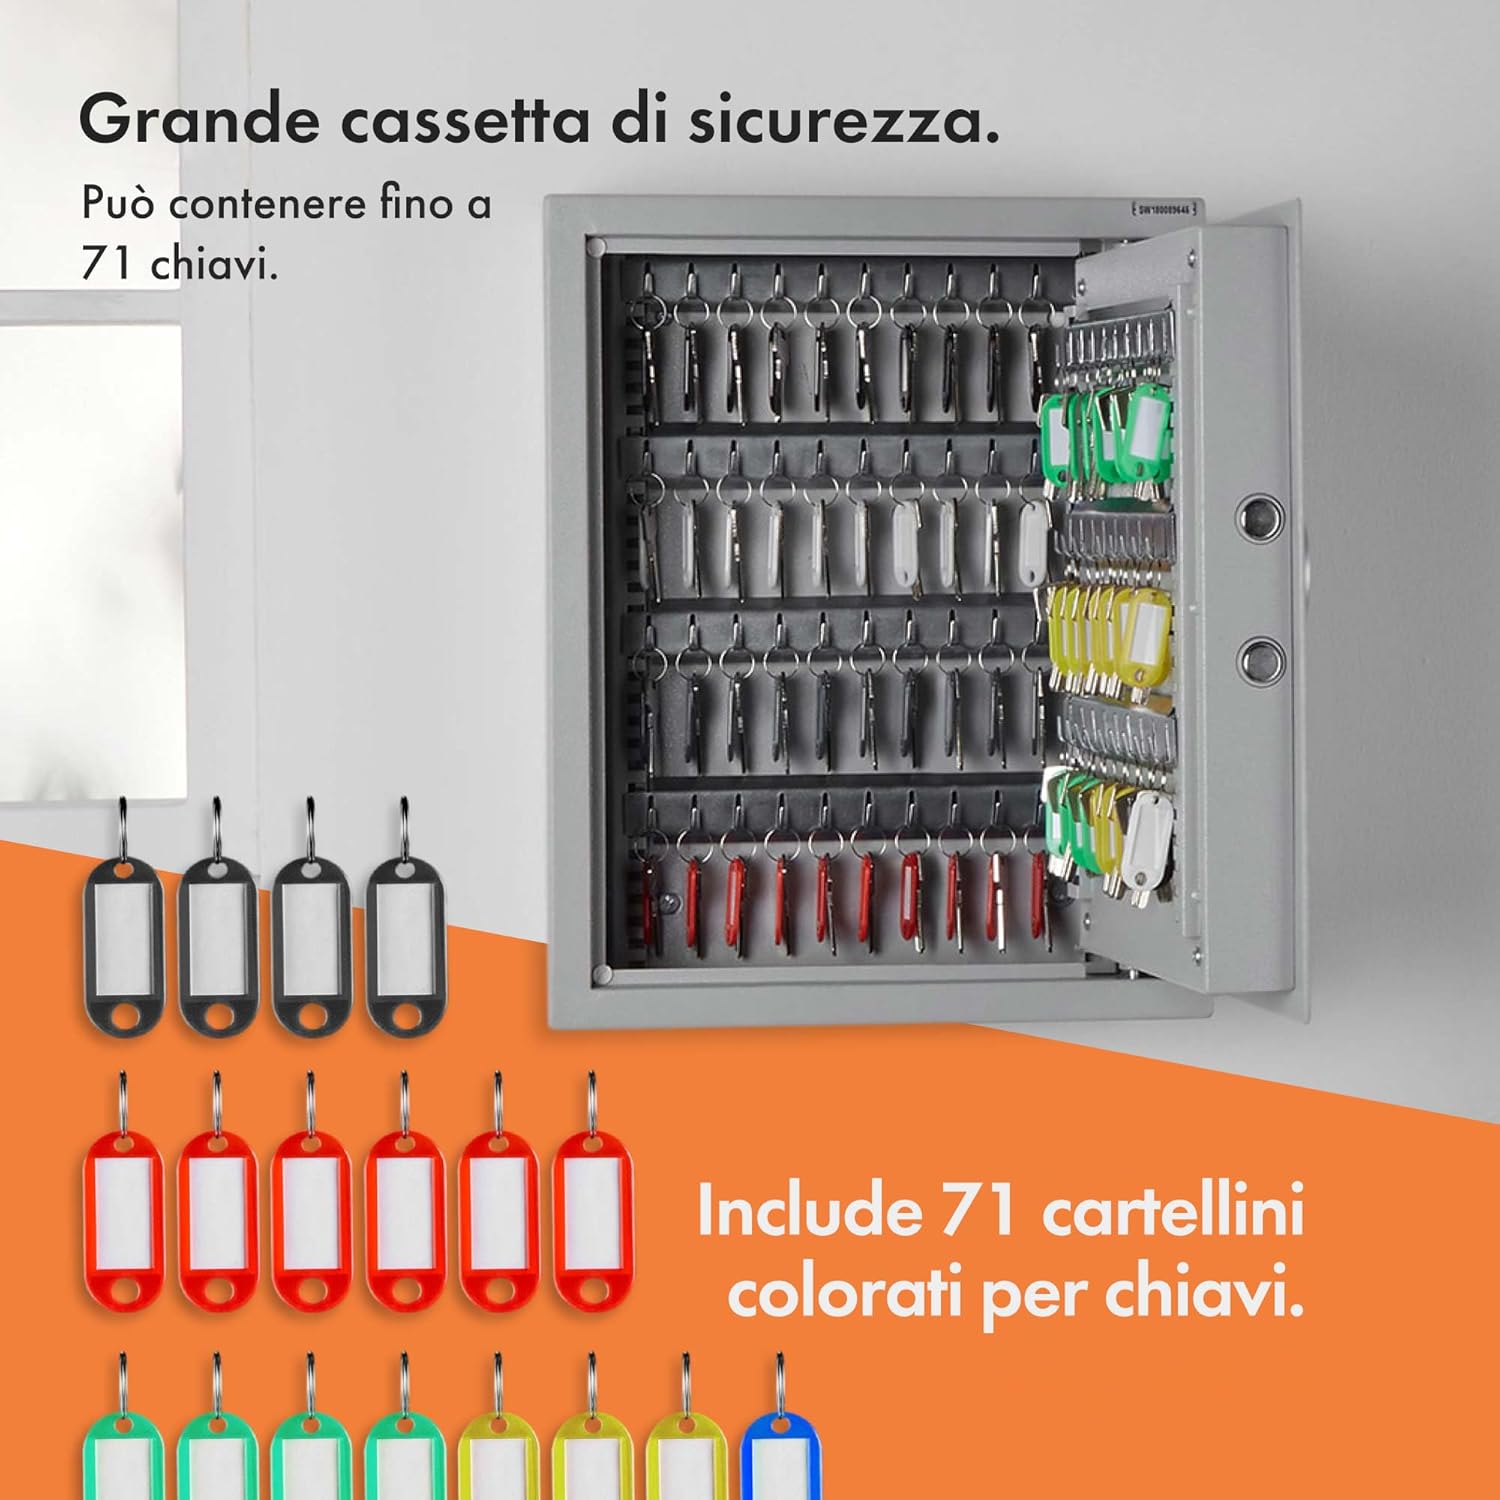
This manual provides essential information for the safe and effective use of your VonHaus 71 Key Digital Safe Cabinet. Please read these instructions thoroughly before installation and operation, and retain them for future reference. The VonHaus Key Safe is designed to securely store up to 71 keys, featuring a robust steel body, an electronic keypad for access, and an emergency override system.
2. Informacje dotyczące bezpieczeństwa
- Ensure the safe is mounted on a solid, stable surface capable of supporting its weight and potential contents.
- Keep emergency override keys in a secure location away from the safe. Do not store them inside the safe.
- Do not expose the safe to extreme temperatures or moisture.
- Regularly check battery levels to ensure continuous operation.
- Keep the keypad clean and free from debris.
3. Zawartość opakowania
Przed przystąpieniem do instalacji sprawdź, czy wszystkie komponenty są obecne:
- VonHaus 71 Key Digital Safe Cabinet
- 2 x klucze do awaryjnego otwierania drzwi
- Śruby montażowe (4)
- Wall Plugs/Anchors (4)
- Keyrings and Labels (71 sets)
- Instrukcja obsługi
4. Koniec produktuview
The VonHaus Key Safe features a robust design for secure key storage. Key components include:
- Rust-Resistant Solid Steel Body: Provides durability and security.
- Digital Electronic Keypad: For setting and entering a 3-8 digit access code.
- Emergency Key Lock: A manual override for access if the code is forgotten or batteries are depleted.
- Robust Rotary Dial: The handle used to open the safe door after successful code entry or manual unlock.
- Wskaźniki LED: Lights to indicate successful entry, failed entry, and low battery level.
- Adjustable Key Shelves: Seven shelves with integrated hooks for organizing up to 71 keys.

5. Konfiguracja
5.1. Montaż na ścianie
The key safe is designed for wall mounting to ensure maximum security. It comes with pre-drilled mounting holes and all necessary hardware.
- Choose a suitable, solid wall location for installation. Ensure there are no hidden electrical wires or pipes.
- Hold the safe against the wall at the desired height and mark the positions of the four pre-drilled mounting holes.
- Drill pilot holes at the marked positions using an appropriate drill bit for your wall type.
- Insert the provided wall plugs (anchors) into the drilled holes.
- Align the safe with the wall plugs and secure it using the provided mounting bolts. Tighten securely.

5.2. Instalacja baterii
The electronic keypad requires batteries (not included) for operation.
- Open the safe door using the emergency override key (refer to Section 6.2 if needed).
- Znajdź komorę baterii po wewnętrznej stronie drzwi sejfu.
- Insert the required batteries (typically AA, check compartment for exact type and quantity) according to the polarity markings.
- Zamknij pokrywę komory baterii.
5.3. Ustawianie kodu osobistego
The safe allows you to set a 3-8 digit personal access code.
- Przy otwartych drzwiach sejfu znajdź czerwony przycisk resetowania po wewnętrznej stronie drzwi, w pobliżu zawiasu.
- Press the red reset button. You will hear a beep, and the yellow LED on the keypad will illuminate.
- W ciągu 5 sekund wprowadź na klawiaturze żądany kod składający się z 3–8 cyfr.
- Press the '#' button to confirm your code. You will hear a confirmation beep, and the yellow LED will turn off.
- Test your new code: With the door still open, enter your new code followed by '#'. The green LED should light up, and you should be able to turn the rotary dial to simulate opening the safe. If it doesn't work, repeat steps 1-4.
6. Instrukcja obsługi
6.1. Otwieranie sejfu za pomocą kodu
- Wprowadź na klawiaturze swój kod osobisty składający się z 3–8 cyfr.
- Press the '#' button. The green LED will illuminate, indicating successful entry.
- Within 5 seconds, turn the rotary dial clockwise to open the safe door.
6.2. Korzystanie z kluczy awaryjnych
In case you forget your code or the batteries are depleted, you can use the emergency override keys.
- Znajdź dziurkę od klucza awaryjnego, zwykle ukrytą za małą pokrywką na panelu klawiatury.
- Insert one of the emergency override keys into the keyhole and turn it.
- While the key is turned, rotate the main rotary dial clockwise to open the safe door.
- Remove the emergency key after opening.

6.3. Organizing Keys
The safe is equipped with 7 adjustable key shelves and 71 keyrings with labels for efficient organization.
- Attach your keys to the provided keyrings and labels.
- The 7 key shelves (4 with 11 hangers and 3 with 9 hangers) can be removed and adjusted to accommodate different key sizes and quantities. Simply slide them out of their slots and re-insert them into desired positions.
- Hang the labeled keyrings onto the hooks on the shelves.


7. Konserwacja
7.1. Wymiana baterii
When the low battery indicator (red LED) illuminates, it is time to replace the batteries.
- Open the safe door (using your code or emergency key).
- Otwórz pokrywę komory baterii.
- Wyjmij stare baterie i zutylizuj je w odpowiedzialny sposób.
- Włóż nowe baterie, zwracając uwagę na prawidłową polaryzację.
- Zamknij pokrywę komory baterii.
7.2. Czyszczenie
Przetrzyj zewnętrzną część sejfu miękką szmatką.amp ściereczka. Nie należy używać środków czyszczących o właściwościach ściernych ani rozpuszczalników.
8. Rozwiązywanie Problemów
- Sejf nie otwiera się za pomocą kodu:
- Upewnij się, że baterie nie są rozładowane. W razie potrzeby wymień je.
- Verify you are entering the correct 3-8 digit code followed by '#'.
- If the code is forgotten, use the emergency override keys.
- Klawiatura nie reaguje:
- Sprawdź i wymień baterie.
- Upewnij się, że żadne zanieczyszczenia nie blokują przycisków.
- Drzwi nie zamykają się prawidłowo:
- Check for any obstructions preventing the door from fully closing.
- Ensure the locking bolts are retracting correctly when the door is open.

Rysunek 8.1: Z bliska view of the robust locking bolts, ensuring secure closure of the safe.
9. Specyfikacje
| Marka | Dom |
| Nazwa modelu | VonHaus 71 Digital Key Safe |
| Numer modelu przedmiotu | 3500139 |
| Kolor | Srebrny |
| Tworzywo | Stal stopowa |
| Typ zamka | Elektroniczny zamek szyfrowy |
| Kluczowa pojemność | 71 klucze |
| Liczba półek | 7 |
| Typ montażu | Wall Mounted (Surface Mount) |
| Waga przedmiotu | 9 kg 600 gram |
| Wymiary produktu (DxSxW) | 14.2 x 17.7 x 4.7 Centimeters (Note: These dimensions seem to be package or internal, refer to Figure 4.1 for external safe dimensions: 36cm W x 45cm H x 12cm D) |
| Wymagany montaż | Yes (Mounting) |
10. Gwarancja i pomoc techniczna
All VonHaus products are backed by a minimum 2-year warranty. For support, warranty claims, or further assistance, please refer to the contact information provided with your purchase or visit the official VonHaus webStrona. Kontaktując się z pomocą techniczną, przygotuj numer modelu (3500139) i dane dotyczące zakupu.


