1. Wprowadzenie
This manual provides detailed instructions for the installation, operation, and maintenance of your Front Runner Slimline II 3/4 Roof Rack Kit. Designed for the Toyota 4Runner (5th Gen), this robust and versatile roof rack system enhances your vehicle's cargo carrying capabilities for various adventures.
Please read all instructions carefully before beginning installation or use to ensure proper function and safety.
2. Informacje dotyczące bezpieczeństwa
- Always ensure all fasteners are securely tightened before driving. Regularly check tightness, especially after initial installation and before long trips.
- Do not exceed the maximum load capacity of 660 pounds (300 kg) for the roof rack. Refer to your vehicle's owner's manual for its specific roof load limits.
- Distribute cargo evenly across the rack to maintain vehicle stability. Secure all items to prevent shifting or falling during transit.
- Be aware of increased vehicle height and weight when driving with the roof rack installed, especially when entering garages, car washes, or areas with low overhead clearance.
- Avoid off-road driving with heavy loads unless specifically designed for such conditions and secured appropriately.
- Use appropriate personal protective equipment (PPE) during installation, such as gloves and eye protection.
3. Co znajduje się w pudełku
The Front Runner Slimline II 3/4 Roof Rack Kit includes the following main components:
- Slimline II Tray (1255mm x 1560mm)
- Foot Rails (2 units)
- Deflektor wiatru
- All necessary mounting hardware and fasteners
Note: Additional accessories are sold separately.
4. Konfiguracja i instalacja
Installation of the Front Runner Slimline II 3/4 Roof Rack Kit requires mechanical aptitude. It is recommended to have at least two people for safe and efficient installation.
4.1. Rozpakowanie i identyfikacja komponentów
Carefully unpack all components and verify against the packing list. Organize all parts and hardware for easy access during installation.

Rysunek 4.1: Koniecview of the unpacked Front Runner Slimline II Roof Rack components, including the tray, foot rails, wind deflector, and various hardware bags.
Video 4.1: Unboxing and assembly display of a roof rack kit, showing various components and hardware. This video provides a visual guide to identifying the parts before installation.
4.2. Assembling the Rack Frame
Begin by assembling the main frame of the Slimline II tray. Follow the detailed instructions provided in the kit for connecting the side rails and cross bars. Ensure all connections are finger-tightened initially, then fully secured once the entire frame is aligned.
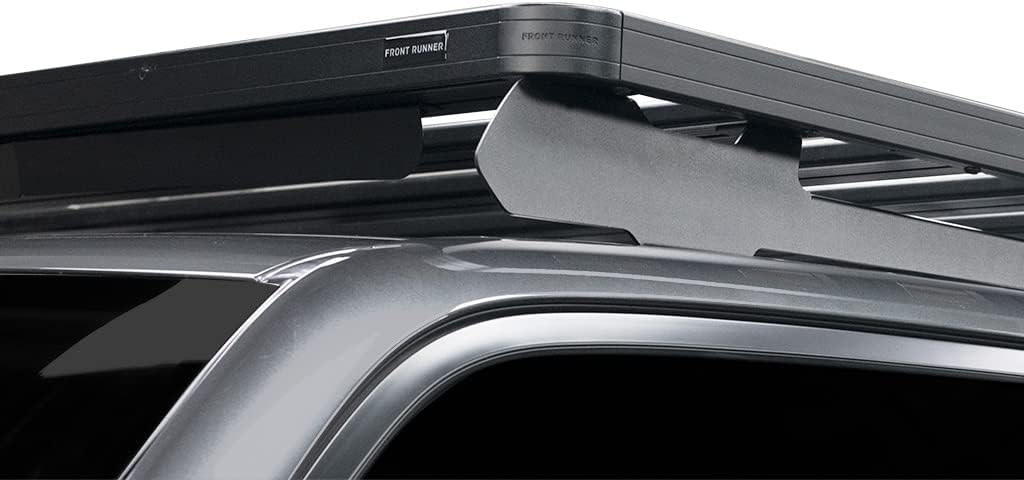
Rysunek 4.2: Zbliżenie view of the corner of the Front Runner Slimline II roof rack, highlighting the robust construction and integrated branding.

Figure 4.3: The fully assembled Front Runner Slimline II roof rack tray, ready for mounting onto the vehicle's foot rails.
4.3. Mounting the Foot Rails to the Vehicle
The foot rails are designed to integrate with the existing mounting points on your Toyota 4Runner (5th Gen). Carefully position the foot rails and secure them according to the specific instructions for your vehicle model. Ensure a snug and stable fit.

Rysunek 4.4: Strona view of the Front Runner Slimline II roof rack installed on a Toyota 4Runner, showcasing jest nisko-profesjonalnyfile design and integration with the vehicle.
Video 4.2: A detailed installation guide for a roof rack, demonstrating the process of attaching the foot rails and main tray to the vehicle. This video is crucial for understanding the mounting procedure.
4.4. Attaching the Slimline II Tray to Foot Rails
With the foot rails securely mounted, carefully lift the assembled Slimline II tray onto the foot rails. Align the mounting points and secure the tray using the provided hardware. Double-check all connections for tightness.

Rysunek 4.5: Tył view of the Front Runner Slimline II roof rack on a Toyota 4Runner, showing the complete assembly and how it sits on the vehicle's roof.
4.5. Installing the Wind Deflector
Attach the wind deflector to the front of the Slimline II tray. This component helps reduce wind noise and drag. Ensure it is properly aligned and securely fastened.

Figure 4.6: The Front Runner Slimline II roof rack with the wind deflector installed, designed to minimize wind noise and improve aerodynamics.
5. Instrukcja obsługi
The Slimline II roof rack is designed for versatile cargo management. Its unique bolt-on design allows for easy attachment of accessories to the top, bottom, or sides of the rack.
- Załadunek ładunku: Distribute weight evenly. Secure all items using appropriate tie-downs, straps, or specialized accessories.
- Zgodność akcesoriów: The rack is compatible with over 50 Front Runner accessories, including mounts for bikes, kayaks, recovery gear, and rooftop tents.
- Konstrukcja modułowa: Slats can be easily added or removed to customize deck space or provide access to a sunroof. Expedition rails can also be added for a basket-style configuration.

Figure 5.1: The Slimline II roof rack demonstrating its multi-functionality with various accessories such as a bike mount, storage boxes, and recovery boards.
Wideo 5.1: Pokaz wideoasing various camping solutions and accessories compatible with Front Runner roof racks, demonstrating practical use cases for outdoor adventures.
6. Konserwacja
- Regularna kontrola: Periodically inspect all bolts, nuts, and mounting points for tightness and signs of wear or damage. Tighten any loose fasteners.
- Czyszczenie: Clean the roof rack regularly with mild soap and water to remove dirt, grime, and road salt. Avoid abrasive cleaners or solvents that could damage the powder coating.
- Zapobieganie korozji: The rack is made from corrosion-free aluminum, but regular cleaning helps maintain its appearance and longevity, especially in harsh environments.
7. Rozwiązywanie Problemów
| Wydanie | Możliwa przyczyna | Rozwiązanie |
|---|---|---|
| Nadmierny hałas wiatru | Improperly installed wind deflector; loose components; cargo not aerodynamic. | Ensure wind deflector is correctly positioned and tightened. Check all rack components for tightness. Adjust cargo placement for better aerodynamics. |
| Rack feels unstable or loose | Loose mounting bolts or foot rail connections. | Inspect and re-tighten all mounting bolts and foot rail connections according to installation instructions. |
| Difficulty attaching accessories | Incorrect accessory type or improper alignment. | Verify accessory compatibility with the Slimline II system. Ensure correct orientation and alignment with the rack's T-slots or mounting points. |
8. Specyfikacje
- Marka: Faworyt
- Model: Slimline II 3/4 Roof Rack Kit
- Zgodność: Toyota 4Runner (5th Gen)
- Wymiary tacy: 1255 mm (dł.) x 1560 mm (szer.)
- Waga przedmiotu: Około 92.2 funta (41.8 kg)
- Nośność: 660 funtów (300 kg) - Always refer to vehicle manufacturer's roof load limits.
- Tworzywo: High-density aluminum with durable powder coating
- Typ montażu: U-Bolt (Vehicle Specific Fit)
- Numer części producenta: KRTF054T
- ASIN: B07MVF491C
9. Gwarancja
The Front Runner Slimline II 3/4 Roof Rack Kit comes with a Limited Lifetime Warranty. For specific terms and conditions, please refer to the official Front Runner webodwiedź witrynę lub skontaktuj się z działem obsługi klienta.
10. Obsługa klienta
For further assistance, technical support, or warranty claims, please contact Front Runner customer service through their official webwitrynę lub sprzedawcę, u którego produkt został zakupiony.
Online resources and additional installation guides may also be available on the Front Runner Store on Amazon.


