1. Koniec produktuview
The Thule VeloCompact 926002 is a compact and lightweight towbar-mounted bike rack designed for transporting up to three bicycles. It offers ease of installation, secure bike attachment, and convenient access to your vehicle's trunk even with bikes loaded. This manual provides essential information for safe assembly, operation, and maintenance.

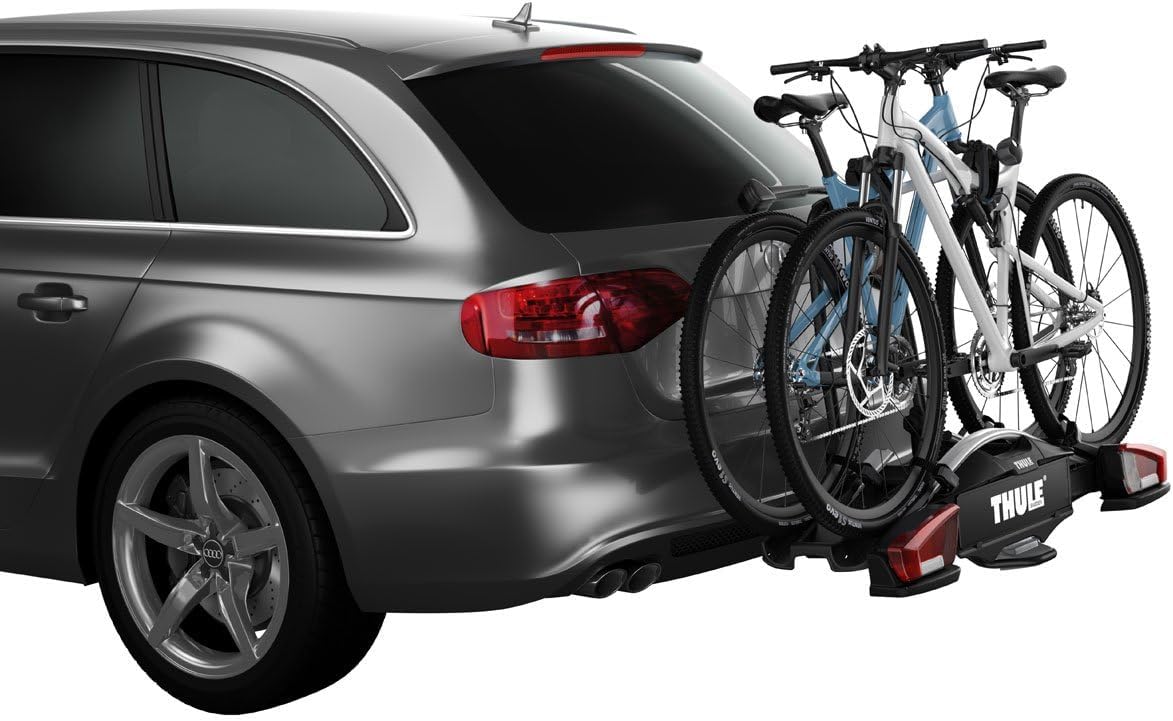
Image 1.1: The Thule VeloCompact 3-Bike 13-pin towbar-mounted bike rack.
2. Informacje dotyczące bezpieczeństwa
Before installing or using the Thule VeloCompact 926002, carefully read and understand all instructions and safety warnings. Failure to do so may result in property damage, personal injury, or voiding of the product warranty.
- Always ensure the bike rack is securely attached to the towbar before loading bicycles.
- Verify that all bicycles are properly secured to the rack using the provided straps and frame holders.
- Nie przekraczaj maksymalnego obciążenia wynoszącego 60 kg (132 funtów).
- Check that the vehicle's rear lights and license plate are visible. If not, an additional light board may be required.
- Be aware of the increased length and width of your vehicle when driving with the bike rack installed.
- Regularnie sprawdzaj, czy na stojaku nie ma śladów zużycia, uszkodzeń lub luźnych elementów.
3. Konfiguracja i instalacja
Follow these steps to correctly install your Thule VeloCompact 926002 bike rack onto your vehicle's towbar.
- Rozpakuj i przygotuj: Remove the bike rack from its packaging. Ensure all components are present and undamaged.
- Mount to Towbar: Place the bike rack onto the towbar. Engage the clamping mechanism by pushing down the lever until it clicks into place. Ensure the rack is firmly seated and does not wobble.
- Podłącz wtyczkę elektryczną: Connect the 13-pin electrical plug from the bike rack to your vehicle's towbar socket. If your vehicle has an 8-pin socket, an adapter may be required (not included). Verify that all lights (brake, turn signals, tail lights) are functioning correctly.
- Dostosuj i zabezpiecz: Extend the light board and wheel trays as needed. Ensure the license plate is clearly visible.

Obraz 3.1: Tył view of the Thule VeloCompact bike rack, showing the light board and wheel trays.
Obraz 3.2: Bok view of the Thule VeloCompact bike rack installed on a vehicle.
Instrukcja wideo instalacji
Video 3.1: Official Thule video demonstrating the installation and usage of the VeloCompact 13-pin bike rack.
4. Instrukcja obsługi
4.1 Załadunek rowerów
- Position Bikes: Place the first bicycle onto the rack, ensuring the frame fits within the adjustable frame holders.
- Bezpieczna rama: Use the removable bike holder arms to secure the bicycle frame. The integrated locking knobs provide a secure grip and can be locked to prevent theft.
- Strap Wheels: Secure the wheels into the wheel trays using the quick-release straps. For bikes with large wheelbases, the rim holders can be extended.
- Repeat for Additional Bikes: Load subsequent bikes, alternating their direction if necessary to optimize space and prevent contact.

Image 4.1: A person loading a mountain bike onto the Thule VeloCompact bike rack.

Image 4.2: The Thule VeloCompact bike rack with three bicycles securely loaded on a vehicle.
4.2 Trunk Access
The Thule VeloCompact features a convenient foot-pedal operated tilt function, allowing easy access to your vehicle's trunk even with bikes mounted.
- Activate Tilt: Press the foot pedal located at the base of the rack.
- Stojak przechylny: Gently tilt the rack downwards, away from the vehicle.
- Access Trunk: Open your vehicle's trunk or tailgate.
- Return Rack: Once finished, lift the rack back into its upright position until it locks securely.

Image 4.3: The Thule VeloCompact bike rack tilted to allow access to the vehicle's trunk.
4.3 Możliwość rozbudowy
The Thule VeloCompact 926002 can be expanded to carry a fourth bicycle with the addition of a specific adapter (sold separately).
5. Konserwacja
Regular maintenance ensures the longevity and safe operation of your bike rack.
- Czyszczenie: Clean the rack regularly with mild soap and water, especially after exposure to road salt or dirt. Avoid harsh chemicals.
- Smarowanie: Periodically lubricate moving parts, such as the tilt mechanism and clamping lever, with a suitable lubricant.
- Kontrola: Before each use, check all bolts, nuts, and straps for tightness and wear. Ensure the electrical connection is clean and free of corrosion.
- Składowanie: When not in use, store the bike rack in a dry, protected area.
6. Rozwiązywanie Problemów
If you encounter issues with your Thule VeloCompact 926002, consider the following common solutions:
- Rack Wobbles: Upewnij się, że clamping lever is fully engaged and locked. Check the towbar ball for proper size and condition.
- Światła nie działają: Verify the 13-pin electrical plug is fully inserted and clean. Check vehicle fuses and the rack's wiring for damage.
- Bikes Not Secure: Re-check all frame holders and wheel straps for proper tension and engagement. Ensure the bike frames are compatible with the holder arms.
- Trudność w przechylaniu: Ensure the foot pedal is fully depressed. Check for any obstructions or debris in the tilting mechanism.
For persistent issues, refer to the official Thule support resources or contact customer service.
7. Specyfikacje
| Funkcja | Specyfikacja |
|---|---|
| Numer modelu | 926002 |
| Maksymalna ładowność | 60 kg (132 funta) |
| Maximum Number of Bikes | 3 (expandable to 4 with adapter) |
| Compatible Frame Dimensions | 22 – 80 mm |
| Połączenie elektryczne | 13-pin (compatible with 8-pin via adapter) |
| Pozycja Wymiary (dł. x szer. x wys.) | 41.73 x 10.63 x 23.62 cala |
| Waga przedmiotu | 43.1 funta |
| Typ montażu | Hitch Mount, Clamp Uchwyt |
| Kolor | Czarny |
8. Gwarancja i wsparcie
For detailed warranty information, product registration, or to contact customer support, please visit the official Thule website or refer to the warranty card included with your product. Thule provides comprehensive support for its products to ensure customer satisfaction.
Aby uzyskać dalszą pomoc, możesz również zapoznać się z Thule official webstrona.


