1. Wprowadzenie
The Snakebyte Gamepad S Pro is a wireless controller designed for use with Nintendo Switch, Switch Lite, and Switch OLED consoles. It offers a console-style gaming experience with features such as dual precision analog sticks, dual rumble motors for immersive feedback, and a dedicated Capture button for recording gameplay moments. The controller connects via Bluetooth 3.0, aiming to provide a low-latency gaming experience. It also includes an assignable turbo feature and charges via an included USB-C cable.

Rycina 1: Przód view of the Snakebyte Gamepad S Pro Controller.
2. Konfiguracja
2.1 Ładowanie Kontrolera
Before initial use, fully charge the controller. Connect the included 5.9 ft (1.8 m) USB-C cable to the controller's charging port and the other end to a USB power source (e.g., Nintendo Switch dock, USB wall adapter, or computer USB port). The charging indicator lights on the controller will provide status feedback.
2.2 Parowanie z Nintendo Switch
To pair the Snakebyte Gamepad S Pro with your Nintendo Switch console:
- Upewnij się, że Twoja konsola Nintendo Switch jest włączona i ma zainstalowane najnowsze oprogramowanie systemowe.
- Z menu HOME wybierz „Kontrolery”, Następnie „Zmień chwyt/kolejność”.
- On the Snakebyte Gamepad S Pro, press and hold the Przycisk Home (house icon) and the Przycisk Y simultaneously for approximately 5 seconds. The indicator lights on the controller will begin to flash rapidly.
- Once the controller is successfully paired, the player indicator light(s) on the bottom of the controller will illuminate solid.
The controller is compatible with Nintendo Switch, Switch OLED, and Switch Lite models.

Figure 2: The Gamepad S Pro is compatible with Nintendo Switch, Switch OLED, and Switch Lite.
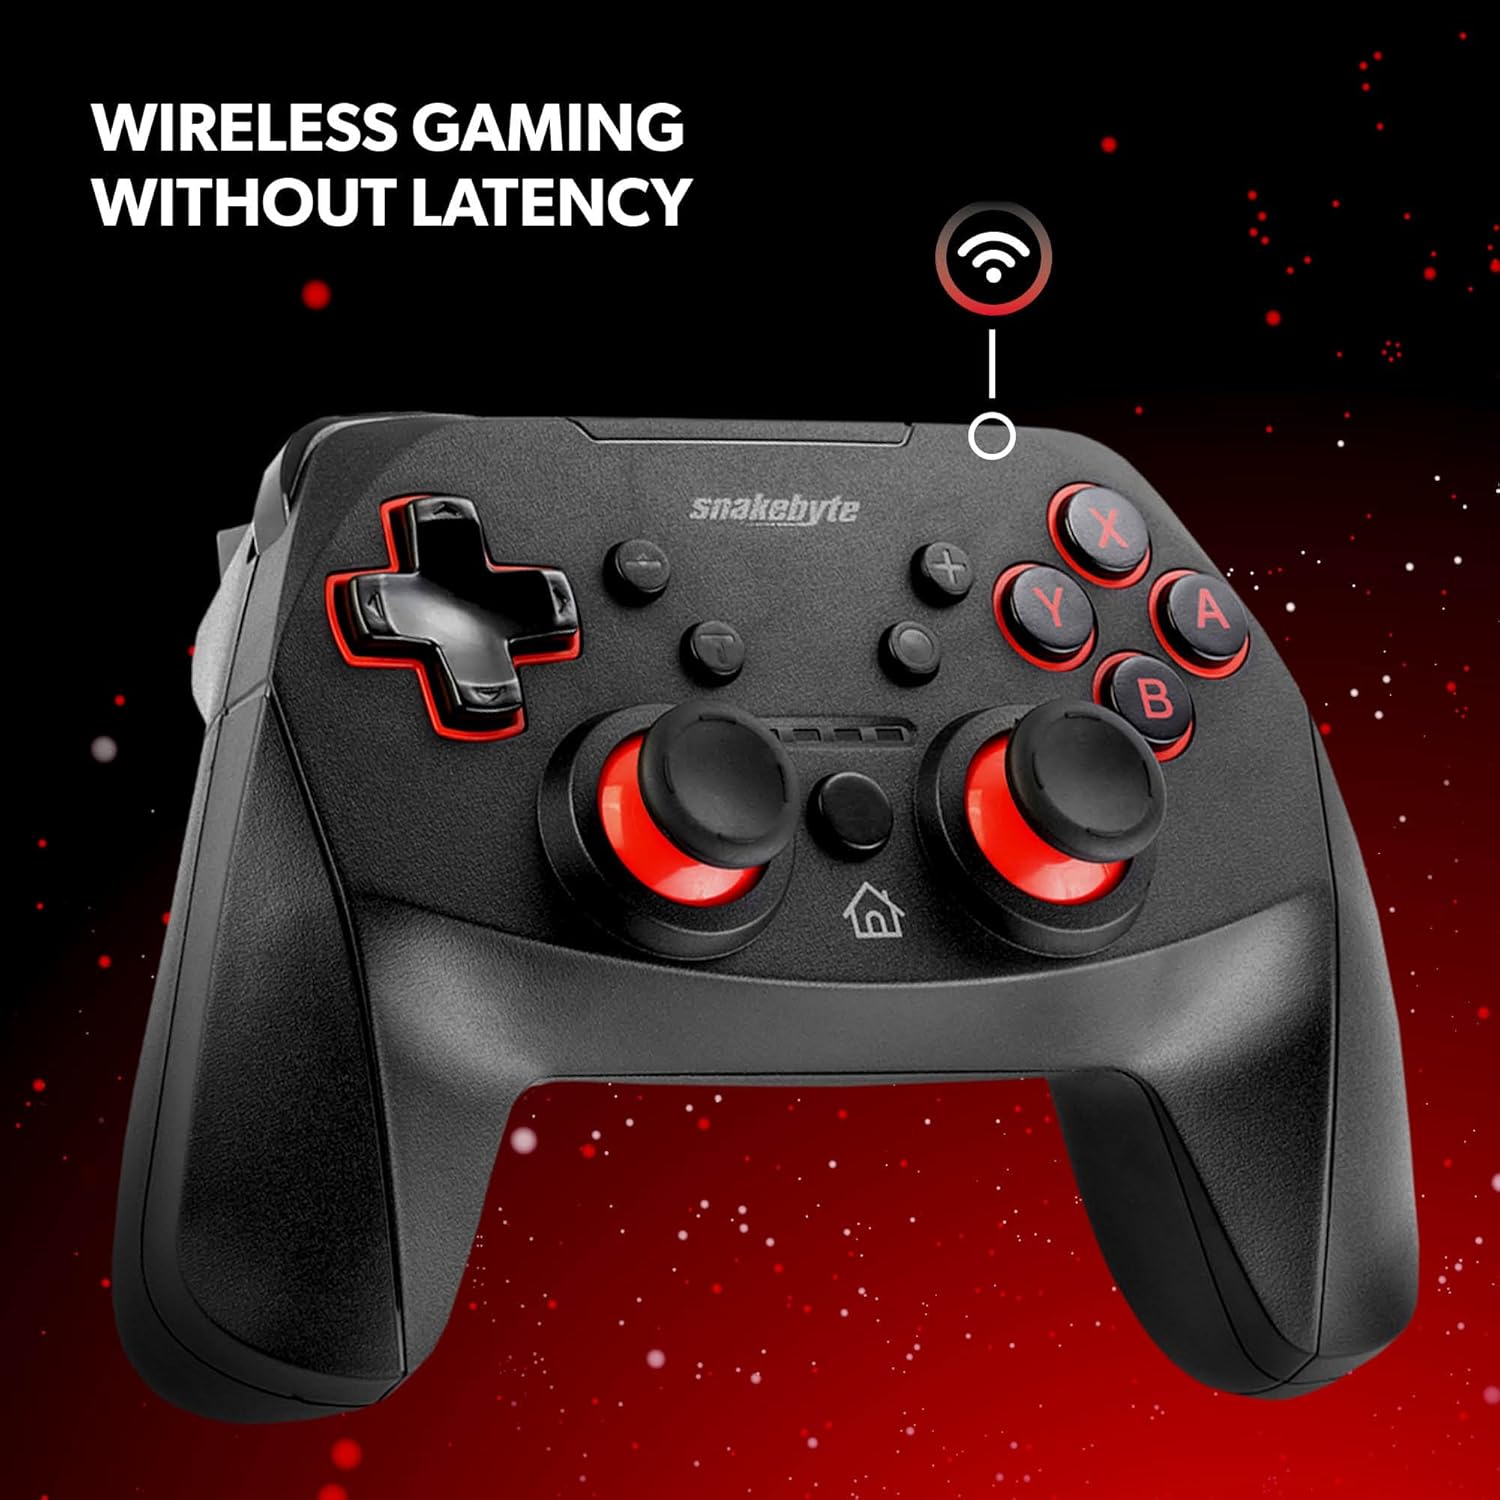
Figure 3: The controller offers wireless connectivity for gaming without latency.
3. Obsługa kontrolera
3.1 Układ i funkcje przycisków
- Przyciski A/B/X/Y: Standardowe przyciski akcji.
- Pad kierunkowy: Wejście kierunkowe.
- Lewy/prawy drążek analogowy: Do precyzyjnego ruchu i kontroli kamery.
- Przyciski L/R: Guziki na ramionach.
- Przyciski ZL/ZR: Przyciski spustowe.
- Przycisk Home: Powrót do menu HOME.
- Przycisk przechwytywania: Saves screenshots or video clips of gameplay.
- Przyciski Plus (+) / Minus (-): Equivalent to Start/Select or Menu buttons.
3.2 Dual Rumble Vibration
The controller features dual rumble motors that provide haptic feedback, enhancing immersion during gameplay. The intensity of the vibration is determined by the game.
3.3 Assignable Turbo Feature
The assignable turbo feature allows a button to be pressed repeatedly with a single hold. Consult the controller's specific instructions (often included in the packaging or on the manufacturer's website) for details on how to assign and activate the turbo function for desired buttons.
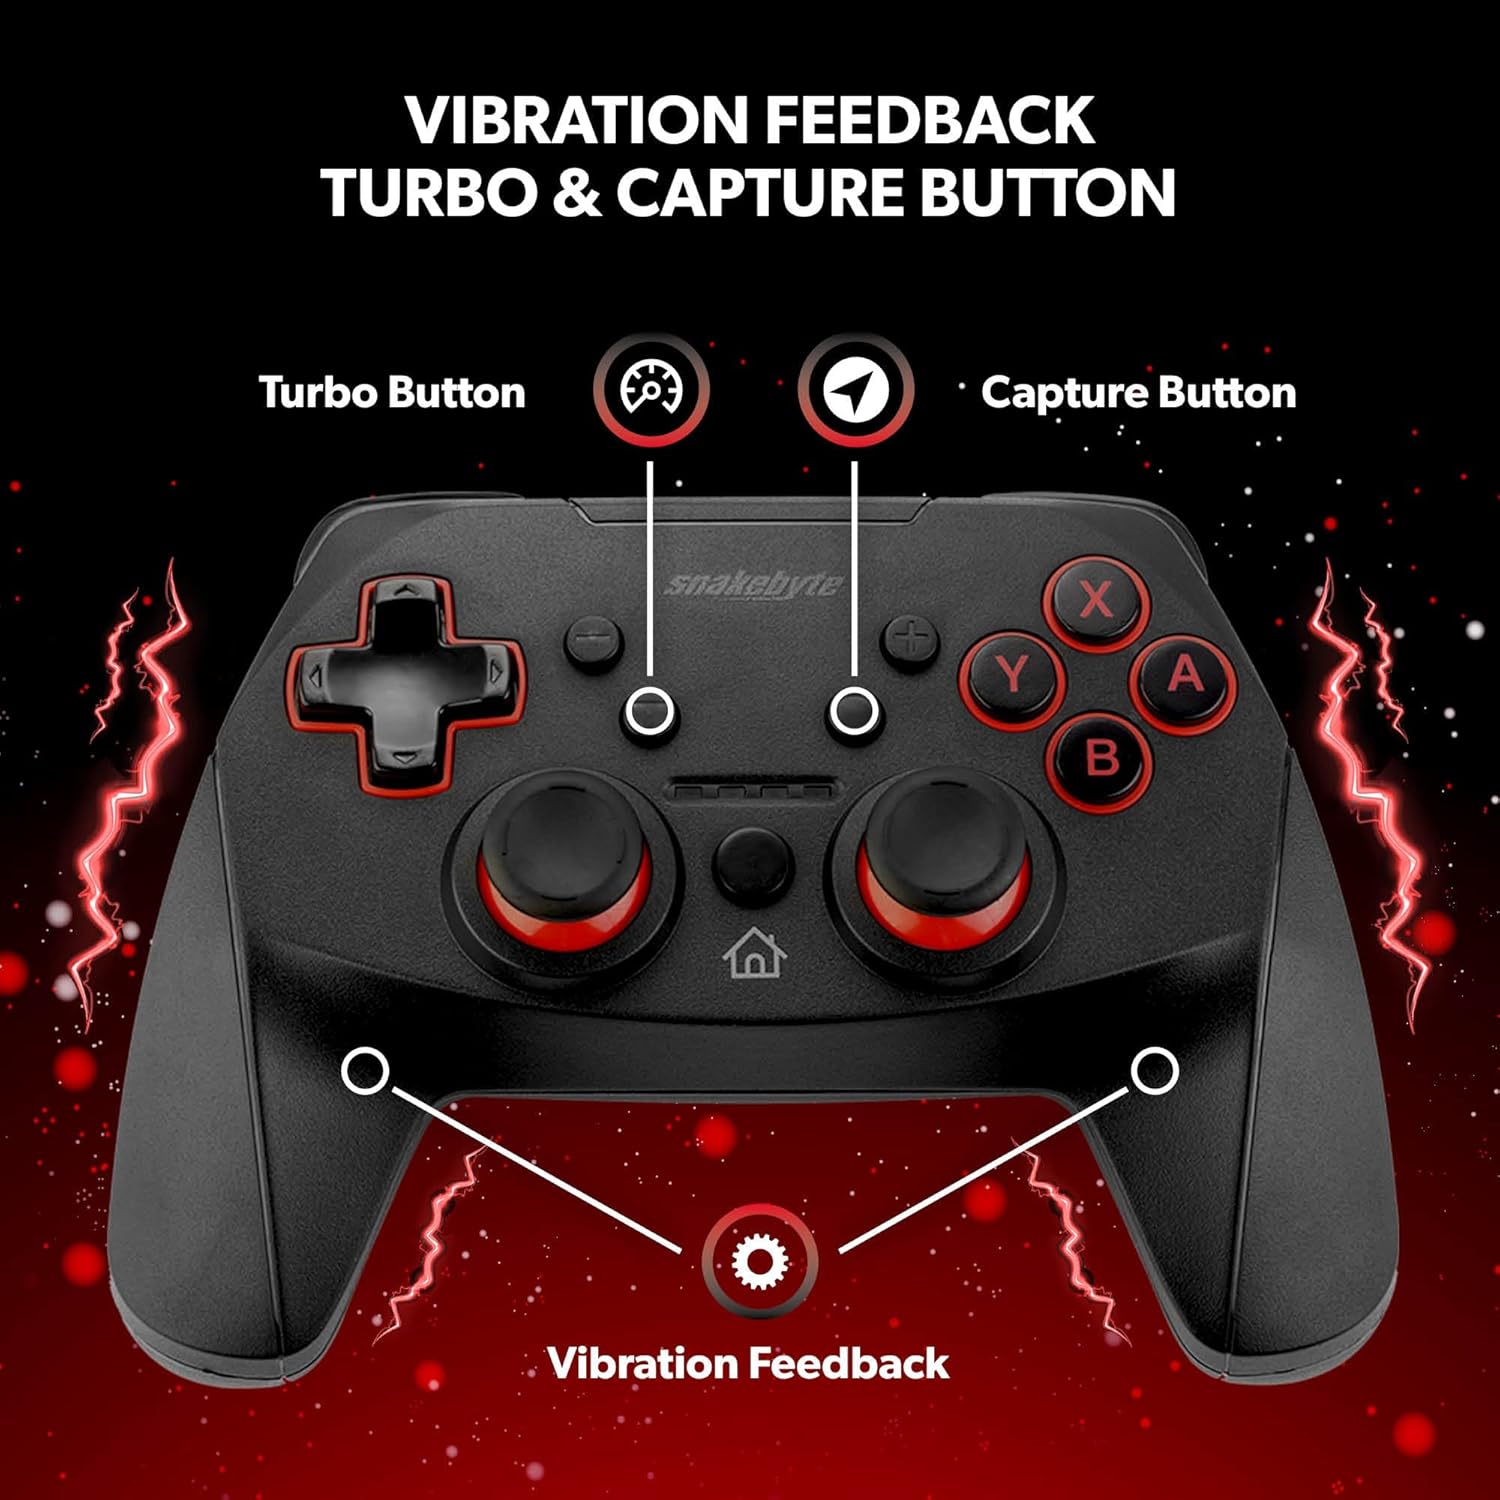
Figure 4: Key features including Turbo Button, Capture Button, and Vibration Feedback.
3.4 gniazda audio
The controller is equipped with an audio jack, allowing you to connect a compatible headset for in-game audio and communication (if supported by the game and console settings).

Figure 5: Detail of the controller's audio jack.
4. Konserwacja
4.1 Czyszczenie
Do czyszczenia kontrolera należy używać miękkiej, suchej ściereczki. W przypadku uporczywych zabrudzeń należy delikatnie przetrzećampen the cloth with water. Avoid using harsh chemicals, abrasive cleaners, or solvents, as these can damage the controller's surface and internal components.
4.2 Pielęgnacja baterii
The controller contains a rechargeable Lithium Metal battery. To prolong battery life:
- Unikaj częstego całkowitego rozładowywania akumulatora.
- Jeśli kontroler nie będzie używany przez dłuższy czas, należy go przechowywać w chłodnym i suchym miejscu.
- Nie wystawiaj kontrolera na działanie ekstremalnych temperatur.
5. Rozwiązywanie Problemów
- Controller not pairing or disconnecting frequently:
- Sprawdź, czy kontroler jest całkowicie naładowany.
- Verify the pairing steps (Home + Y buttons) are followed correctly.
- Move closer to the Nintendo Switch console to ensure a strong Bluetooth connection.
- Check for any firmware updates for the controller on the official Snakebyte website, as updates can resolve connectivity issues.
- Restart both the Nintendo Switch console and the controller.
- Buttons or joysticks are unresponsive or sticking:
- Power off the controller and then power it back on.
- Ensure no debris is lodged around the buttons or joysticks. Clean as per maintenance instructions.
- Controller does not wake the Nintendo Switch from standby:
- This controller may not support waking the console from standby mode. Power on the console manually using the power button on the console itself.
- No Gyro Sensor:
- Please note that this controller does not include a gyro sensor. Games requiring motion controls or fine aiming adjustments via tilting will not function as intended with this controller.
6. Specyfikacje
| Numer modelu | SB911194 |
| Marka | Snakebyte |
| Łączność | Bluetooth 3.0 |
| Zgodność | Nintendo Switch, Switch Lite, Switch OLED |
| Wymiary (dł. x szer. x wys.) | 3.94 x 2.36 x 5.51 cala |
| Waga przedmiotu | 8.47 uncji (240 grama) |
| Typ baterii | 1 bateria litowo-metalowa (w zestawie) |
| Długość kabla ładującego | 5.9 stóp (1.8 metry) |
| Cechy specjalne | Dual Motor Vibration, Assignable Turbo, Capture Button, Audio Jack |

Figure 6: The controller is designed for absolute durability.
7. Gwarancja i wsparcie
For detailed warranty information, please refer to the warranty card included with your product packaging or visit the official Snakebyte website. For technical support, product registration, or further inquiries, please contact Snakebyte customer service through their official channels.
Official Snakebyte Webstrona: www.snakebyte.com


