1. Wprowadzenie
Thank you for choosing the Solight LED Desk Lamp WO46. This versatile lamp combines modern design with practical features, including a dimmable LED light, an integrated display showing time, date, alarm, and temperature. This manual provides essential information for the safe and efficient use of your new desk lamp.
2. Instrukcje bezpieczeństwa
- Przed użyciem należy uważnie przeczytać wszystkie instrukcje i zachować je do wykorzystania w przyszłości.
- Upewnij się, że napięcie zasilaniatage matches the requirements specified on the product.
- Nie wystawiaj lamp na działanie wody lub nadmiernej wilgoci.
- Avoid disassembling or modifying the lamp. Wszelkie prace serwisowe powierzaj wykwalifikowanemu personelowi.
- Utrzymaj lamp z dala od źródeł ciepła i bezpośredniego światła słonecznego.
- Wyczyść lamp only with a soft, dry cloth. Do not use abrasive cleaners or solvents.
- Produkt przeznaczony jest wyłącznie do użytku wewnątrz pomieszczeń.
3. Zawartość opakowania
Proszę sprawdzić, czy w paczce znajdują się następujące elementy:
- Solight LED Desk Lamp WO46
- Kabel zasilający
- Instrukcja obsługi (ten dokument)
4. Koniec produktuview
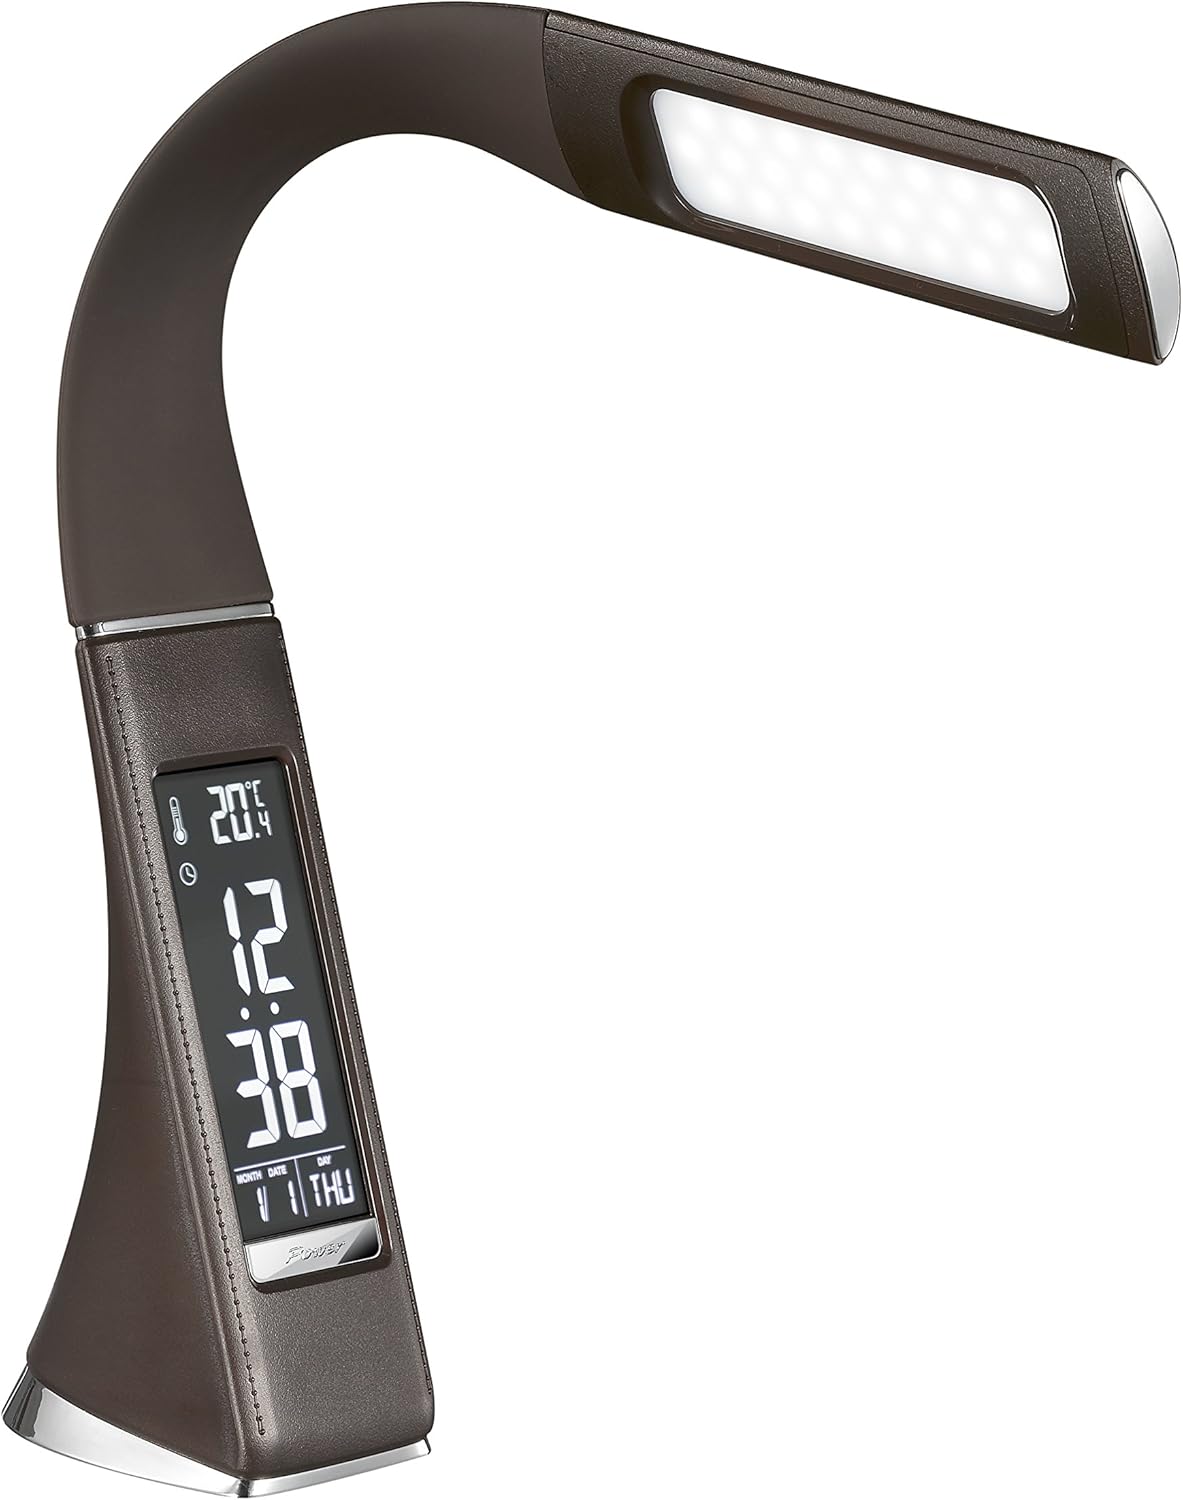
The Solight LED Desk Lamp WO46 features a flexible arm, an integrated LED light panel, and a multi-functional display on its base. The base also houses the touch-sensitive controls.

Figure 1: Solight LED Desk Lamp WO46 in folded position, displaying time, date, and temperature on its integrated screen.

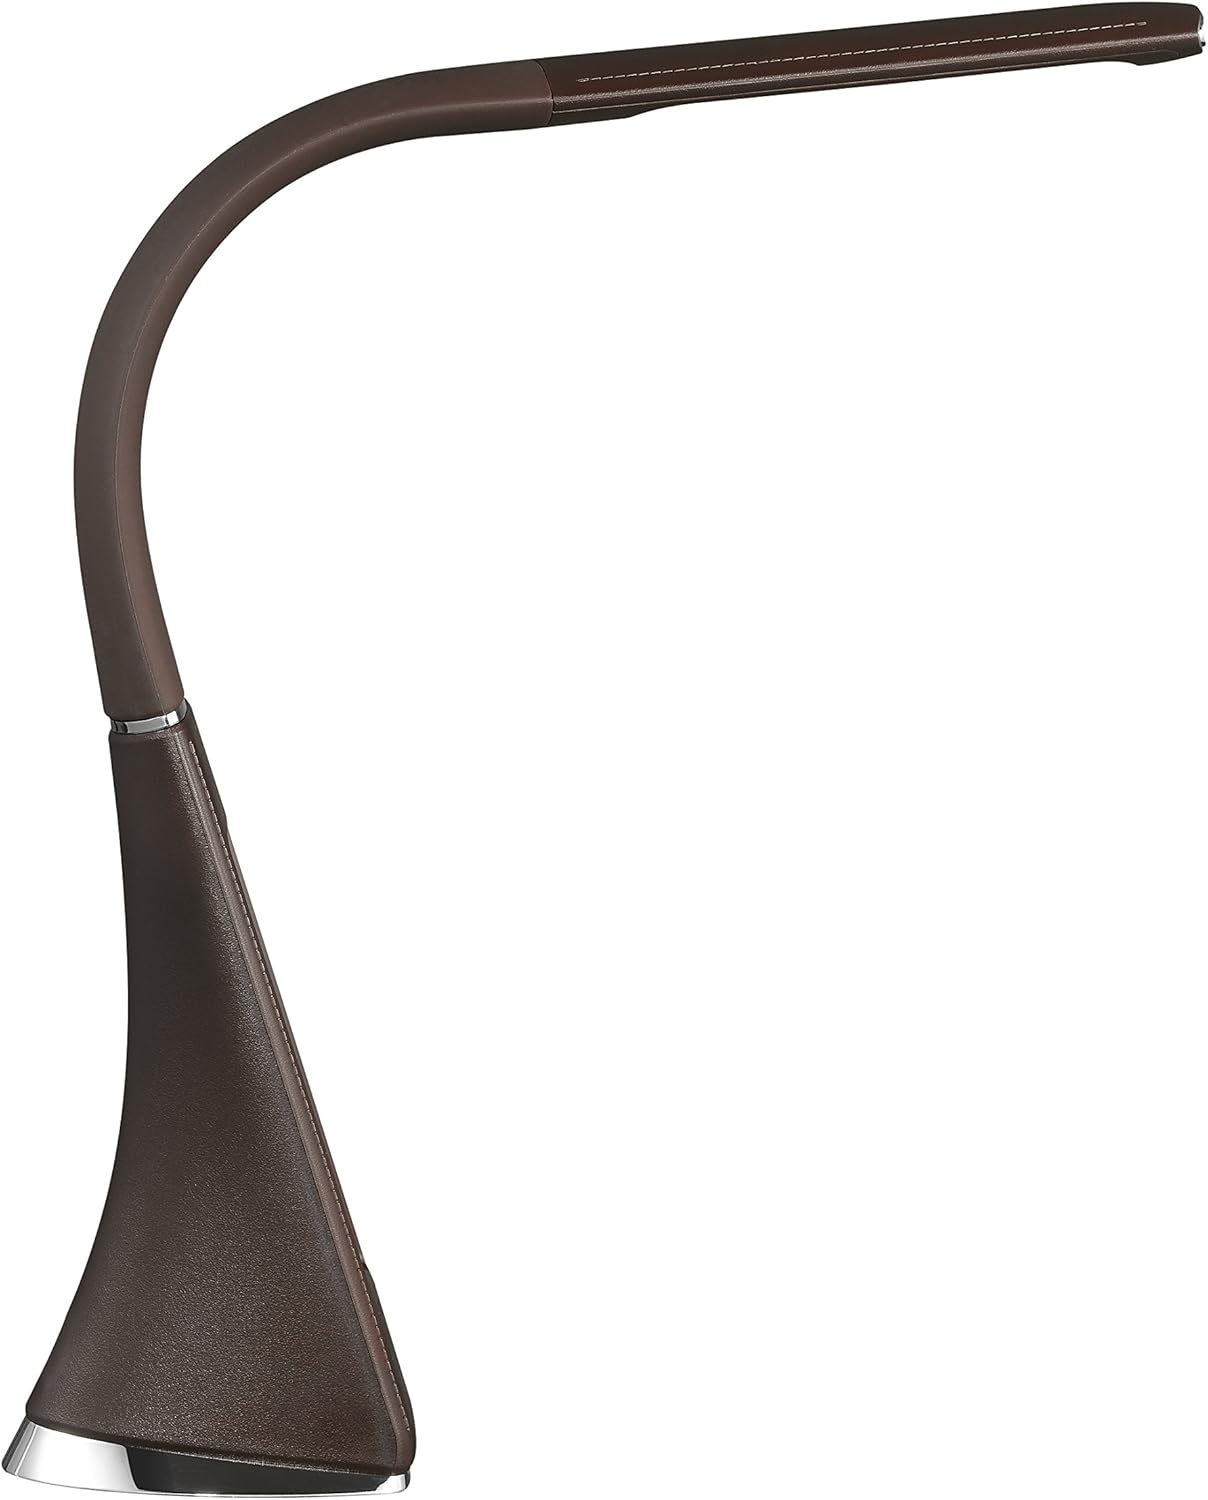
Figure 2: Solight LED Desk Lamp WO46 with its arm extended, highlighting the LED light panel and the functional display.
Rysunek 3: Kątowy view of the Solight LED Desk Lamp WO46, extended, emphasizing its sleek design and the display panel.
Rysunek 4: Profesjonalizm bocznyfile of the Solight LED Desk Lamp WO46, extended, illustrating the flexibility of its arm and the slim design of the light panel.

Rysunek 5: Tył view of the Solight LED Desk Lamp WO46, extended, indicating the power input port located at the back of the lampbaza.
5. Konfiguracja
- Rozpakować: Ostrożnie wyjąć wszystkie elementy z opakowania.
- Umieszczenie: Umieść lamp on a stable, flat surface. The non-slip base ensures stability.
- Podłącz zasilanie: Insert the power cable into the DC input port at the back of the lamp's base, then plug the adapter into a standard electrical outlet.
- Dostosuj pozycję: Gently adjust the flexible arm to your desired lighting angle.
6. Instrukcja obsługi
6.1 Sterowanie oświetleniem
- Włączanie/wyłączanie: Press the touch-sensitive power button on the base to turn the lamp włączony lub wyłączony.
- Regulacja jasności: Z lamp on, press and hold the power button to cycle through the three available brightness levels. Release the button at your desired brightness.
6.2 Funkcje wyświetlacza
The integrated display shows time, date, day of the week, temperature, and alarm status. Specific buttons on the base (e.g., 'Mode', 'Set', 'Up', 'Down' - refer to physical markings on your lamp if available) are used to navigate and set these functions.
- Ustawianie czasu i daty:
- Press the 'Mode' button until the time display flashes.
- Use the 'Up' and 'Down' buttons to adjust the hour, then press 'Set' to confirm and move to minutes.
- Powtórz dla minut, roku, miesiąca i dnia.
- Press 'Mode' to exit setting mode.
- Ustawianie alarmu:
- Press the 'Mode' button repeatedly until the alarm icon appears and the alarm time flashes.
- Use 'Up' and 'Down' to set the alarm hour, then 'Set' to confirm and move to minutes.
- Press 'Mode' to activate/deactivate the alarm. An alarm icon will indicate if it's active.
- Wyświetlacz temperatury: Lamp automatically displays the ambient temperature. No user adjustment is typically required for this function.
7. Konserwacja
- Czyszczenie: Odłącz lamp Przed czyszczeniem odłącz urządzenie od zasilania. Wytrzyjamp's surface with a soft, dry, lint-free cloth. Do not use liquid cleaners or sprays.
- Składowanie: Jeśli przechowujesz lamp Przez dłuższy czas upewnij się, że jest czyste i suche. Przechowuj je w chłodnym, suchym miejscu, z dala od bezpośredniego światła słonecznego.
8. Rozwiązywanie Problemów
| Problem | Możliwa przyczyna | Rozwiązanie |
|---|---|---|
| Lamp nie włącza się. | Brak zasilania. | Check if the power cable is securely connected to the lamp and the electrical outlet. Ensure the outlet is functional. |
| Display is blank or incorrect. | Przerwa w dostawie prądu lub nieprawidłowe ustawienia. | Ensure continuous power. Reset time and date settings as per Section 6.2. |
| Światło migocze. | Niestabilne zasilanie. | Spróbuj podłączyć lamp do innego gniazdka elektrycznego. |
| Alarm nie włącza się. | Alarm nie został aktywowany lub został nieprawidłowo ustawiony. | Verify that the alarm is set and activated (alarm icon visible) as per Section 6.2. |
9. Specyfikacje
| Funkcja | Szczegół |
|---|---|
| Numer modelu | WO46-H |
| Wymiary (dł. x szer. x wys.) | Wymiary 5.5 x 9 x 50 cm |
| Waga | 599 g (1.32 funta) |
| Tworzywo | PS (polistyren) |
| Rodzaj wykończenia | Leather look |
| Typ źródła światła | PROWADZONY |
| Liczba żarówek | 3 |
| Strumień świetlny | 300 lm |
| Moc | 1.5 watów |
| Tomtage | 230 wolty |
| Średnia długość życia | 30,000 godzin |
| Stopień ochrony IP | IP20 |
| Styl przełączania | Naciśnij przycisk |
| Etykieta energetyczna | A+ |
10. Gwarancja i wsparcie
Solight products are designed and manufactured to the highest quality standards. For information regarding warranty coverage, technical support, or spare parts availability, please refer to the documentation provided with your purchase or visit the official Solight webStrona. Zachowaj dowód zakupu na wypadek roszczeń gwarancyjnych.


