Wstęp
Thank you for choosing the Night Cat Electric Fly Swatter. This device is designed to effectively eliminate flying insects such as flies and mosquitoes using a high-voltage electric grid. Its portable and rechargeable design makes it suitable for both indoor and outdoor use. Please read this manual carefully before use to ensure safe and optimal performance.
Instrukcje bezpieczeństwa
- Przechowywać w miejscu niedostępnym dla dzieci i zwierząt domowych.
- Do not touch the inner electric grid when the device is active or charging. The protective outer grids are designed for safety, but direct contact with the inner grid can cause an electric shock.
- Nie używać w pobliżu łatwopalnych gazów lub cieczy.
- Do not use in wet environments or allow the device to get wet. This can cause electric shock or damage.
- Do not insert metal objects into the grid.
- Turn off the device before cleaning or storing.
- Jeśli urządzenie jest uszkodzone, nie próbuj naprawiać go samodzielnie. Skontaktuj się z obsługą klienta.
- This device is intended for insect control only. Do not use for any other purpose.
Produkt ponadview
The Night Cat Electric Fly Swatter features a robust design with multiple safety and convenience features.
Komponenty i funkcje

Rysunek 1: Key components and features of the Night Cat Electric Fly Swatter. This diagram highlights the triple-layer safety mesh, durable ABS material construction, a dual-action safety switch, an indicator light for operation and charging status, a convenient USB charging port, and an ergonomic anti-slip handle design.
Wymiary i waga

Rysunek 2: The Night Cat Electric Fly Swatter is designed to be portable and lightweight. It measures approximately 43 cm (17 inches) in length and 22 cm (9 inches) in width, with a weight of 300 grams. For comparison, its size is similar to a standard 10-inch tablet, making it easy to handle and carry.
Organizować coś
Ładowanie urządzenia
Before first use, fully charge the electric fly swatter. The device is equipped with a 1200 mAh lithium-polymer battery for extended use.
- Locate the USB charging port on the handle of the fly swatter.
- Connect the provided USB charging cable to the swatter's port.
- Connect the other end of the USB cable to a compatible USB power source, such as a USB adapter (not included) or a power bank.
- During charging, the indicator light will turn czerwony.
- Po pełnym naładowaniu zaświeci się kontrolka zielony.
- Po zakończeniu ładowania odłącz kabel ładujący.
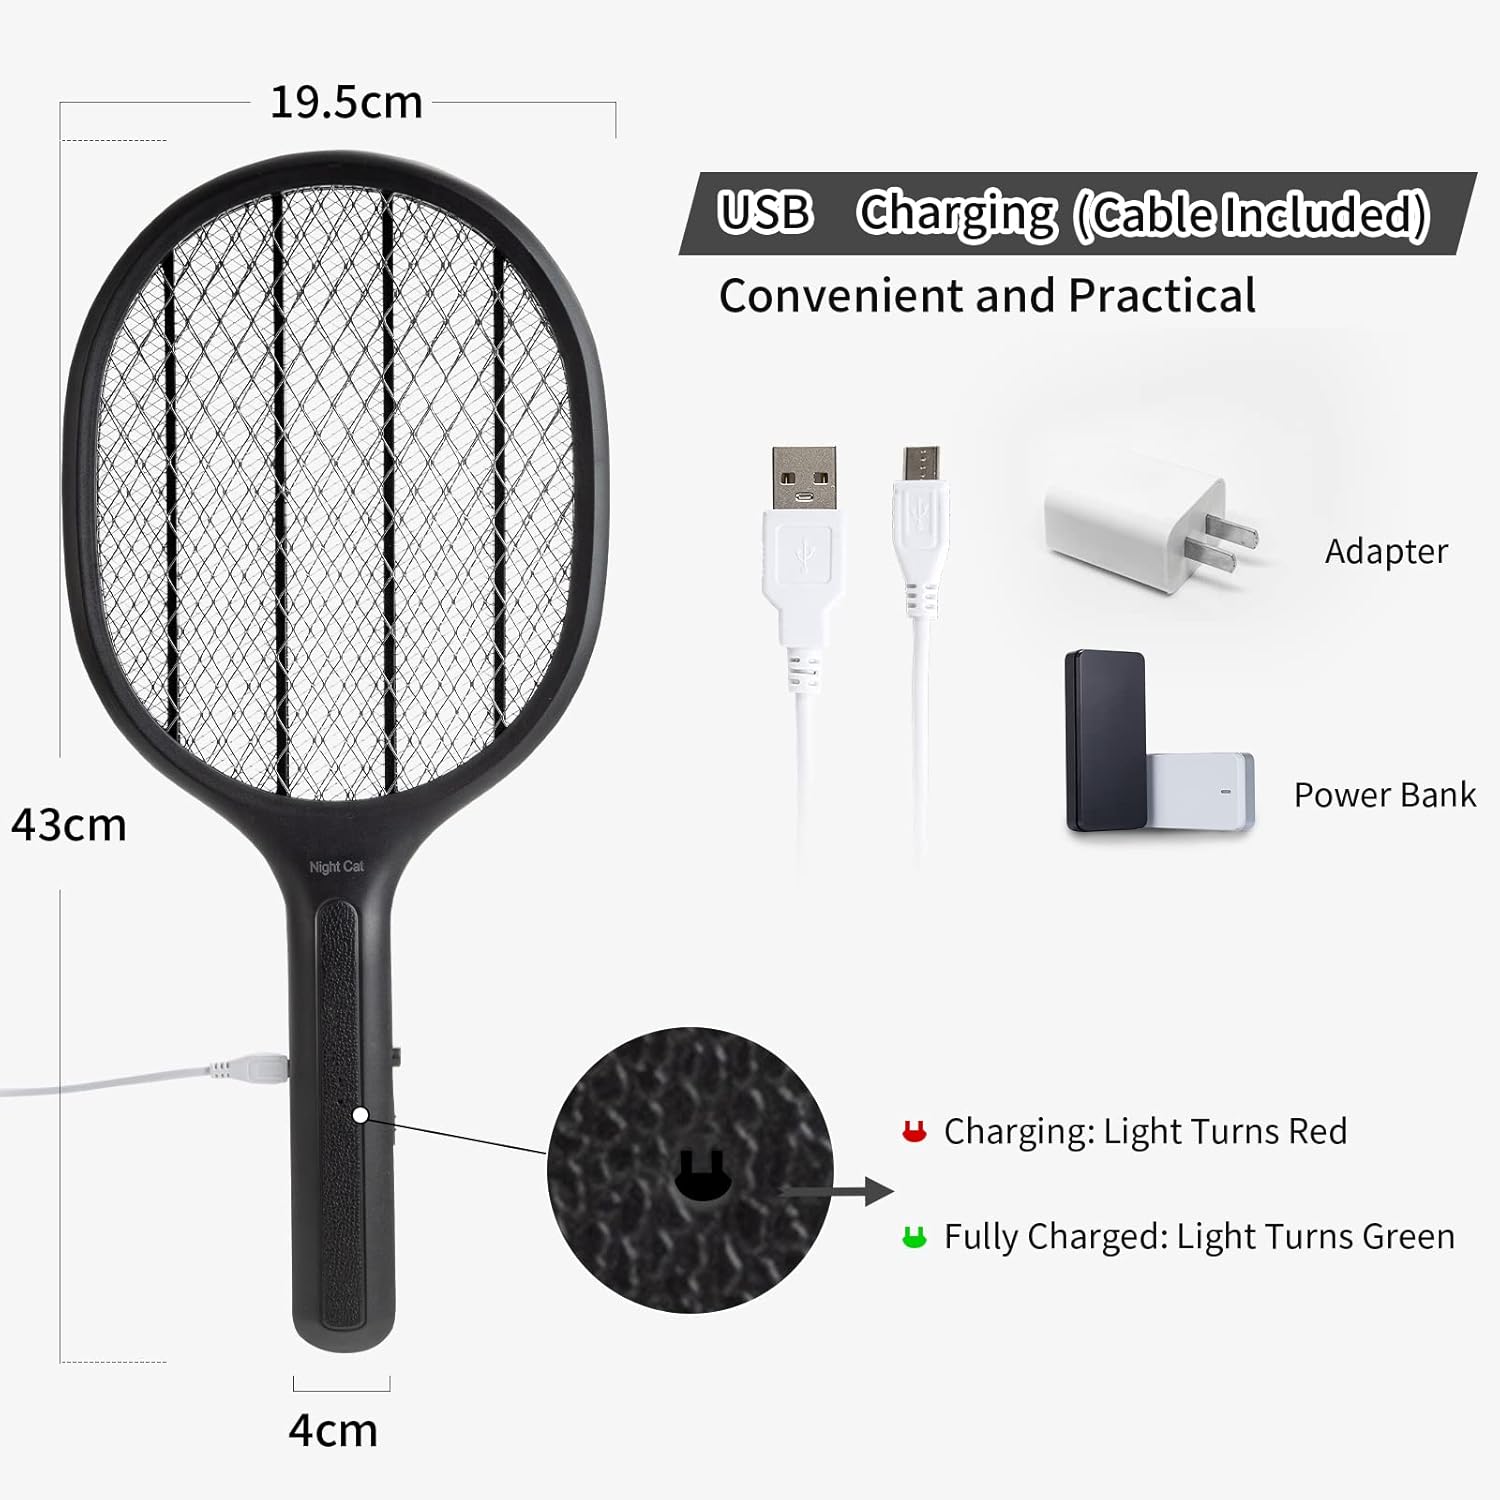
Rysunek 3: USB charging setup for the Night Cat Electric Fly Swatter. The image illustrates how to connect the device to a USB adapter or power bank for charging. The charging indicator light turns red when charging and green when fully charged.
Instrukcja obsługi
Włączanie/wyłączanie
The device features a double switch for enhanced safety.
- To activate the electric grid, slide the main power switch to the "ON" position.
- Press and hold the activation button located on the side of the handle. The indicator light will illuminate, signifying that the grid is active and ready for use.
- Release the activation button to deactivate the grid.
- For storage or when not in use, slide the main power switch to the "OFF" position.
Efektywne wykorzystanie
The 3000V output voltage ensures effective insect elimination.
- Once the grid is active, swing the swatter towards the target insect.
- Ensure the insect makes contact with the electric grid. A distinct "zap" sound indicates successful elimination.
- For best results, aim for a direct hit.
- The device is effective against various flying insects, including flies, mosquitoes, and other small pests.
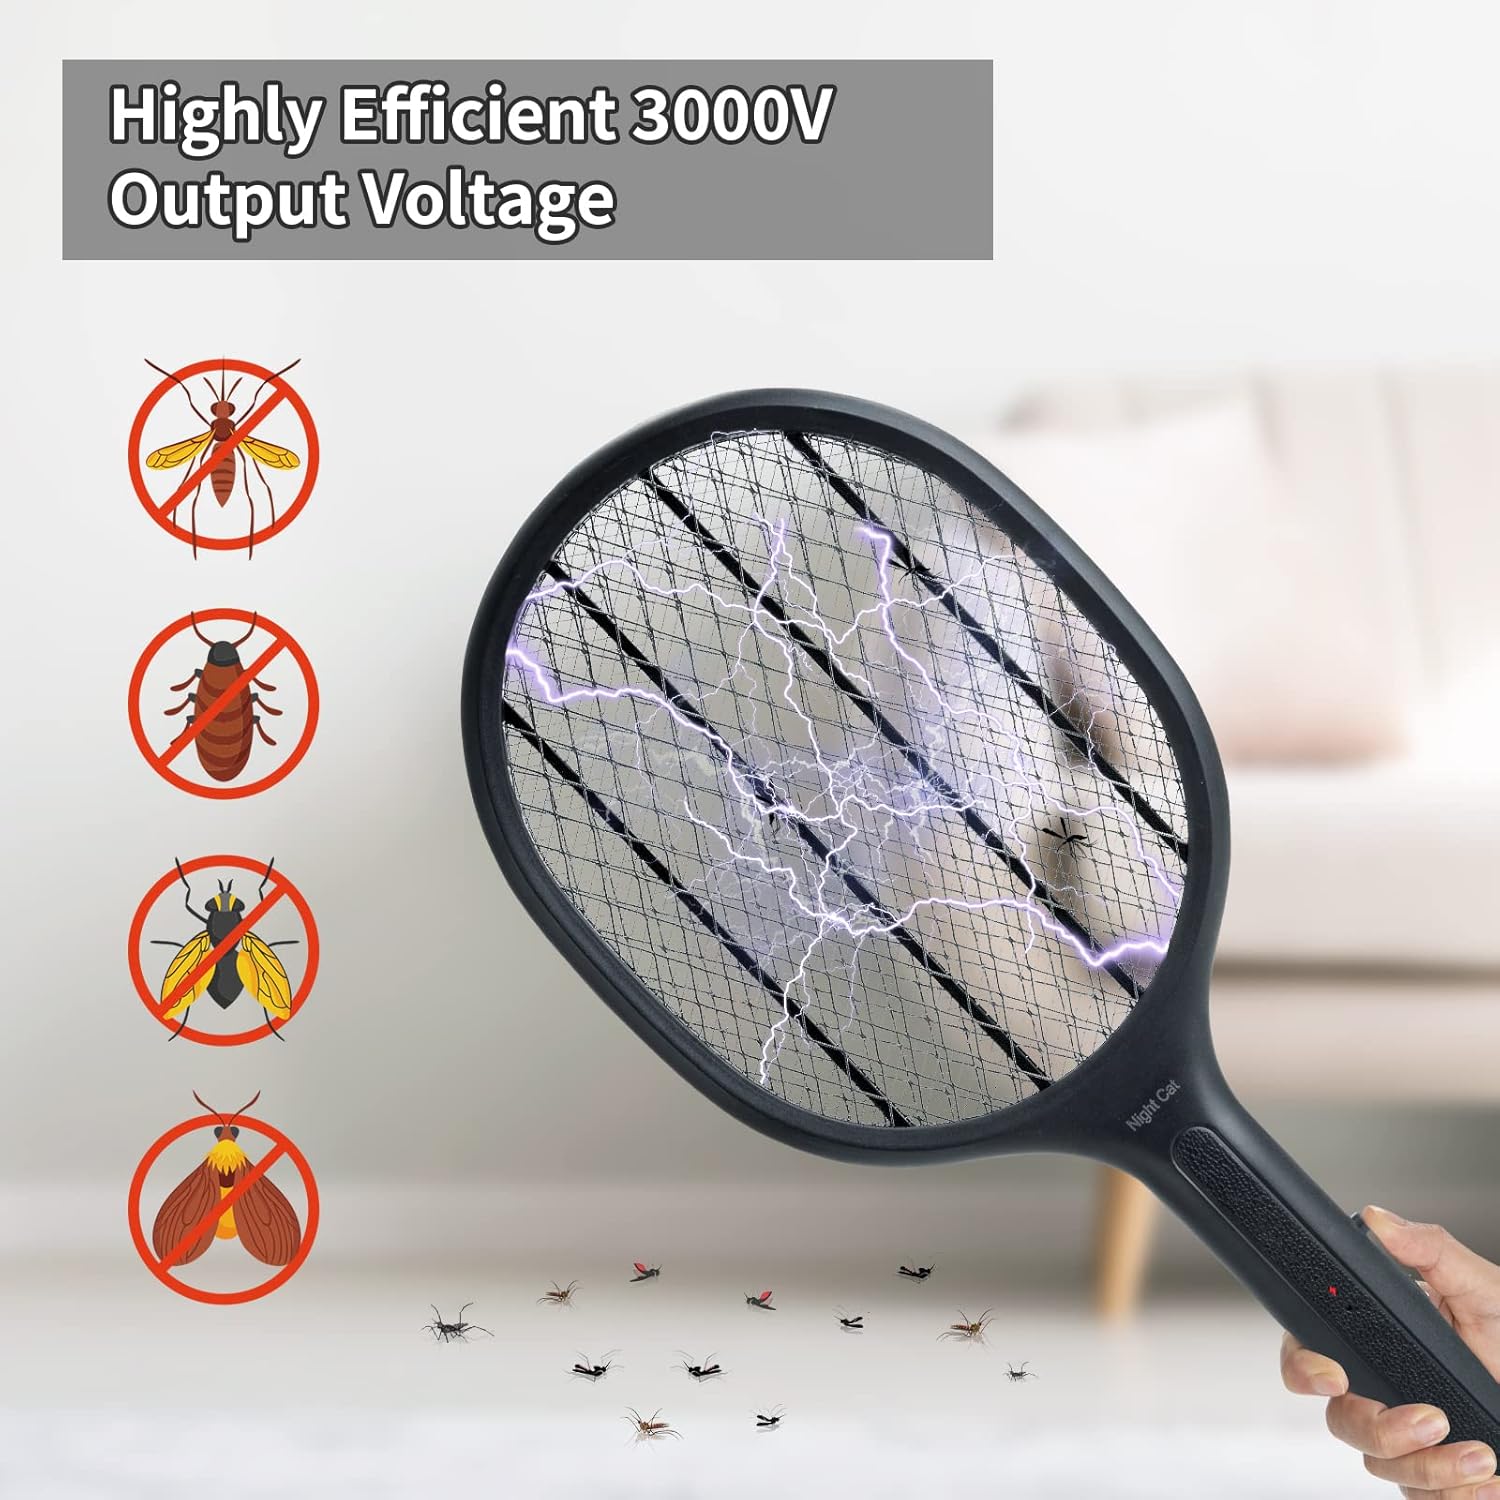
Rysunek 4: The Night Cat Electric Fly Swatter in action, illustrating its highly efficient 3000V output voltage. The image shows the electric discharge as it eliminates various insects, including mosquitoes, flies, and other small pests.
Konserwacja
Czyszczenie
- Always ensure the device is turned OFF and disconnected from any charging source before cleaning.
- Use a soft, dry brush or cloth to gently remove any insect debris from the grid.
- Do not use water or any cleaning liquids on the electric grid.
- Wipe the handle and exterior with a clean, damp Jeśli to konieczne, przetrzyj szmatką, a następnie dokładnie osusz.
Składowanie
- Store the fly swatter in a cool, dry place, away from direct sunlight and moisture.
- Aby zachować sprawność baterii, przed długotrwałym przechowywaniem należy upewnić się, że urządzenie jest całkowicie naładowane.
- Keep the device in its original packaging or a protective cover to prevent damage.
Rozwiązywanie problemów
| Problem | Możliwa przyczyna | Rozwiązanie |
|---|---|---|
| Urządzenie nie włącza się. | Bateria jest słaba lub rozładowana. | Naładuj całkowicie urządzenie za pomocą dostarczonego kabla USB. |
| Kontrolka nie świeci. | Main power switch is OFF or activation button not pressed. | Ensure the main switch is ON and the activation button is pressed and held. |
| No "zap" sound when hitting an insect. | Insect did not make full contact with the inner grid; grid is dirty; battery is low. | Ensure direct contact. Clean the grid. Recharge the device. |
| Device appears damaged or overheated. | Internal malfunction or improper use. | Immediately turn off the device and discontinue use. Contact customer support. |
Specyfikacje
| Funkcja | Szczegół |
|---|---|
| Numer modelu | 8835-EU-BLK |
| Marka | Nocny Kot |
| Wymiary (dł. x szer. x wys.) | 49 x 22 x 4 cm (19.3 x 8.7 x 1.6 cala) |
| Waga | 300 gramów (0.66 funta) |
| Tworzywo | Akrylonitryl-butadien-styren (ABS) |
| Objętość wyjściatage | 3000 V |
| Typ baterii | 1200 mAh Lithium-Polymer (Rechargeable) |
| Metoda ładowania | USB |
| Gatunki docelowe | Flies, Mosquitoes, and other small flying insects |
Gwarancja i wsparcie
Night Cat products are manufactured with high-quality materials and undergo strict quality control. For any issues or inquiries regarding your Night Cat Electric Fly Swatter, please contact our customer support team. We are committed to providing a satisfactory solution.
Szczegółowe warunki gwarancji i dane kontaktowe znajdziesz w dokumentacji zakupu.


