1. Wprowadzenie
This manual provides detailed instructions for the FERM OTM1006 12V Li-Ion Cordless Multi-Tool. It covers safe setup, operation, and maintenance for various tasks such as sawing, sanding, cutting, and scraping. Please read this manual thoroughly before using the tool to ensure safe and efficient operation.
2. Koniec produktuview
The FERM OTM1006 is a versatile 12V Li-Ion cordless multi-tool designed for a wide range of applications. Its powerful motor delivers up to 18,000 oscillations per minute, making it suitable for demanding tasks. The tool features variable speed control for optimal performance across different materials and applications, and its quick accessory change system enhances user convenience.

Rysunek 1: The FERM OTM1006 Cordless Multi-Tool shown with its 12V Li-Ion battery and various attachments, including sanding pads, scraper blade, and saw blades.
3. Instrukcje bezpieczeństwa
OSTRZEŻENIE: Przeczytaj wszystkie ostrzeżenia dotyczące bezpieczeństwa, instrukcje, ilustracje i dane techniczne dołączone do tego elektronarzędzia. Niezastosowanie się do wszystkich poniższych instrukcji może spowodować porażenie prądem, pożar i/lub poważne obrażenia.
Ogólne ostrzeżenia dotyczące bezpieczeństwa elektronarzędzi:
- Bezpieczeństwo w miejscu pracy: Utrzymuj miejsce pracy w czystości i dobrym oświetleniu. Zagracone lub ciemne pomieszczenia sprzyjają wypadkom. Nie używaj elektronarzędzi w atmosferach wybuchowych, takich jak łatwopalne ciecze, gazy lub pyły.
- Bezpieczeństwo elektryczne: Wtyczki elektronarzędzi muszą pasować do gniazdka. Nigdy nie modyfikuj wtyczki w żaden sposób. Unikaj kontaktu ciała z powierzchniami uziemionymi.
- Bezpieczeństwo osobiste: Stay alert, watch what you are doing, and use common sense when operating a power tool. Do not use a power tool while you are tired or under the influence of drugs, alcohol, or medication. Always wear eye protection, dust mask, non-skid safety shoes, hard hat, or hearing protection as appropriate.
- Użytkowanie i pielęgnacja elektronarzędzia: Nie używaj elektronarzędzia na siłę. Używaj elektronarzędzia odpowiedniego do danego zastosowania. Odłącz wtyczkę od źródła zasilania i/lub wyjmij akumulator przed wykonaniem jakichkolwiek regulacji, wymianą akcesoriów lub przechowywaniem elektronarzędzia.
- Używanie i pielęgnacja narzędzia akumulatorowego: Ładuj wyłącznie za pomocą ładowarki wskazanej przez producenta. Używaj elektronarzędzi wyłącznie z dedykowanymi akumulatorami.
4. Zawartość opakowania
The FERM OTM1006 multi-tool package includes the following items:
- FERM OTM1006 Cordless Li-Ion Multi-Tool
- 12V – 1.5 Ah Li-Ion Battery
- Ładowarka baterii
- Three pieces of Velcro sanding paper
- Płyta szlifierska
- HSS Segment saw blade
- Ostrze skrobaka
- E-cut saw blade
- Hexagonal screwdriver (Allen key)
- Robust storage case

Rysunek 2: A selection of the included accessories: sanding pads, a sanding plate, a segment saw blade, an E-cut saw blade, and a scraper blade.
5. Konfiguracja
5.1. Ładowanie akumulatora
- Przed pierwszym użyciem upewnij się, że bateria jest w pełni naładowana.
- Podłącz ładowarkę do odpowiedniego gniazdka elektrycznego.
- Włóż akumulator do ładowarki. Kontrolka ładowania pokaże stan ładowania.
- Po pełnym naładowaniu odłącz akumulator od ładowarki i wyjmij wtyczkę ładowarki z gniazdka.
5.2. Podłączanie/wyjmowanie akumulatora
- To attach: Align the battery with the base of the multi-tool and slide it in until it clicks securely into place.
- To remove: Press the battery release button (if present) and slide the battery out.
5.3. Mocowanie akcesoriów
The OTM1006 features an easy accessory change system. Use the provided hexagonal screwdriver (Allen key) for secure attachment.
- Przed wymianą akcesoriów należy upewnić się, że narzędzie jest wyłączone i akumulator został wyjęty.
- Loosen the accessory screw on the tool head using the hexagonal screwdriver.
- Place the desired accessory (e.g., sanding plate, saw blade, scraper) onto the tool head, ensuring it aligns with the mounting pins.
- Tighten the accessory screw firmly with the hexagonal screwdriver to secure the attachment.

Rysunek 3: The multi-tool head with a circular saw blade securely attached, ready for use.
6. Instrukcja obsługi
6.1. Włączanie/wyłączanie
- To turn on: Slide the ON/OFF switch forward to the "I" position.
- To turn off: Slide the ON/OFF switch backward to the "O" position.

Rysunek 4: The ON/OFF slide switch located on the top of the multi-tool for easy operation.
6.2. Regulacja prędkości zmiennej
The OTM1006 is equipped with a variable speed control dial, allowing you to adjust the oscillation rate from 1 to 6 (or similar markings) for optimal performance on different materials.
- Rotate the speed dial to select the desired oscillation speed. Lower settings are suitable for delicate materials or tasks requiring more control, while higher settings are for faster material removal or harder materials.
- Zawsze sprawdzaj prędkość na kawałku zbędnego materiału, zanim zaczniesz pracować nad głównym projektem.

Rysunek 5: The variable speed control dial, typically numbered 1 to 6, located on the side of the tool.
6.3. Aplikacje
The multi-tool can be used for various tasks depending on the attached accessory:
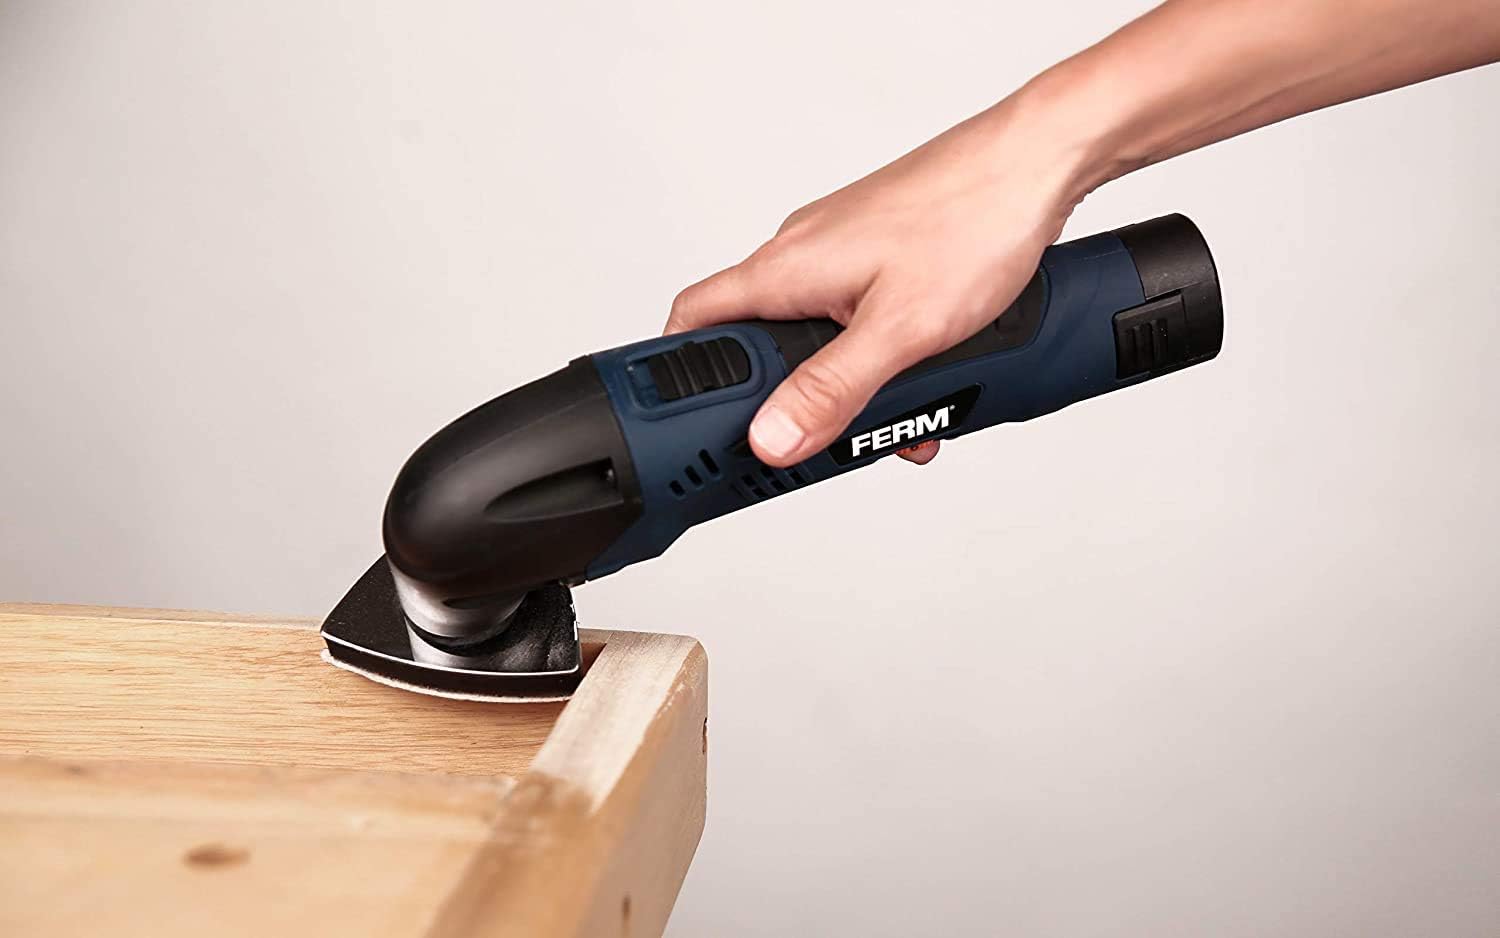
- Szlifowanie: Attach the sanding plate and appropriate grit sanding paper. Use for smoothing surfaces, removing paint, or preparing wood.
- Cięcie: Use E-cut or segment saw blades for cutting wood, plastic, soft metals, or drywall.
- Skrobanie: Attach the scraper blade for removing old paint, adhesive, or caulk.

Rysunek 6: The multi-tool equipped with a sanding pad, actively sanding a wooden surface.

Rysunek 7: The multi-tool with a cutting blade, demonstrating its use for cutting a PVC pipe.
Rysunek 8: The multi-tool fitted with a scraper blade, ready for scraping tasks.
Zawsze upewnij się, że przedmiot obrabiany jest bezpiecznie zamocowany.amped and wear appropriate personal protective equipment.
7. Konserwacja
7.1. Czyszczenie
- Przed czyszczeniem należy zawsze wyjąć baterię.
- Aby zapobiec przegrzaniu, utrzymuj otwory wentylacyjne narzędzia w czystości.
- Wytrzyj obudowę narzędzia miękką ściereczką.amp płótno. Nie używaj ostrych środków chemicznych ani ściernych środków czyszczących.
- Clean accessories after each use to maintain their effectiveness and lifespan.
7.2. Przechowywanie
- Store the tool and accessories in the robust storage case provided.
- Store in a dry, secure place out of reach of children.
- For long-term storage, ensure the battery is partially charged (around 50%) and recharge it every few months to prolong its life.
8. Rozwiązywanie Problemów
| Problem | Możliwa przyczyna | Rozwiązanie |
|---|---|---|
| Narzędzie nie uruchamia się | Akumulator nie jest naładowany lub jest nieprawidłowo włożony. | Sprawdź, czy bateria jest całkowicie naładowana i prawidłowo włożona, aż do kliknięcia. |
| Obniżona wydajność / Przegrzanie | Ventilation slots blocked; accessory dull or incorrect for task; excessive pressure applied. | Clean ventilation slots. Replace dull accessories. Use appropriate accessory. Reduce pressure. |
| Accessory vibrates excessively or comes loose | Accessory not properly secured. | Ensure accessory screw is tightened firmly with the hexagonal screwdriver. |
9. Specyfikacje
| Funkcja | Szczegół |
|---|---|
| Numer modelu | OTM1006 |
| Producent | Zamknąć |
| Źródło zasilania | Zasilany bateryjnie |
| Typ baterii | 12V Li-Ion (1.5 Ah) |
| Tomtage | 12 wolty |
| Moc | 18 watów |
| Prędkość oscylacji | Up to 18,000 oscillations/minute |
| Cechy specjalne | Kompaktowy, o zmiennej prędkości |
| Wymiary produktu (dł. x szer. x wys.) | Wymiary 30 x 8 x 25 cm |
| Waga przedmiotu | 760 gramów |
| Kraj pochodzenia | Chiny |
| UPC | 8716507000086 |
10. Gwarancja i wsparcie
FERM products are manufactured to high quality standards and are guaranteed against defects in materials and workmanship for a period specified by your local retailer or distributor. Please retain your proof of purchase for warranty claims.
W celu uzyskania pomocy technicznej, części zamiennych lub serwisu skontaktuj się z lokalnym dealerem FERM lub odwiedź oficjalną stronę internetową FERM website. Information regarding spare parts availability is currently unavailable through this document.


