1. Wprowadzenie
This manual provides essential instructions for the safe and efficient operation, installation, and maintenance of your Steinbach SPS 50-1T self-priming filter pump. Please read this manual thoroughly before operating the pump to ensure proper function and longevity of the product. This filter pump is designed for use with swimming pools up to approximately 22,000 liters water content.
2. Instrukcje bezpieczeństwa
Ważny: Always disconnect the pump from the power supply before performing any installation, maintenance, or cleaning tasks.
- Ensure the power supply matches the pump's specifications (230V/250W).
- The pump must be installed on a stable, level surface, protected from direct weather exposure.
- Nie należy używać pompy, jeśli przewód zasilający lub wtyczka są uszkodzone.
- Podczas pracy pompy należy trzymać dzieci i osoby nieupoważnione z dala od niej.
- Never run the pump dry. Ensure the pump is filled with water before starting.
- Maksymalna temperatura wody roboczej wynosi 35°C.
- All electrical connections should be performed by a qualified electrician and comply with local regulations.
3. Koniec produktuview i komponenty
The Steinbach SPS 50-1T is a self-priming filter pump equipped with a pre-filter and an integrated timer. Familiarize yourself with the main components:

Rysunek 1: Ogólnie view of the Steinbach SPS 50-1T filter pump, showing the motor, pump housing, pre-filter, and control panel.
- Silnik: The electrical unit that drives the pump impeller.
- Obudowa pompy: Contains the impeller and directs water flow.
- Filtr wstępny: A transparent chamber with a removable basket designed to capture larger debris before it reaches the pump impeller, protecting the pump from damage.
- Połączenia wlotowe/wylotowe: Points for connecting hoses (Ø 32/38 mm).
- Panel sterowania: Features ON/OFF and TIMER buttons, along with indicator lights for setting operation duration.

Rysunek 2: Szczegółowy view of the pre-filter assembly, showing the transparent lid and the hose connection point for the inlet.
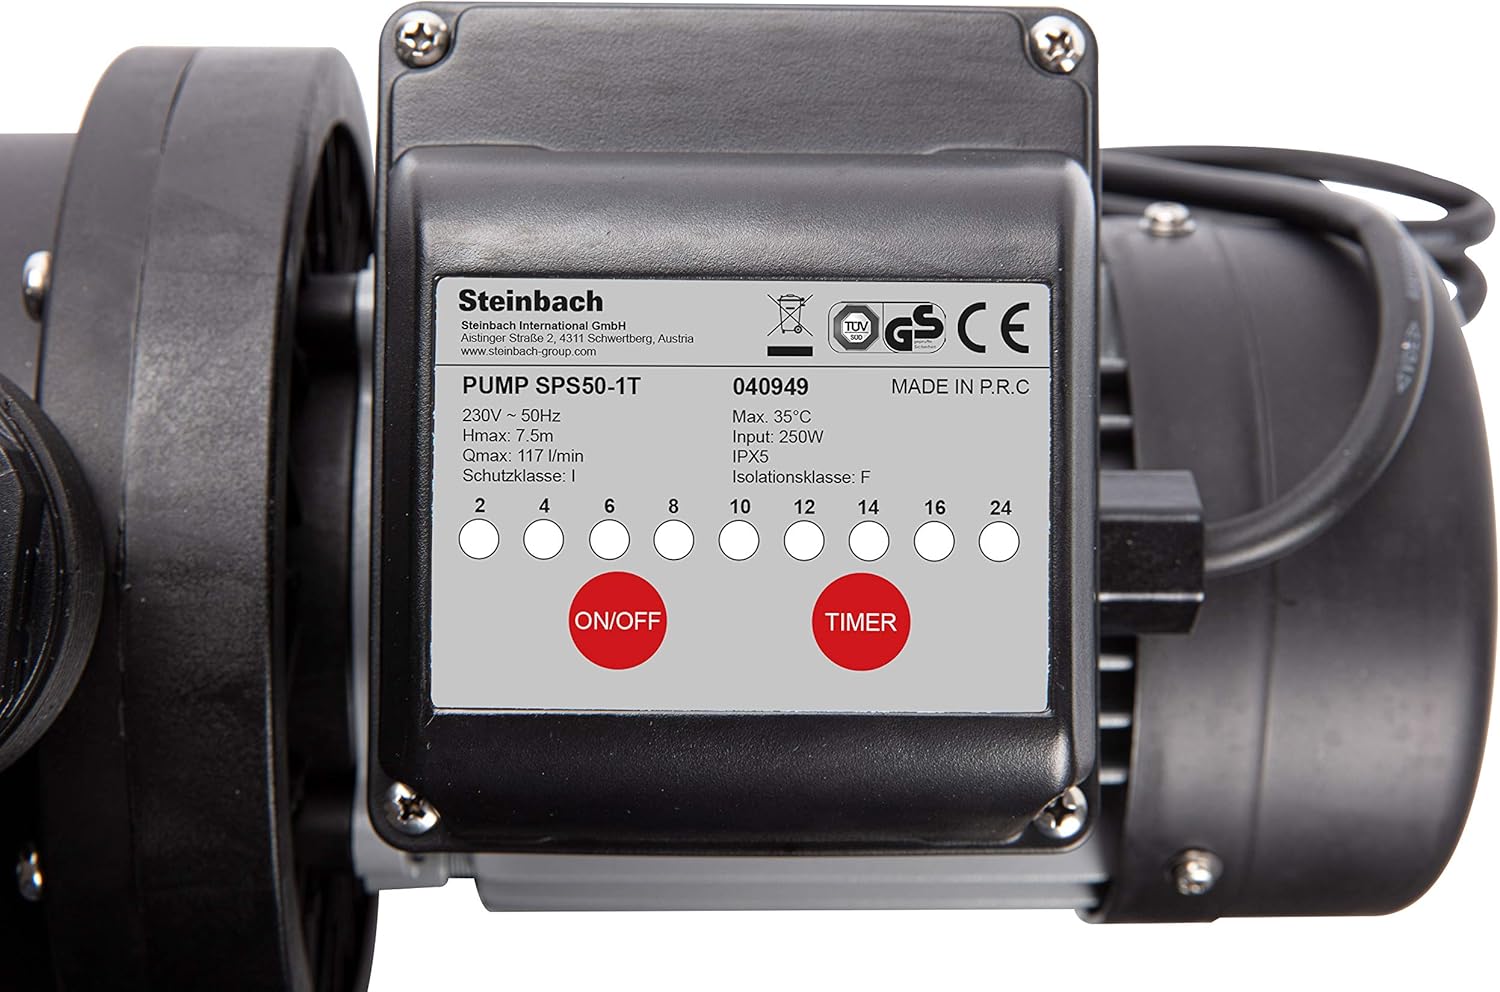
Rysunek 3: The pump's control panel, featuring the ON/OFF button, TIMER button, and indicator lights for setting operational hours.
4. Konfiguracja i instalacja
- Umieszczenie: Position the pump on a firm, level surface, ideally below the water level of the pool for easier priming. Ensure it is protected from rain and direct sunlight.
- Połączenia węży: Connect the pool's skimmer line to the pump's inlet (pre-filter side) and the return line to the pump's outlet. Use hoses with a diameter of Ø 32/38 mm. Secure all connections with hose clamps, aby zapobiec wyciekom.

Rysunek 4: View of the threaded inlet and outlet ports on the pump, ready for hose adapters.
- Zalewanie pompy: Before starting, ensure the pre-filter is filled with water. If the pump is above water level, it may require manual priming by filling the pre-filter chamber until water flows into the pump housing.
- Podłączenie elektryczne: Plug the pump into a grounded electrical outlet (230V). Ensure the outlet is protected by a Residual Current Device (RCD) for safety.
5. Instrukcja obsługi
Once installed and primed, the pump is ready for operation.
5.1 Obsługa ręczna
- Naciśnij WŁ./WYŁ. button on the control panel to start the pump.
- Naciśnij WŁ./WYŁ. button again to stop the pump.
5.2 Funkcja timera
The integrated timer allows for automated operation cycles.
- Ensure the pump is connected to power.
- Naciśnij REGULATOR CZASOWY button repeatedly to select the desired operating duration (e.g., 2, 4, 6, 8, 10, 12, 14, 16, 24 hours). The corresponding indicator light will illuminate.
- The pump will start and run for the selected duration, then automatically shut off.
- The timer cycle will repeat daily at the same time it was initially set. To reset the timer, unplug the pump for a few seconds and then plug it back in.
6. Konserwacja
Regularna konserwacja zapewnia optymalną wydajność i wydłuża żywotność pompy.
6.1 Cleaning the Pre-filter Basket
- Odłączyć pompę od zasilania.
- Close any valves to prevent water flow from the pool.
- Unscrew the transparent lid of the pre-filter.
- Remove the pre-filter basket and clean it thoroughly under running water.
- Inspect the O-ring seal on the lid for damage and ensure it is clean.
- Replace the basket, secure the lid, and open the valves.
- Re-prime the pump if necessary before restarting.

Rysunek 5: The pre-filter chamber with its transparent lid removed, showing the internal basket for debris collection.
6.2 Zimowanie
- At the end of the swimming season, disconnect the pump from power and drain all water from the pump and hoses to prevent freezing damage.
- Dokładnie oczyść pompę i przechowuj ją w suchym miejscu, wolnym od mrozu.
7. Rozwiązywanie Problemów
| Problem | Możliwa przyczyna | Rozwiązanie |
|---|---|---|
| Pompa nie uruchamia się | No power; tripped circuit breaker; motor overload. | Check power connection; reset circuit breaker; allow motor to cool. |
| Pompa działa, ale nie ma przepływu wody | Pump not primed; air leak in suction line; clogged pre-filter basket; closed valves. | Prime the pump; check all connections for leaks; clean pre-filter; open all valves. |
| Zmniejszony przepływ wody | Partially clogged pre-filter; restricted suction or return lines; low water level in pool. | Clean pre-filter; check and clear hoses; ensure adequate pool water level. |
| Nadmierny hałas | Air in pump; cavitation; motor bearing wear. | Ensure pump is fully primed and no air leaks; check for obstructions in suction line; contact service if motor noise persists. |
8. Specyfikacje techniczne
| Funkcja | Specyfikacja |
|---|---|
| Model | SPS 50-1T (040949) |
| Zasilacz | 230 V / 50 Hz |
| Pobór mocy | 250 watów |
| Pump Power (Flow Rate) | 7,020 liters/hour (Q= 117 l/min) |
| Maksymalna wysokość pompy (wysokość podnoszenia) | 7.5 metrów |
| Typ pompy | Self-priming with Pre-Filter |
| Przyłącze węża | Średnica 32/38 mm |
| Maksymalna temperatura wody | 35°C |
| Maximum Pool Size | 22,000 litrów |
| Poziom hałasu | Około. 70dB |
| Zintegrowane funkcje | Regulator czasowy |
| Wymiary produktu | Wymiary 1 x 1 x 1 cm |
| Waga przedmiotu | 6 kilograma |
| Tworzywo | Metal (motor housing), Plastic (pump housing, pre-filter) |
9. Gwarancja i wsparcie
For warranty information, technical support, or spare parts, please refer to the documentation provided with your purchase or contact Steinbach customer service. Keep your proof of purchase for warranty claims.
You can find more information and contact details on the official Steinbach webstrona: www.steinbach.at


