Instruction Manual for Ekena Millwork Devon Rope Panel Moulding
Model: PML02X00DE-CASE-4 | Brand: Ekena Millwork
1. Wprowadzenie
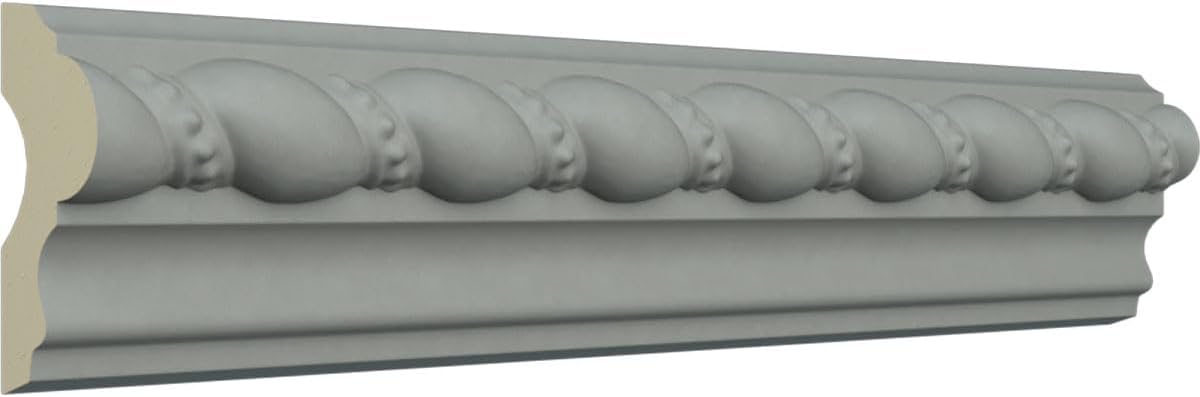
The Ekena Millwork Devon Rope Panel Moulding is a decorative architectural element designed to enhance interior spaces. Crafted from solid urethane, this moulding offers exceptional durability and intricate detail, replicating historical patterns. It is lightweight, factory-primed, and ready for painting or faux finishing, making installation straightforward. This manual provides essential information for the proper handling, installation, and maintenance of your panel moulding.
Rycina 1: Przód view of the Ekena Millwork Devon Rope Panel Moulding, showcasing its detailed rope design.
2. Funkcje produktu
Historical Design: Modeled after original historical patterns and designs, providing a classic aesthetic.
Trwały materiał: Made from solid urethane for maximum durability and detail retention.
Łatwa instalacja: Lightweight construction ensures quick and easy installation.
Ready for Finish: Factory primed and ready for your choice of paint or faux finish.
Wszechstronny: Can be cut, drilled, glued, or screwed to fit various applications.
Rysunek 2: Kątowy view of the panel moulding, highlighting its three-dimensional profile.
3. Konfiguracja i przygotowanie
3.1 Wymagane narzędzia i materiały
Taśma miernicza
Ołówek
Miter saw or fine-tooth saw
Adhesive (construction adhesive recommended)
Finishing nails or screws (optional, for added security)
Caulk gun and paintable caulk
Sanding block or fine-grit sandpaper
Paint or faux finish (as desired)
Okulary i rękawice ochronne
3.2 Przygotowanie powierzchni
Ensure the installation surface (wall, ceiling, etc.) is clean, dry, and free from dust, grease, or loose paint. For best adhesion, lightly sand glossy surfaces.
3.3 Cutting the Moulding
Measure the desired length for each piece of moulding. Use a miter saw or a fine-tooth saw to cut the urethane material. The material is designed to be easily cut without splintering. For corners, cut at appropriate angles (e.g., 45 degrees for 90-degree corners) to create seamless joints.
Figure 3: Cross-section of the moulding, illustrating its profile and solid urethane composition.
4. Wytyczne dotyczące instalacji
Dopasowanie na sucho: Before applying adhesive, dry fit all cut pieces to ensure they align correctly and form the desired pattern.
Nałóż klej: Apply a continuous bead of high-quality construction adhesive to the back of the moulding where it will contact the surface.
Pozycja i prasa: Carefully position the moulding piece onto the marked area on the wall or ceiling. Press firmly along the entire length to ensure good contact with the adhesive.
Bezpieczne (opcjonalnie): For added security, especially on ceilings or heavy pieces, use finishing nails or screws. Countersink the fasteners and fill the holes with paintable caulk or wood filler.
Join Pieces: When joining multiple pieces, apply a small amount of adhesive to the mitered ends before pressing them together. Wipe away any excess adhesive immediately.
Uszczelnianie: Once all pieces are installed and the adhesive has set (refer to adhesive manufacturer's instructions for curing time), apply paintable caulk along all seams and edges where the moulding meets the wall/ceiling. This creates a smooth, finished look and seals any gaps.
Wykończeniowy: After the caulk is dry, the moulding is ready for painting or faux finishing. Since it is factory-primed, it provides an excellent base for your chosen finish.
Rysunek 4: Example of panel moulding installed on an interior wall corner, demonstrating its application.
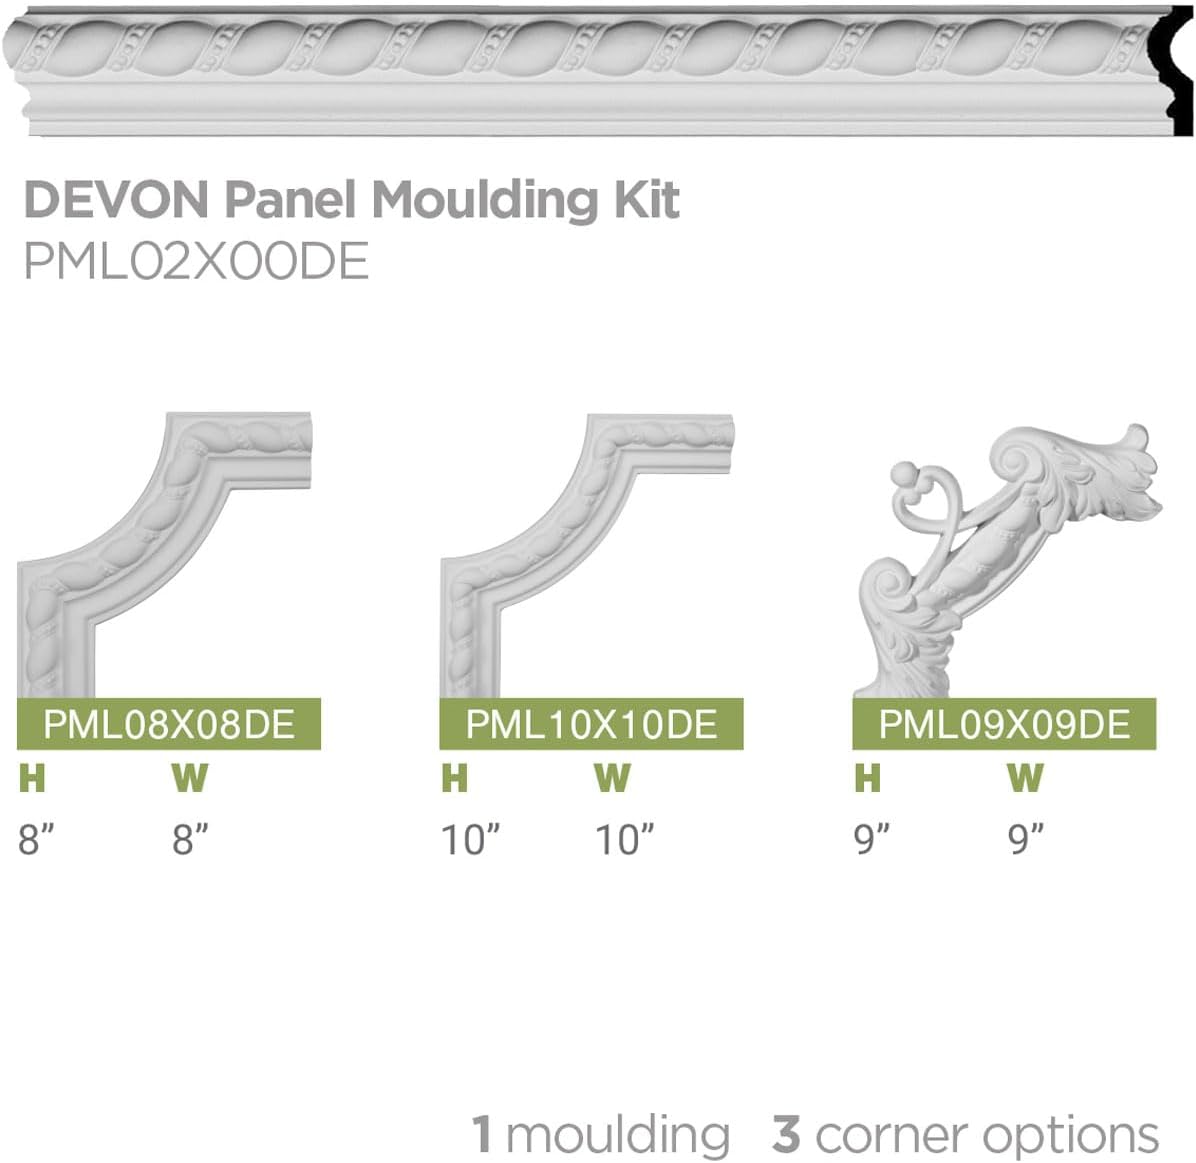
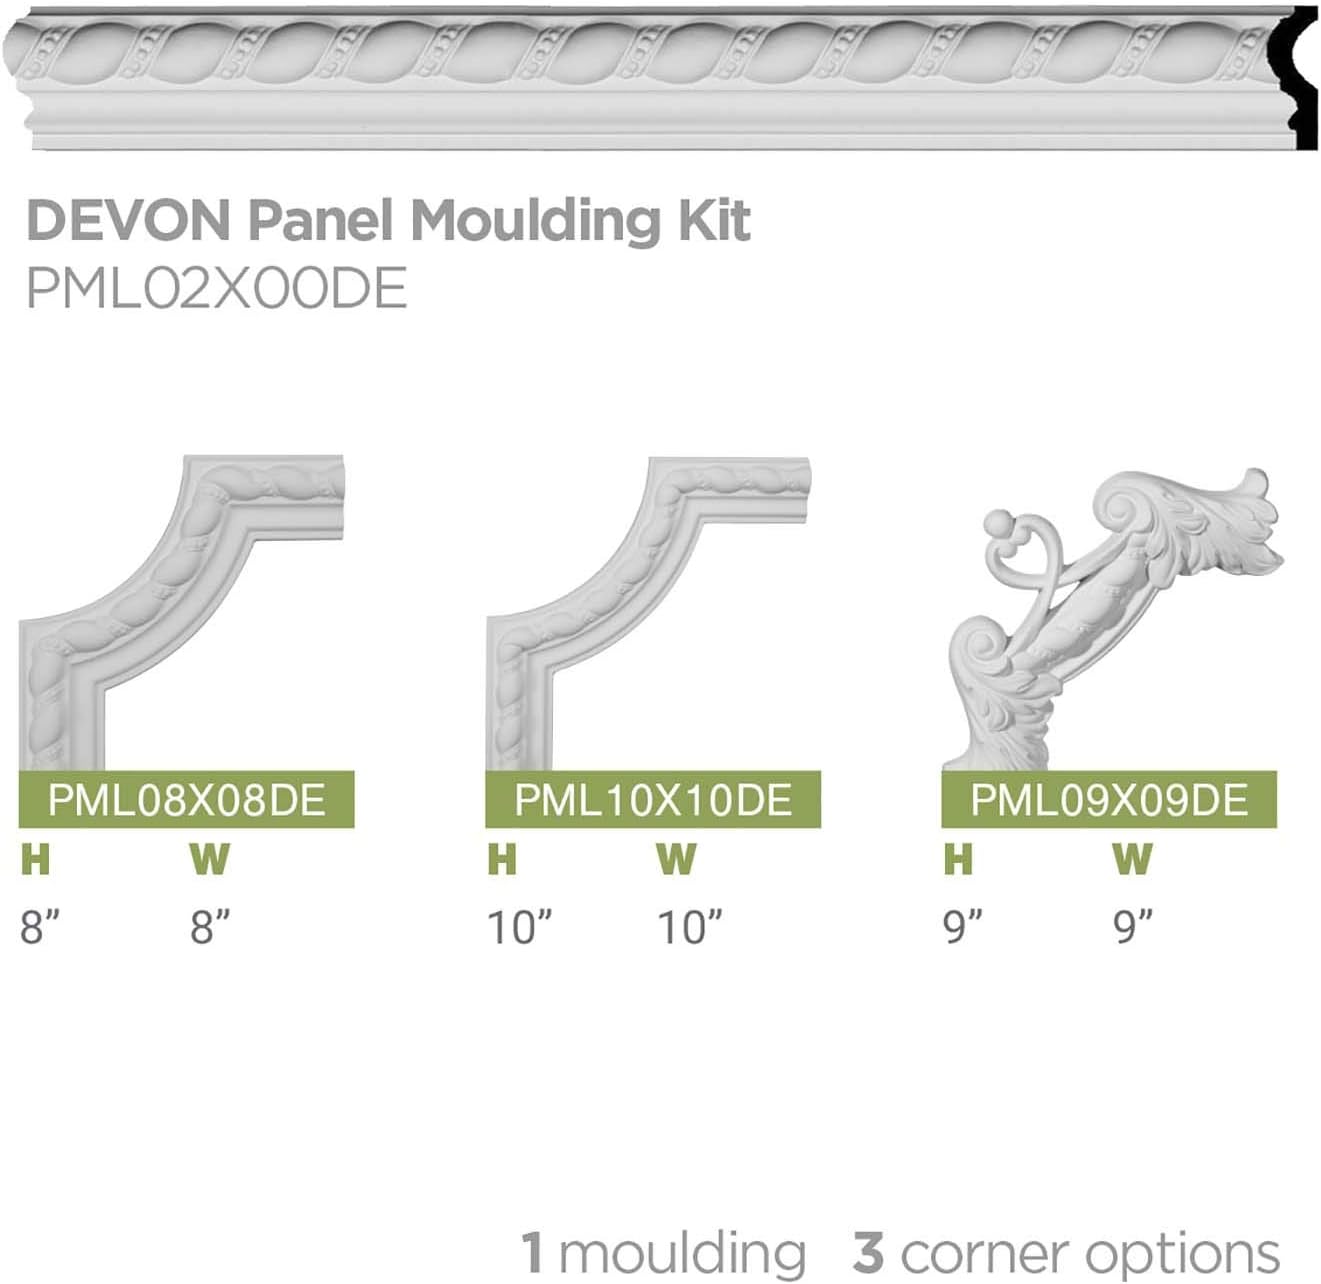
Figure 5: Diagram illustrating how panel moulding pieces and various corner options can be combined to create decorative wall or ceiling panels.
5. Konserwacja
Ekena Millwork urethane mouldings are low-maintenance. Regular cleaning with a soft, damp cloth is sufficient to remove dust and dirt. Avoid abrasive cleaners or harsh chemicals, as these may damage the finish or the urethane material. If the painted finish becomes worn or damaged over time, simply clean the surface and apply a fresh coat of paint.
6. Rozwiązywanie Problemów
6.1 Adhesion Issues
If the moulding does not adhere properly, ensure the surface was clean and dry before application. Re-apply adhesive and use temporary support (e.g., painter's tape, clamps) until the adhesive cures. For persistent issues, consider using additional mechanical fasteners like finishing nails.
6.2 Gaps at Joints
Small gaps at mitered joints are common. These can be filled with paintable caulk before painting. For larger gaps, ensure cuts are precise and consider using a small amount of urethane-compatible filler before caulking.
6.3 Paint Finish Problems
If the paint finish is uneven or peeling, ensure the moulding surface was clean and properly prepared (lightly sanded if necessary) before painting. Use a high-quality primer if applying a significantly different color or type of paint, even though the moulding is factory-primed.
7. Specyfikacje
Atrybut
Szczegół
Producent
Ekena Millwork
Numer części
PML02X00DE-CASE-4
Waga przedmiotu
11.2 uncji
Wymiary produktu
94.5 x 0.88 x 2 cala
Numer modelu przedmiotu
PML02X00DE-CASE-4
Rozmiar
2"H x 7/8"P x 96"L
Kolor
Factory Primed
Ilość w opakowaniu przedmiotu
1 (Note: Product is sold as a 4-pack, but this spec refers to individual item quantity)
Czy potrzebne są baterie?
NIE
ASIN
B01HHIGST4
Data pierwszej dostępności
24 czerwca 2016 r.
8. Gwarancja i wsparcie
For detailed warranty information and customer support, please refer to the official documentation provided by Ekena Millwork. You can also find additional resources and contact information on their official webstrona.
Ekena Millwork is dedicated to pushing boundaries and innovating in the architectural products industry. With roots in carving, they apply their expertise to various materials, including urethane, resin, fiberglass, expanded cellular PVC, and rustic timber. Their focus is on building products that last and providing tools for customers to design and develop perfect applications for their homes.
Video 1: Ekena Millwork Company Overview. This video provides insight into the company's manufacturing processes, commitment to craftsmanship, and innovative approach to creating high-quality architectural products.
10. Aplikacja Examples
Ekena Millwork panel mouldings can be used to create a variety of decorative effects in your home. Here are some visual examples:
Figure 6: A living room featuring decorative wall panels created with Ekena Millwork moulding, adding architectural interest.
Rysunek 7: Byłyample of ceiling panels formed with Ekena Millwork moulding, enhancing the room's overhead design.
Figure 8: An office environment showcasing wall panels made with Ekena Millwork moulding, contributing to a sophisticated interior.
Powiązane dokumenty - PML02X00DE-CASE-4
Instrukcja montażu okiennic winylowych Kompleksowe instrukcje montażu okiennic winylowych Ekena Millwork, obejmujące kwestie bezpieczeństwa, narzędzia, materiały oraz wskazówki krok po kroku dotyczące ogólnego montażu oraz stylów deskowo-listwowych.
Przewodnik po montażu listwy wielofunkcyjnej 4 w 1 z winylu Project Source Szczegółowe instrukcje montażu listwy wielofunkcyjnej Project Source 4 w 1, wszechstronnego rozwiązania do przejść między podłogami winylowymi. Dowiedz się, jak zamontować listwę T, listwę przejściową do wykładzin dywanowych, reduktor do twardych powierzchni i listwę końcową za pomocą zintegrowanego systemu podkładek do podłóg o różnych wysokościach.
Nanoleaf EXPO Display Case User Manual: Setup, Pairing, and Control Comprehensive user manual for the Nanoleaf x Fantaqi EXPO Smart LED Display Case, covering unboxing, physical setup, iOS and Android pairing, smart home integration, control options, troubleshooting, and FAQs.