1. Wprowadzenie
This manual provides detailed instructions for the safe and effective operation of the OWON XDS3102 Digital Oscilloscope. The XDS3102 is a versatile 4-in-1 instrument, combining the functions of a digital storage oscilloscope, datalogger, multimeter, and waveform generator. It features a 100 MHz bandwidth, 1 GS/s sample rate, and an 8-bit resolution ADC for precise waveform analysis.
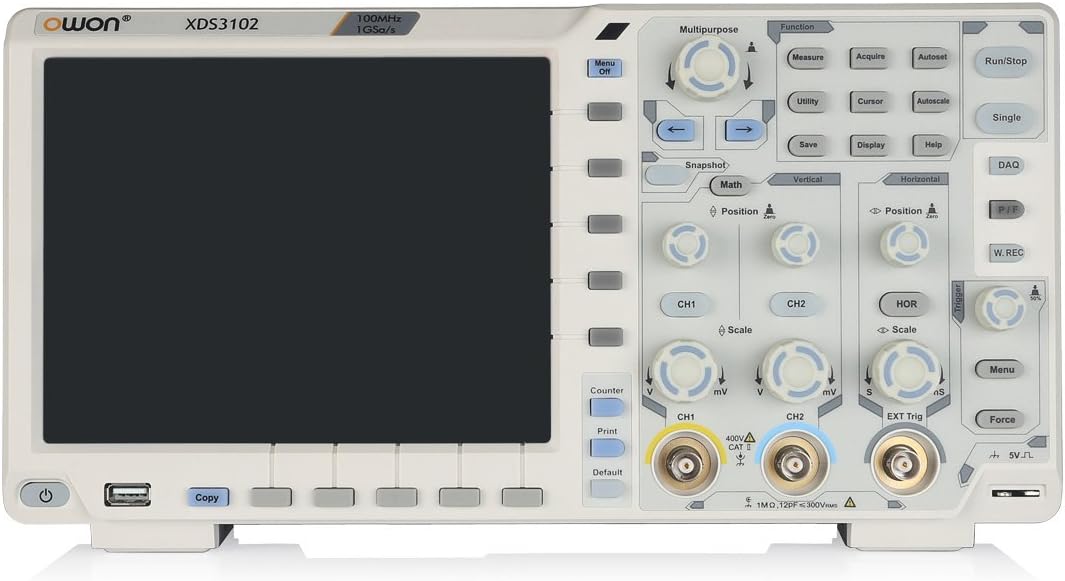
Rycina 1: Przód view of the OWON XDS3102 Digital Oscilloscope, showing the display, control panel, and input connectors.
2. Główne cechy
- Przepustowość łącza: 100MHz
- Sampstawka: 1 GS/s
- Rezolucja: 8-bit ADC for detailed waveform restoration
- Kanały: 2
- Czułość pionowa: 1 mV/div - 10 V/div with low background noise
- Wyświetlacz: 8-inch 800 x 600 high-resolution LCD
- Wielofunkcyjność: Digital Storage Oscilloscope, Datalogger, Multimeter, Waveform Generator
- Advanced Triggering: Xvisual multi-trigger functions
- Bus Decoding: Supports various bus decoding functions (optional: RS232, SPI, I2C, CAN)
3. Zawartość opakowania
Sprawdź, czy w przesyłce znajdują się wszystkie wymienione poniżej elementy:

Figure 2: OWON XDS3102 Oscilloscope with its standard accessories, including probes, power cord, USB cable, and software CD.
- OWON XDS3102 Digital Oscilloscope Unit
- Przewód zasilający
- Płyta CD z oprogramowaniem
- Kabel USB
- Probe (1x)
- Narzędzie do regulacji sondy
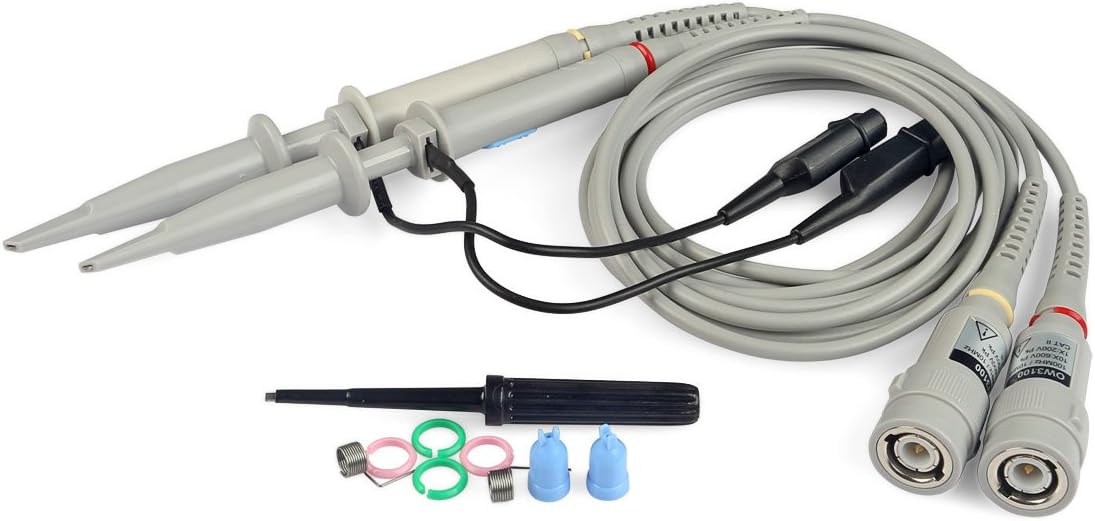
Figure 3: Close-up of the included oscilloscope probes and adjustment tool.
4. Konfiguracja
4.1 Połączenie zasilania
- Upewnij się, że oscyloskop jest umieszczony na stabilnej i równej powierzchni, zapewniającej odpowiednią wentylację.
- Connect the provided power cord to the AC power inlet on the rear panel of the oscilloscope.
- Plug the other end of the power cord into a grounded AC power outlet. The device supports 100V-240V, 50/60Hz.
- Aby włączyć urządzenie, naciśnij przycisk zasilania znajdujący się na panelu przednim.

Figure 4: Rear panel of the oscilloscope, highlighting the power input, USB device port, and LAN port.
4.2 Podłączenie sondy
- Podłącz złącze BNC sondy oscyloskopu do wybranego kanału wejściowego (CH1 lub CH2) na panelu przednim.
- Upewnij się, że połączenie jest bezpieczne.
- Attach the probe tip to the circuit point you wish to measure.
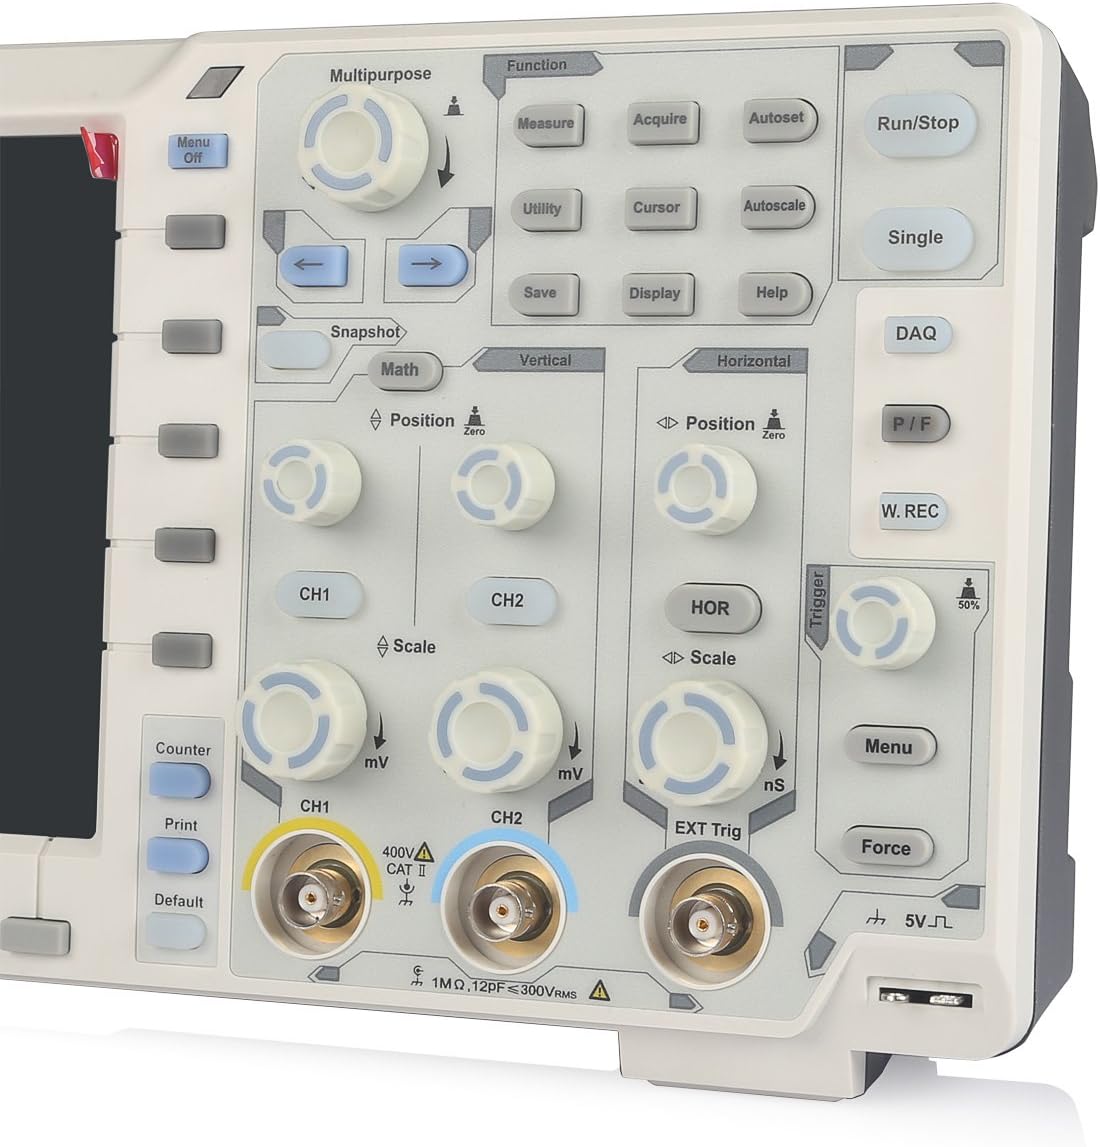
Rysunek 5: Szczegółowy view of the front panel, showing CH1 and CH2 BNC input connectors and associated controls.
5. Instrukcja obsługi
5.1 Podstawowa obsługa oscyloskopu
- Włączanie/wyłączanie: Use the power button on the lower left of the front panel.
- Automatyczne ustawianie: Naciśnij Automatyczne ustawianie przycisk umożliwiający automatyczną regulację ustawień pionowych, poziomych i wyzwalania w celu uzyskania stabilnego wyświetlania przebiegu.
- Vertical Controls (CH1/CH2): Użyj Pozycja knob to adjust vertical position and the Skala knob to adjust vertical sensitivity (V/div).
- Sterowanie poziome: Użyj Pozycja knob to adjust horizontal position and the Skala knob to adjust time base (s/div).
- Sterowanie wyzwalaczem: Adjust the trigger level using the dedicated knob. Press the Menu button in the trigger section to access trigger settings.
- Pomiar: Naciśnij Mierzyć button to display automatic measurements of waveform parameters.
- Ratować: Użyj Ratować button to store waveforms or settings.
5.2 Multi-functionality (Datalogger, Multimeter, Waveform Generator)
The XDS3102 can function as a Datalogger, Multimeter, and Waveform Generator. Access these functions via the Różnego przeznaczenia or Funkcjonować buttons on the control panel. Specific instructions for each mode are detailed in the full software manual provided on the included CD.
Opcjonalne funkcje: The device supports various optional functions such as VGA+AV output, Wi-Fi connectivity, 1CH 25M waveform generator, DMM digital multimeter, capacitive touch screen, and decoding kits (RS232, SPI, I2C, CAN). These functions require additional modules or software and are not included in the standard package.
6. Konserwacja
- Czyszczenie: Use a soft, dry cloth to clean the exterior of the oscilloscope. For stubborn dirt, a lightly dampened cloth with mild detergent can be used. Avoid abrasive cleaners or solvents.
- Składowanie: When not in use, store the oscilloscope in a clean, dry environment, away from direct sunlight and extreme temperatures.
- Pielęgnacja sondy: Handle probes carefully. Avoid bending or stressing the cables. Regularly check for damage to the probe tips and connectors.
- Komponenty wewnętrzne: The device contains no user-serviceable components inside. Do not attempt to open the casing. Serwisowanie należy zlecić wykwalifikowanemu personelowi.

Figure 6: Close-up of the rear warning label, emphasizing not to open the device and to refer servicing to qualified personnel.
7. Rozwiązywanie Problemów
| Problem | Możliwa przyczyna | Rozwiązanie |
|---|---|---|
| Urządzenie nie włącza się. | Przewód zasilający nie jest podłączony; gniazdko elektryczne jest uszkodzone; przepalony wewnętrzny bezpiecznik. | Check power cord connection. Test power outlet. If problem persists, contact support. |
| Nie wyświetla się żaden przebieg. | Probe not connected; input signal too small/large; trigger settings incorrect. | Ensure probe is connected to input and circuit. Use Automatyczne ustawianie. Adjust vertical scale (V/div) and trigger level. |
| Niestabilna forma fali. | Incorrect trigger settings; noisy signal. | Adjust trigger level and mode. Ensure proper grounding of the circuit and oscilloscope. |
| Display issues (e.g., flickering, no image). | Błąd oprogramowania; awaria sprzętu. | Uruchom ponownie urządzenie. Jeśli problem będzie się powtarzał, skontaktuj się z pomocą techniczną. |
8. Specyfikacje
| Specyfikacja | Wartość |
|---|---|
| Producent | OWON |
| Numer modelu | XDS3102 |
| Waga przedmiotu | 7.38 funta |
| Wymiary opakowania | 16.14 x 11.18 x 7.01 cala |
| Tworzywo | Plastikowy |
| Ilość w opakowaniu przedmiotu | 1 |
| Baterie w zestawie | NIE |
| Wymagane baterie | NIE |
| Tomtage Zakres | 100 V - 240 V, 50/60 Hz |
| Maksymalna moc | 15 W |
| Opcjonalna bateria | 4.2 V |
9. Gwarancja i wsparcie
OWON products are designed for reliability and performance. For warranty information, please refer to the warranty card included with your product or visit the official OWON website. For technical support, troubleshooting assistance, or inquiries regarding optional features, please contact OWON customer service or your authorized dealer.
Oficjalny OWON Webstrona: www.owon.com.cn


