1. Wprowadzenie
The Apogee One is an all-in-one portable USB audio interface designed for professional recordings. It features a built-in studio-quality condenser microphone and allows for simultaneous recording of a microphone (built-in or external) and a guitar. With industry-leading AD/DA conversion and mic preamp technology, the Apogee One delivers pristine audio quality for music, podcasts, and voice-overs, along with studio-quality sound for headphones. It offers intuitive control and seamless compatibility with Mac OS and Windows.
2. Główne cechy
- 2-in x 2-out audio interface with built-in microphone.
- USB 2.0 connection for Mac or PC with 24-bit/96kHz AD/DA conversion.
- Direct monitoring and complete input/output control via Apogee's Maestro software.
- Durable die-cast aluminum chassis.
- Legendary Apogee sound quality.
- Compatible with Lightning-equipped iPads/iPhones. (Not compatible with USB-C iPads).
3. Zawartość opakowania
The Apogee One package typically includes:
- Apogee One Audio Interface
- Kabel USB
- Breakout Cable (for external microphone and instrument input)
- Universal Power Supply (may be sold separately in some regions)
- Szybki przewodnik
4. Konfiguracja
4.1 Łączenie się z komputerem (Mac/Windows)
- Zainstaluj oprogramowanie: Download and install the latest Apogee Maestro software and drivers from the official Apogee webstrona.
-
Podłącz USB: Connect the Apogee One to your computer using the supplied USB cable.
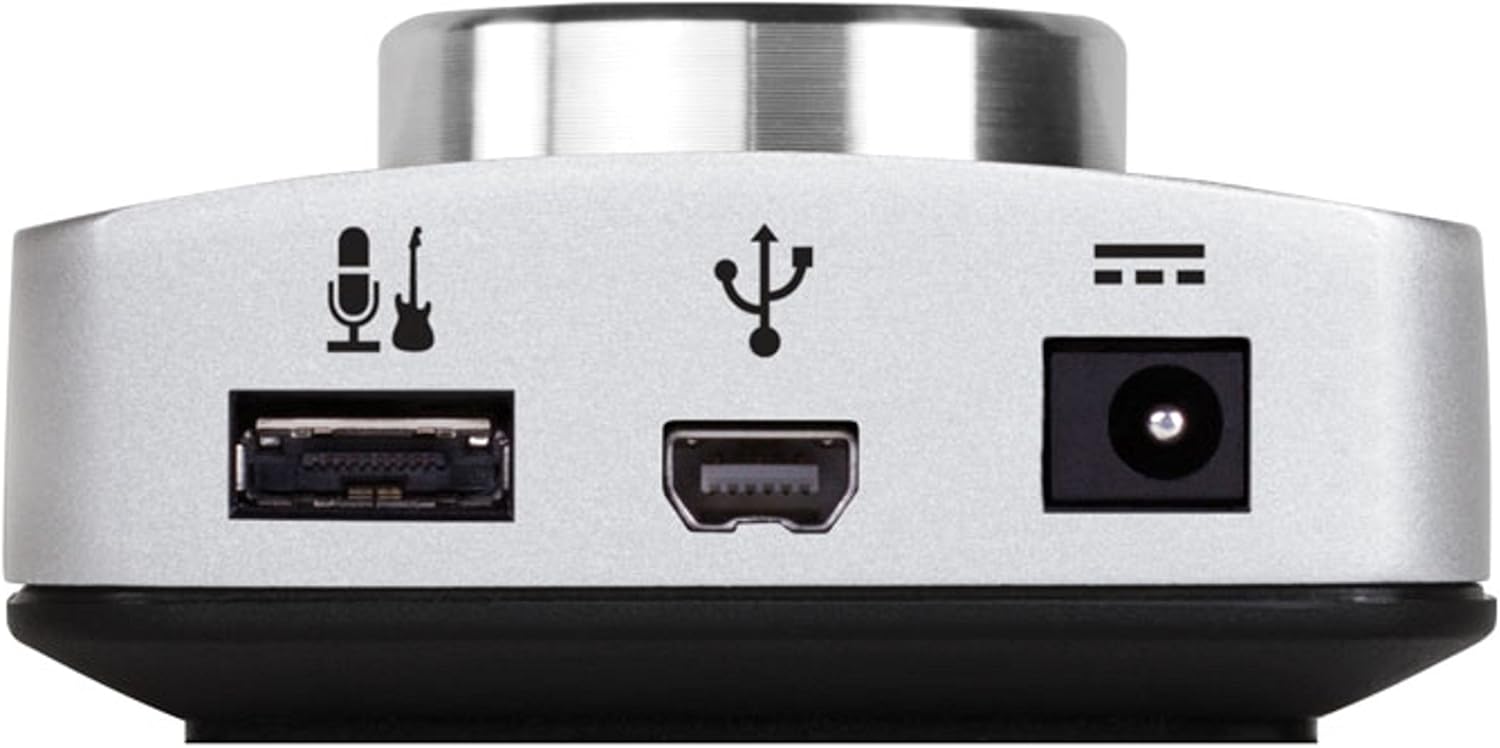
Rysunek 1: Góra view of the Apogee One, highlighting the USB port for computer connection.
- Włączanie: The Apogee One is typically bus-powered via USB. If additional power is needed or for standalone operation, connect the universal power supply.
- Konfiguruj ustawienia audio: Open your computer's sound settings or your Digital Audio Workstation (DAW) and select "Apogee One" as the input and output device.
4.2 Connecting to iOS Devices (Lightning)
- Zasilanie: For iOS device connection, the Apogee One requires external power. Connect the universal power supply to the Apogee One.
- Connect to iOS: Use the appropriate Lightning cable (sold separately or included with iOS kits) to connect the Apogee One to your iOS device.
- Zgodność aplikacji: Ensure you are using a compatible iOS recording application.
5. Operating the Apogee One
5.1 kontroli nadview

Rycina 2: Przód view of the Apogee One, displaying the main control knob and input/output indicators.
- Large Control Knob: This multi-function knob controls input gain, output volume, and various settings accessible via the Maestro software.
- Przyciski wyboru wejścia: Buttons on the front panel allow you to select between the built-in microphone, external microphone, or instrument input.
- Wskaźniki LED: Provide visual feedback for input levels, output levels, and selected input source.
5.2 Recording with the Built-in Condenser Microphone
The Apogee One features an integrated omnidirectional condenser microphone for high-quality vocal and acoustic instrument capture. Simply select the built-in microphone input using the front panel controls or Maestro software, adjust the gain, and begin recording.
5.3 Recording External Microphones and Instruments
Use the supplied breakout cable to connect external microphones (XLR) or instruments (1/4" jack). The Apogee One provides phantom power for condenser microphones, which can be enabled via the Maestro software.

Figure 3: Apogee One in use, demonstrating connections for an external microphone and a guitar.
Video 1: Demonstrates recording hip-hop music using the Apogee One with an iPad, showcasing its versatility for mobile production.
5.4 Monitorowanie
The Apogee One includes a high-quality headphone output for direct monitoring of your audio. Adjust the headphone volume using the main control knob. Direct monitoring allows for listening to your input signal with zero latency.

Rysunek 4: Strona view of the Apogee One, highlighting the headphone output jack.
Wideo 2: Overview of the Apogee ONE-MAC USB Audio Interface, demonstrating its features and use in a studio setting.
Video 3: Grammy Award-winning producer Theron "Neff-U" Feemster discusses using the Apogee One for Mac in his music production workflow.
6. Konserwacja
- Czyszczenie: Use a soft, dry cloth to clean the exterior of the Apogee One. Avoid using harsh chemicals or abrasive materials.
- Składowanie: Przechowywać urządzenie w chłodnym i suchym miejscu, z dala od bezpośredniego światła słonecznego i ekstremalnych temperatur.
- Aktualizacje oprogramowania układowego: Regularnie sprawdzaj Apogee webwitryna z aktualizacjami oprogramowania sprzętowego, zapewniająca optymalną wydajność i kompatybilność.
7. Rozwiązywanie Problemów
Typowe problemy i rozwiązania:
-
No Sound/Input:
- Upewnij się, że wszystkie kable są bezpiecznie podłączone.
- Verify the Apogee One is selected as the audio input/output device in your computer's settings or DAW.
- Check input gain levels on the device and in your software.
- Confirm phantom power is enabled for condenser microphones.
-
Zniekształcony dźwięk:
- Reduce input gain to prevent clipping (indicated by red LEDs).
- Check for driver conflicts or outdated drivers; update if necessary.
-
Connectivity Issues (Windows):
- Ensure the latest Windows drivers are installed from the Apogee webstrona.
- Spróbuj podłączyć do innego portu USB.
- Adjust USB and power settings on your computer as recommended by Apogee support.
-
Zgodność z systemem iOS:
- Confirm your iOS device uses a Lightning port (not USB-C).
- Ensure external power is connected to the Apogee One when using with iOS.
8. Specyfikacje
| Funkcja | Szczegół |
|---|---|
| Waga przedmiotu | 12.8 uncji |
| Wymiary produktu | 6.4 x 0.8 x 2.2 cala |
| Numer modelu przedmiotu | ONE-MAC |
| Technologia łączności | USB |
| Interfejs sprzętowy | USB |
| Liczba kanałów | 2 wejście x 2 wyjście |
| Konwersja AD/DA | 24-bit / 96kHz |
| System operacyjny | Windows, macOS |
| Kompatybilne urządzenia | Personal Computer, Lightning-equipped iPads/iPhones |
| Obsługiwane oprogramowanie | Apogee’s Maestro software |
| Cotage | 3.9 watów |
9. Gwarancja i wsparcie
For detailed warranty information and technical support, please refer to the official Apogee Electronics webOdwiedź stronę internetową lub skontaktuj się bezpośrednio z działem obsługi klienta. Zachowaj dowód zakupu na wypadek reklamacji.


