1. Wprowadzenie
Dziękujemy za zakupasing the COBY DTV-700 Digital to Analog TV Converter. This device allows you to receive digital broadcast television signals and convert them for display on older analog televisions. It also functions as a multimedia player, supporting various audio, video, and image formats via its USB port, and offers recording capabilities. Please read this manual thoroughly before operating the device to ensure proper use and to maximize your viewzdobywania doświadczenia.
2. Zawartość opakowania
Proszę zaznaczyć pole dotyczące następujących elementów:
- COBY DTV-700 Digital to Analog TV Converter
- Zdalne sterowanie
- Zasilacz AC/DC
- AV Cable (RCA)
- Instrukcja obsługi (ten dokument)
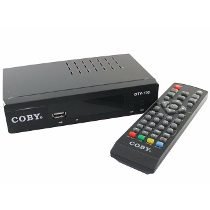
Image 2.1: The COBY DTV-700 Digital to Analog TV Converter. This image shows the compact design of the converter unit, typically black with various ports and indicators.
3. Informacje dotyczące bezpieczeństwa
Aby zapewnić bezpieczną obsługę i zapobiec uszkodzeniom, należy przestrzegać następujących środków ostrożności:
- Nie wystawiaj urządzenia na działanie deszczu, wilgoci ani ekstremalnych temperatur.
- Nie otwierać casing; wszelkie prace serwisowe należy zlecać wykwalifikowanemu personelowi.
- Zapewnij odpowiednią wentylację wokół urządzenia, aby zapobiec przegrzaniu.
- Używaj wyłącznie dołączonego zasilacza.
- Trzymaj urządzenie z dala od bezpośredniego światła słonecznego, źródeł ciepła i silnych pól magnetycznych.
- Baterie i odpady elektroniczne należy utylizować zgodnie z lokalnymi przepisami.
4. Koniec produktuview
4.1 Panel przedni
Na panelu przednim znajdują się zazwyczaj:
- Wskaźnik zasilania: Świeci się, gdy urządzenie jest włączone.
- Przyciski zmiany kanału w górę/w dół: For changing channels.
- Przycisk menu: Dostęp do menu głównego.
- Port USB: For connecting USB storage devices for media playback and recording.
4.2 Panel tylny
Na tylnym panelu znajdują się wszystkie niezbędne porty połączeniowe:
- MRÓWKA W: Connects to your antenna for receiving digital signals.
- WYJŚCIE HDMI: Connects to an HDMI-compatible TV for high-definition output.
- AV OUT (RCA): Connects to older analog TVs using composite video (yellow) and stereo audio (red/white) cables.
- WYJŚCIE KONCENTRYCZNE: Digital audio output (if available).
- DC IN: Connects to the provided AC/DC power adapter.
5. Konfiguracja
5.1 Connecting the Converter
- Podłącz antenę: Podłącz antenę cyfrową do MRÓWKA W port on the rear of the DTV-700.
- Połącz z telewizorem:
- For Analog TVs: Use the supplied AV cable. Connect the yellow plug to the video input of your TV, and the red/white plugs to the corresponding audio inputs. Connect the other end to the AV OUT ports on the DTV-700.
- For Digital/HDTVs: Use an HDMI cable (not included). Connect one end to the Wyjście HDMI port on the DTV-700 and the other end to an available HDMI input on your TV.
- Podłącz zasilanie: Plug the AC/DC power adapter into the DC WEJŚCIE port on the DTV-700, then plug the adapter into a wall outlet.
5.2 Konfiguracja początkowa i skanowanie kanałów
- Turn on your TV and select the correct input source (e.g., AV1, HDMI1) that corresponds to your connection.
- Power on the DTV-700 using the remote control or the power button on the front panel.
- The first time you power on, an initial setup wizard may appear. Follow the on-screen prompts to select your language and country.
- Initiate an automatic channel scan. This will search for all available digital channels in your area. This process may take several minutes. Do not interrupt the scan.
- Once the scan is complete, the converter will tune to the first available channel.
6. Instrukcja obsługi
6.1 Funkcje zdalnego sterowania
The remote control provides full functionality for your DTV-700. Ensure two AAA batteries are inserted correctly (batteries not included).
- MOC: Włącza lub wyłącza urządzenie.
- CO +/-: Zmienia kanały w górę lub w dół.
- GŁOŚNOŚĆ +/-: Reguluje głośność.
- MENU: Dostęp do menu głównego.
- WYJŚCIE: Wyjście z bieżącego menu lub funkcji.
- INFORMACJE: Wyświetla aktualne informacje o kanale.
- OK / Navigation Buttons: Potwierdza wybory i umożliwia nawigację po menu.
- REK: Starts recording the current program.
- ODTWÓRZ/PAUZA, STOP, PRZEWIŃ DO PRZODU, DO TYŁU: Sterowanie odtwarzaniem multimediów.
- USB: Przełącza na tryb odtwarzania multimediów USB.
6.2 Nawigacja kanałowa
Użyj CH +/- buttons on the remote or front panel to browse channels. You can also directly enter a channel number using the numeric keypad on the remote.
6.3 Menu główne
Naciśnij MENU button to access settings for Program, Picture, Sound, Time, Option, and System. Use the navigation buttons to select options and OK aby potwierdzić.
7. Odtwarzanie multimediów
The DTV-700 supports media playback from a USB storage device (e.g., USB flash drive, external hard drive). Insert your USB device into the USB port on the front panel.
7.1 Obsługiwane formaty
- Muzyka: MP3, WMA
- Zdjęcie: JPG, BMP, PNG
- Wideo: MKV, AVI, DIVX, XVID, MOV, VOB, FLV, DAT, MPEG, MP4, TS
7.2 Odtwarzanie multimediów
- Podłącz urządzenie pamięci masowej USB do portu USB.
- Naciśnij USB button on the remote control or navigate to the 'Multimedia' section in the main menu.
- Select the desired media type (Music, Photo, Video) and browse your files.
- Użyj przycisków nawigacyjnych, aby wybrać file i naciśnij OK grać.
8. Funkcje nagrywania
The DTV-700 allows you to record live TV programs to a connected USB storage device.
8.1 Natychmiastowe nagrywanie
Podczas oglądania programu naciśnij przycisk REK button on the remote control to start recording. Press ZATRZYMYWAĆ SIĘ aby zakończyć nagrywanie.
8.2 Scheduled Recording (PVR)
Access the PVR (Personal Video Recorder) or Schedule menu via the main menu to set up timed recordings. You will need to specify the channel, start time, end time, and date for the recording.
9. Rozwiązywanie Problemów
| Problem | Możliwa przyczyna / rozwiązanie |
|---|---|
| Brak obrazu i dźwięku |
|
| Słaba jakość obrazu / Brak kanałów |
|
| Pilot nie działa |
|
| USB media not playing |
|
10. Specyfikacje
- Model: DTV-700
- Marka: Koby
- Wejście: Digital TV Antenna (ATSC/DVB-T/T2 compatible, depending on region)
- Wyjście: HDMI, AV (RCA Composite Video/Audio)
- Port USB: Yes (for media playback and PVR)
- Obsługiwane formaty multimediów:
- Music: MP3, WMA
- Zdjęcie: JPG, BMP, PNG
- Video: MKV, AVI, DIVX, XVID, MOV, VOB, FLV, DAT, MPEG, MP4, TS
- Moc: AC/DC Adapter (Input: 100-240V ~ 50/60Hz, Output: typically 5V-12V DC)
- Wymiary: Approximately 20 x 15.6 x 6.2 cm (Package dimensions)
- Waga: Approximately 490 g (Package weight)
- Baterie do pilota zdalnego sterowania: 2 x AAA (brak w zestawie)
11. Konserwacja
To ensure the longevity and optimal performance of your DTV-700 converter:
- Czyszczenie: Do czyszczenia zewnętrznej części urządzenia należy używać miękkiej, suchej ściereczki. Nie należy używać płynnych środków czyszczących ani środków ściernych.
- Wentylacja: Upewnij się, że otwory wentylacyjne nie są zablokowane, aby zapobiec przegrzaniu.
- Składowanie: Jeśli urządzenie będzie przechowywane przez dłuższy czas, należy odłączyć je od zasilania i przechowywać w chłodnym, suchym miejscu.
12. Gwarancja i wsparcie
Aby uzyskać informacje dotyczące gwarancji i pomocy technicznej, zapoznaj się z kartą gwarancyjną dołączoną do produktu lub odwiedź oficjalną stronę internetową firmy Coby webZachowaj paragon jako dowód zakupu na wypadek ewentualnych roszczeń gwarancyjnych.
Coby is committed to providing quality products and customer satisfaction. If you encounter any issues not covered in this manual, please contact Coby customer service for assistance.


