1. Wprowadzenie
This manual provides comprehensive instructions for the setup, installation, operation, maintenance, and troubleshooting of your Antec VSK2000-U3 Micro-ATX Desktop Case. Please read this manual thoroughly before beginning installation to ensure proper assembly and optimal performance.
Video 1: Computer Case Display. This video provides a visual overview of a computer case, demonstrating its external features and design.
2. Główne cechy
The Antec VSK2000-U3 Micro-ATX Desktop Case is designed for efficient and compact PC builds. Key features include:
- Motherboard Support: Up to Micro-ATX
- Cooling: 1 x 92 mm temperature-controlled fan included
- Power Supply Unit (PSU) Support: TFX form factor
- Drive Bays: Supports up to 1 x 5.25” ODD, 1 x 3.5" HDD & 1 x 2.5" SSD
- Gniazda rozszerzeń: 4

Rycina 1: Przód view of the Antec VSK2000-U3 case, highlighting the front panel I/O and optical drive bay.
3. Konfiguracja i instalacja
Follow these steps to install your components into the Antec VSK2000-U3 case. Ensure all power is disconnected before handling internal components.
3.1. Przygotowanie sprawy
- Zdejmij panele boczne: Carefully remove the side panels of the case to access the interior.
- Zainstaluj osłonę I/O: Zainstaluj osłonę I/O dostarczoną wraz z płytą główną w tylnym otworze obudowy.

Rysunek 2: Strona view of the Antec VSK2000-U3 case with the side panel removed, showing the internal layout.
3.2. Instalacja płyty głównej
- Align Motherboard: Carefully align your Micro-ATX motherboard with the standoffs inside the case.
- Bezpieczna płyta główna: Use the provided screws to secure the motherboard to the standoffs.
3.3. Instalacja zasilania
- Stanowisko PSU: Install your TFX form factor power supply into its designated bay.
- Bezpieczny zasilacz: Zabezpiecz zasilacz śrubami od tyłu obudowy.
- Podłącz kable zasilające: Route and connect the necessary power cables to your motherboard and other components.

Rysunek 3: Tył view of the Antec VSK2000-U3 case, showing the I/O shield area, expansion slots, and PSU mounting.
3.4. Drive Installation (ODD, HDD, SSD)
- Optical Drive (ODD): Install your 5.25" optical drive into the front bay. The case features a tool-less ODD housing system.
- Hard Disk Drive (HDD): Install your 3.5" HDD into the designated bay. The case features a tool-less HDD housing system.
- Solid State Drive (SSD): Install your 2.5" SSD into the designated bay.
- Connect Drives: Connect SATA data and power cables to all installed drives.
3.5. Instalacja karty rozszerzeń
- Zdejmij osłony gniazd: Zdejmij niezbędne zaślepki gniazd rozszerzeń z tyłu obudowy.
- Zainstaluj kartę: Insert your expansion card (e.g., graphics card) into the appropriate PCI-E slot on the motherboard.
- Karta bezpieczna: Secure the expansion card with a screw.
3.6. Połączenia na panelu przednim
Connect the front panel cables (USB 3.0, audio, power switch, reset switch, LED indicators) to the corresponding headers on your motherboard. Refer to your motherboard manual for specific header locations.
3.7. Zarządzanie kablami
Route cables neatly to improve airflow and aesthetics. Use cable ties or the case's cable management features to secure cables away from moving parts and airflow paths.
3.8. Video Tutorials for Installation
Video 2: Detailed Installation Tutorial. This video demonstrates the step-by-step process of installing components into a computer case, including the motherboard, power supply, and drives.
Video 3: Micro ATX PC Case Installation. This video illustrates the assembly process for a Micro ATX PC case, covering component placement and cable routing.
4. Instrukcja obsługi
Once all components are securely installed and connected, replace the side panels. Connect your monitor, keyboard, mouse, and other peripherals to the appropriate ports on the rear I/O panel and front panel. Connect the power cable to the power supply and a wall outlet, then press the power button on the front of the case to start your system.
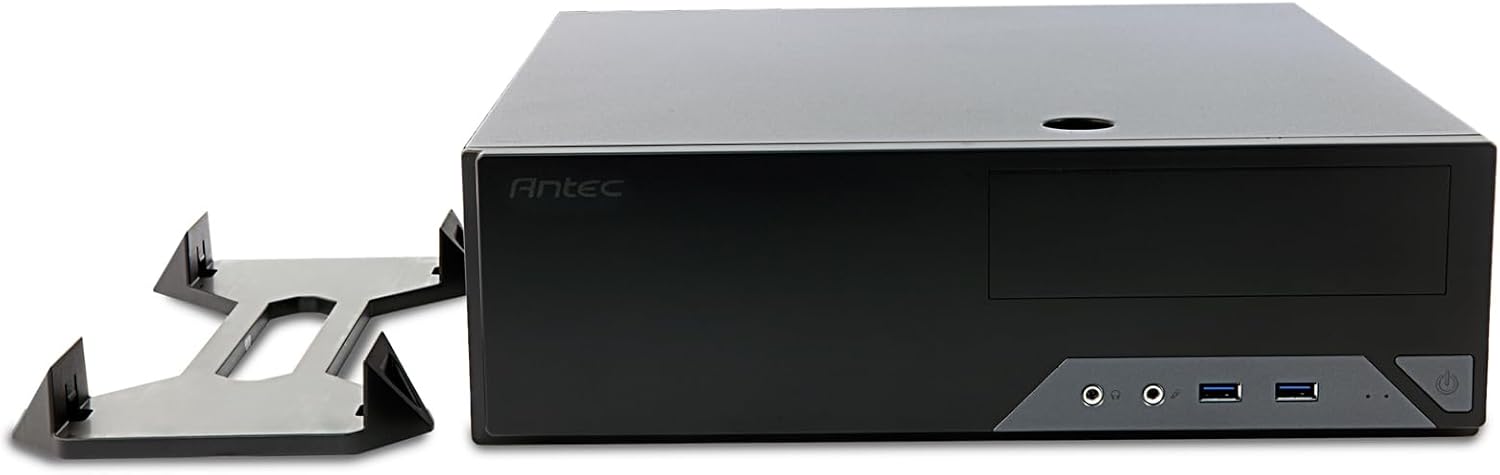
Figure 4: The Antec VSK2000-U3 case shown in a horizontal orientation with its included stand, demonstrating versatile placement options.
5. Konserwacja
Regularna konserwacja pomaga zapewnić długowieczność i optymalną wydajność Twojego komputera.
- Czyszczenie kurzu: Periodically clean dust from the case interior, fans, and air vents using compressed air or a soft brush. Ensure the system is powered off and unplugged before cleaning.
- Zarządzanie kablami: Check cable routing periodically to ensure no cables are obstructing airflow or fan operation.
- Kontrola wentylatora: Ensure the included 92mm temperature-controlled fan and any other installed fans are operating correctly and free from obstructions.
6. Rozwiązywanie Problemów
Jeśli napotkasz problemy ze swoim komputerem, rozważ poniższe typowe kroki rozwiązywania problemów:
- Brak zasilania:
- Verify the power cable is securely connected to the PSU and wall outlet.
- Upewnij się, że przełącznik zasilacza jest w pozycji „ON”.
- Check all internal power connections (24-pin ATX, 8-pin CPU, GPU power, drive power).
- Confirm front panel power switch cable is correctly connected to the motherboard.
- Brak wyświetlacza:
- Ensure the monitor is connected to the correct graphics output (dedicated GPU or motherboard integrated graphics).
- Ponownie zamontuj kartę graficzną i moduły pamięci RAM.
- Nadmierny hałas:
- Identify the source of the noise (fan, HDD).
- Clean dust from fans.
- Ensure no cables are touching fan blades.
7. Specyfikacje
| Funkcja | Szczegół |
|---|---|
| Marka | Antek |
| Szereg | VSK2000-U3 |
| Nazwa modelu | VSK2000-U3 |
| Zgodność płyty głównej | Mikro ATX |
| Typ sprawy | Mid Tower (Slim Desktop) |
| Wymiary (dł. x szer. x wys.) | 18.6 x 15.9 x 7 cala |
| Waga przedmiotu | 5.28 funta |
| Kolor | Czarny |
| Tworzywo | Painted/Coated Metal (Likely Steel Or Aluminum With Plastic Components) |
| Typ montażu zasilacza | Rear Mount (TFX form factor) |
| Metoda chłodzenia | Air (1 x 92 mm temperature-controlled fan included) |
| Rozmiar wentylatora | 92 milimetrów |
| Zatoki napędowe | 1 x 5.25” ODD, 1 x 3.5" HDD, 1 x 2.5" SSD |
| Gniazda rozszerzeń | 4 |
8. Gwarancja i wsparcie
The Antec VSK2000-U3 Micro-ATX Desktop Case comes with a 2-letnia gwarancja. For technical support, warranty claims, or additional product information, please visit the official Antec webOdwiedź witrynę lub skontaktuj się z działem obsługi klienta. Zachowaj dowód zakupu, aby skorzystać z gwarancji.
Aby uzyskać dalszą pomoc, zapoznaj się z Antec Store.


