1. Wprowadzenie
This manual provides detailed instructions for the installation, operation, and maintenance of your ASUS Z97-A ATX DDR3 LGA 1150 Motherboard. Please read this manual thoroughly before proceeding with installation to ensure proper setup and optimal performance.
Główne cechy
- 5-Way Optimization by Dual Intelligent Processors 5: Integrated system tuning for performance, efficiency, digital power, fan control, and networking.
- SATA Express & M.2 Support: High-speed data transfer interfaces up to 10Gb/s for modern storage devices.
- Turbo App: Application-specific optimization for enhanced performance.
- Remote GO!: Remote control and media streaming capabilities.
- Kryształowy dźwięk 2: Enhanced audio solution for clear sound reproduction.
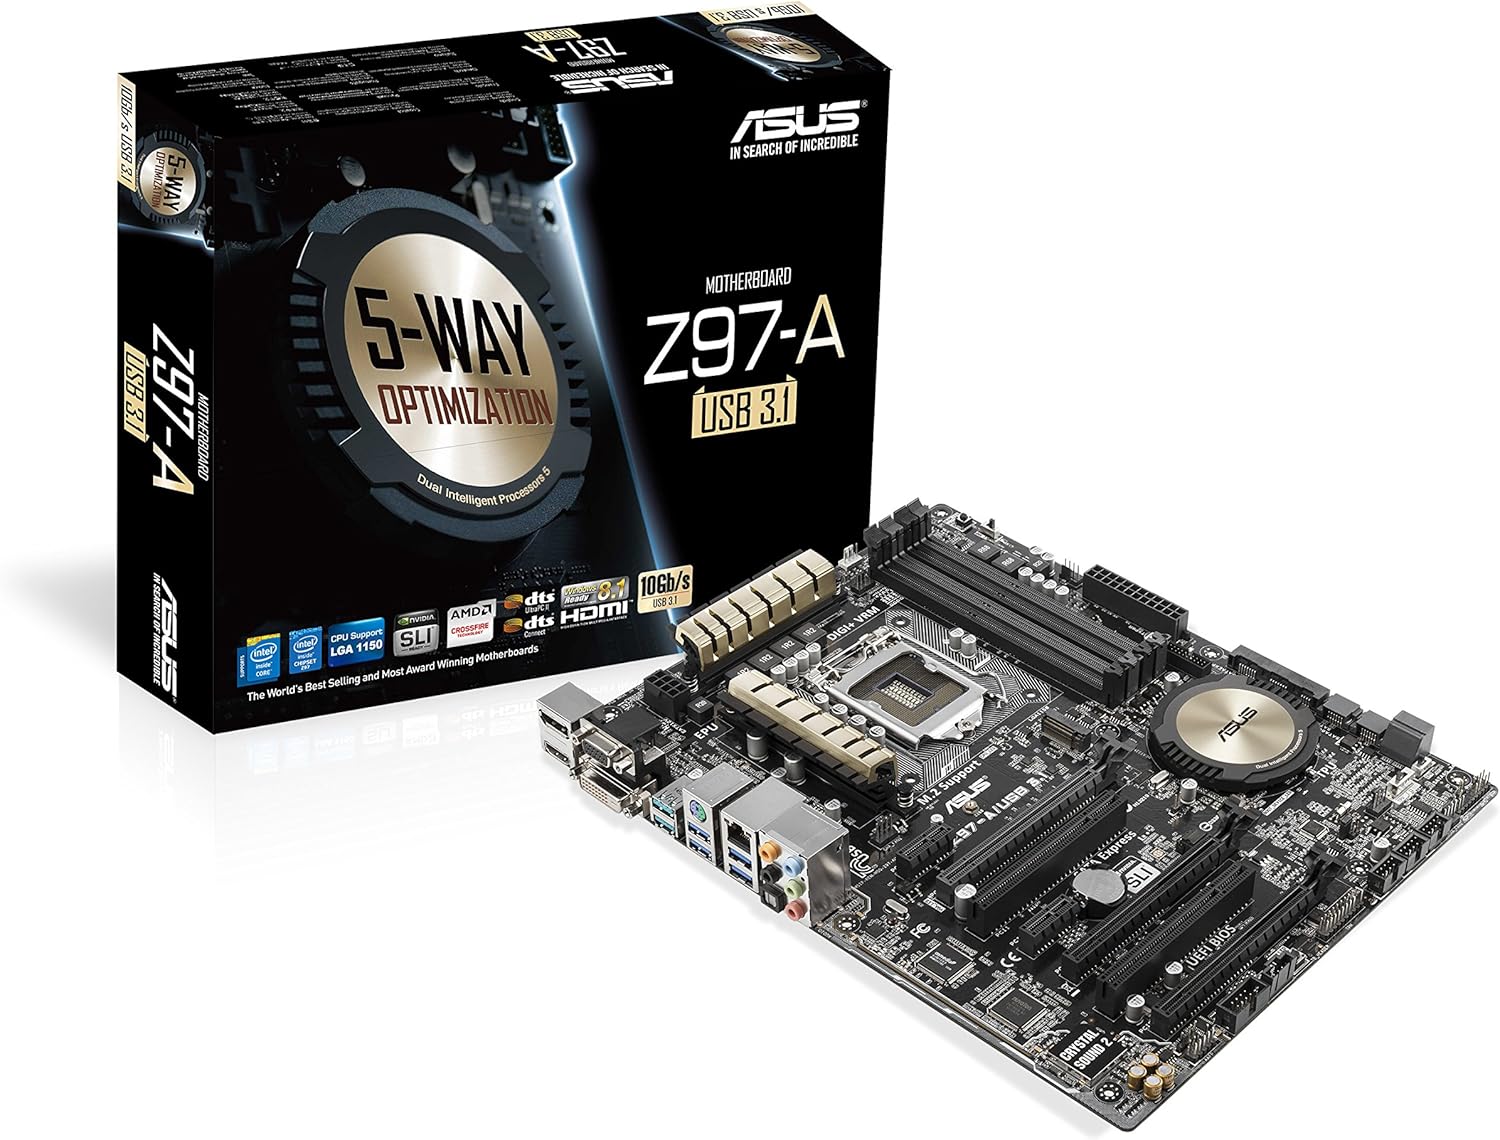
Figure 1: ASUS Z97-A Motherboard and its retail packaging.
2. Konfiguracja i instalacja
2.1 Zanim zaczniesz
- Środki ostrożności: Zawsze odłączaj zasilanie przed instalacją lub demontażem jakichkolwiek komponentów. Noś antystatyczną opaskę na nadgarstek, aby zapobiec uszkodzeniom spowodowanym wyładowaniami elektrostatycznymi (ESD).
- Zgodność komponentów: Ensure all components (CPU, RAM, GPU, power supply) are compatible with the ASUS Z97-A motherboard. Refer to the specifications section for details.
2.2 Kroki instalacji komponentów
- Zainstaluj procesor: Carefully open the CPU socket lever, align the CPU with the socket (matching the golden triangle on the CPU to the triangle on the socket), gently place the CPU into the socket, and close the lever.
- Zainstaluj chłodzenie procesora: Attach the CPU cooler according to its manufacturer's instructions. Ensure proper thermal paste application and secure mounting.
- Zainstaluj moduły pamięci (RAM): Open the clips on the DIMM slots. Align the RAM module with the slot key, press down firmly on both ends until the clips snap into place. For dual-channel operation, install modules in matching color slots.
- Zainstaluj urządzenia pamięci masowej: Connect SATA drives to the SATA 6Gb/s ports using SATA data cables. If using an M.2 SSD, install it into the M.2 slot and secure it with the provided screw.
- Zainstaluj karty rozszerzeń: Insert graphics cards or other PCIe cards into the appropriate PCIe slots. Ensure they are seated firmly and secured with a screw to the chassis.
- Podłącz zasilanie: Connect the 24-pin ATX power connector and the 8-pin CPU power connector from your power supply to the motherboard. Connect power to all other components (graphics card, storage drives).
- Montaż płyty głównej w obudowie: Carefully place the motherboard into your PC case, aligning it with the standoffs. Secure the motherboard with screws.
- Podłącz kable panelu przedniego: Connect the power button, reset button, HDD LED, power LED, and USB/audio headers from your case to the corresponding pins on the motherboard. Refer to the motherboard layout diagram for exact locations.

Rysunek 2: Widok z góry na dół view of the ASUS Z97-A Motherboard, showing component layout.

Figure 3: Rear I/O panel of the ASUS Z97-A Motherboard, featuring various connectivity options.

Figure 4: Included accessories for the ASUS Z97-A Motherboard, such as the I/O shield and cables.
3. Obsługa systemu
3.1 Pierwsze uruchomienie i konfiguracja BIOS-u/UEFI
Upon the first power-on, your system will typically enter the BIOS (Basic Input/Output System) or UEFI (Unified Extensible Firmware Interface) setup utility. This interface allows you to configure fundamental system settings.
- Dostęp do BIOS-u/UEFI: Naciśnij USUNĄĆ klucz lub F2 key during the Power-On Self-Test (POST) to enter the BIOS/UEFI setup.
- Podstawowe ustawienia: Configure boot order, date/time, and enable/disable integrated peripherals. Save changes before exiting.
3.2 Narzędzia programowe
ASUS provides a suite of software tools to enhance your motherboard's functionality and performance. The primary utility is Pakiet AI 3.
- Optymalizacja 5-etapowa: Automatically tunes your system for optimal performance, energy efficiency, digital power control, fan settings, and network prioritization.
- Ekspert Fanów 3: Advanced fan control for precise cooling and reduced noise.
- USB 3.0 Boost: Accelerates USB 3.0 transfer speeds.
4. Konserwacja
4.1 Driver and BIOS Updates
Regularly updating your motherboard's drivers and BIOS/UEFI firmware is crucial for system stability, performance, and compatibility with new hardware or software.
- Kierowcy: Download the latest drivers for your chipset, audio, LAN, and other integrated components from the official ASUS support webstrona.
- BIOS/UEFI: Sprawdź pomoc techniczną ASUS website for the latest BIOS/UEFI versions. Follow the provided instructions carefully for updating to avoid system instability.
4.2 Czyszczenie fizyczne
Dust accumulation can lead to overheating and reduced component lifespan. Regular cleaning is recommended.
- Częstotliwość: Clean your system every 3-6 months, or more frequently in dusty environments.
- Metoda: Use compressed air to remove dust from fans, heatsinks, and other components. Ensure the system is powered off and unplugged before cleaning.
5. Rozwiązywanie Problemów
W tej sekcji omówiono typowe problemy, jakie mogą wystąpić podczas konfiguracji lub użytkowania.
- Brak zasilania: Verify all power cables are securely connected to the motherboard and components. Check the power supply unit (PSU) switch.
- Brak wyświetlacza: Ensure the monitor is connected to the correct video output (either integrated graphics or a dedicated graphics card). Reseat the graphics card and RAM modules.
- System nie uruchamia się: Check for any diagnostic LEDs or POST codes on the motherboard that might indicate a specific component failure. Reseat CPU, RAM, and expansion cards.
- Komponent nie został wykryty: Verify that the component is correctly installed and its drivers are up-to-date. Check BIOS/UEFI settings to ensure the component is enabled.
- Przegrzanie: Ensure CPU cooler is properly installed, fans are spinning, and case airflow is adequate. Clean dust from heatsinks and fans.
If issues persist, consult the detailed troubleshooting guide on the ASUS support webodwiedź witrynę lub skontaktuj się z pomocą techniczną.
6. Specyfikacje
| Funkcja | Specyfikacja |
|---|---|
| Marka | ASUS |
| Szereg | Z97-A |
| Gniazdo procesora | LGA 1150 |
| Kompatybilne procesory | Intel Core i3-4xxx, Intel Core i5-4xxx, Intel Core i7-4xxx, Intel Core i3-5xxx, Intel Core i5-5xxx, Intel Core i7-5xxx |
| Typ chipsetu | Intel Z97 |
| Technologia pamięci RAM | Pamięć DDR3 SDRAM |
| Prędkość pamięci | 1600 MHz (do 3200 MHz w trybie OC) |
| Pojemność pamięci masowej (maks.) | 32 GB |
| Wymiary produktu (dł. x szer. x wys.) | 10.4 x 2.7 x 12.9 cala |
| Waga przedmiotu | 3.2 uncji |
| Porty USB 2.0 | 2 (tył) + wewnętrzne złącza |
| Porty USB 3.0 | 6 (4 rear, 2 via internal header) |
| Wyjścia wideo | DisplayPort, HDMI, DVI, VGA |
| Sieć lokalna | Intel Gigabit LAN |
| Audio | Kodek audio Realtek ALC892 8-kanałowy o wysokiej rozdzielczości |
| Interfejsy pamięci masowej | SATA 6Gb/s, SATA Express, M.2 |
7. Gwarancja i wsparcie
ASUS products are manufactured to the highest quality standards. For specific warranty terms and conditions applicable to your region, please refer to the warranty card included with your product or visit the official ASUS webstrona.
Aby uzyskać pomoc techniczną, pobrać sterowniki, zaktualizować BIOS i uzyskać więcej informacji o produkcie, odwiedź oficjalną stronę pomocy technicznej ASUS webstrona:
8. Dodatkowe zasoby
Wideo 1: Overview of the ASUS Z97-A Motherboard, highlighting its features and capabilities.


