1. Wprowadzenie
The Fluke LVD2 is a versatile non-contact AC voltage detector combined with an LED flashlight, designed for commercial and industrial applications. This pen-style device offers dual sensitivity, indicating proximity to an AC voltage source with a blue light and direct presence at the source with a red light. It is rated to CAT IV 600 V, ensuring high safety standards for electrical testing.
2. Informacje dotyczące bezpieczeństwa
Always prioritize safety when working with electrical systems. This device is designed to assist in identifying live circuits, but it should not be the sole method for verifying de-energized circuits. Always follow local safety codes and procedures. Ensure the device is functioning correctly before each use by testing it on a known live circuit.
- CAT IV 600 V Rating: This rating indicates the device is suitable for measurements at the source of the low-voltagInstalacje takie jak liczniki energii elektrycznej i podstawowe zabezpieczenia nadprądowe.
- Tomtage Zakres: Wykrywa objętość ACtage from 90 V to 600 V. Do not use outside this specified range.
- Kontrola: Before each use, inspect the tester for any damage. Do not use if it appears damaged.
- Warunki środowiskowe: Operating temperature range is 0 to 50 degrees Celsius. Avoid using in wet or excessively humid conditions unless specifically rated for such environments.
3. Funkcje produktu
- Dual sensitivity for voltage wykrywanie.
- Integrated LED light with a 100,000-hour life.
- Wykrywa objętość ACtage od 90 V do 600 V.
- Rated to CAT IV 600 V for enhanced safety.
- Blue light indicates proximity to an AC voltage source (1 to 5 inches / 2.54 cm to 12.7 cm).
- Red light indicates direct presence at the AC voltagŹródło.
- Compact pen-style design for easy portability.
4. Konfiguracja
4.1 Instalacja baterii
The Fluke LVD2 requires one AAA battery for operation. While some units may include a battery, it is recommended to have a fresh battery on hand for optimal performance.
- Twist and pull off the cap at the end of the tester to access the battery compartment.
- Włóż jedną baterię AAA, zwracając uwagę na prawidłową biegunowość (+/-), zgodnie ze wskazaniami wewnątrz komory.
- Replace the cap by twisting it back into place until secure.
After installing the battery, press the power button to ensure the LED flashlight turns on, indicating proper battery installation and functionality.
5. Instrukcja obsługi
5.1 Włączanie/wyłączanie
To power on the Fluke LVD2 and activate the LED flashlight, press the power button located on the body of the tester. Press the button again to turn off the device and the flashlight.
5.2 tom bez kontaktutage Wykrywanie
The LVD2 utilizes dual sensitivity to indicate the presence and proximity of AC voltage:
- Blue Light Indication: When the tip of the tester is brought within 1 to 5 inches (2.54 cm to 12.7 cm) of an AC voltage source, the tip will illuminate blue. This indicates proximity to a live circuit.
- Red Light Indication: As the tester's tip comes into direct contact or very close proximity with the AC voltage source, the tip will illuminate red. This signifies that you are directly at the source of the live voltage.
Always observe both light indications for accurate assessment. The integrated LED flashlight aids in illuminating dark work areas, enhancing visibility during testing.

Figure 1: The Fluke LVD2 Non-Contact Voltage Tester, showing its pen-style design and the clear tip for light indication.
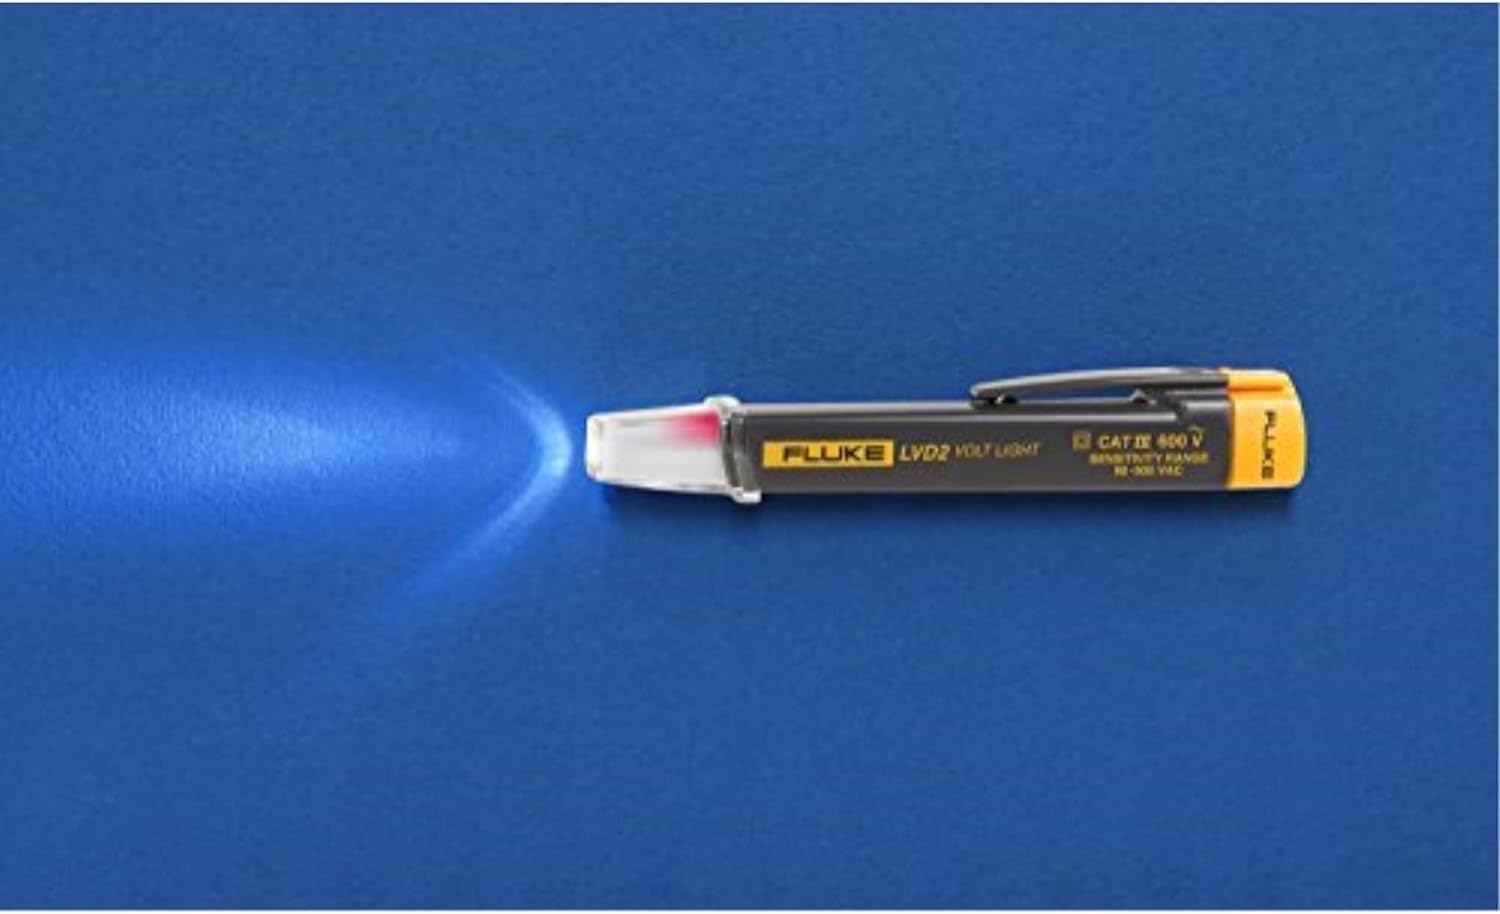
Figure 2: The Fluke LVD2 in use, demonstrating the blue light indication when detecting AC voltagz daleka.
6. Konserwacja
6.1 Czyszczenie
To clean the exterior of the tester, use a soft, damp Ściereczką. Nie używaj środków czyszczących o działaniu ściernym ani rozpuszczalników. Upewnij się, że urządzenie jest całkowicie suche przed przechowywaniem lub kolejnym użyciem.
6.2 Wymiana baterii
When the LED flashlight dims or the voltage detection becomes unreliable, it is time to replace the AAA battery. Follow the battery installation steps in Section 4.1. Always dispose of used batteries responsibly according to local regulations.
7. Rozwiązywanie Problemów
| Problem | Możliwa przyczyna | Rozwiązanie |
|---|---|---|
| Tester does not turn on. | Rozładowana lub nieprawidłowo zainstalowana bateria. | Wymień baterię, zwracając uwagę na prawidłową biegunowość. |
| No light indication when near live circuit. | Battery low or dead; circuit voltage outside detection range (90-600V AC); device malfunction. | Replace battery. Verify circuit voltage is within range. If problem persists, contact Fluke support. |
| Inconsistent or false readings. | Strong electromagnetic interference; device too far from source; low battery. | Move away from strong interference sources. Ensure close proximity to the conductor. Replace battery. |
8. Specyfikacje
| Specyfikacja | Wartość |
|---|---|
| Model | LVD2/CT |
| Zasięg wykrywania | 90 V do 600 V AC |
| Ocena bezpieczeństwa | KAT IV 600 V |
| Źródło światła | Ultra-Bright White LED (100,000 hr life) |
| Wskaźniki wykrywania | Blue (proximity), Red (at source) |
| Źródło zasilania | 1 bateria AAA |
| Temperatura pracy | od 0 do 50 °C (od 32 do 122 °F) |
| Wymiary (dł. x szer. x wys.) | Approximately 20 x 20 x 2 inches (as per product data, likely package dimensions) |
| Waga przedmiotu | 1.06 uncji |
9. Gwarancja i wsparcie
The Fluke LVD2 Non-Contact Voltage Tester typically comes with a 2-letnia gwarancja od daty zakupu wskazanej przez klientaviews. For detailed warranty terms, technical support, or service inquiries, please visit the official Fluke webOdwiedź witrynę lub skontaktuj się z działem obsługi klienta. Zachowaj dowód zakupu na wypadek reklamacji.
Official Fluke Webstrona: www.fluke.com


